|
Issue 15 Winter 2010/11.
Page 4 Owners Tips.
|
|
|
Late summers sails Angela Letters Buchanan's Found Scran Bag! |
|
|
Replacing the rigging.
|
|
|
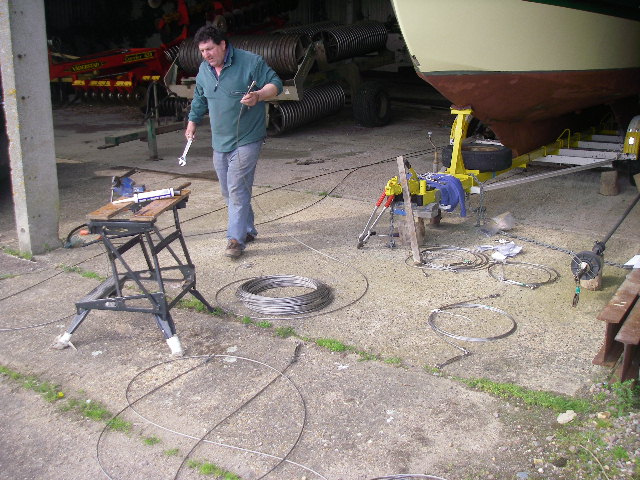
We launched our boat in 1990. She was rigged with a mixture of 5 and 6 mm stainless wire and a mixture of 1x19 and 7x7. OK not what you would normally expect, but at the time I came across job lots of wire and used what I had. The Eventide 24 and 26 can be rigged with 5mm 1x19 wire. I used a mix of 5 and 6mm because it came at the right price. But when on board it became apparent the 5mm was not half as comfortable to grab as the 6mm! Now 20 years is considered too long to keep stainless rigging, they recommend 10! Cruising boats maybe 15... I think it should be more individual to the boat. Eventides are not hard racing boats and not normally stressed as such. We also trail 'Fiddler's Green' to winter storage in a barn every year and thus the mast is lowered. Every year I go over the rigging very closely checking for problems and only once did I find one of the wires had a strand broken, on one of the lower shrouds made from 6mm 7x7 construction. The 7x7 wire is very slightly less strong than 1x19 but a lot more flexible than 1x19. The damage was caused where the wire crossed the guardrail and had chaffed. A simple job to replace, but remember to replace both sides, not just one. That had been 4 or 5 years back As the boat was approaching the 20 years afloat, (August 2010) and needed an insurance survey for 2011, this was a job I had to tackle. (along with the gas certification). I had bought a 100m roll of 6mm stainless rope some years previously, and had been storing it for the eventual day. What I needed to do was fix eyes to it. 20 years ago my brother in law and I cleared a shop of tools to set up a farm workshop for him, and in it was a Talurit machine with dies for Talurits up to 6mm. I had thoughts of using it again, until I read that 5mm was the suggested limit for this sort of fitting and from 6 up the clamp on Norseman/Staylock terminals were considered best. I had some I thought I could reuse, but sadly they were too old and you could not get inserts for them, instead a search on the internet and the use of our eBay page brought just what I needed, 20 'Bluewave' end fittings at £12.00 a time As the retail was twice that I think I got a result.
|
|
|
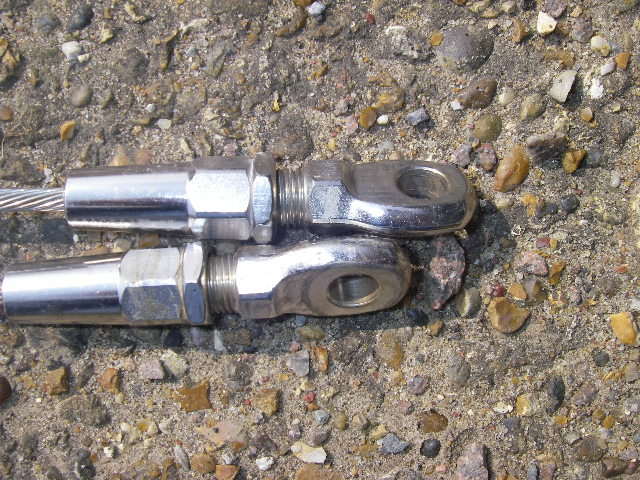
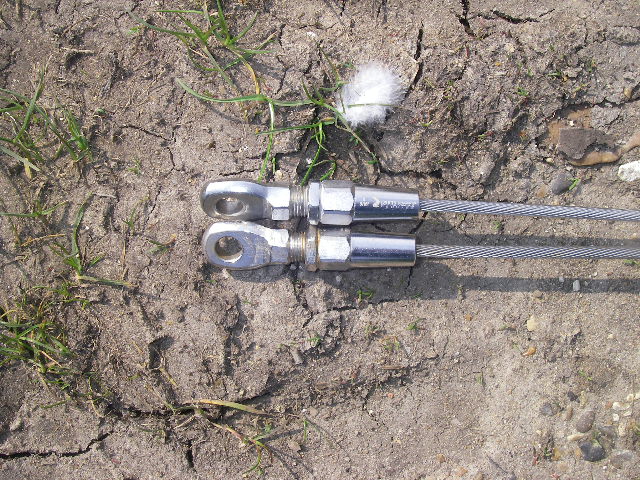
These were a couple of the old fittings, a Norseman on the left and a Talurit right, with pressed on copper sleeve. |
|
|
So at the end of the season I went round the boat carefully measuring and photographing all the rigging screws. Any that were screwed hard down could have the wire shortened, any end fittings that were only just into the rigging screw body, could benefit from a slightly longer wire. May 2010, I called upon the experience of local rigger Dave. He would fit all the terminals and wire with me as labourer. Took about 3 hours and cost me just £100.00. Well worth it for his expertise. The most difficult bit was the roller reefing. The Plastimo gear has a 5mm bearing in each section for the original 5mm wire and this had to be removed, which meant drilling out the rivets and then opening up the nylon bearings to suit. When the wire was removed and inspected no damage at all could be found either where the bearings rode on it, nor in the end terminals. I do however insist on toggles fitted at the lower ends of forestays or they are mounted on a shackle like fitting so no stress is put on the wire end fittings. this has to be good practice. too often I have seen rigging screws fitted directly to stem head fittings with no allowance for sideways pul when the sail sets.... On to fitting the new wire.
|
|
|
|
Here Dave and I are preparing the wire, the new roll has to be unrolled and laid out without kinks. Not as easy as you might think, 100 metres of 6mm wire has a mind of it's own! |
|
|
All the old wire is similarly carefully unrolled and laid out to compare lengths. |
|
|
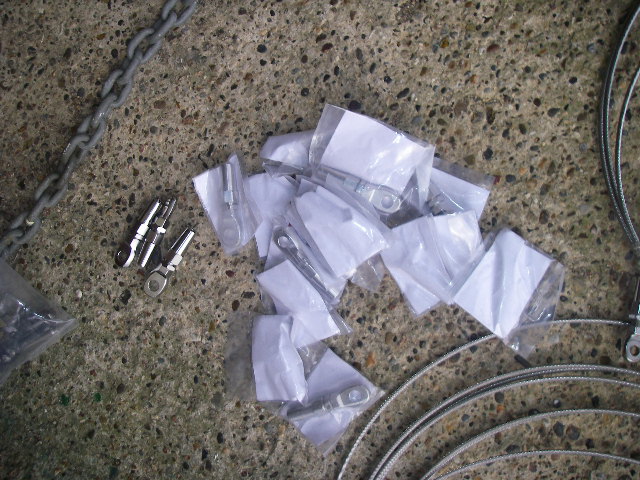
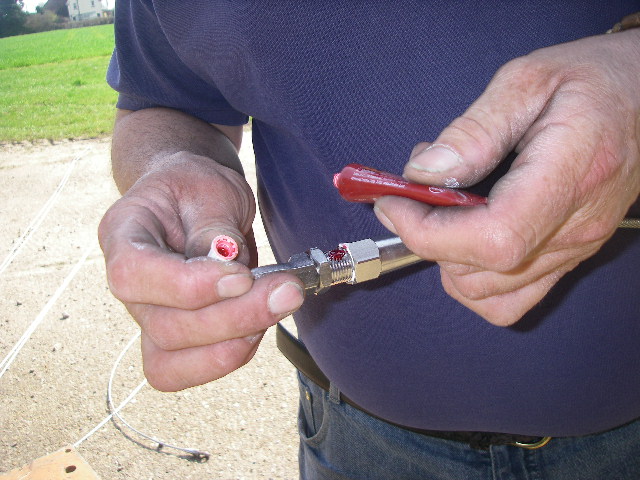
These are the new end fittings. They are made in Denmark, 'Bluewave' is the trade name. Unlike the older Norseman fittings you simply have to poke the new wire into the fitting, slipping the internal jaws over the wire as you do so, simple. The old Norseman fittings took a lot of time and effort to fit by comparison and part of the wire had to be un-laid, then the ferrell fitted and the wire laid back over the top and bent into position, a palava that could go wrong. |
|
|
Not all the wires we took off turned out to be exactly the same length... these are the topmast shrouds and we decided to chose a mid way between them as a length. The rigging screws had always been a few turns different! |
|
|
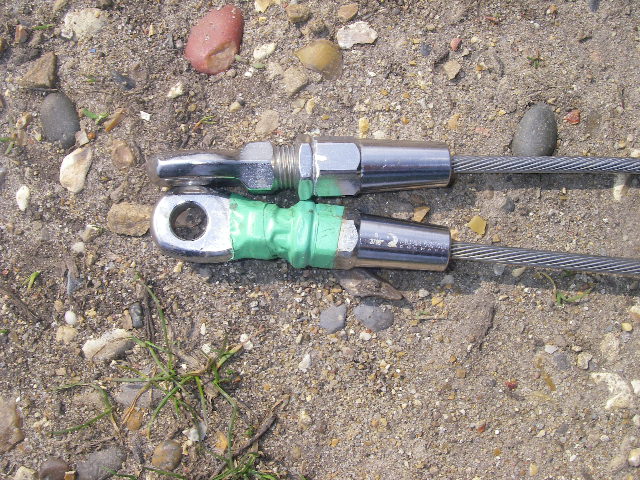
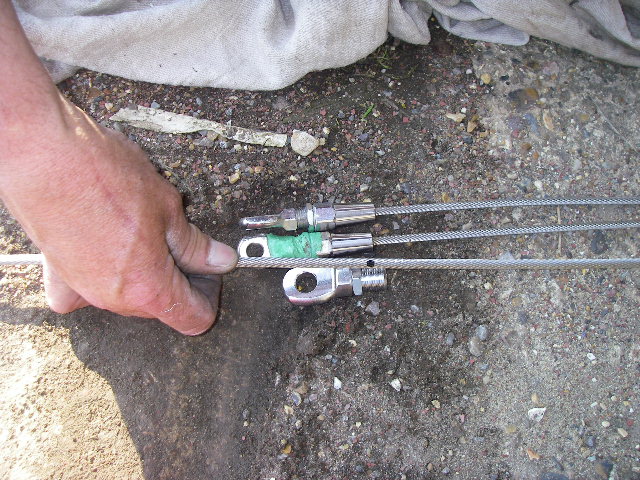
Some were spot on. Note the remains of the green tape on one of these. I always tape up all the rigging screws, after the rig is set up, covering all the attachments, clevis pins and split rings, just in case. Also stops hands getting caught on a pin end or split ring. |
|
|
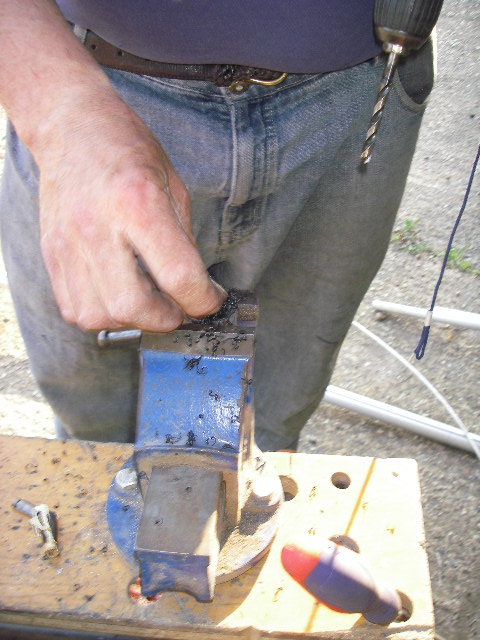
Dave had minimal tools for the job, a workmate with strong vice attached, good adjustable spanners for the large bodies of the terminals and old screwdrivers as spikes into the ground. He also had a van full of other tools of the trade and boxes full of odd clevis pins and spring clip rings to secure them. As it happened we did need a different clevis pin in one fitting, rummaged from his box! I did a swap! |
|
|
Here the first pair of new 6mm Bluewave fittings are on. |
|
|
Note how Dave measures up, with all stretched taught he marks the wire with a felt tip where he needs to cut. |
|
|
Dave has a real beefy pair of wire cutters. I got mine out to test, my smaller ones would cut it, but his were so much stronger.! (I stow my cutters on board in case I need to cut away the rig or remake an end fitting, I carry spare end fittings too)! |
|
|
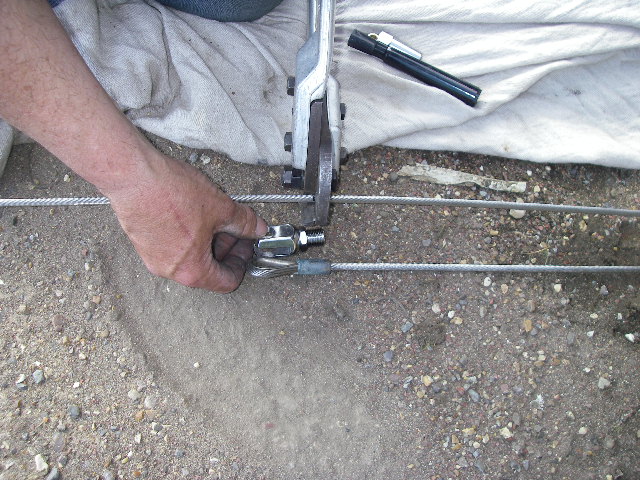
Here Dave is using a pair of metric adjustables to tighten up the cone. The fitting is then undone, inspected and then sealed. Some will scoff at adjustable spanners, but a good set, with wide jaws to prevent damage and a good tightly machined fit so they do not wobble, were just right. Not a rusty set of 40 year old ones! |
|
|
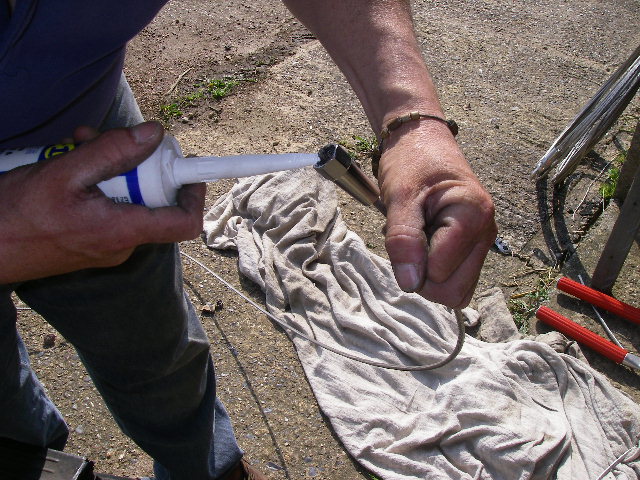
The fitting is filled with mastic before final tightening, to ensure no water can sit inside corroding the stainless. |
|
|
Here Locktite is applied to the lock nut. This is important as half these end fitting were to be 30 ft above us when in use! |
|
|
The last job was the Plastimo bearings on the roller reefing, it took several attempts before we got the hole the correct size to be a snug fit and yet turn smoothly on the new 6mm wire. |
|
|
|
|
After all the end fittings were done I
refitted them to the mast, carefully laying them alongside the spar and
padding the wire with old carpet for transit.
We then turned our attention to the old wire and just for fun destroyed a few of the Talurit end fittings that were used. The wire was perfect. We also un did some of the Norseman fittings, the wire was perfect too! I think the insurance boys and the stainless manufacturers might be in cahoots here. OK a lightly built and rigged racing machine hard pushed might fatigue it's rig, especially if it is stored ashore for the winter with the mast up, a common practice these days.... Seems most damage is done to wire by either corrosion, if water can seep into the fittings, or by fatigue. Leaving a mast up over winter in the gales etc rattling the mast for 6 months, can cause the wire to go brittle and especially near end fittings, break. there was not a single strand bad or broken on my rig after 20 years. Reckon the new heavier 6mm wire will see me out! What to do with the old wire, well it just so happened John Stevens needed some 6mm wire for his guard rails, so the backstays and upper shrouds at least were recycled. We launched in May and the new wires fitted perfectly, though we did notice it was a little bit of a tight stretch to fit on some of the rigging screws at first. It might stretch.... Having all 6mm wire is a lot easier on the hands moving about on deck, guess larger boats and larger wire would be better too. there's a thought a 50 footer with 10mm wire, well that might be nice, well why not a 75ft ... back to reality... I set the rig up as normal this year and the only difference I noted was it was a lot easier to get the rigging tight with 6mm than it was with 5! I had enough new wire to remake the guard rails too. John |
|
|
******************************* |
|
|
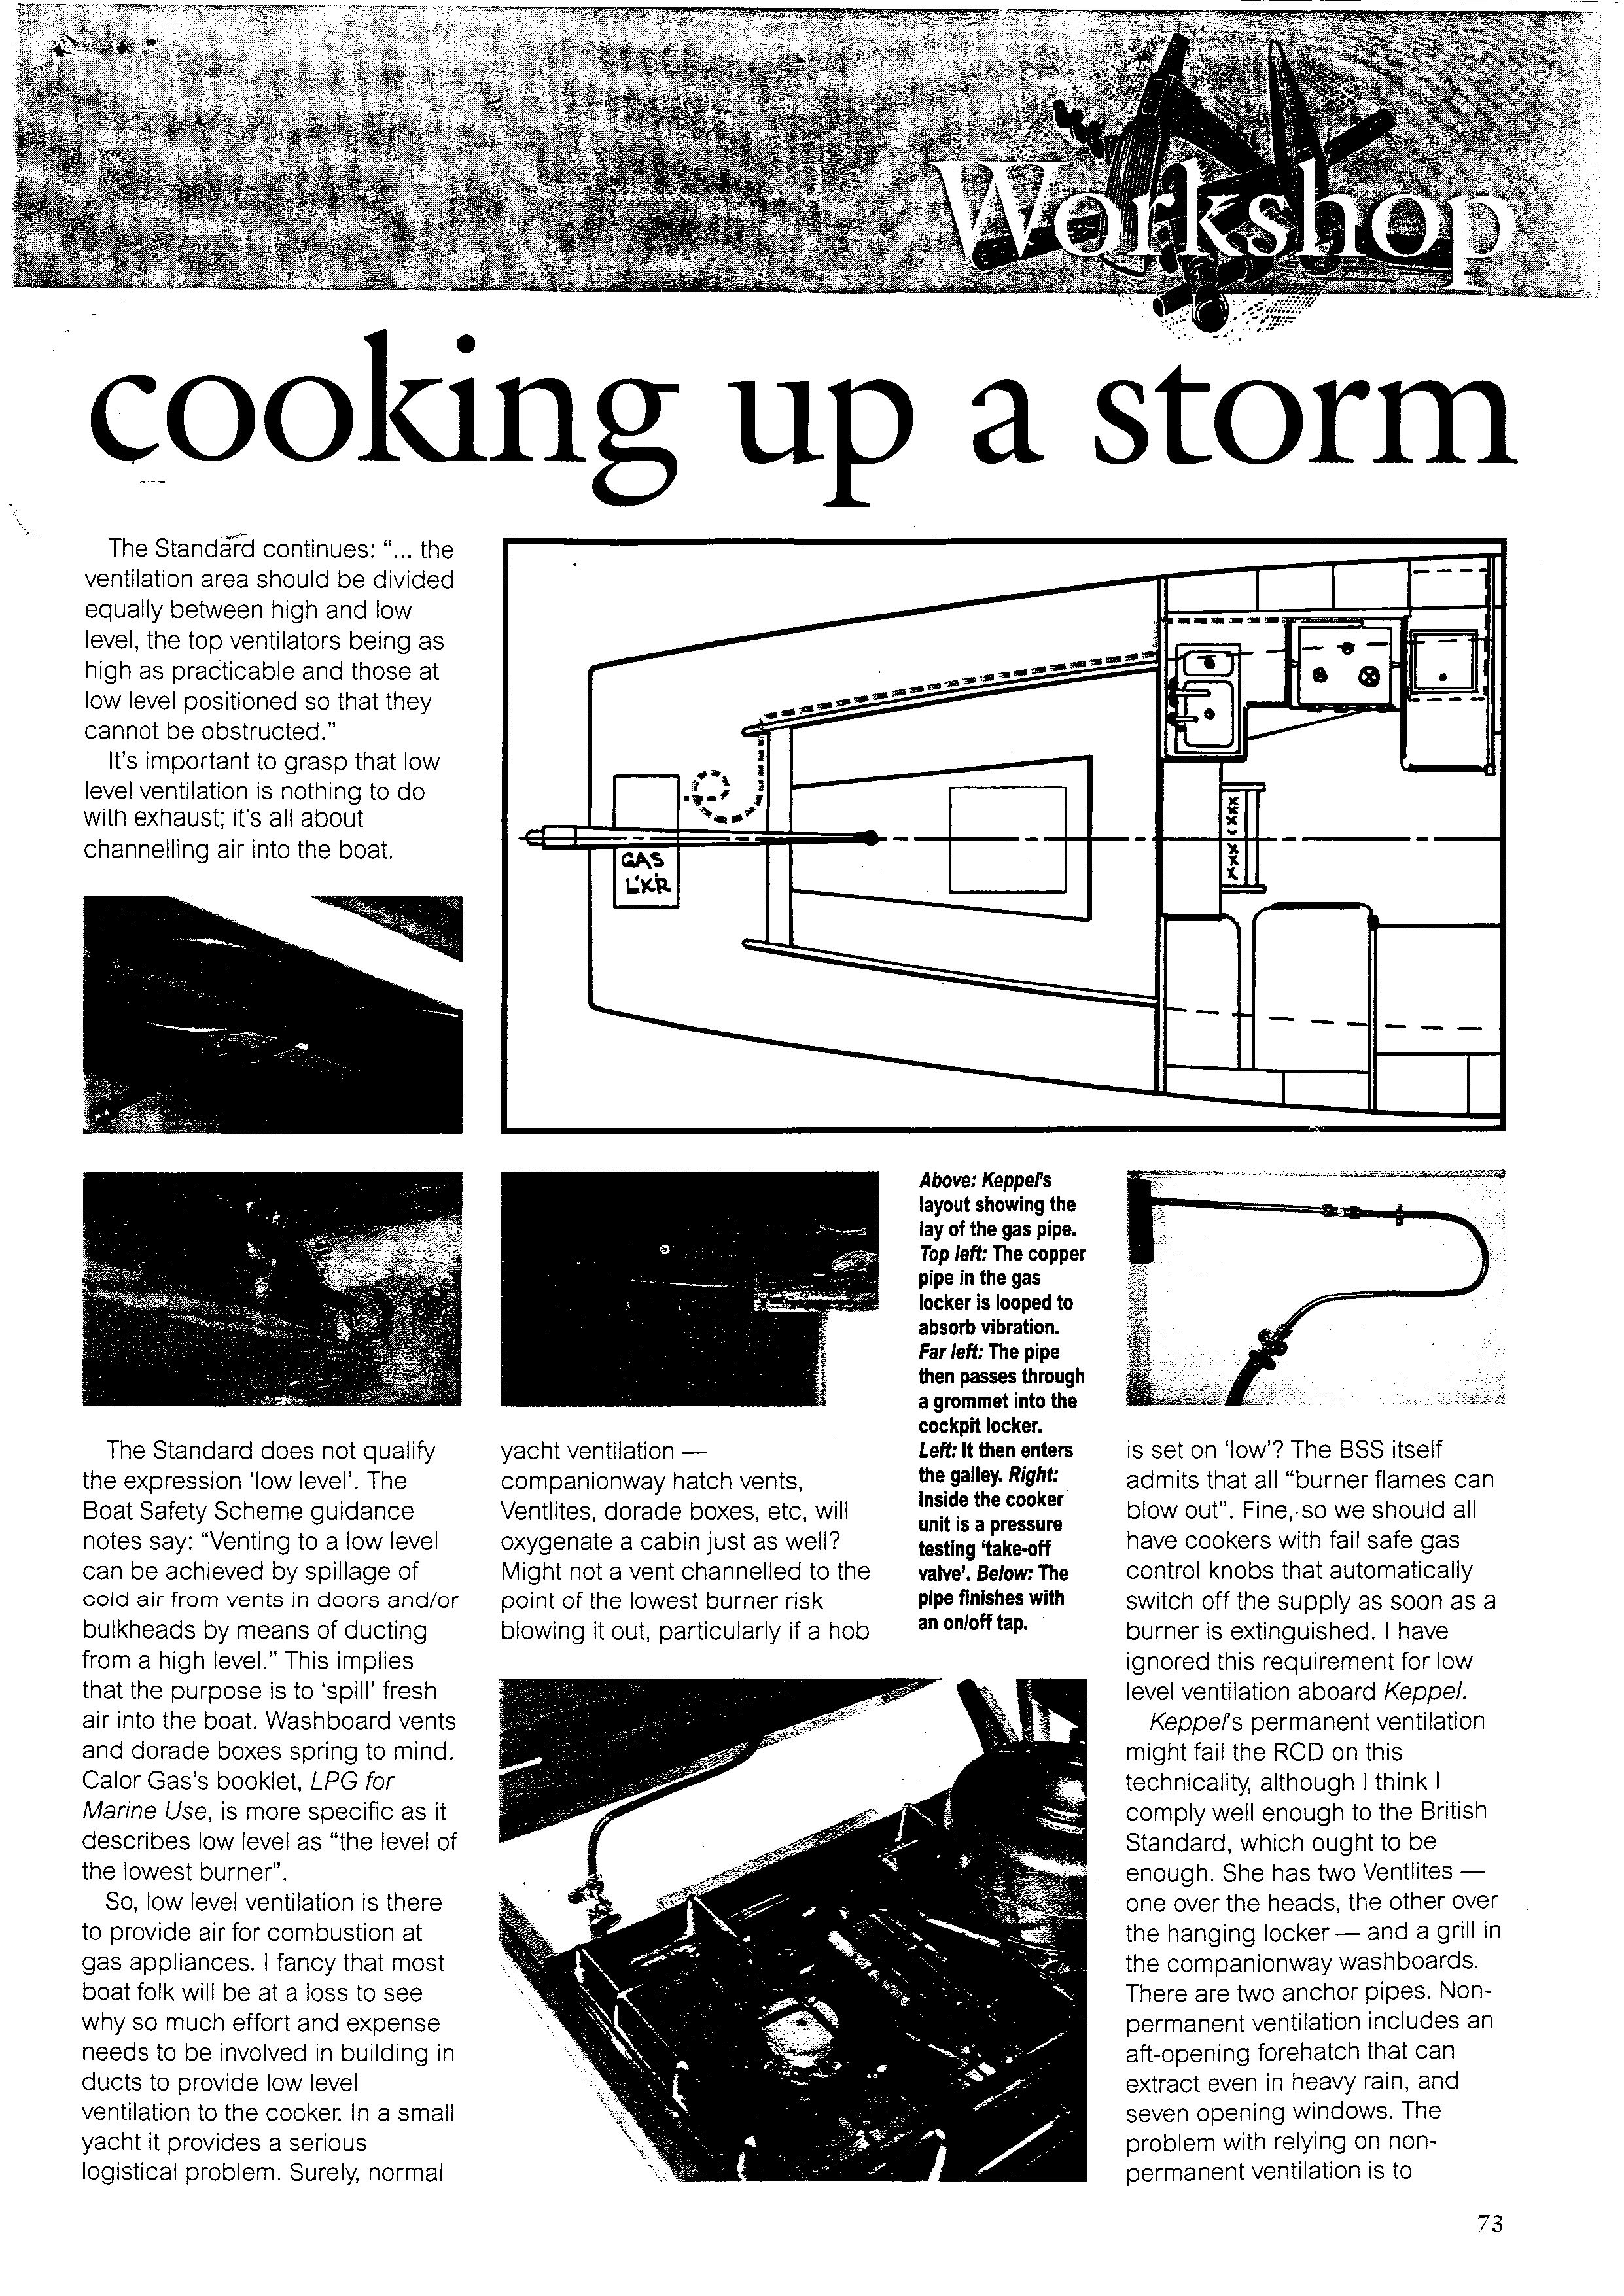
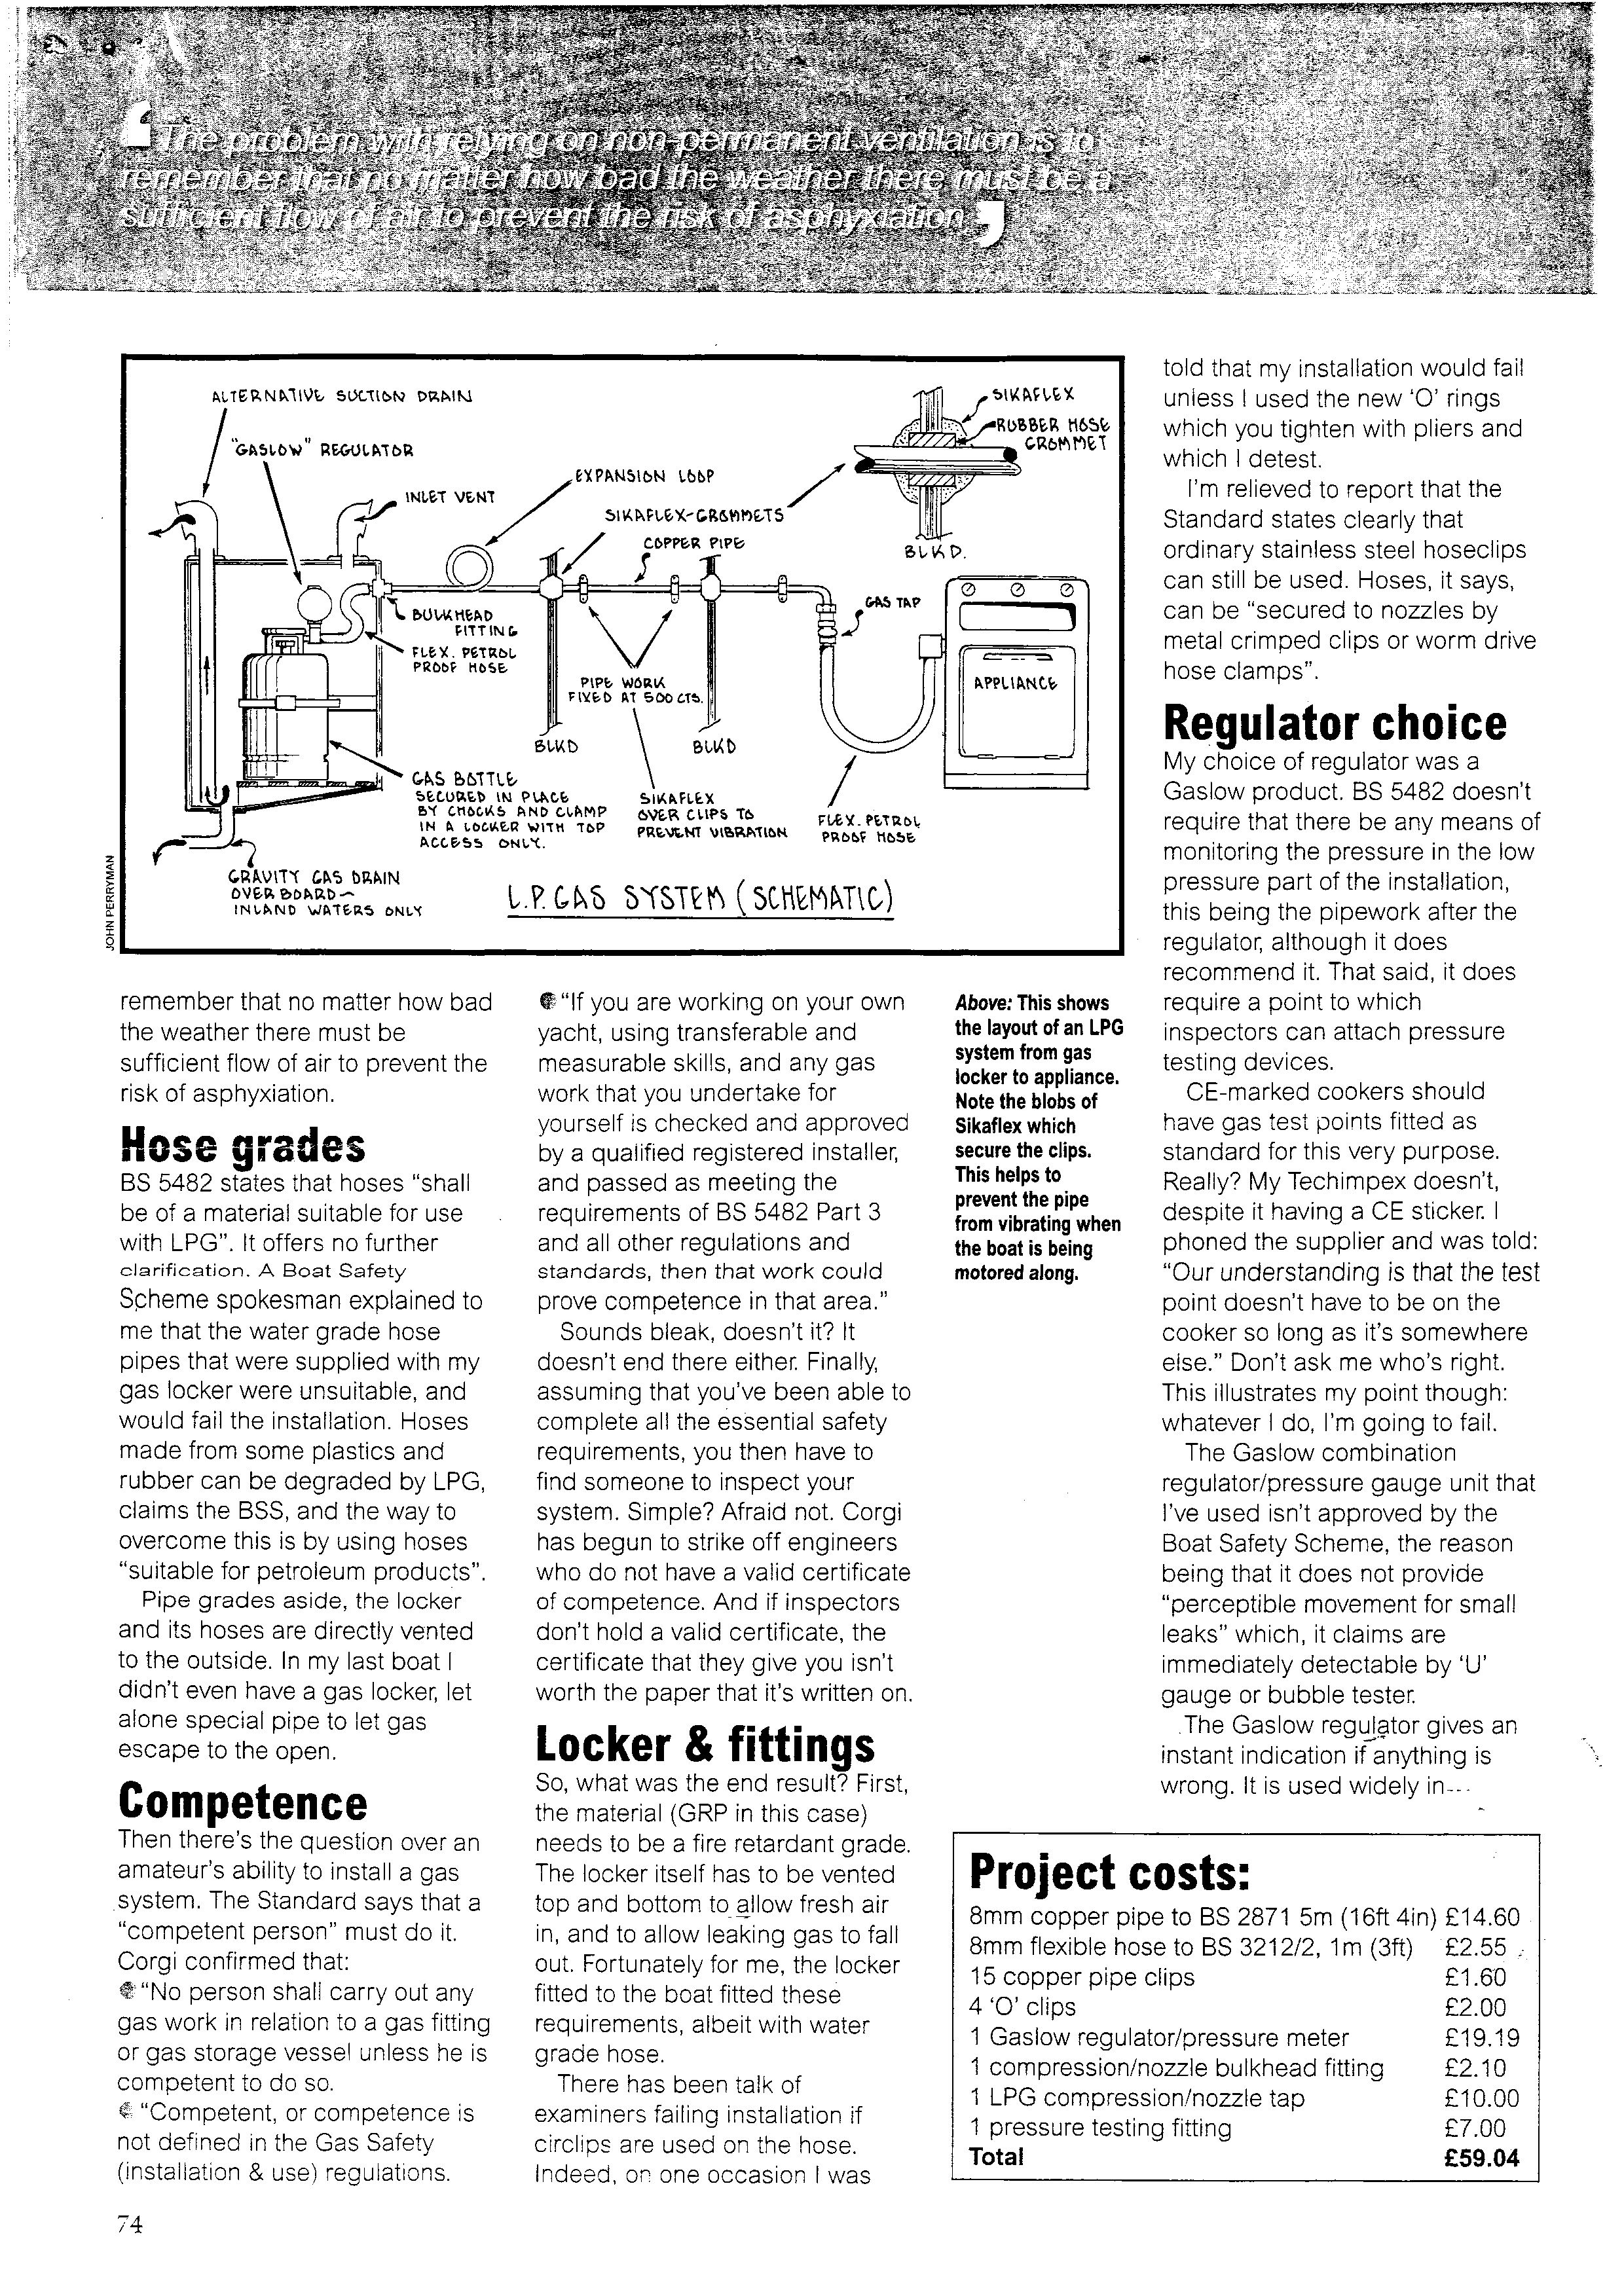
The following article by Richard Hare of the GH 'Keppel' was sent into us by Brian of the GH 'Tusk'. Dan Houston of Classic Boat has kindly given permission for us to reproduce it, Thanks Dan. |
|
|
|
|
|
|
|
|
|
|
|
|
|
|
|
|
|
|
|
|
Last year I went through much the same
dilemma on Fiddler's Green, I wrote about it at the time. We had a gas
engineer come and check out the boat. As it was coming up for the 20
year survey I wanted to be able to present a certificate to the surveyor. The gas engineer had me replace the regulator, it was 5 years out of date, apparently the rubber diaphragms rot.. I already had a 'Gaslow' and a good idea that is too, and a gas sensor and alarm. What I thought was daft was to replace the armoured hose to the cooker with plain gas hose.... This is the only place the hose is allowed inside and it is the one place where it is likely to be abraded as the cooker swings in it's gimbals. But apparently an armoured hose could rot or perish and you would not see it under the stainless braid, so I had to change the fittings on the cooker and the gas tap, (fitted a new one it was easier.) onto the copper pipe that feeds the cooker. I also came across the clash of regulations, wiring must be separate and gas pipe high.. Not always possible. Clipping pipe every few inches where I could was over clipped apparently, but I felt safer that way! Getting the venting right on the gas bottle storage was another problem, mine passed after I added a larger vent at the top of the locker... Lots of hoops to jump through, but at the end of the day I did feel I had done all I could and more to make it safe. (My Plastimo oven/cooker has flame failure devices on every burner, OK safe but can be a pain to ignite sometimes, count to 10, damn, count to 20, damn, still the flame goes out when you let the button go!) Better safe than sorry, John |
|