June 2010 and we have a delivery crew, a support boat and crew and now the weather!
(We had tried earlier in the year but called it off!)
Time to get Glasstide back to Essex.
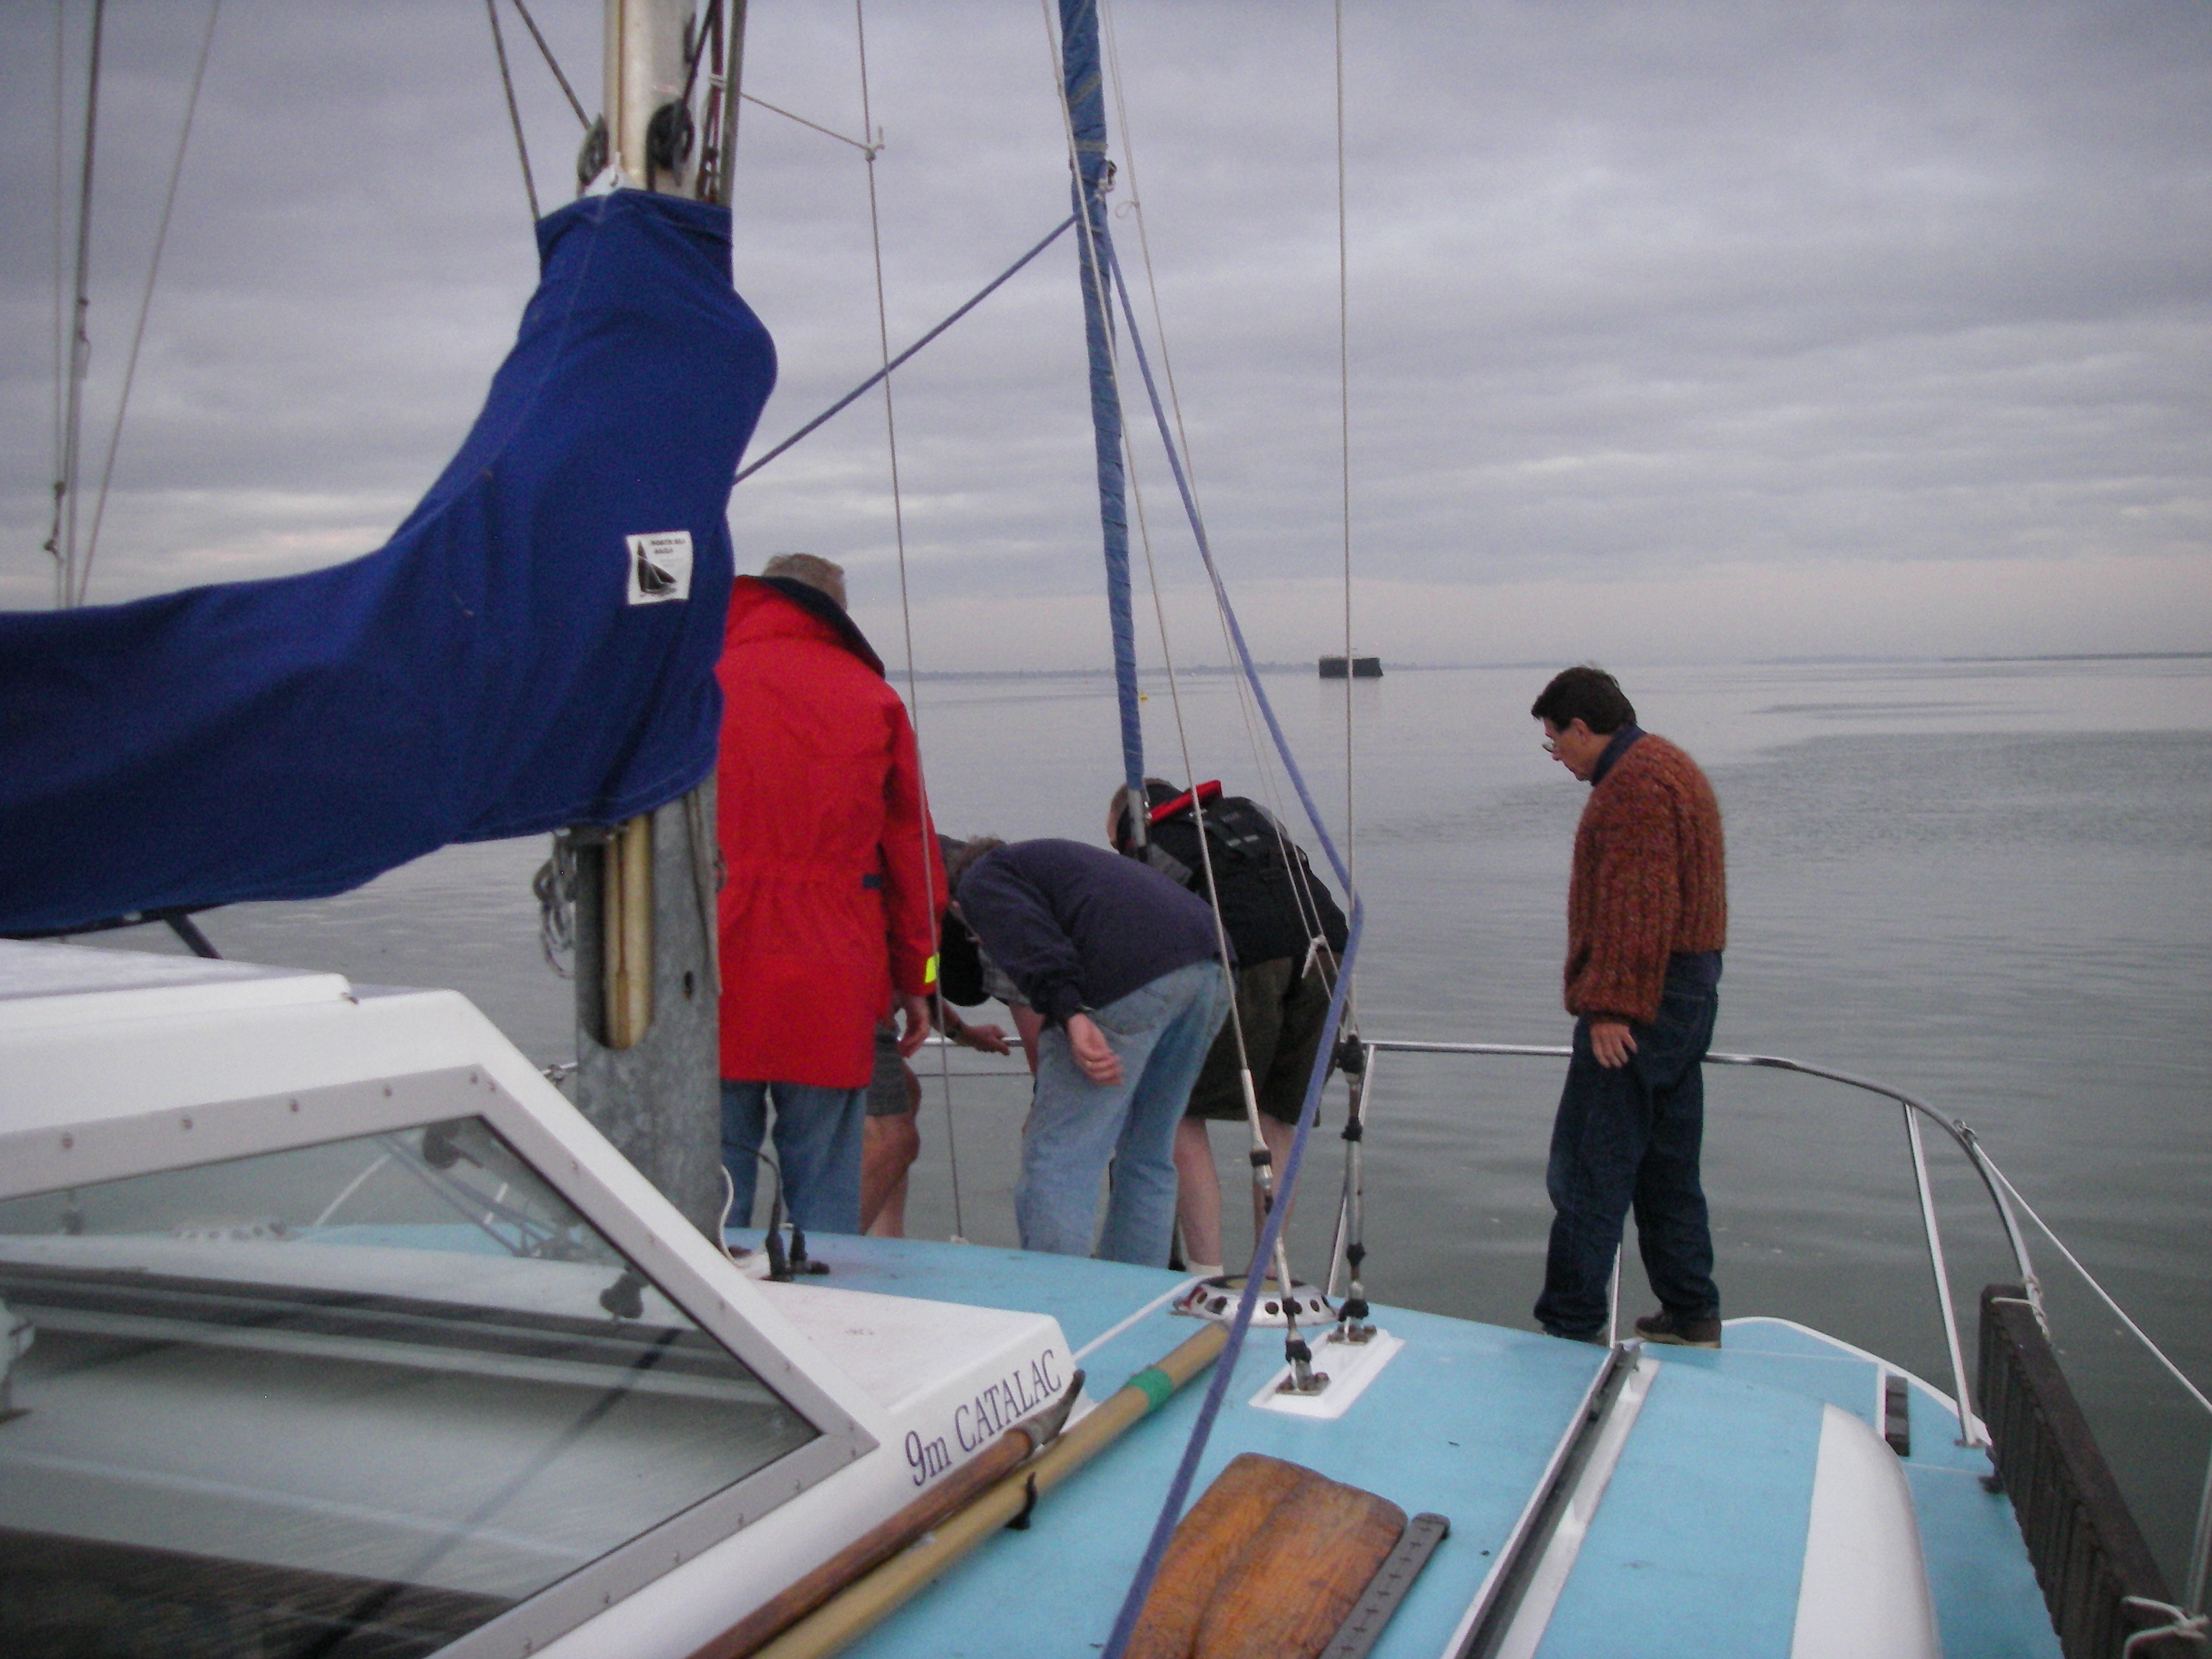
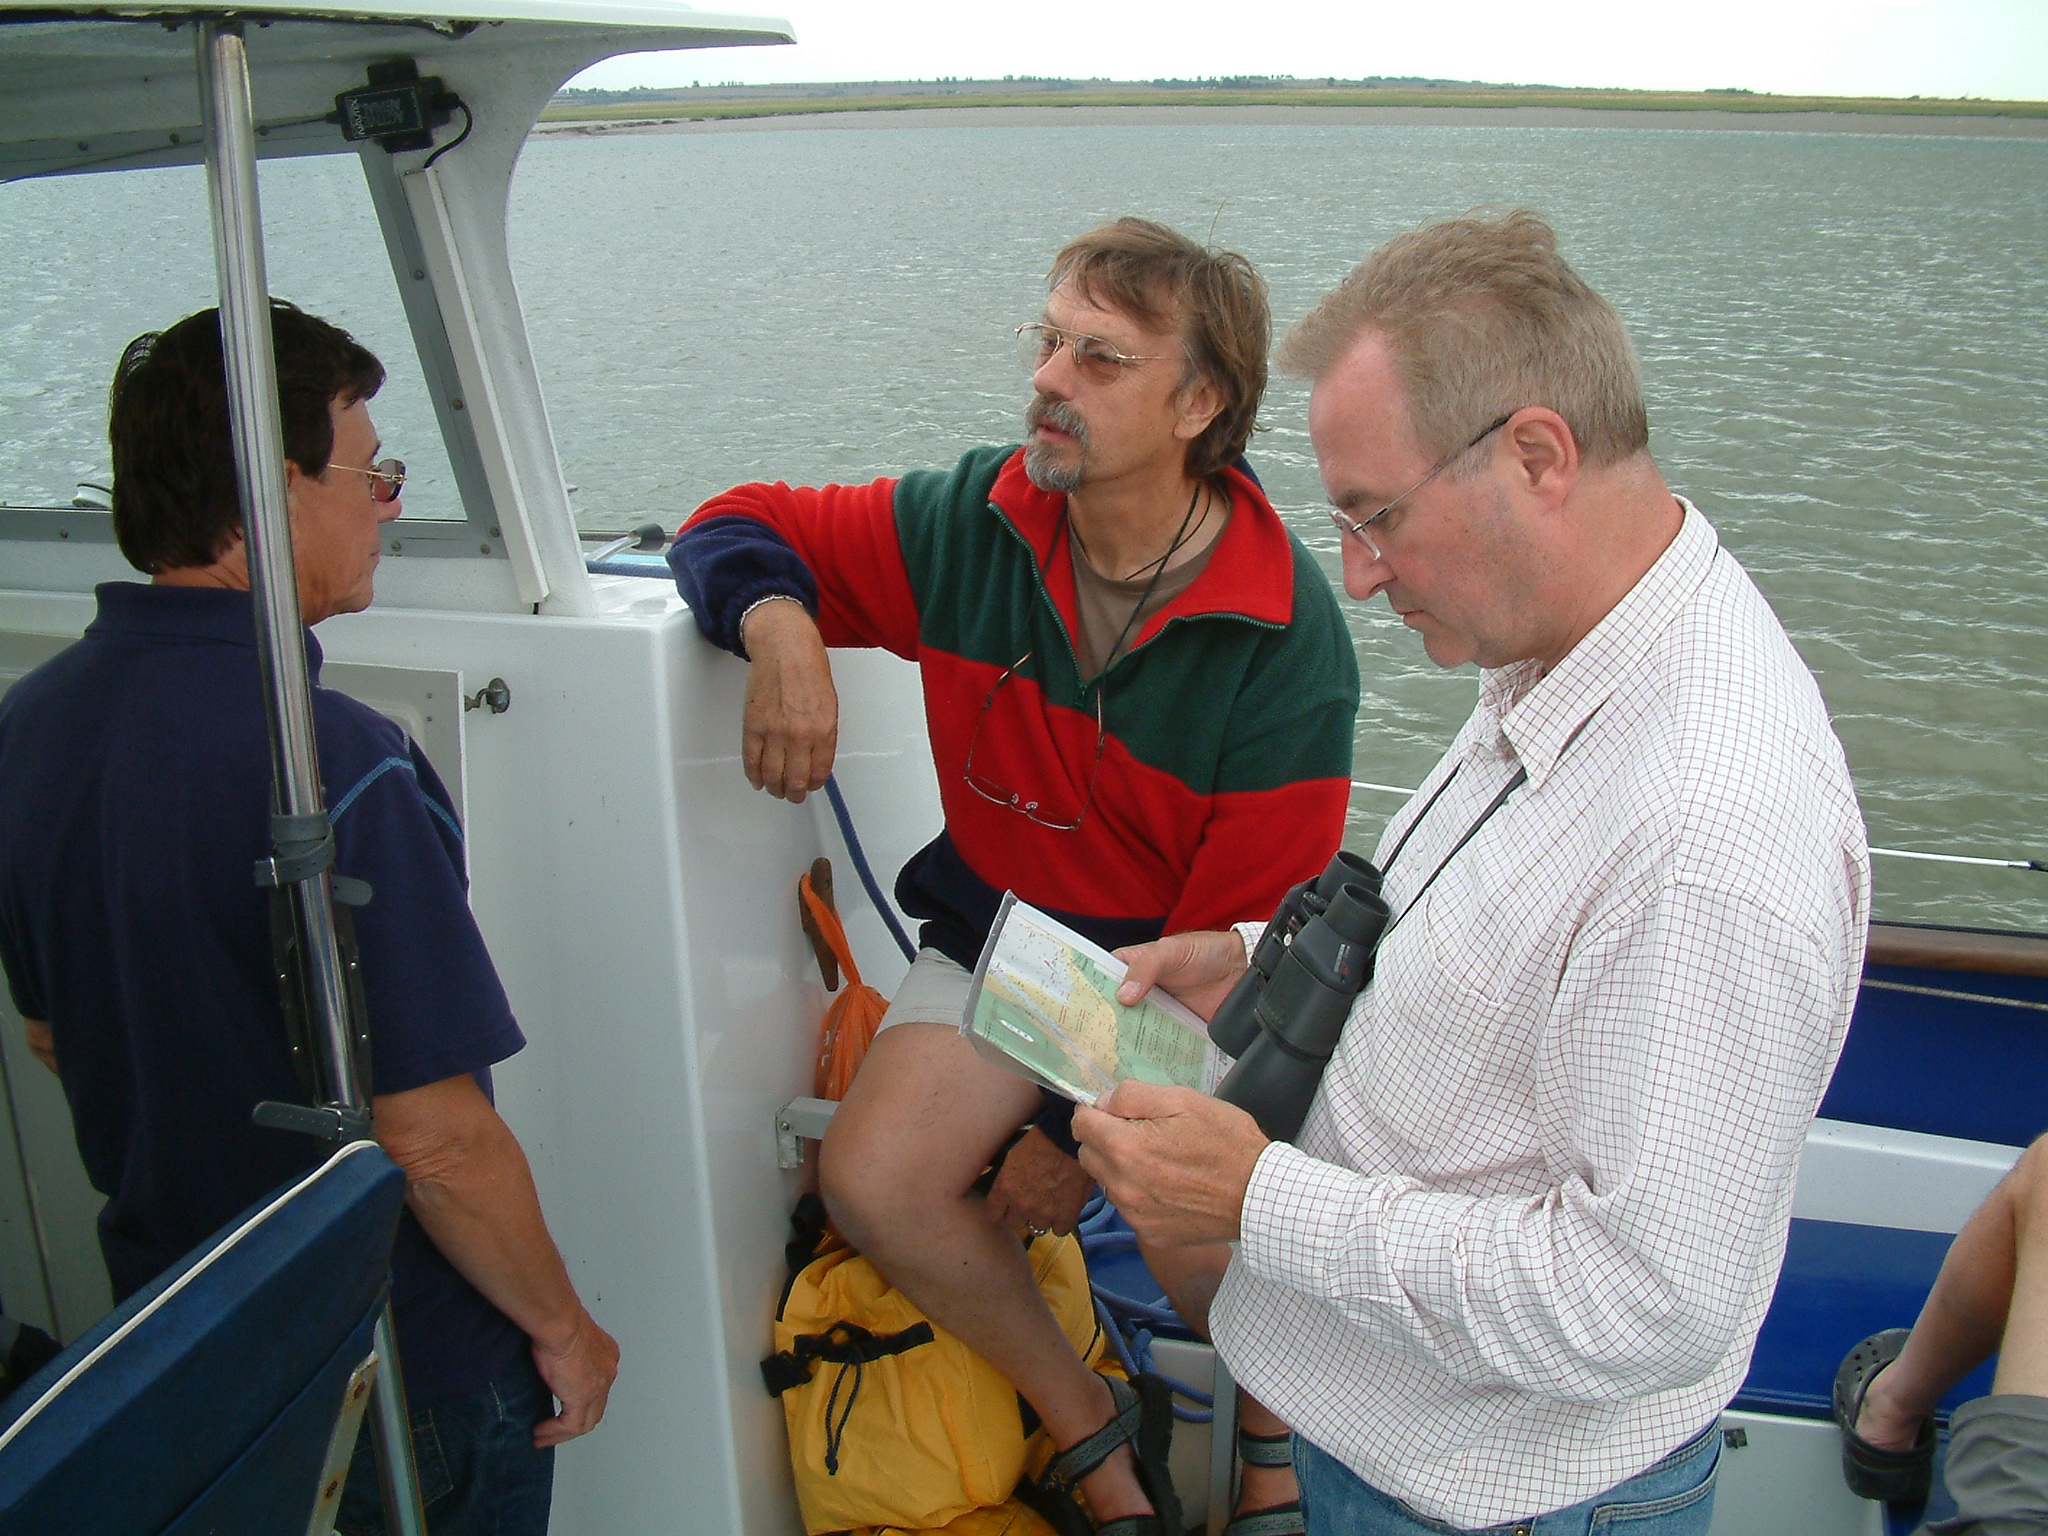
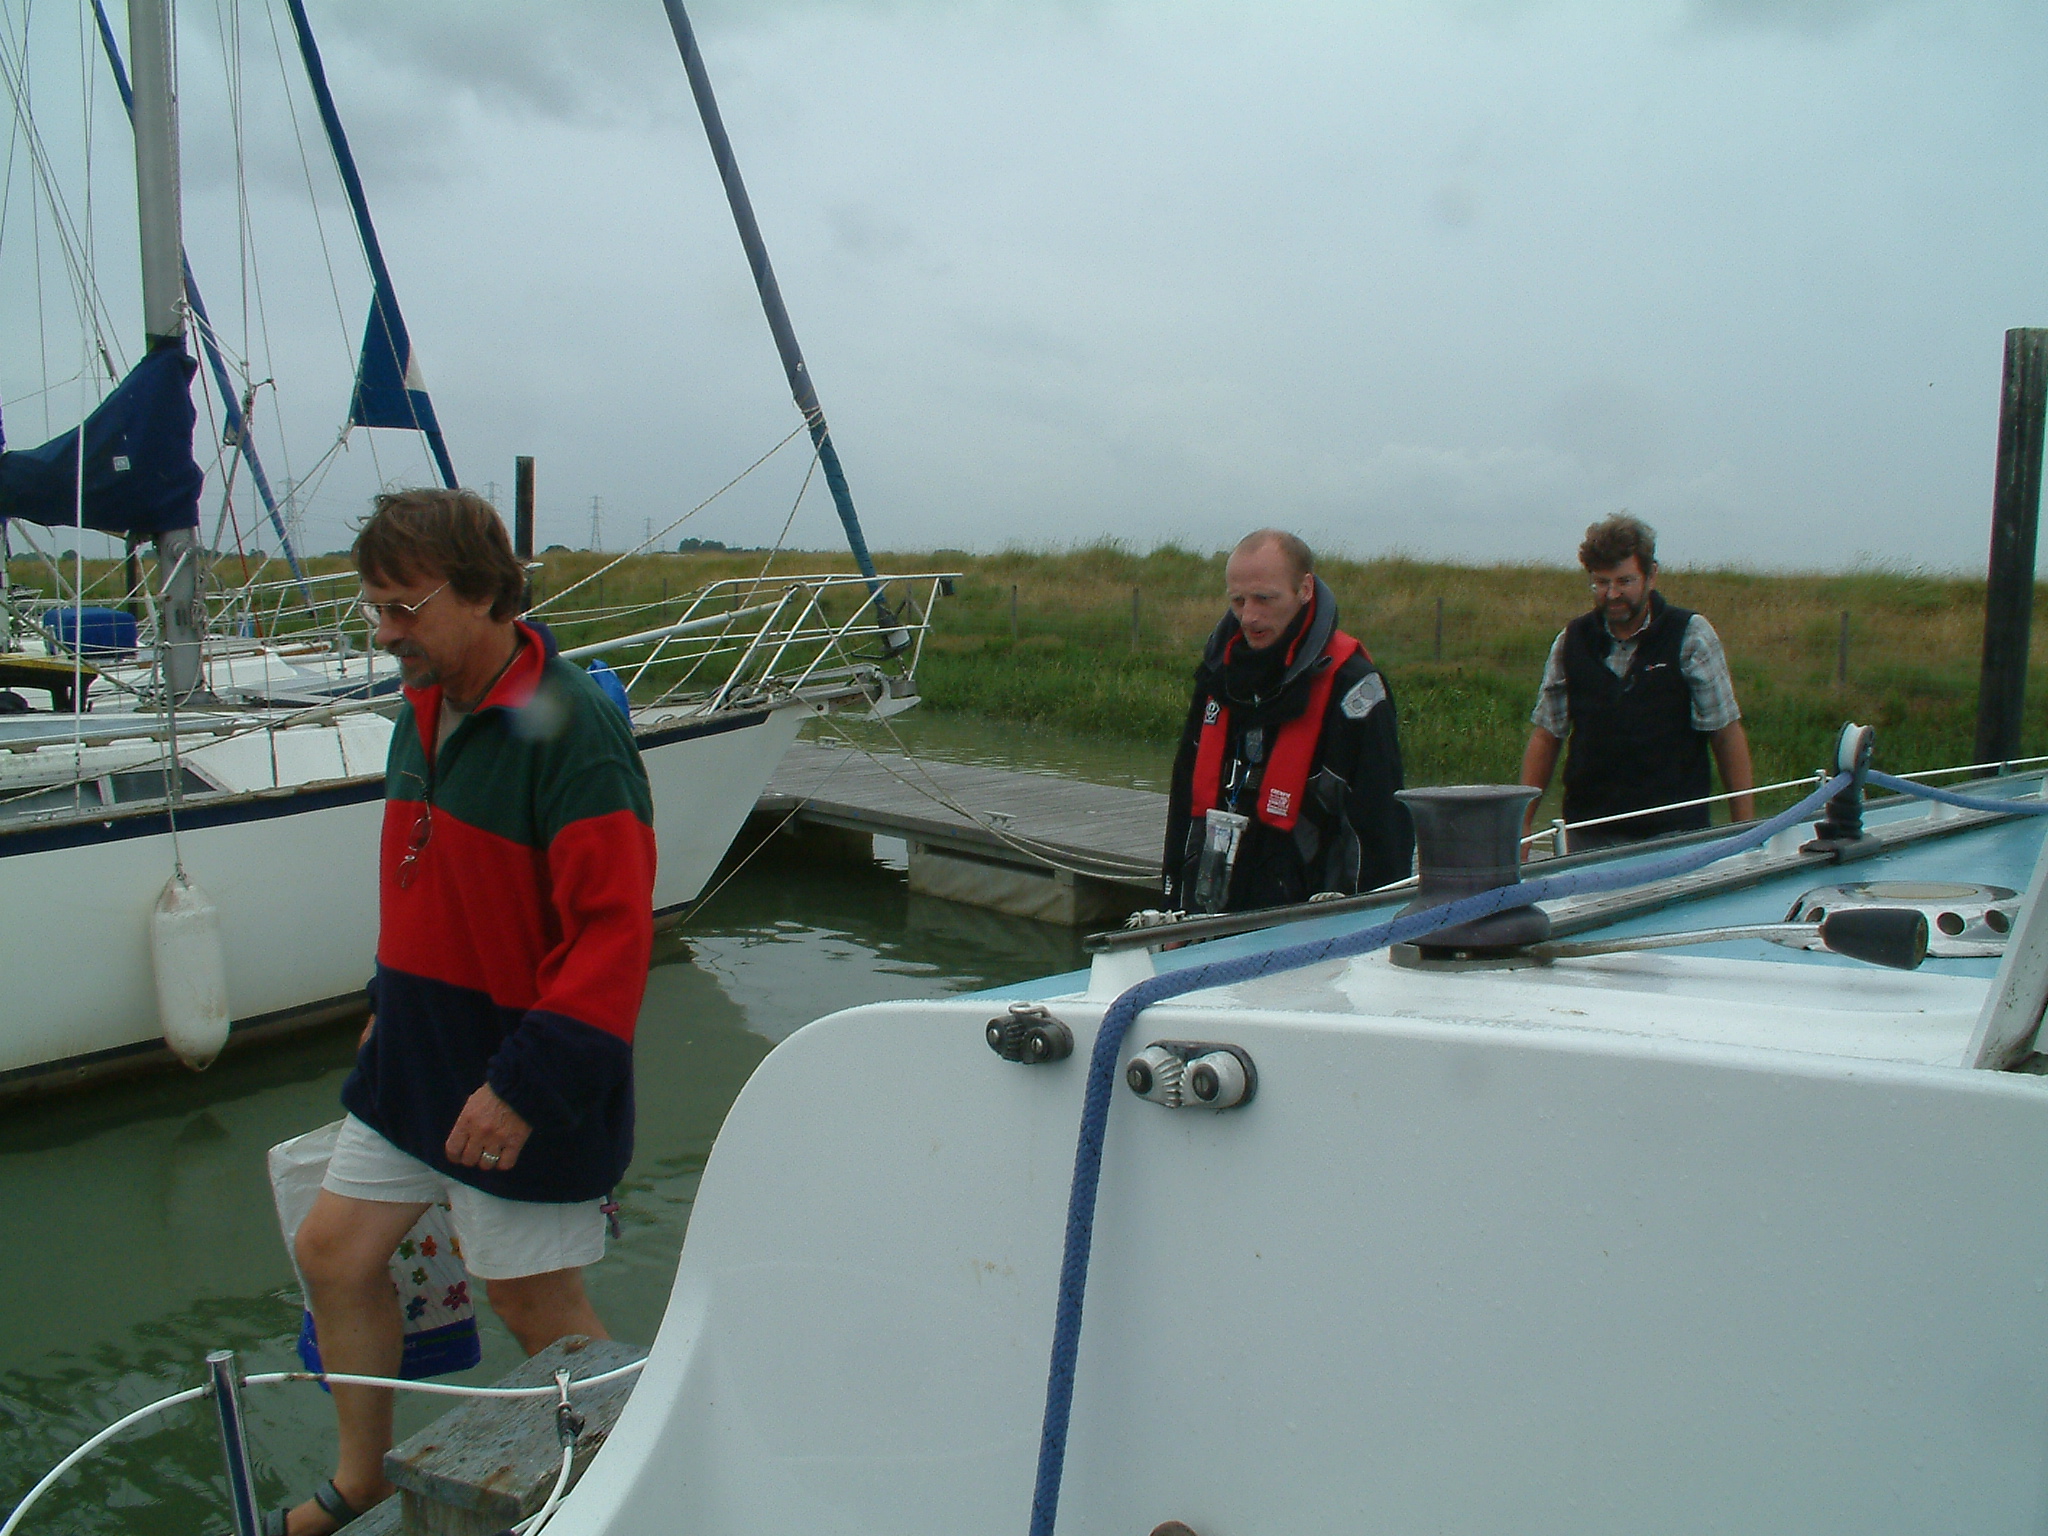
So it was at 0500 one June morning the crew of Mobri II, a 30ft Catalac Cat, owned by the EOG Fund Managed Brian, were lifting anchor off Bradwell, after having had just a few hours sleep, sneaking out of Tollesbury at 0100 on the tide. The early 0500 start was to catch the last of the ebb down to and through the Swin Spitway so we could ride the flood tide all the way to the Swale. John W had worked out the speed needed and the timings. (and allowed a bit for problems!).
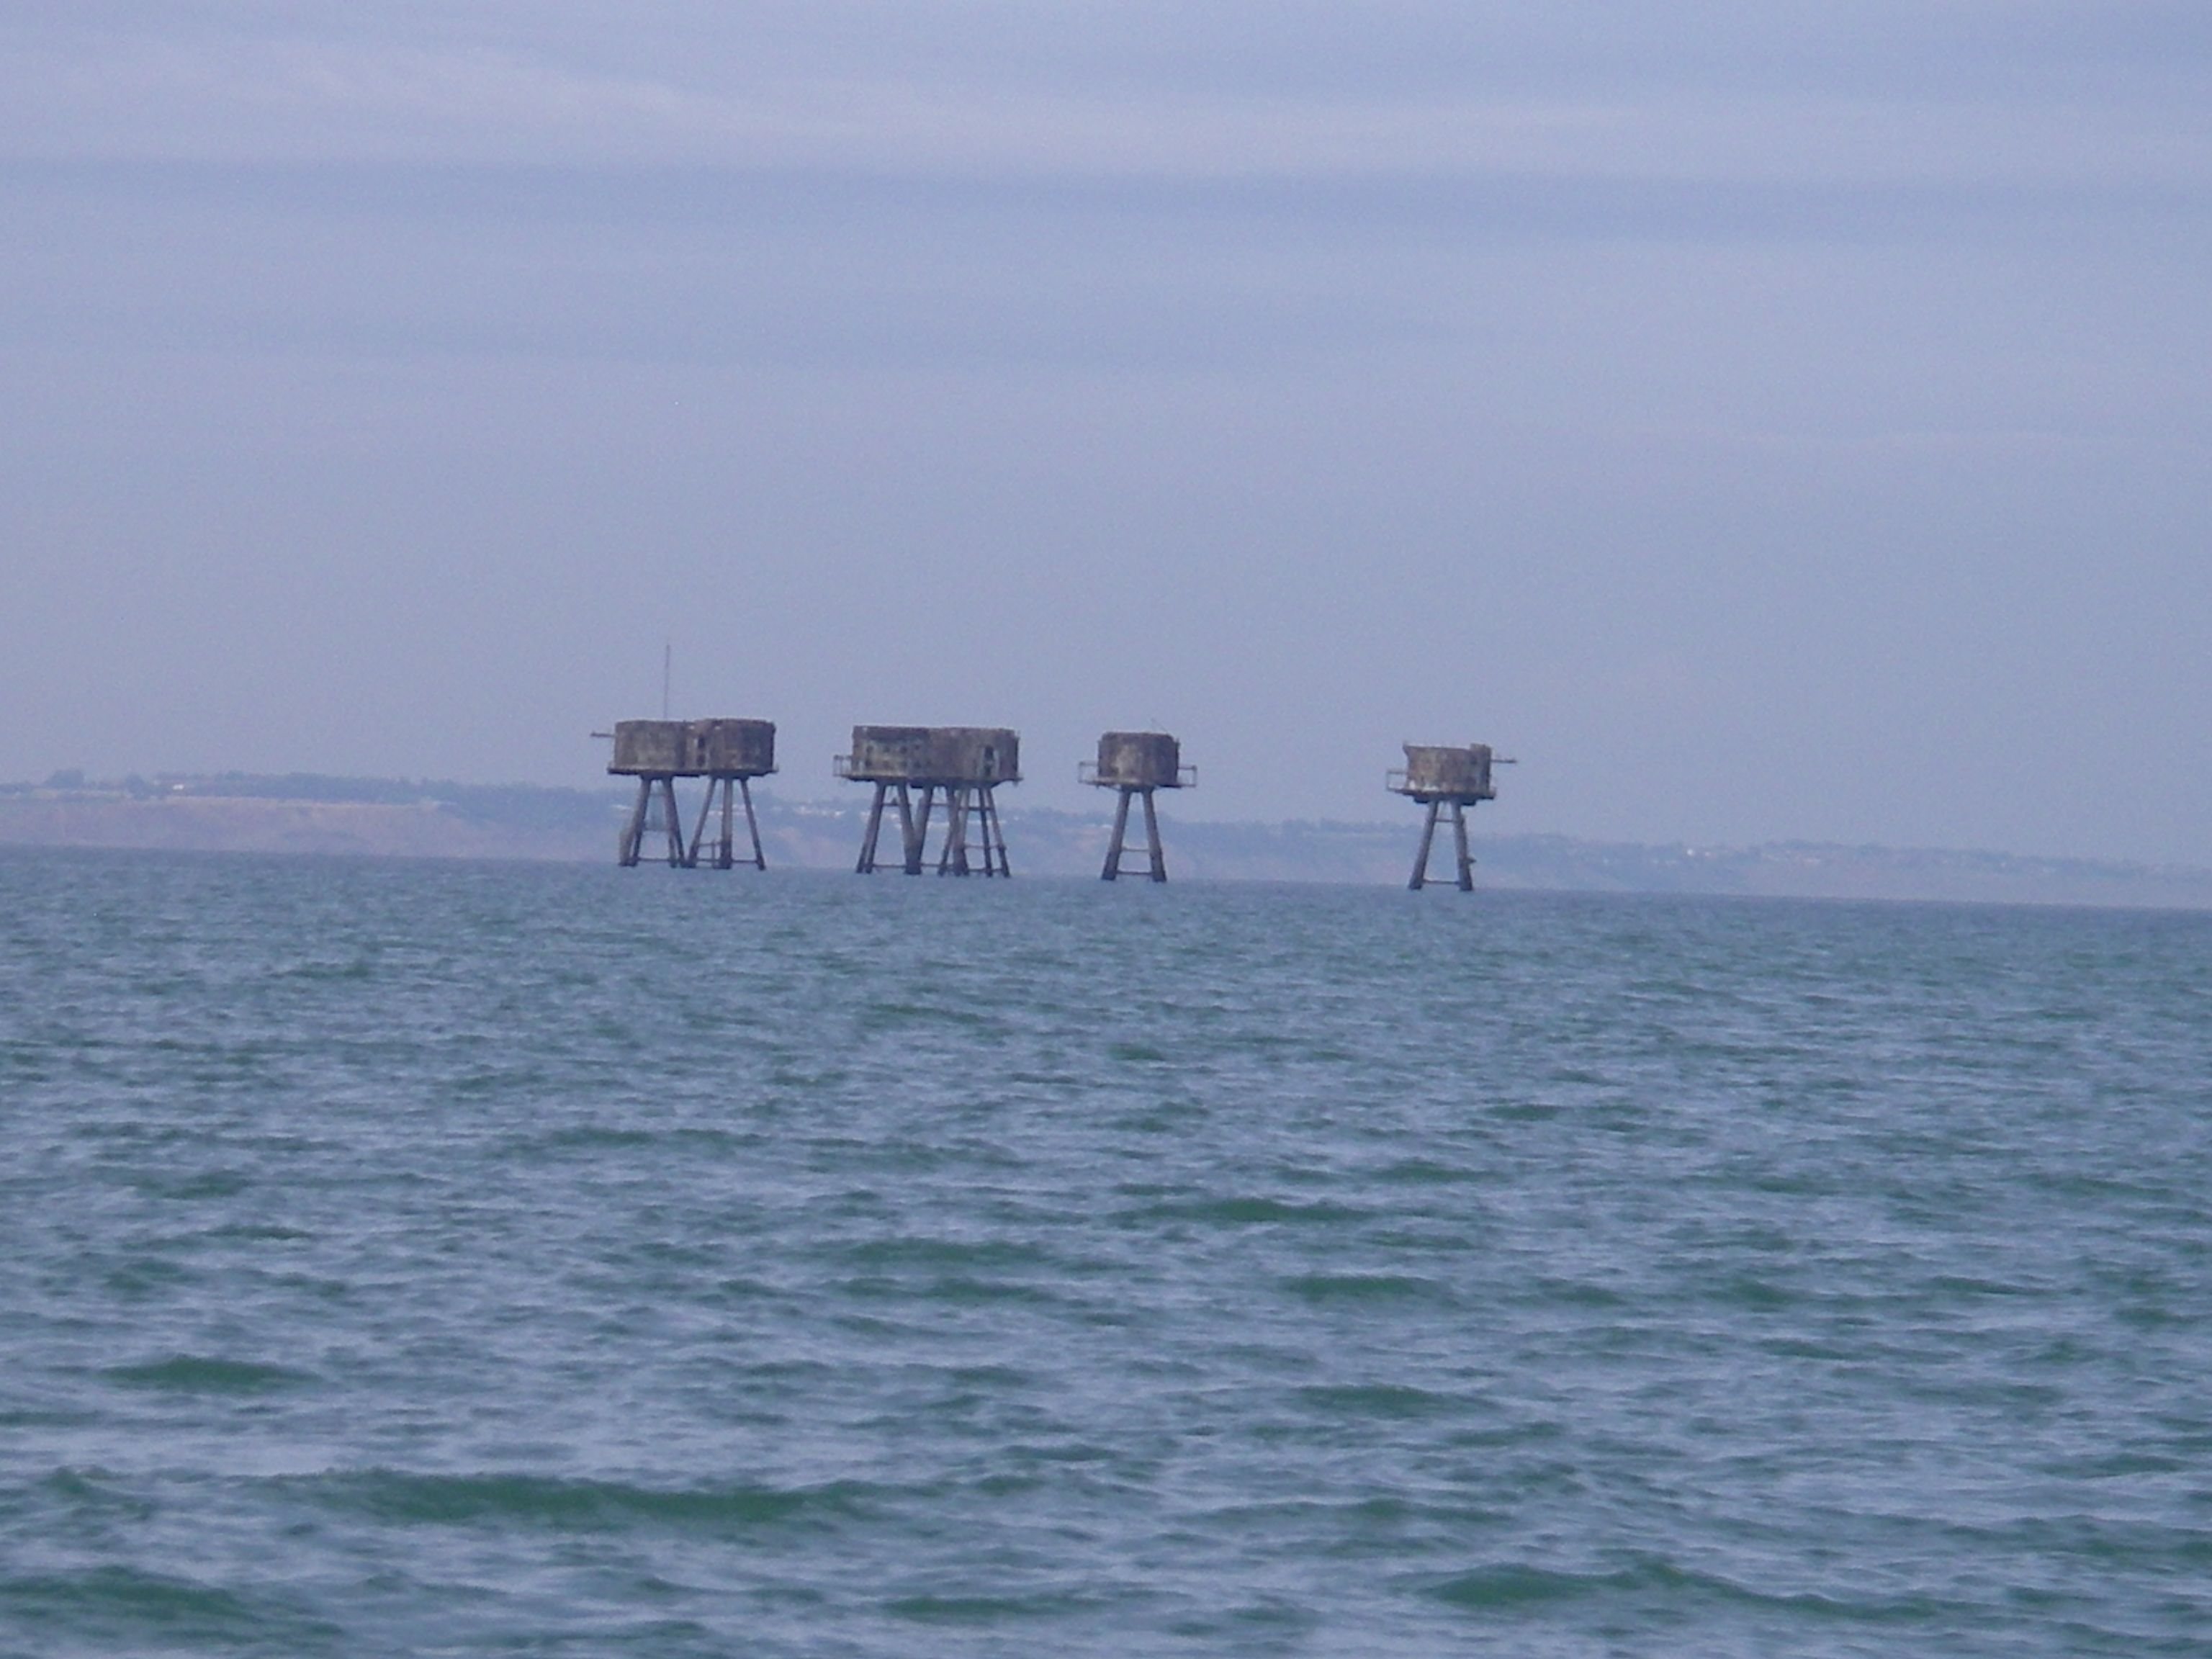
As the morning progressed we motored steadily south into a slight F2, passing the Red Sand Towers, a good landmark, as we crossed the shipping lanes. This is the tricky bit, we had to stop and gill about for 3 different ships, before we could make the dash, bear in mind these boys are in a hurry and are doing in excess of 15 knots!
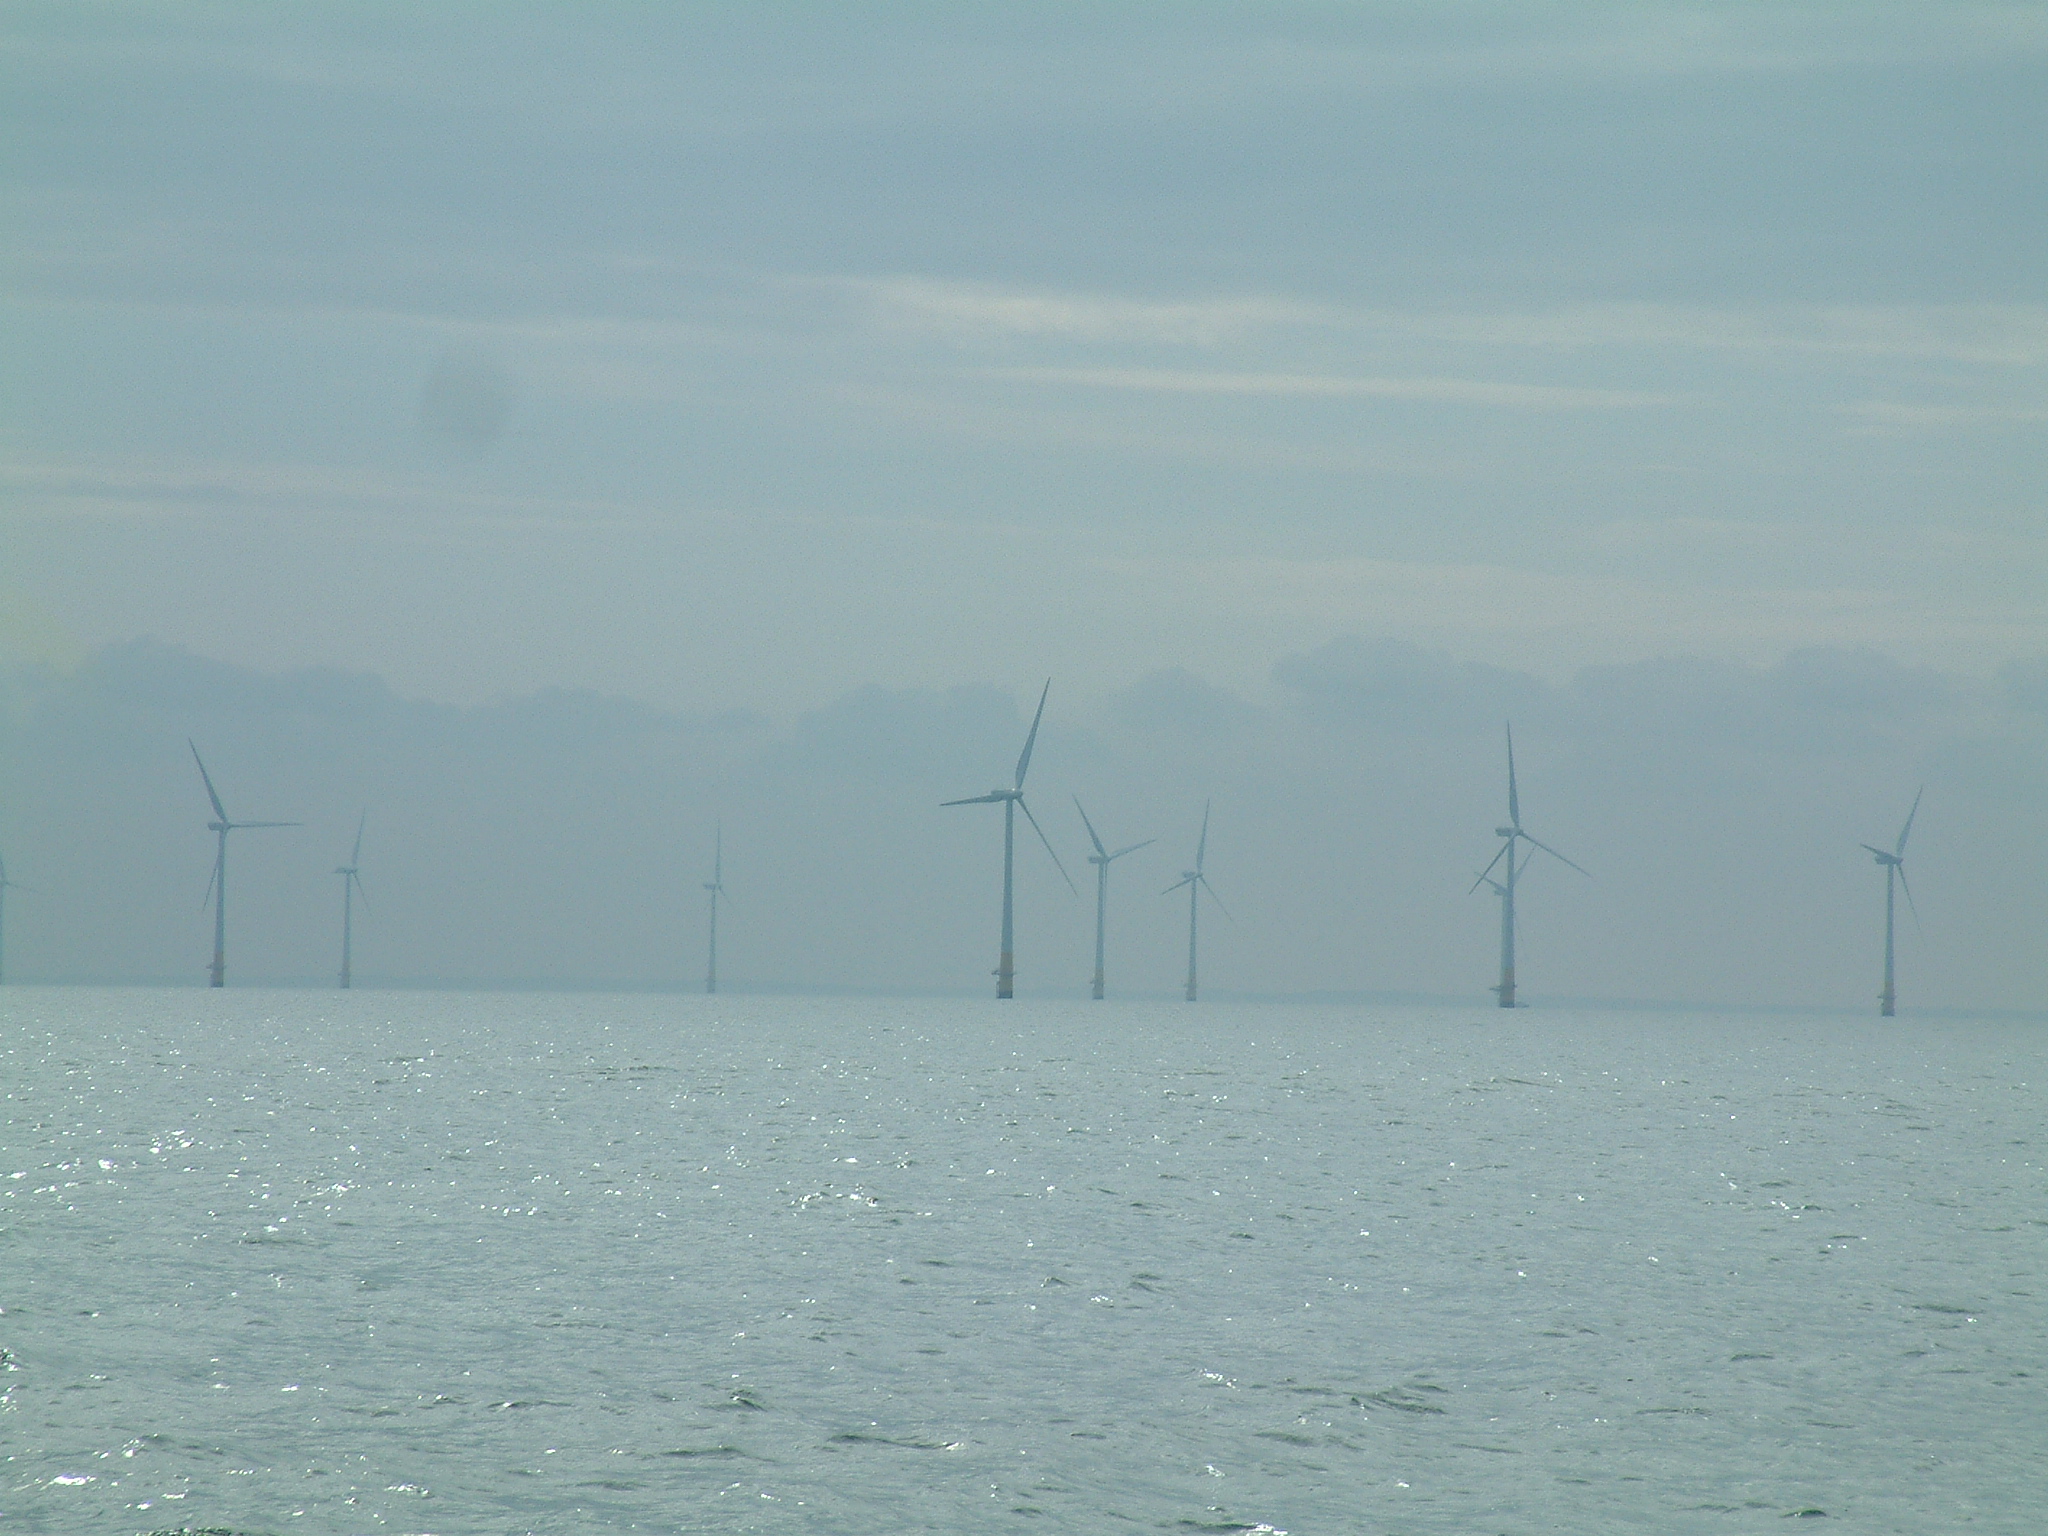
We pass close by the Kentish Flats wind farm, another good landmark, just on the south side of the shipping lane.
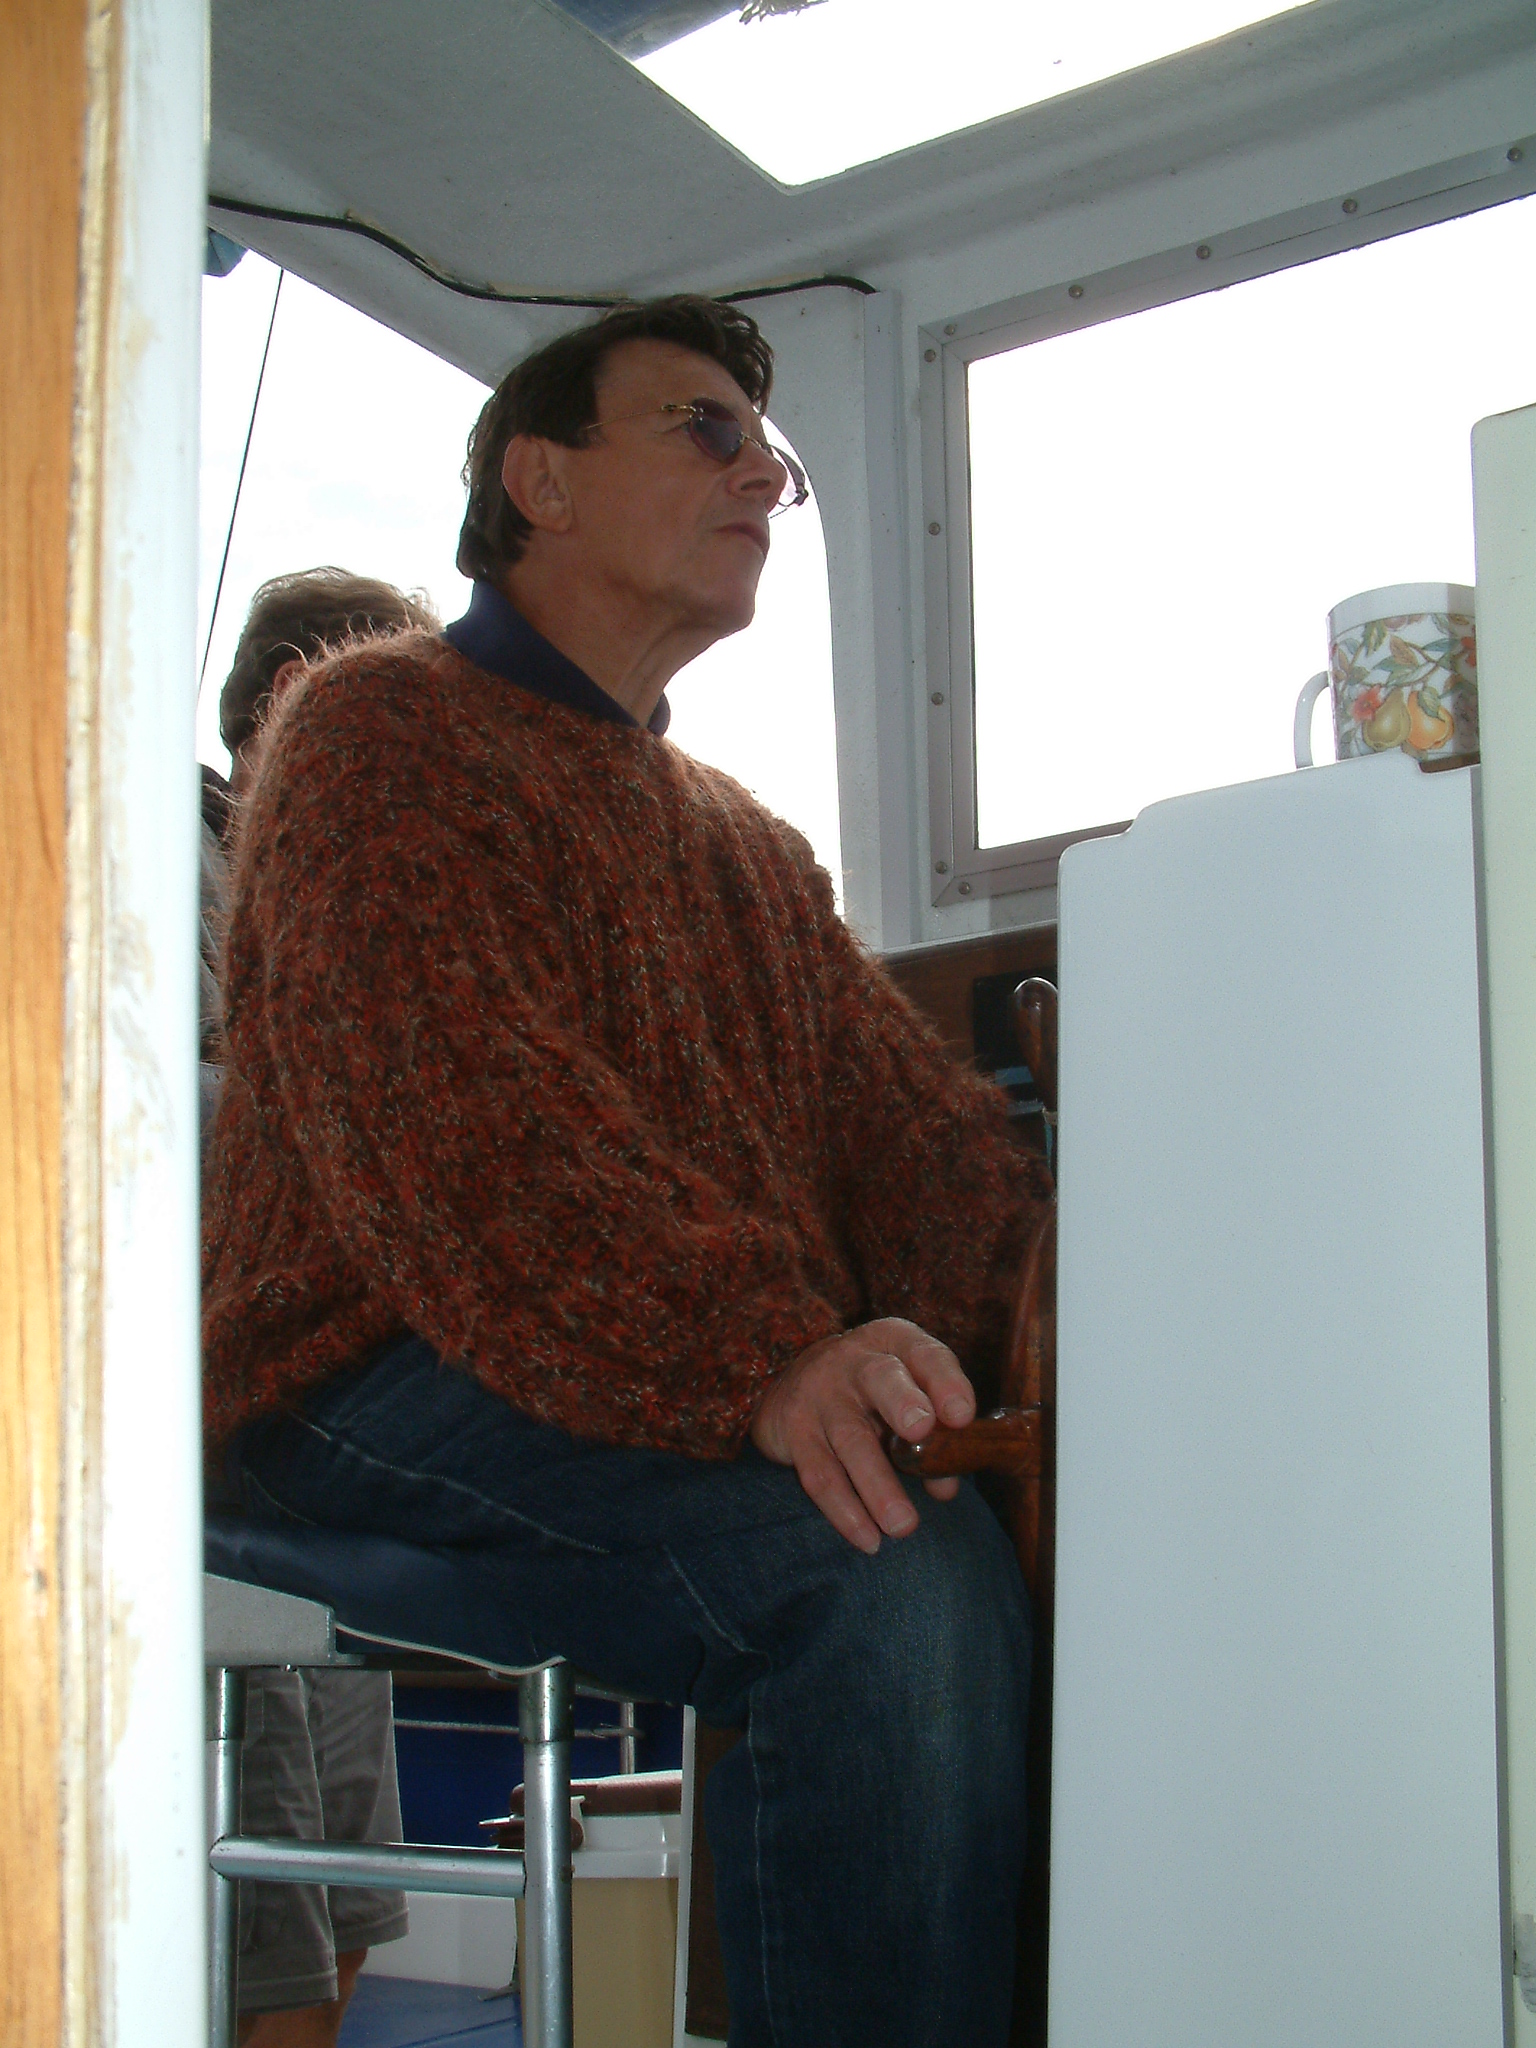

Here Brendan our (now ex) webmaster is having a well earned cuppa, we have just crept into Conyer Creek about an hour before HW. Brendan is to jump on board Glasstide with John Stevens the Database manager, for the trip back. Sadly Brendan had a mental breakdown years later and tried to destroy this site, (and others), did all sorts of naughtiness and eventually was arrested, not a happy bunny... Sad to see a clever man self destruct.
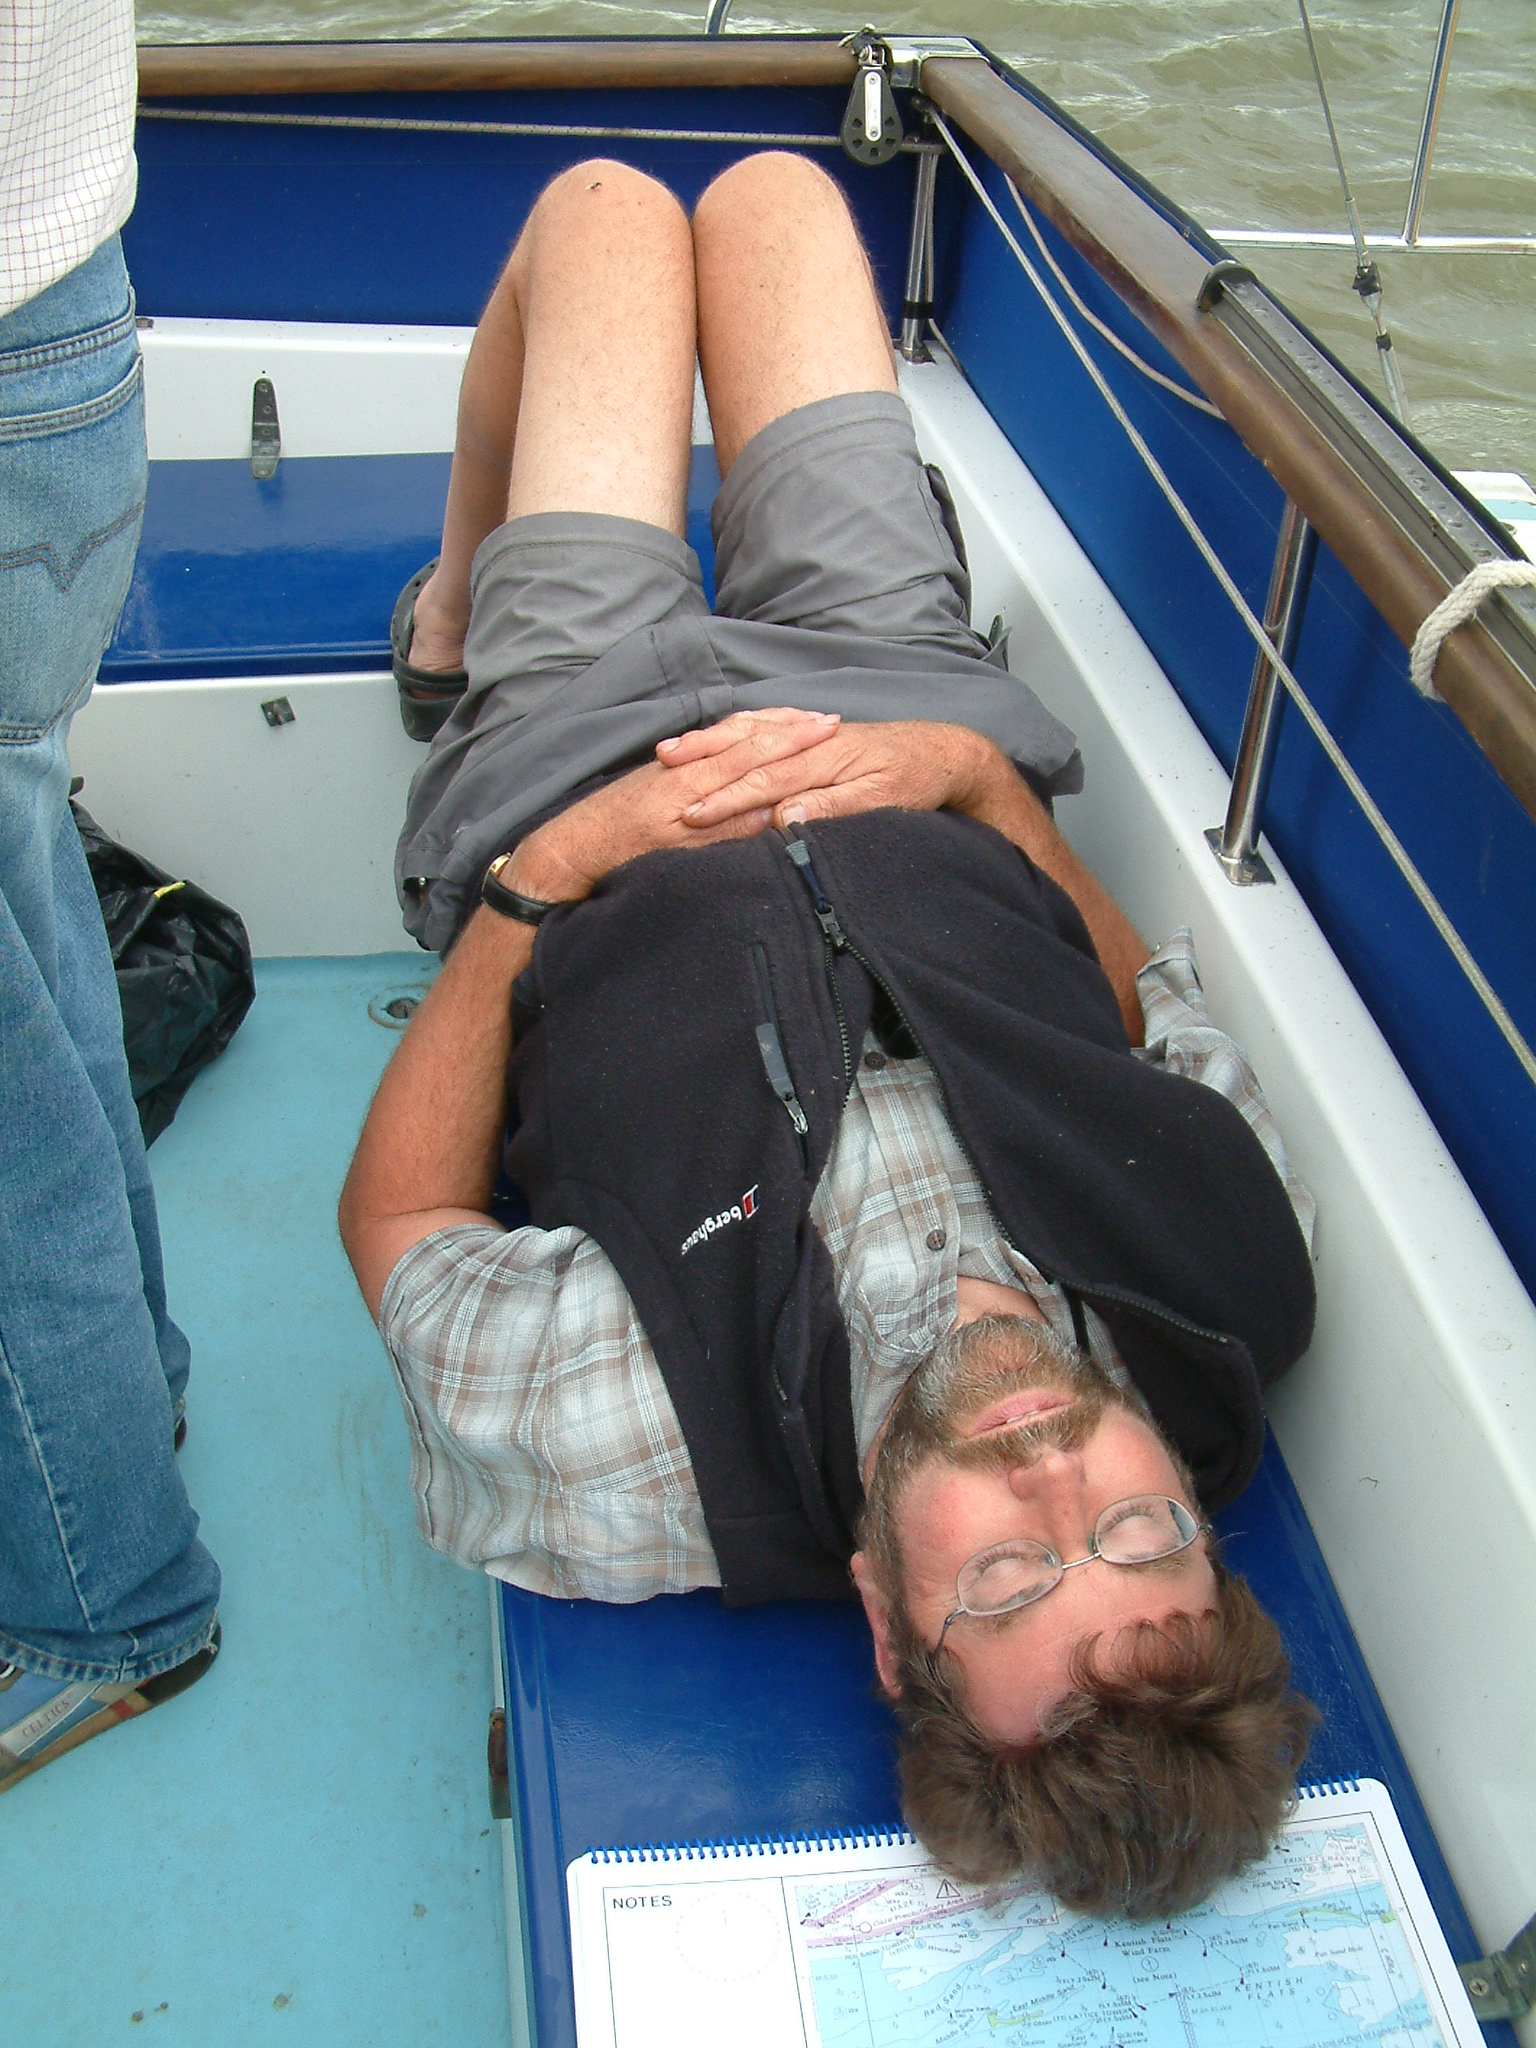
Some found this just too much after the early start, Brian's friend John, his other crew, crashed out in the cockpit for an hour!
Glasstide following close behind. No time to lose here and we have little time to admire the changes in Conyer. There is a nice new Marina where once there were hulks, a decent clubhouse too. Sadly the 'Ship' pub has now closed, as has the yard where Maurice had his dealings with the Bay Class boats and the Noontide 32 was built. A lot has changed, now there are rows of smart barges with live-a-boards, posh motor boats too, though by all accounts they do not move much!
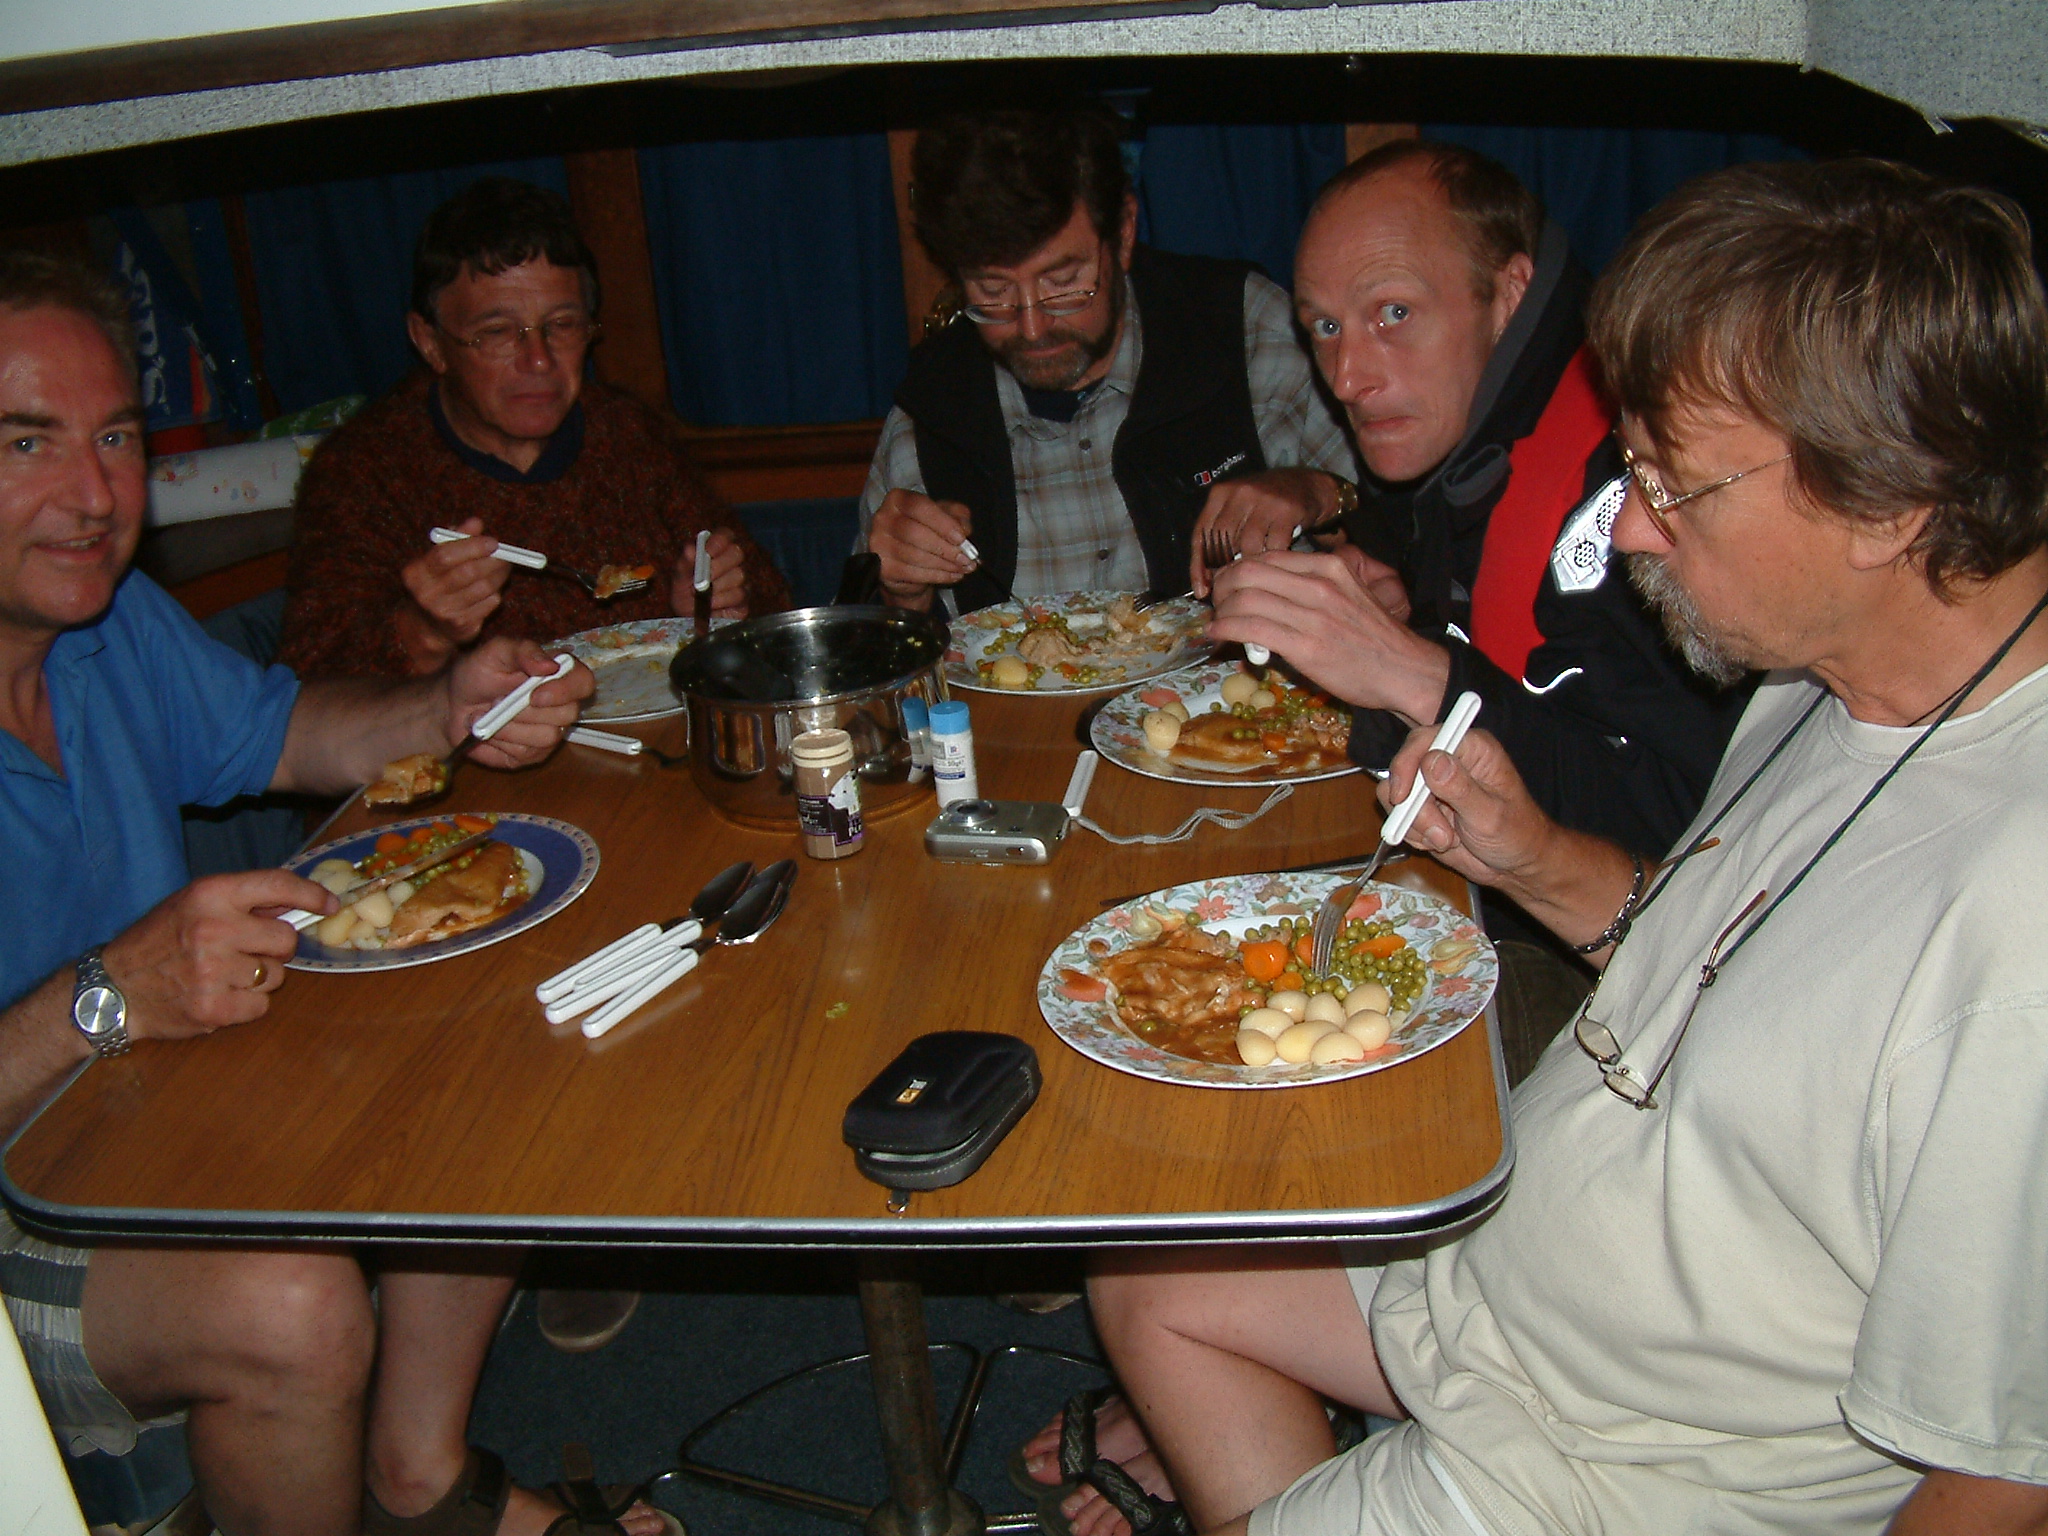
That evening we all sit round in Mobri II to enjoy a hot meal and discuss the events of the day, it is not long before heads are nodding and we are off to bed, after the early start and disturbed night before that, we are all dog tired. We can have a quiet night here and no rush in the morning..
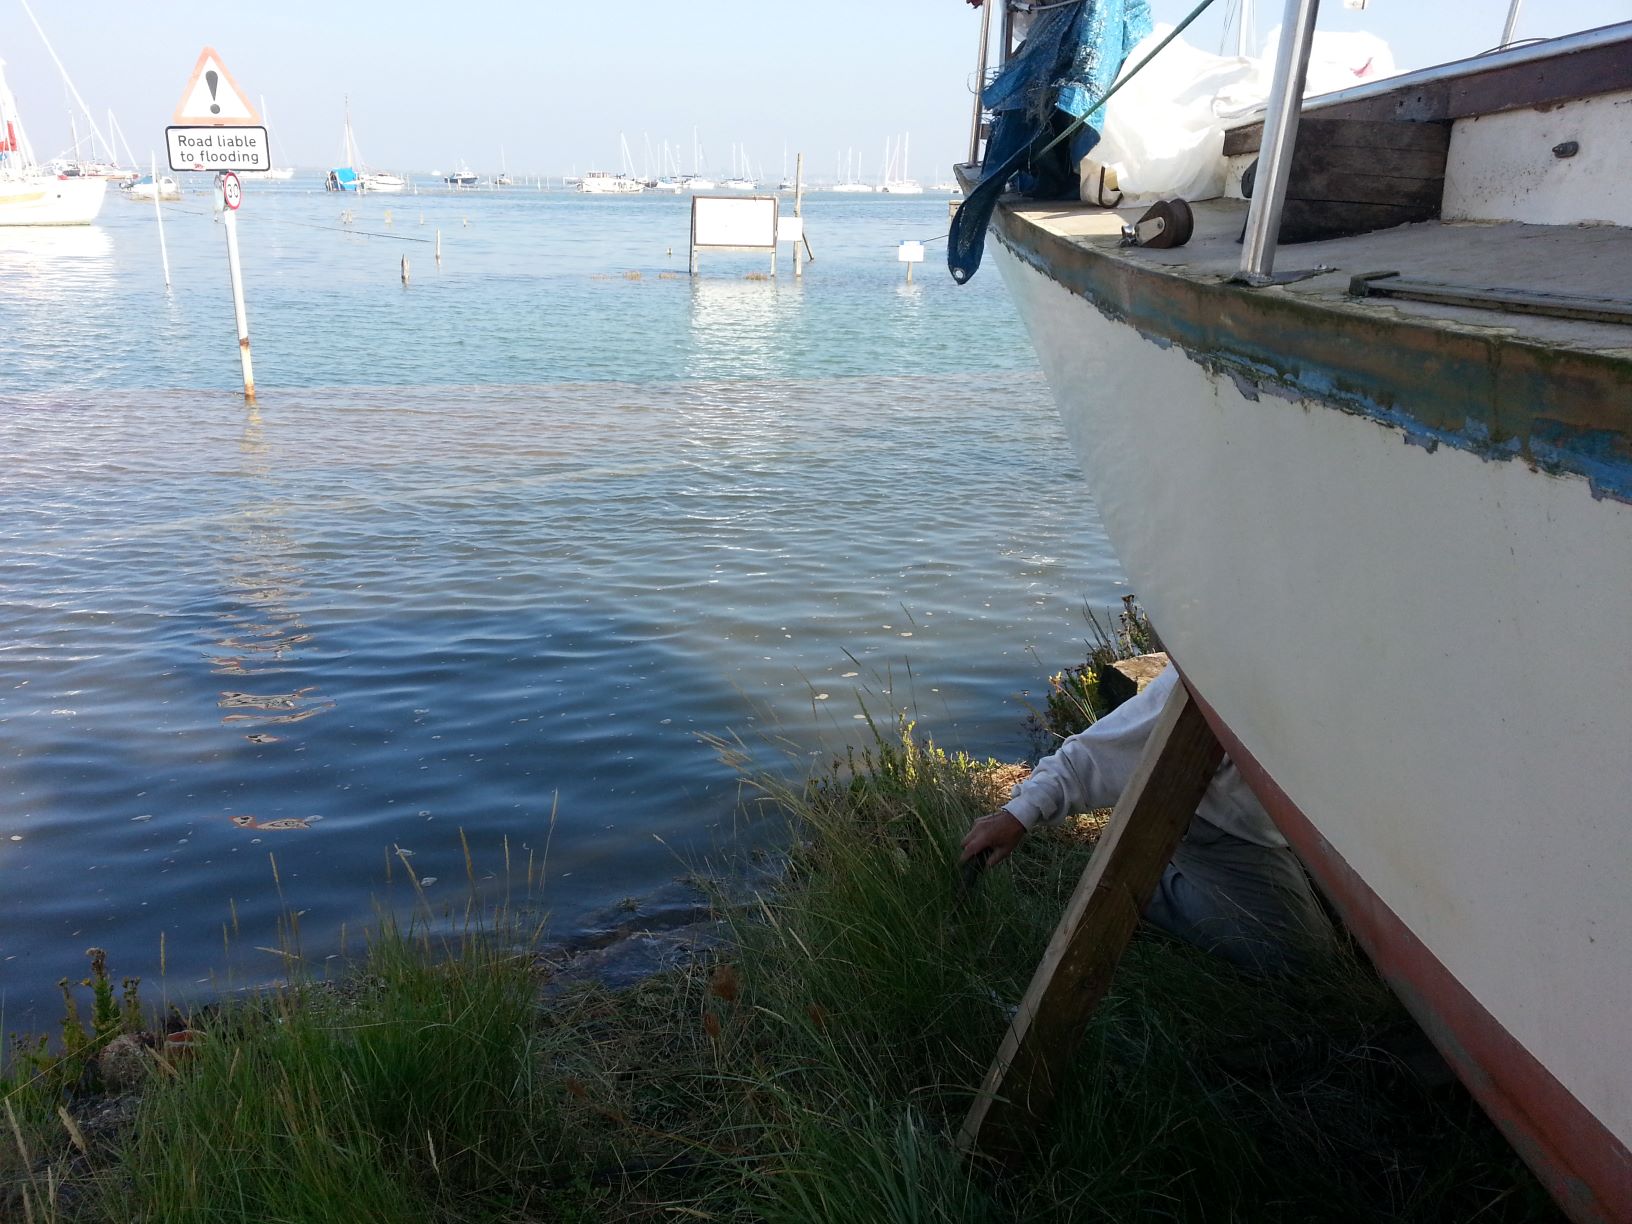
Here we are with Glasstide just astern leaving Harty Ferry area. About this time I notice the water has stopped coming out the telltale on Glasstide's port side.... There is a loss of flow.
John sets too to change the pump impellor. Then it must be catching, as Brian has just had to do the same on Mobri II when steam is noticed by the crew of Glasstide, emanating from the port motors exhaust!. Pumps sorted and all tools put away and we putter on... On Glasstide John will retrieve the lost water pump screw from the bilges another day!
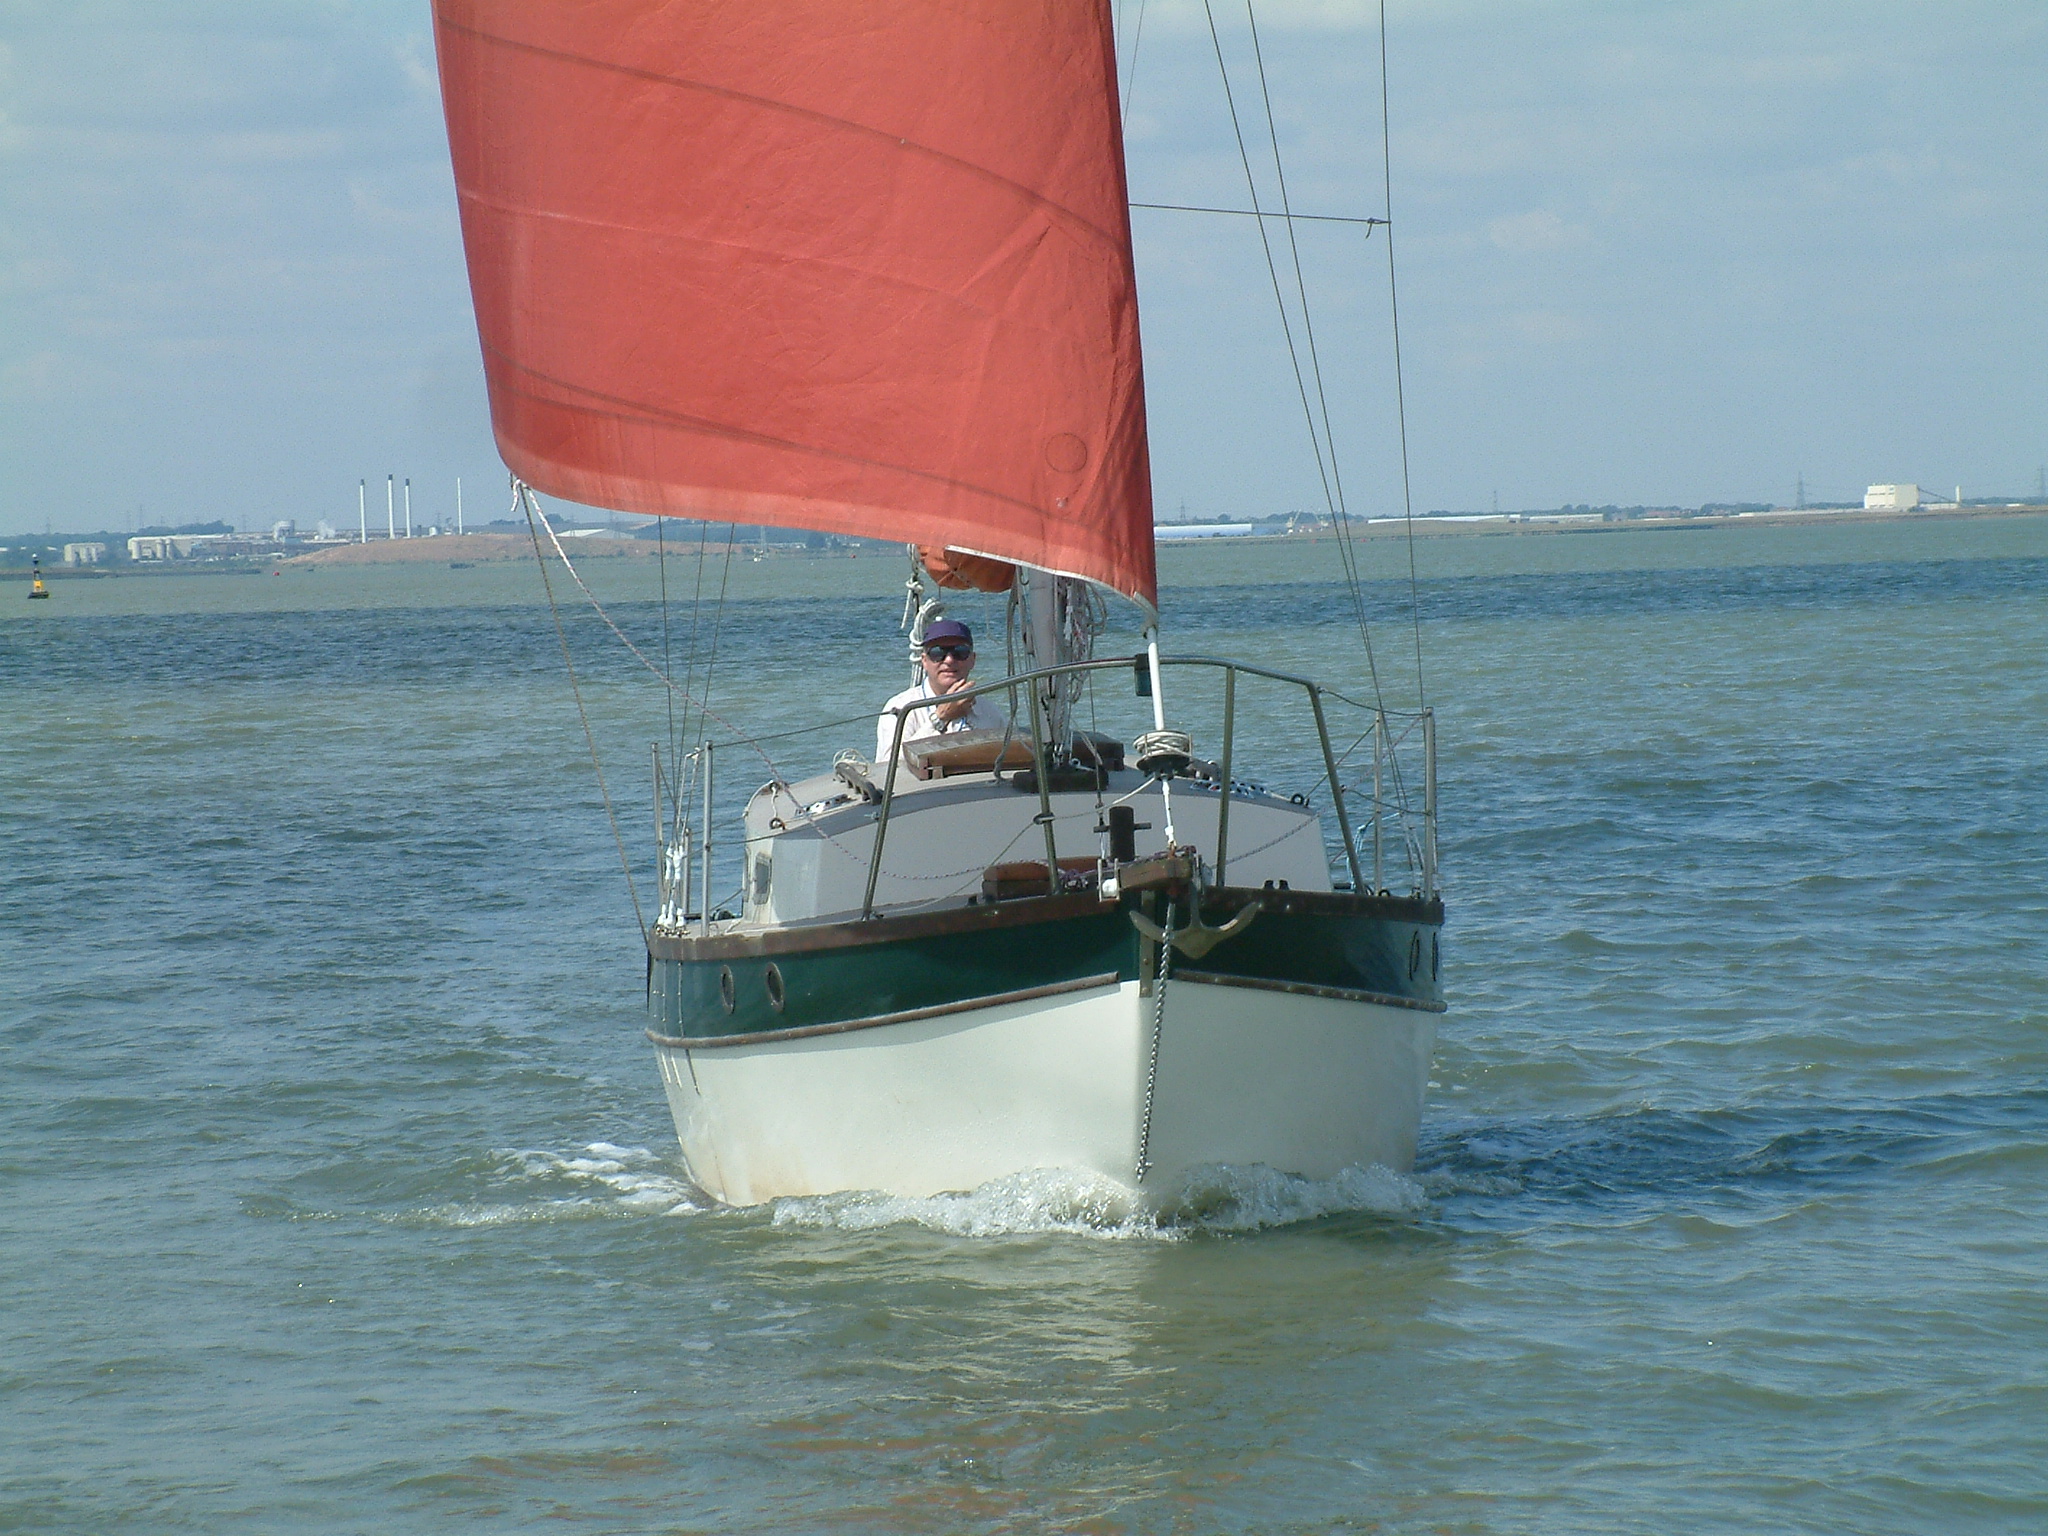
As we motor sail out of the Swale into the London River, we fall in with a Peter Duck, we get a few great shots then sidle over to speak to her owners, turns out I know the man, he had the Eventide, 'Metisse' years ago! We exchange pleasantries and stay more or less together the rest of the day, as they are bound for Brightlingsea!
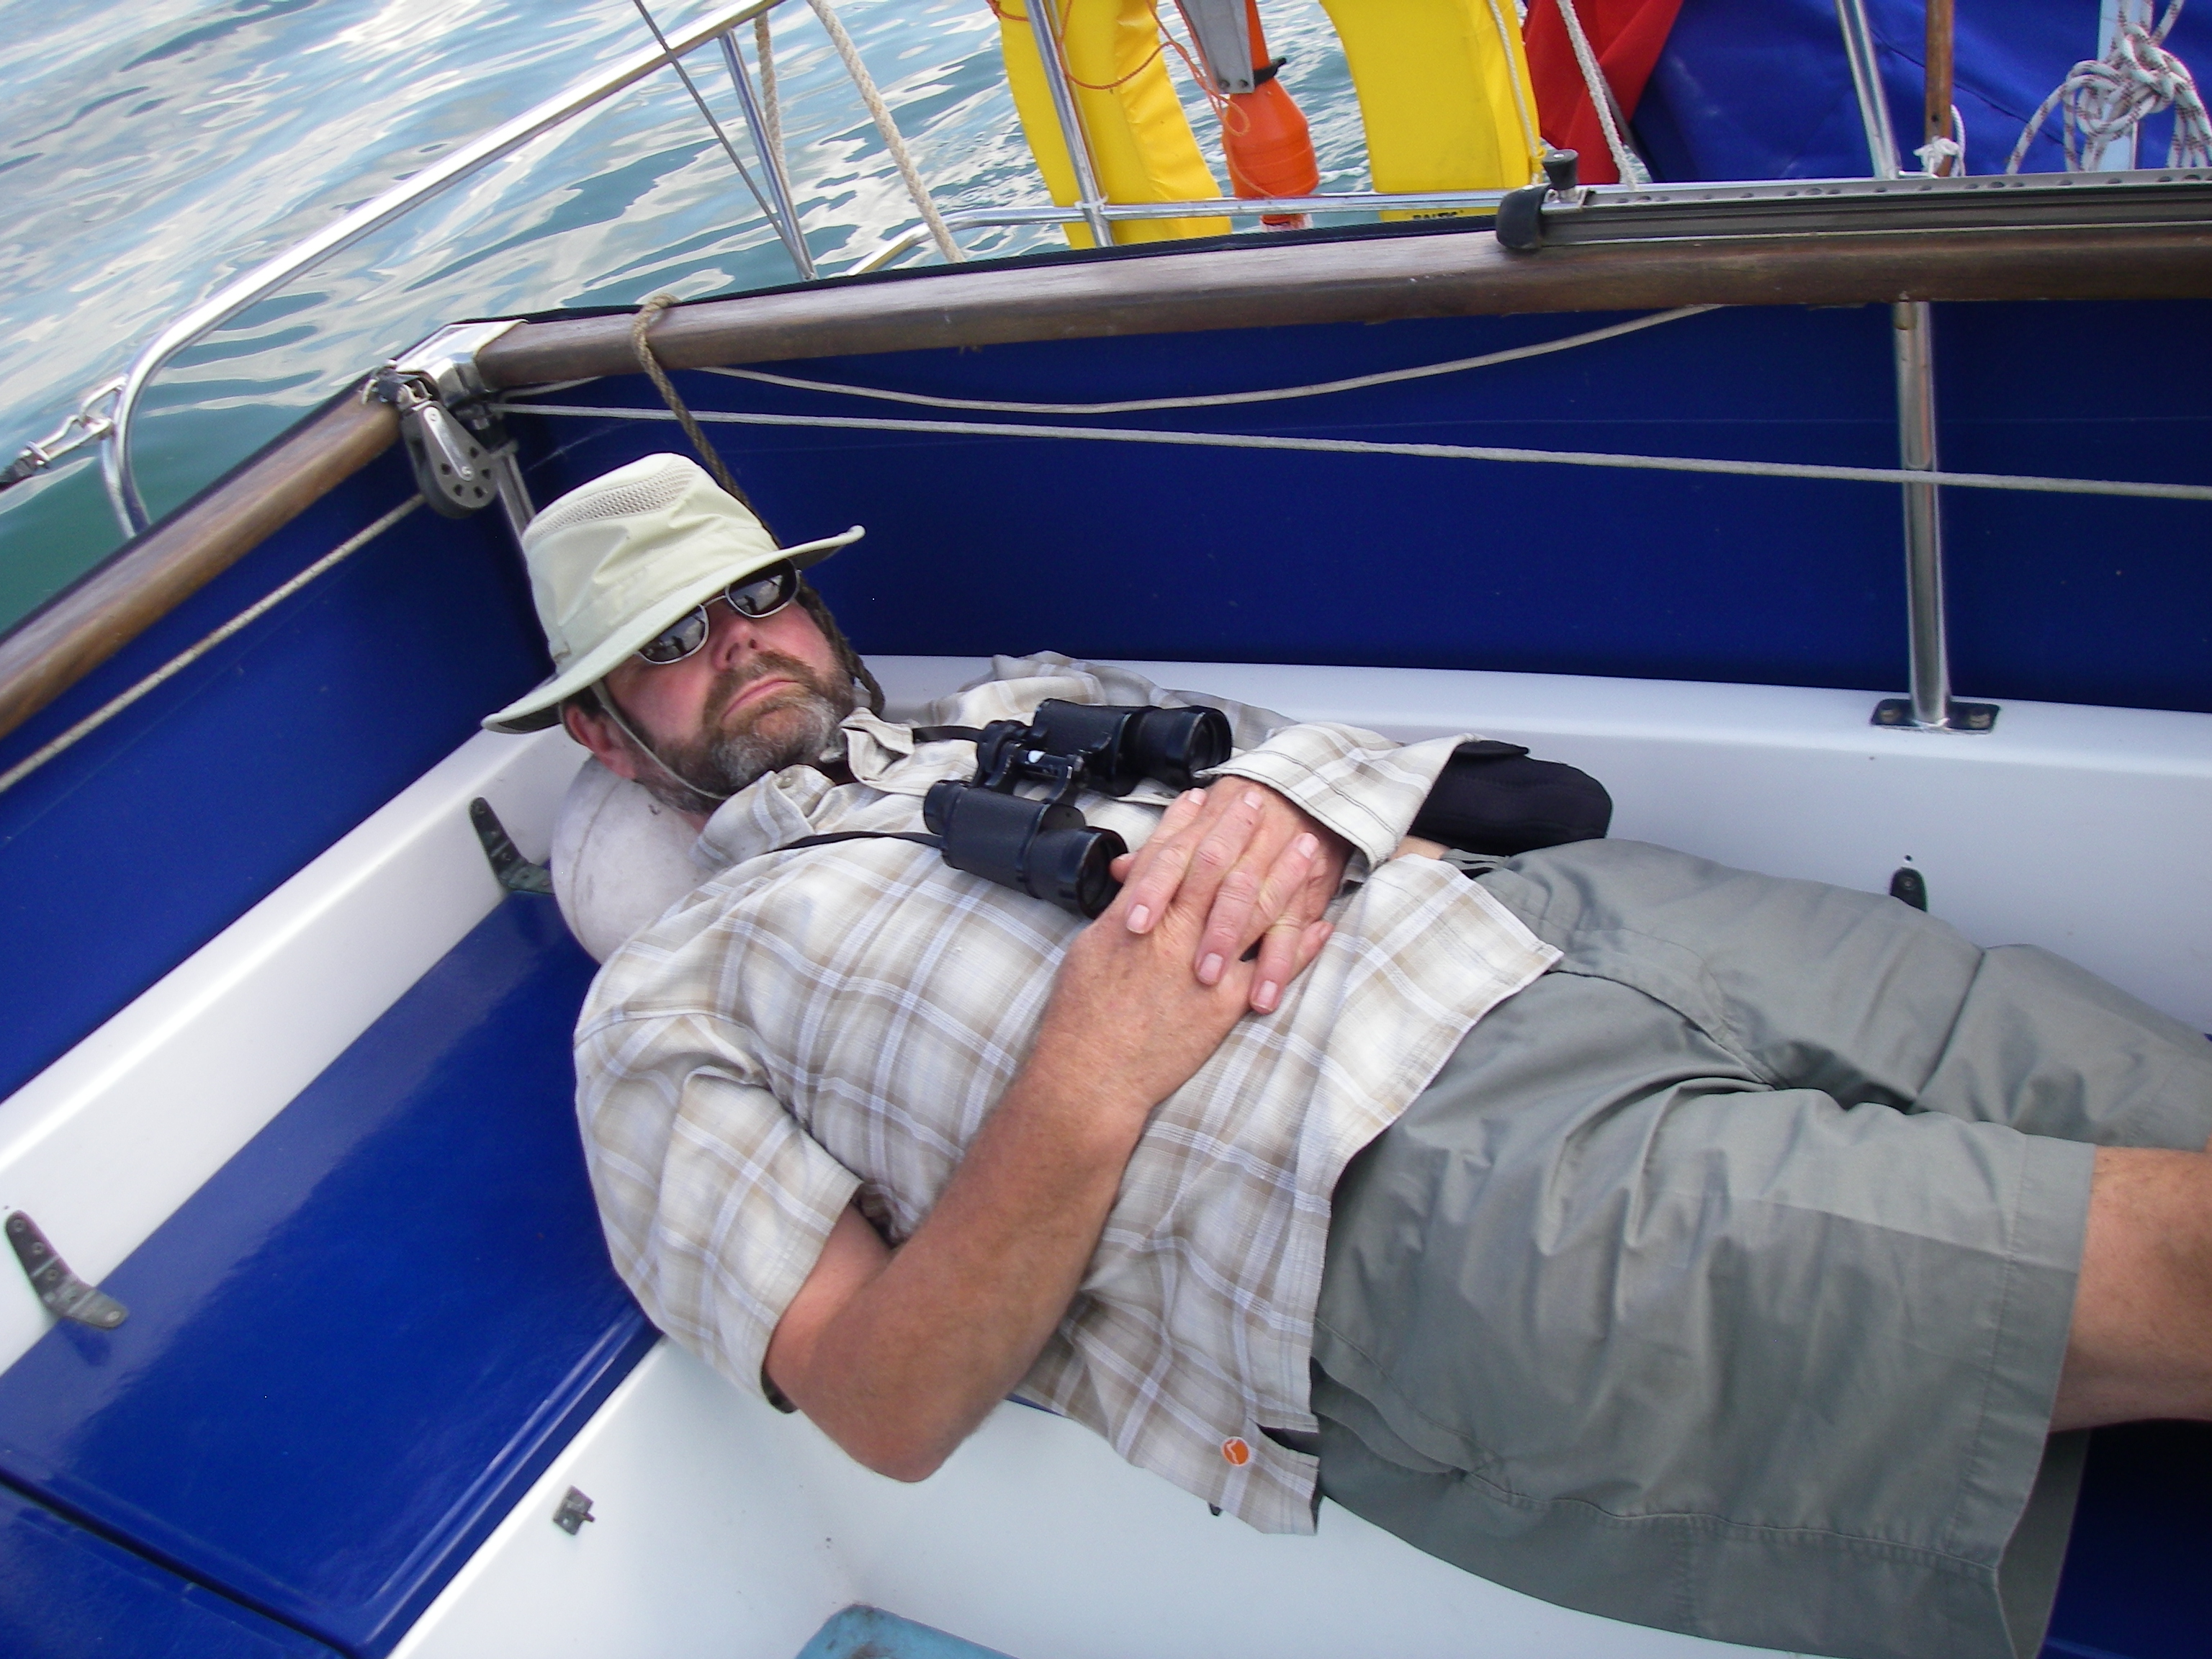
At this stage the wild all night party catches up with Brian's crew John, and he finds a new use for the wander fender! With the motors ticking over and the genoa pulling it is a pleasant sail, the mainsail ties are off and soon we will be able to set it.
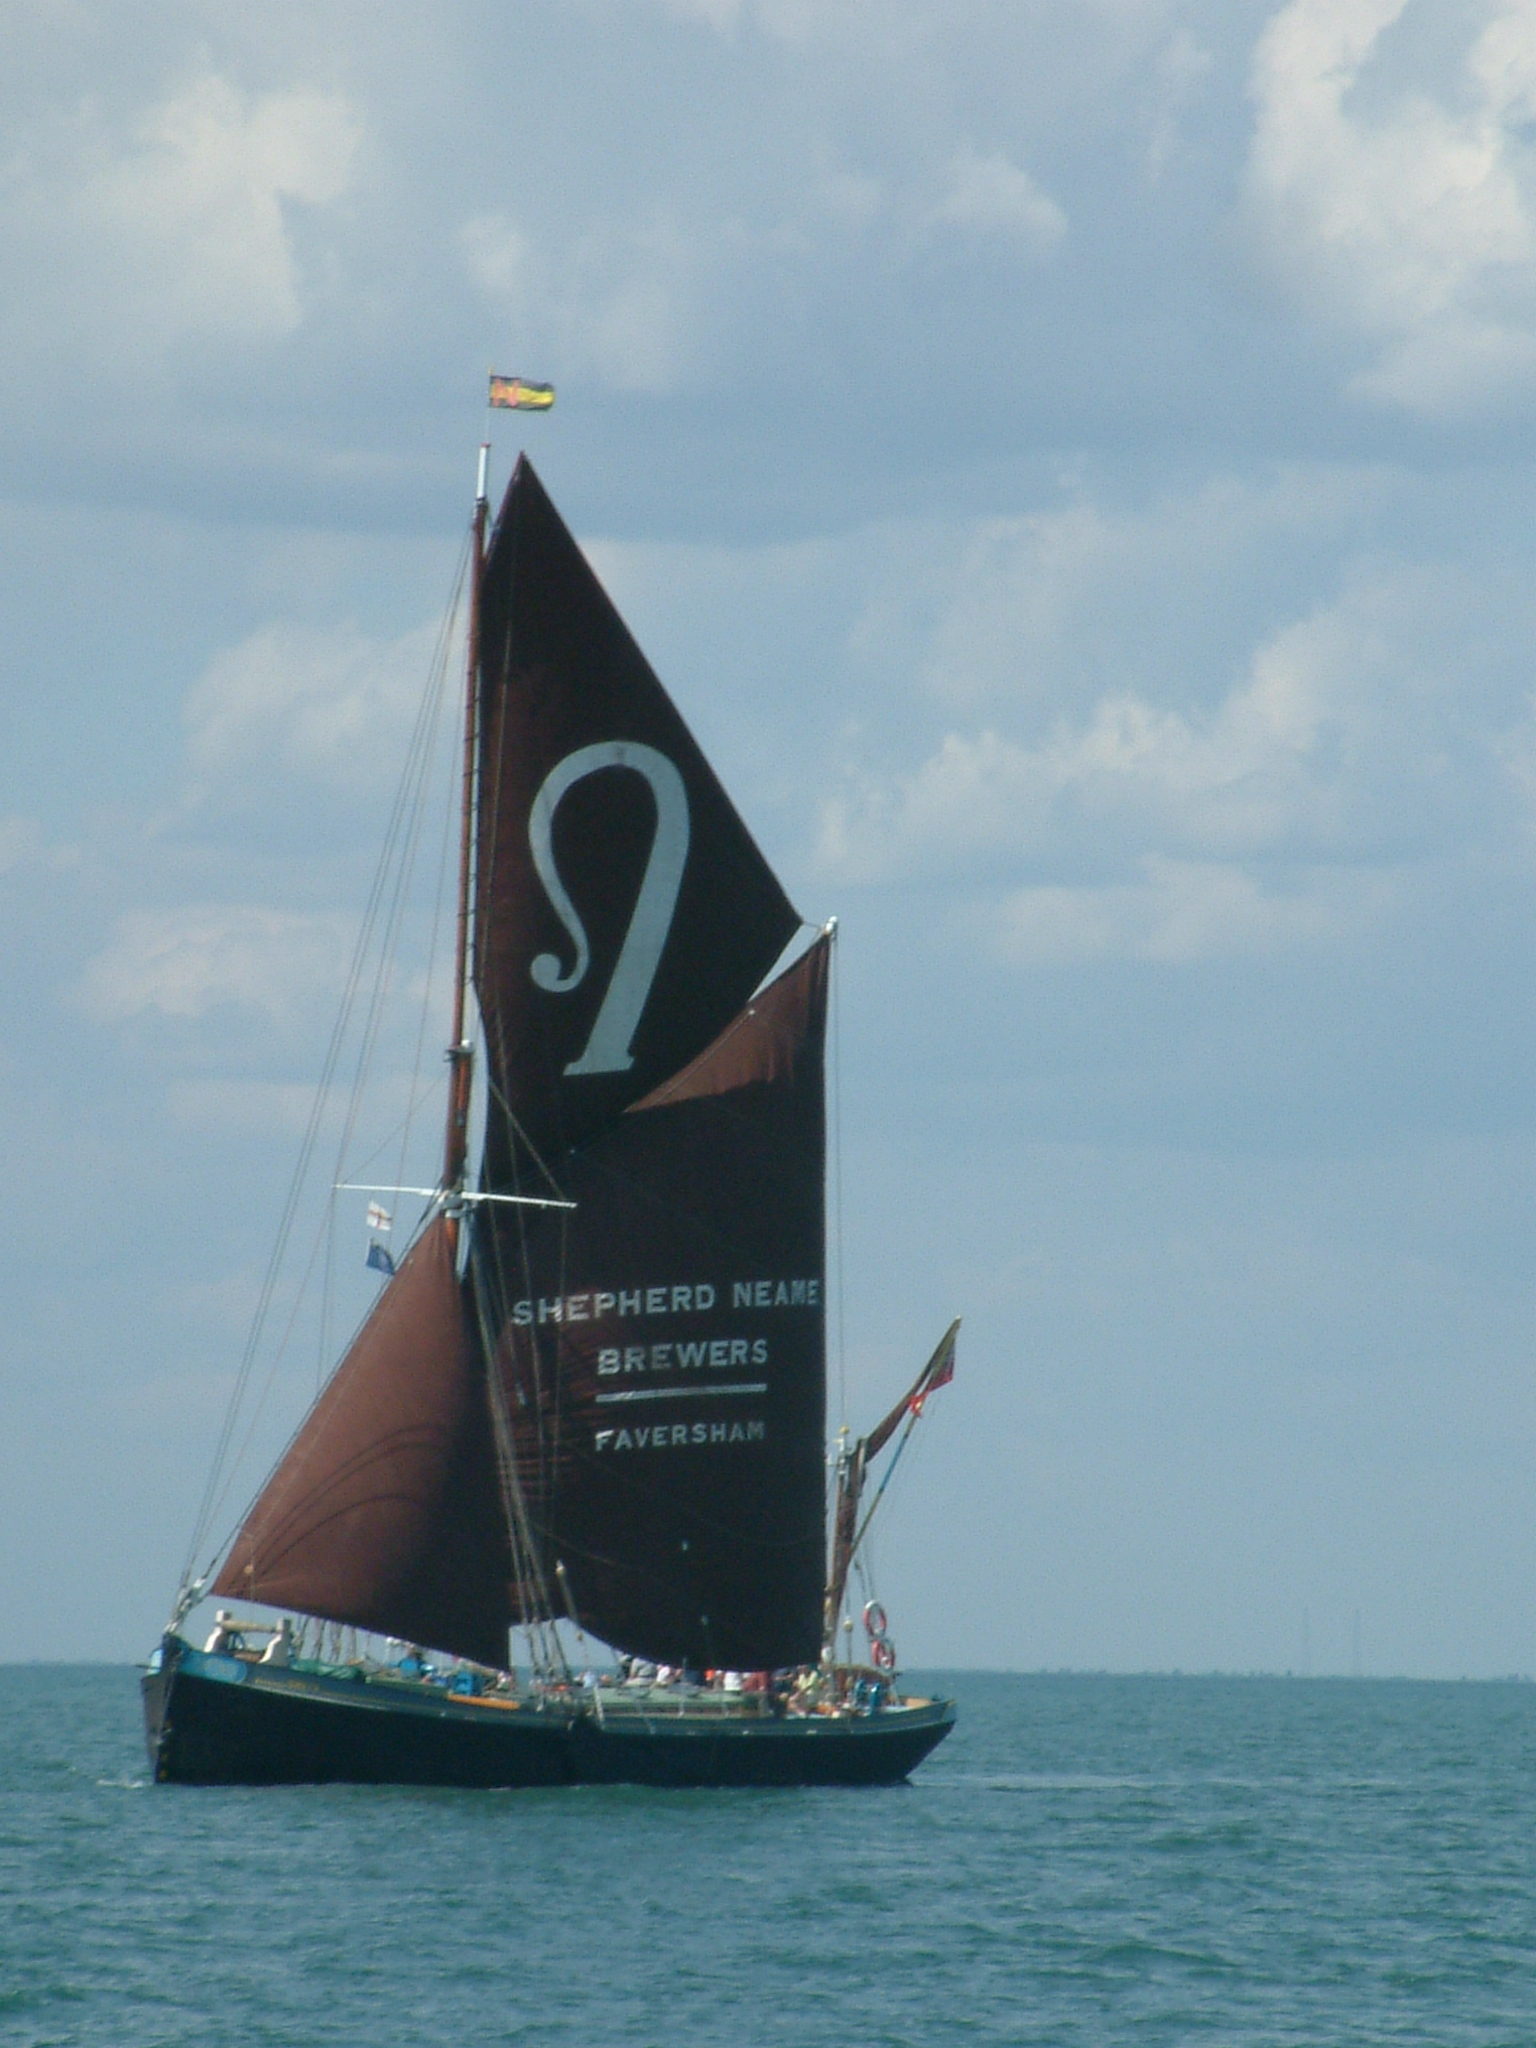
One of the local barges is sailing into the Swale as we leave, bound for her home port of Faversham maybe, the HQ of Shepherd Neame, the brewers.
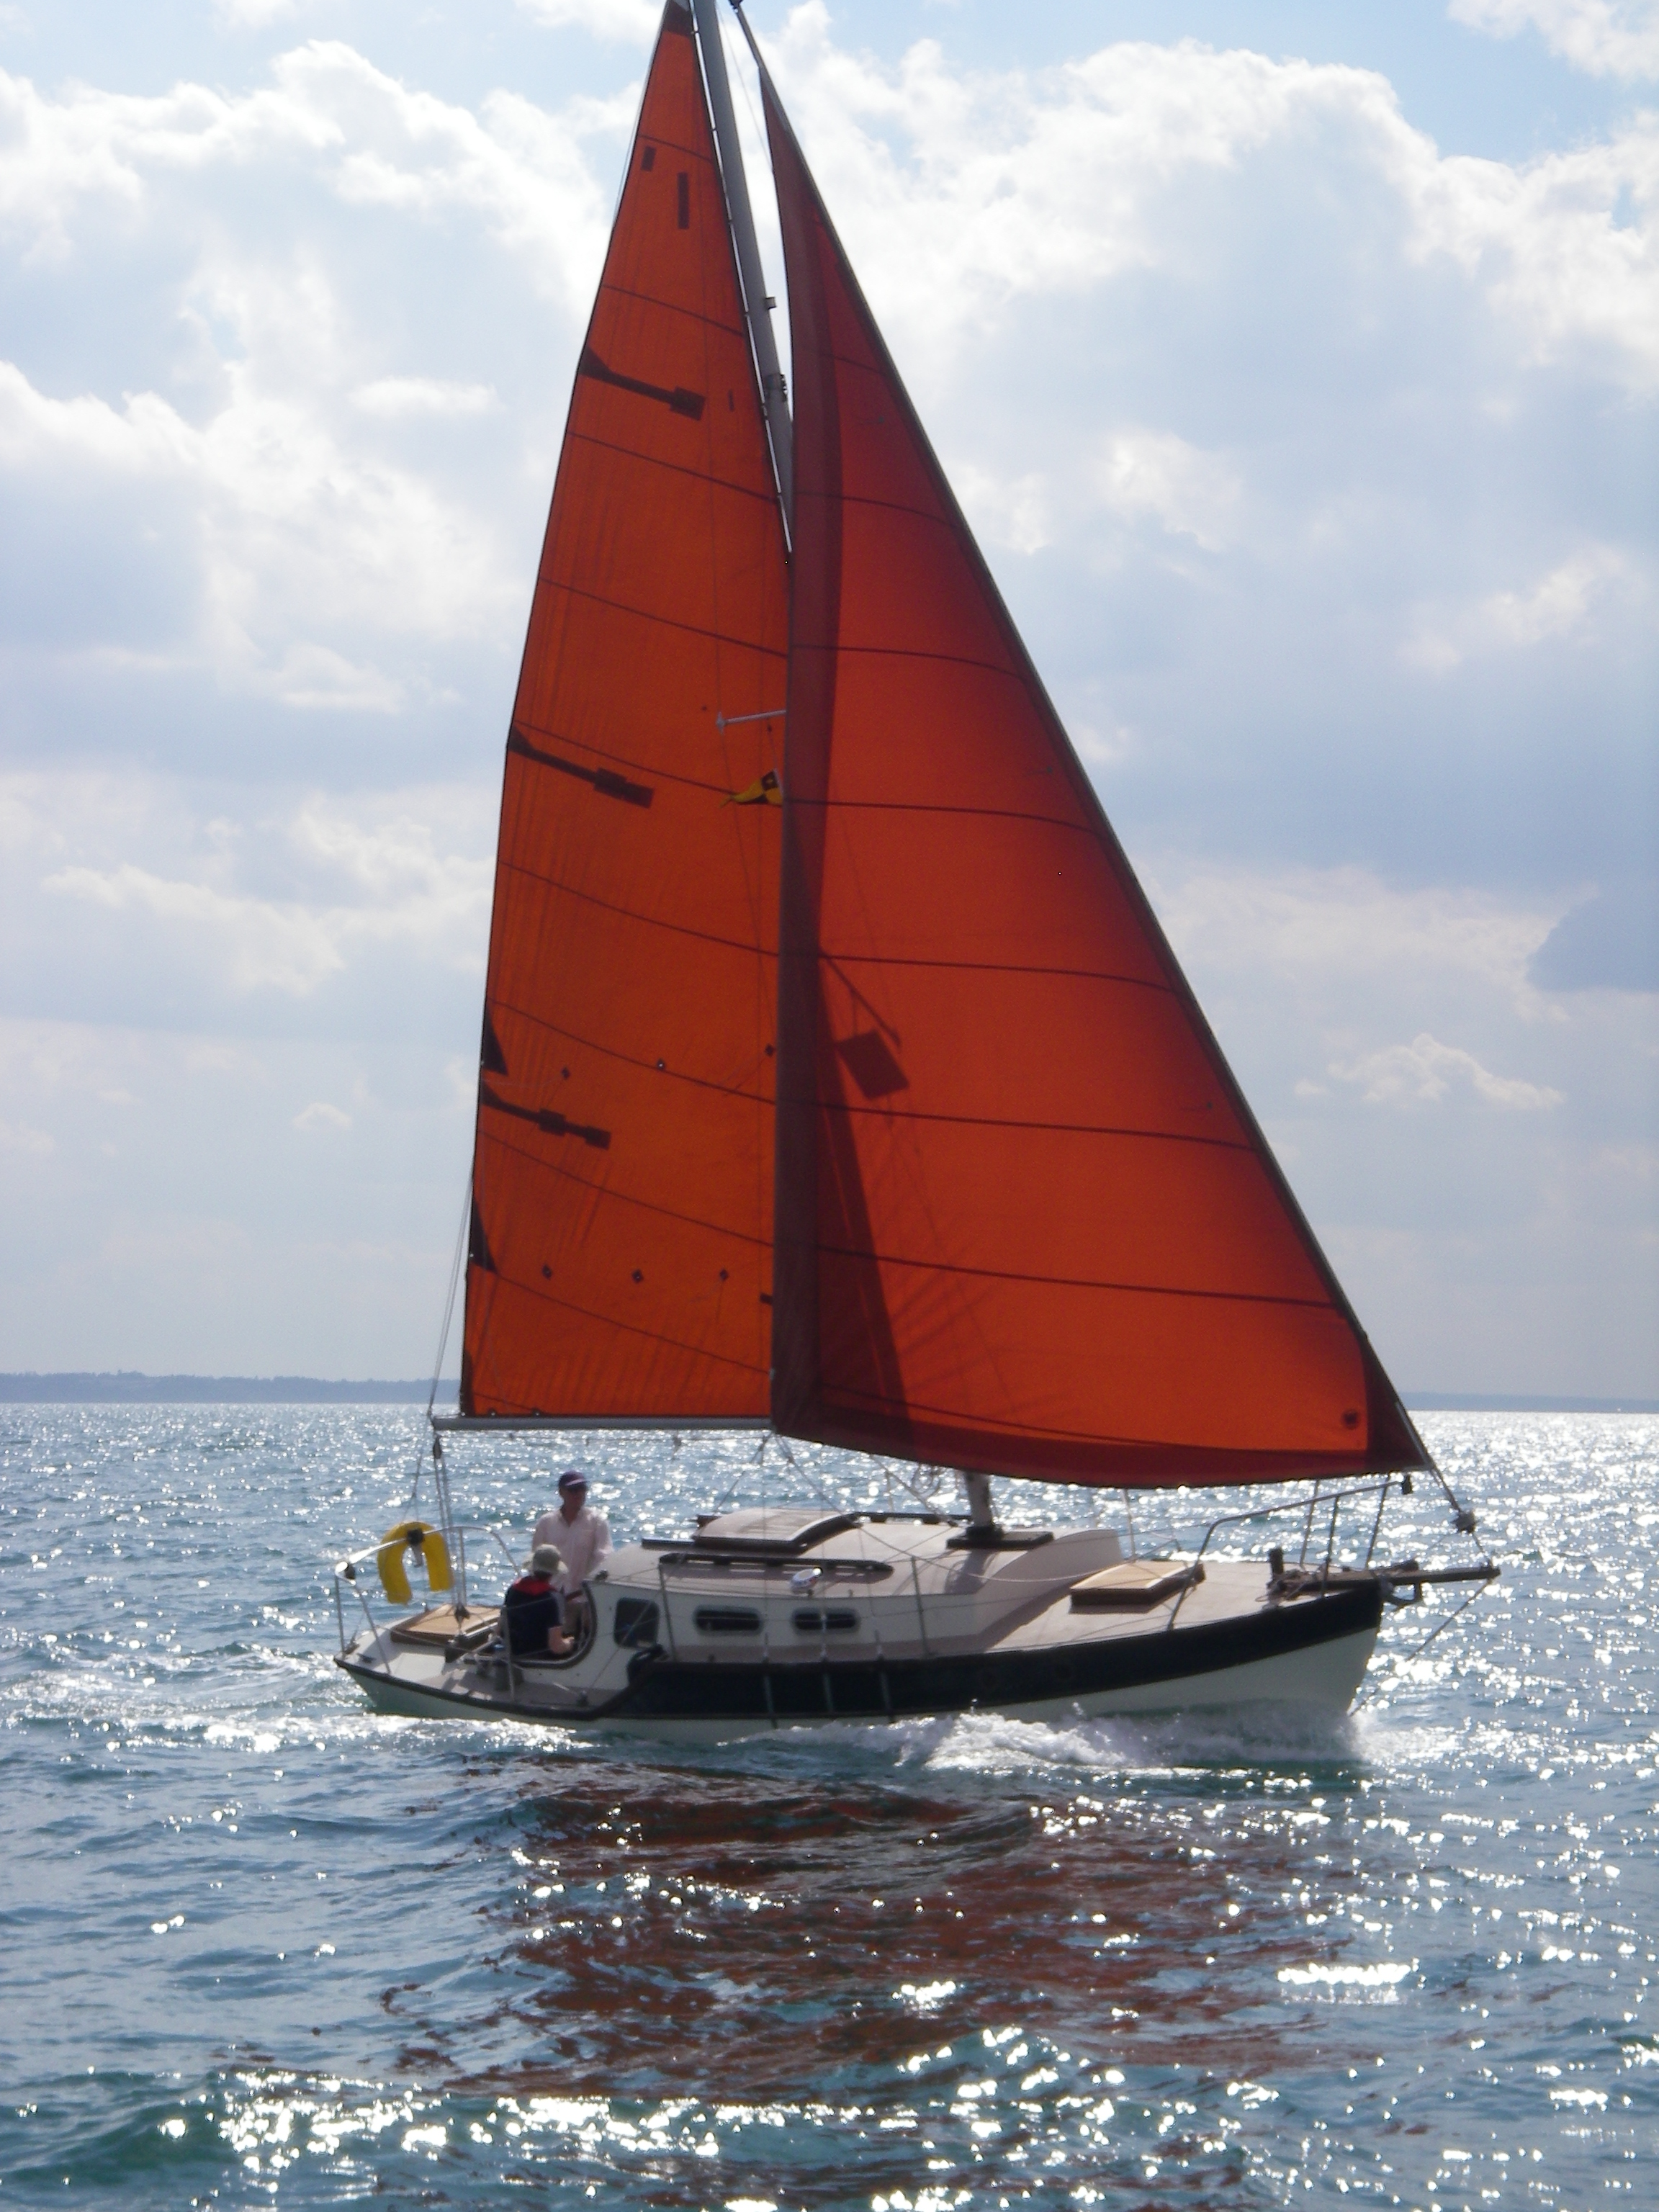
Glasstide looks a picture as we sail up the Swin, the wind, though slightly ahead of us is free enough for her to sail and she powers away from us on the Cat. Mobri II has only a small jib up today, soon Brian hopes to fly a full size Genoa with a sacrificial strip, but at the moment there is the choice of the small or a ghoster, that is far too big for everyday use. So it is small jib and a slow sail...
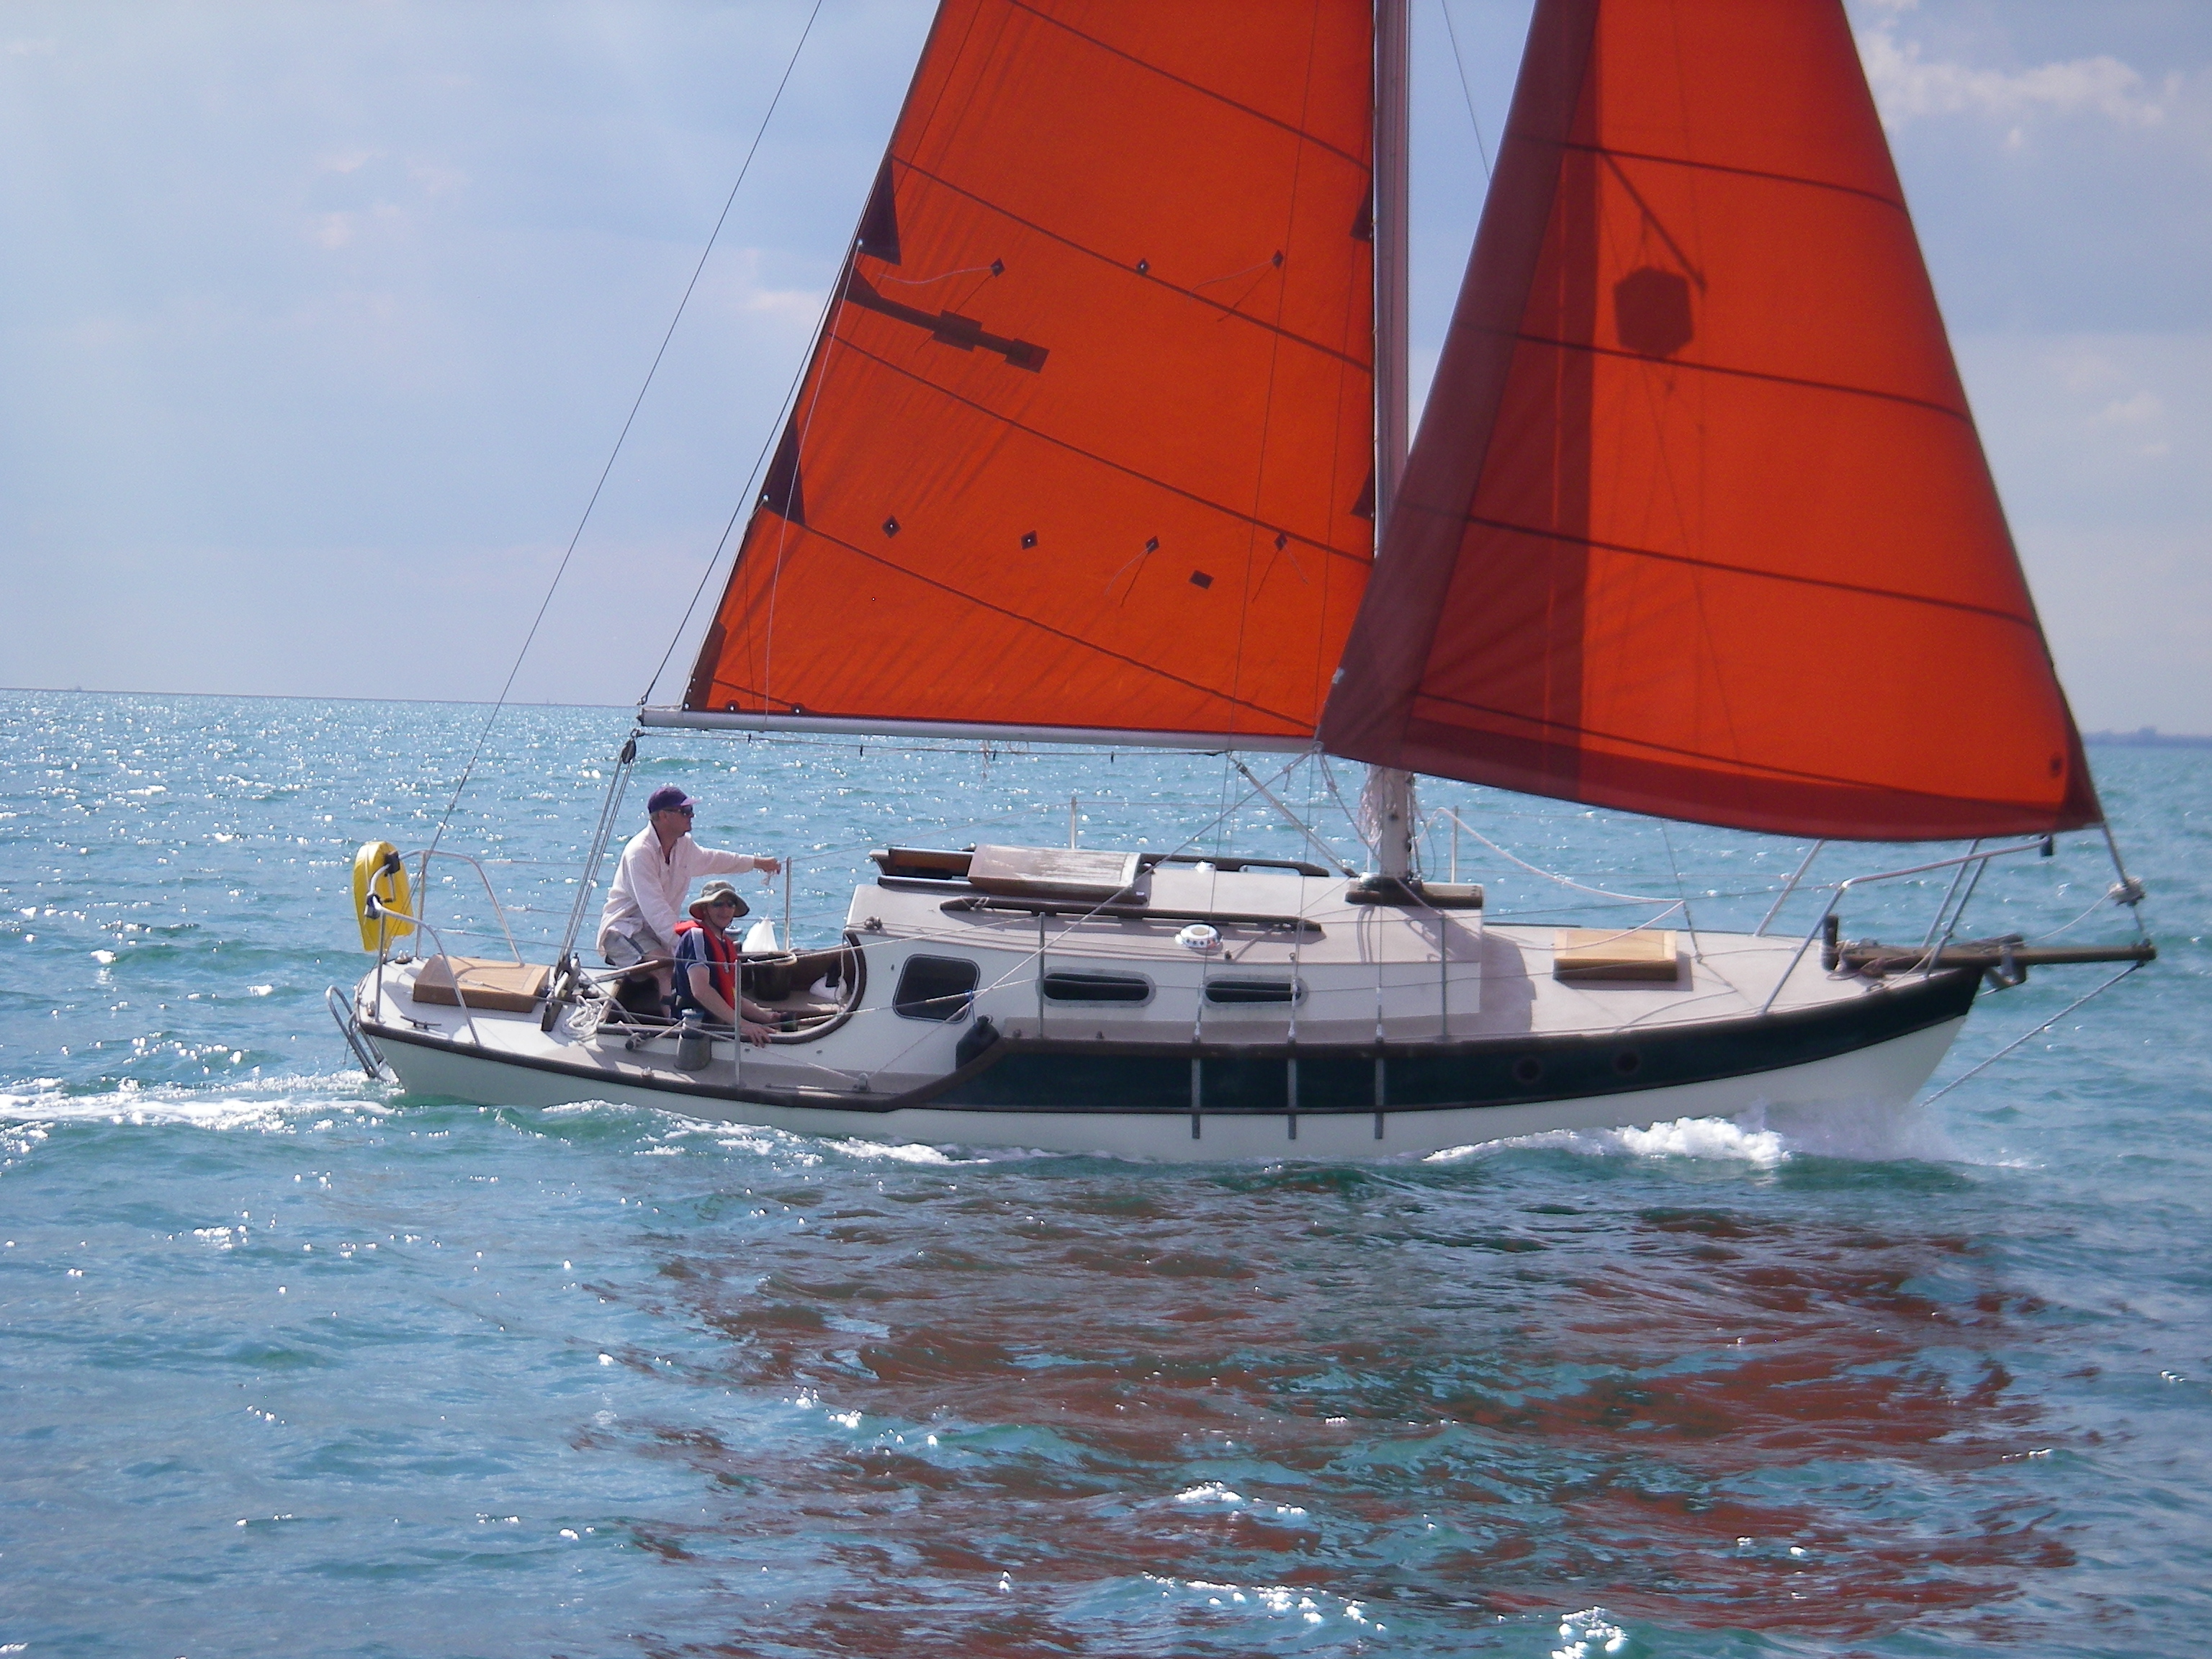
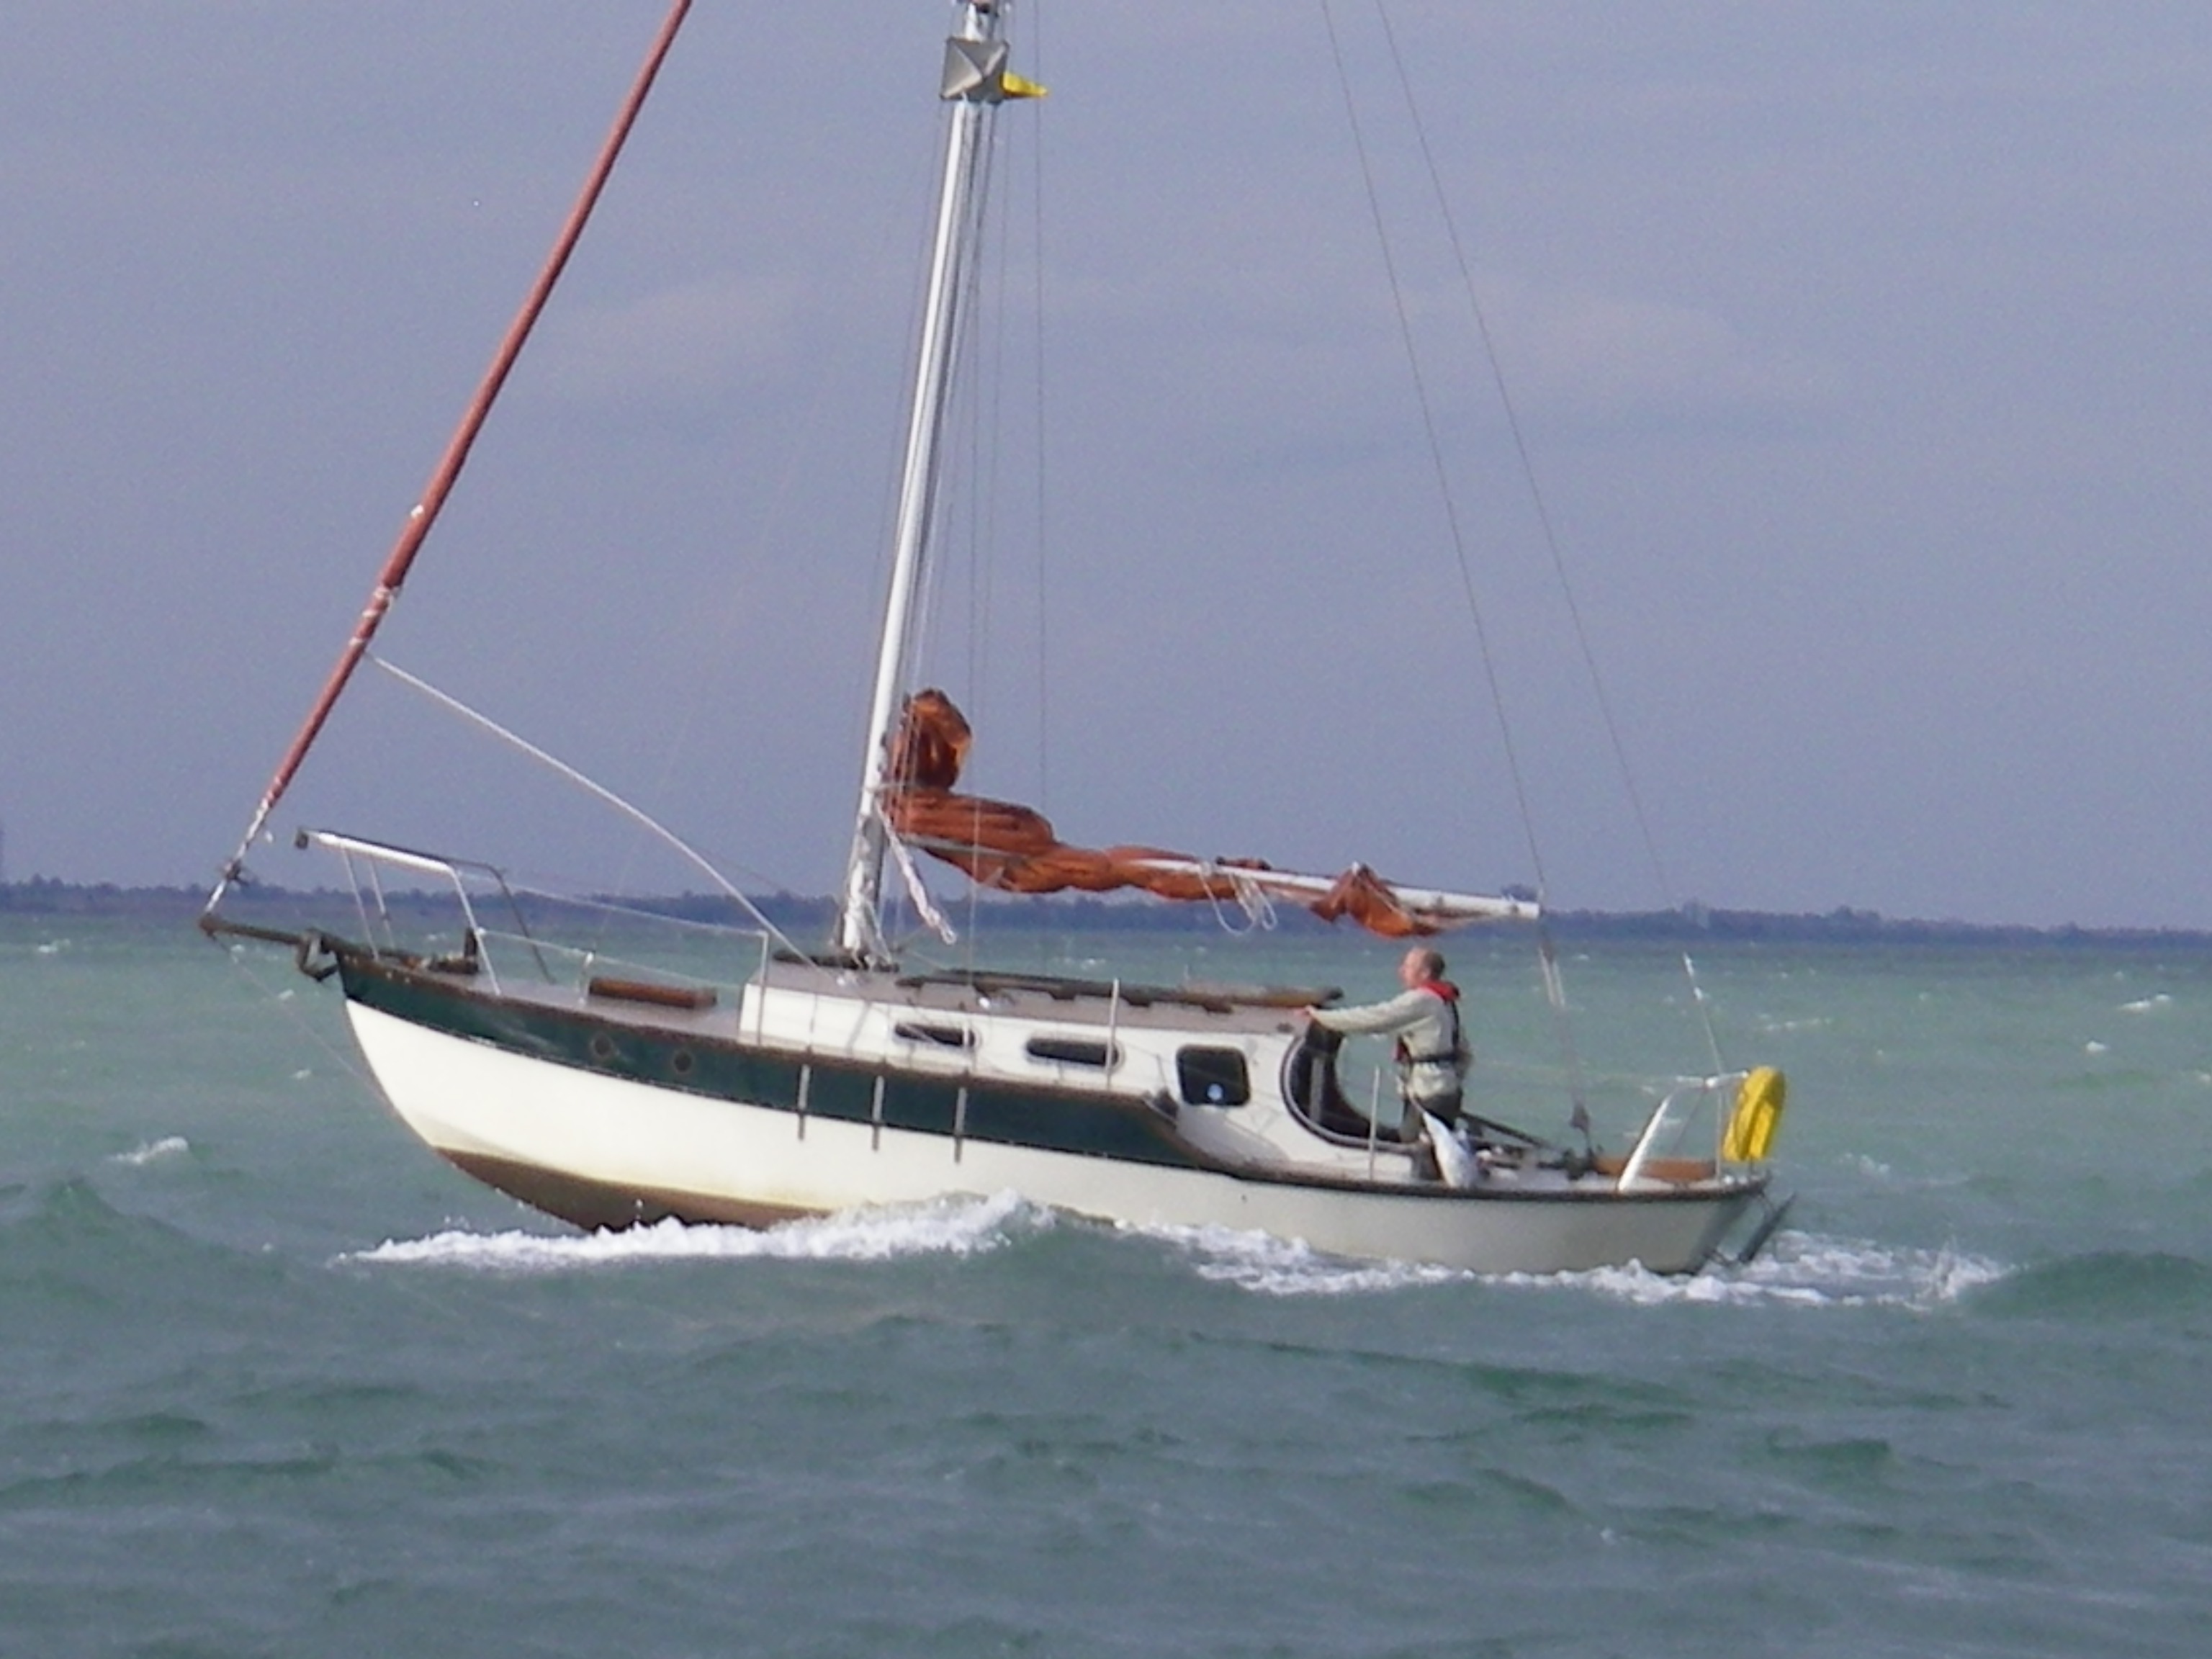
We catch up as we near the Swin Spitway buoy, the wind has piped up to a good 5, and is right on the nose as we fight our way across the hard ebb, flowing out of the Crouch to sniff out the shallow water of the Spitway. We can see what a good job we did on the antifouling as she pitches into it. We sidle up close for a bit, then move gently ahead, the twin Kubota's purring away gently. We keep station and a tow rope is made ready, just in case John's little Volvo has a problem, but she powers manfully on.
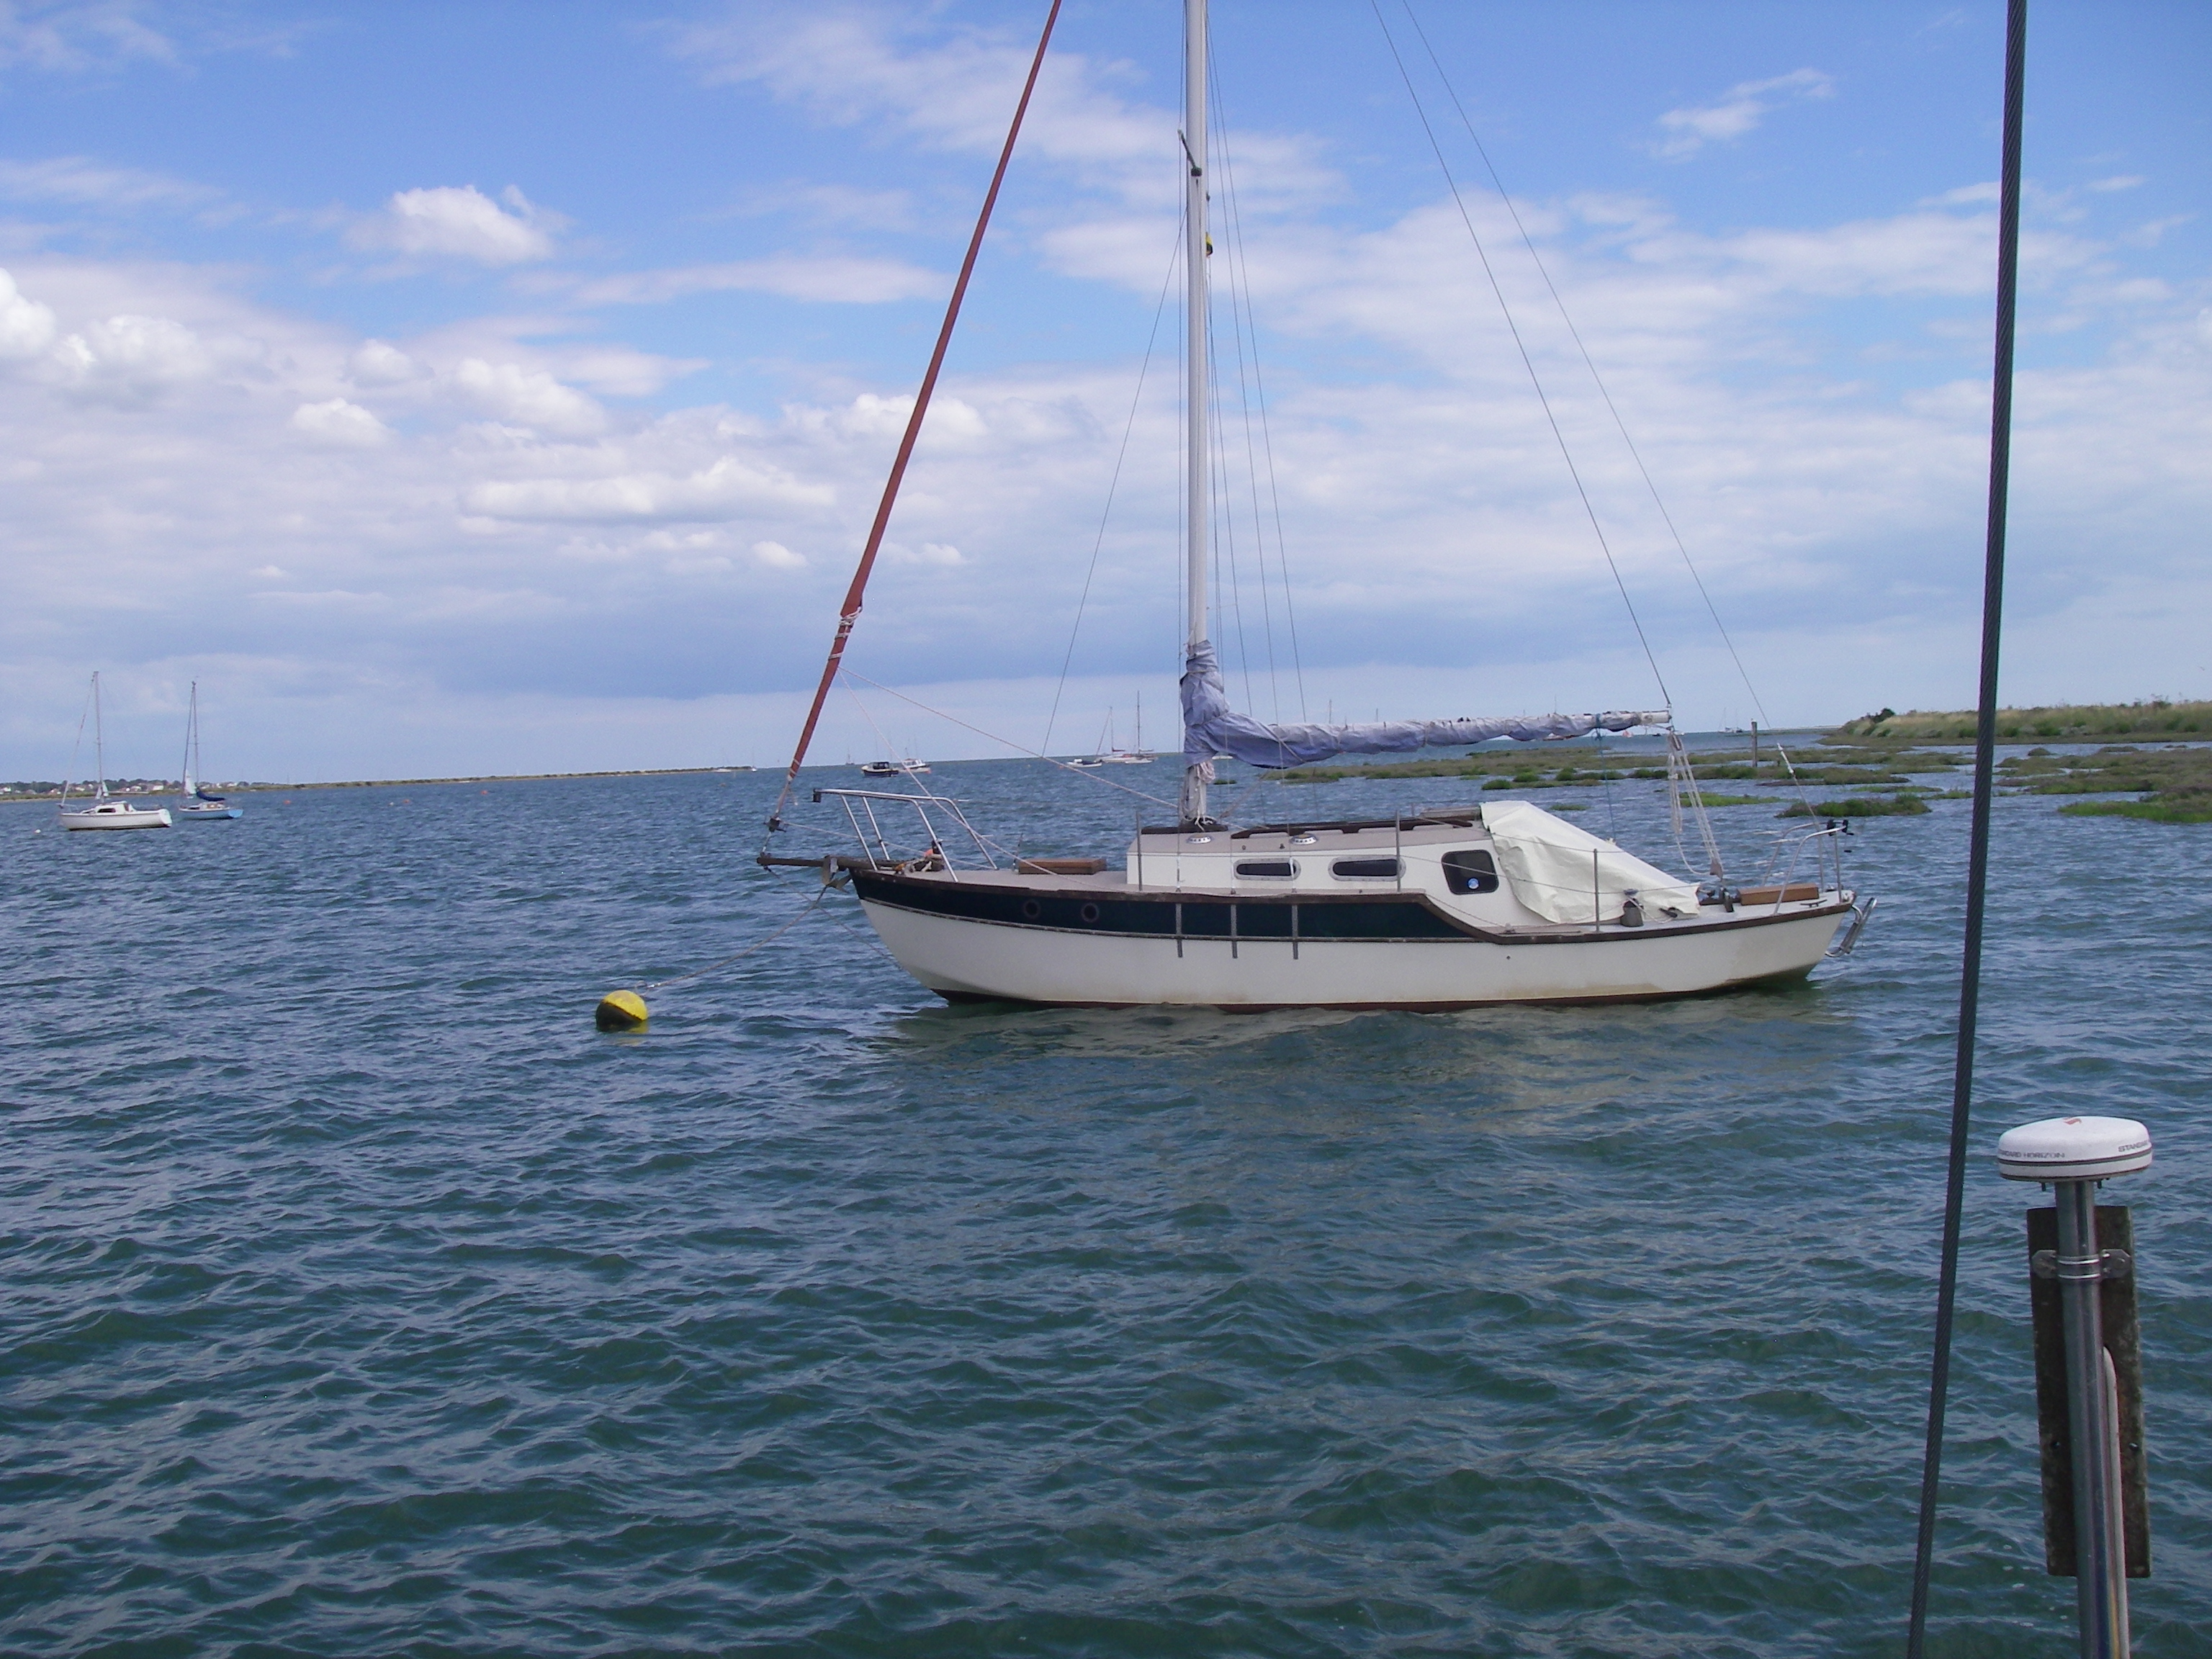
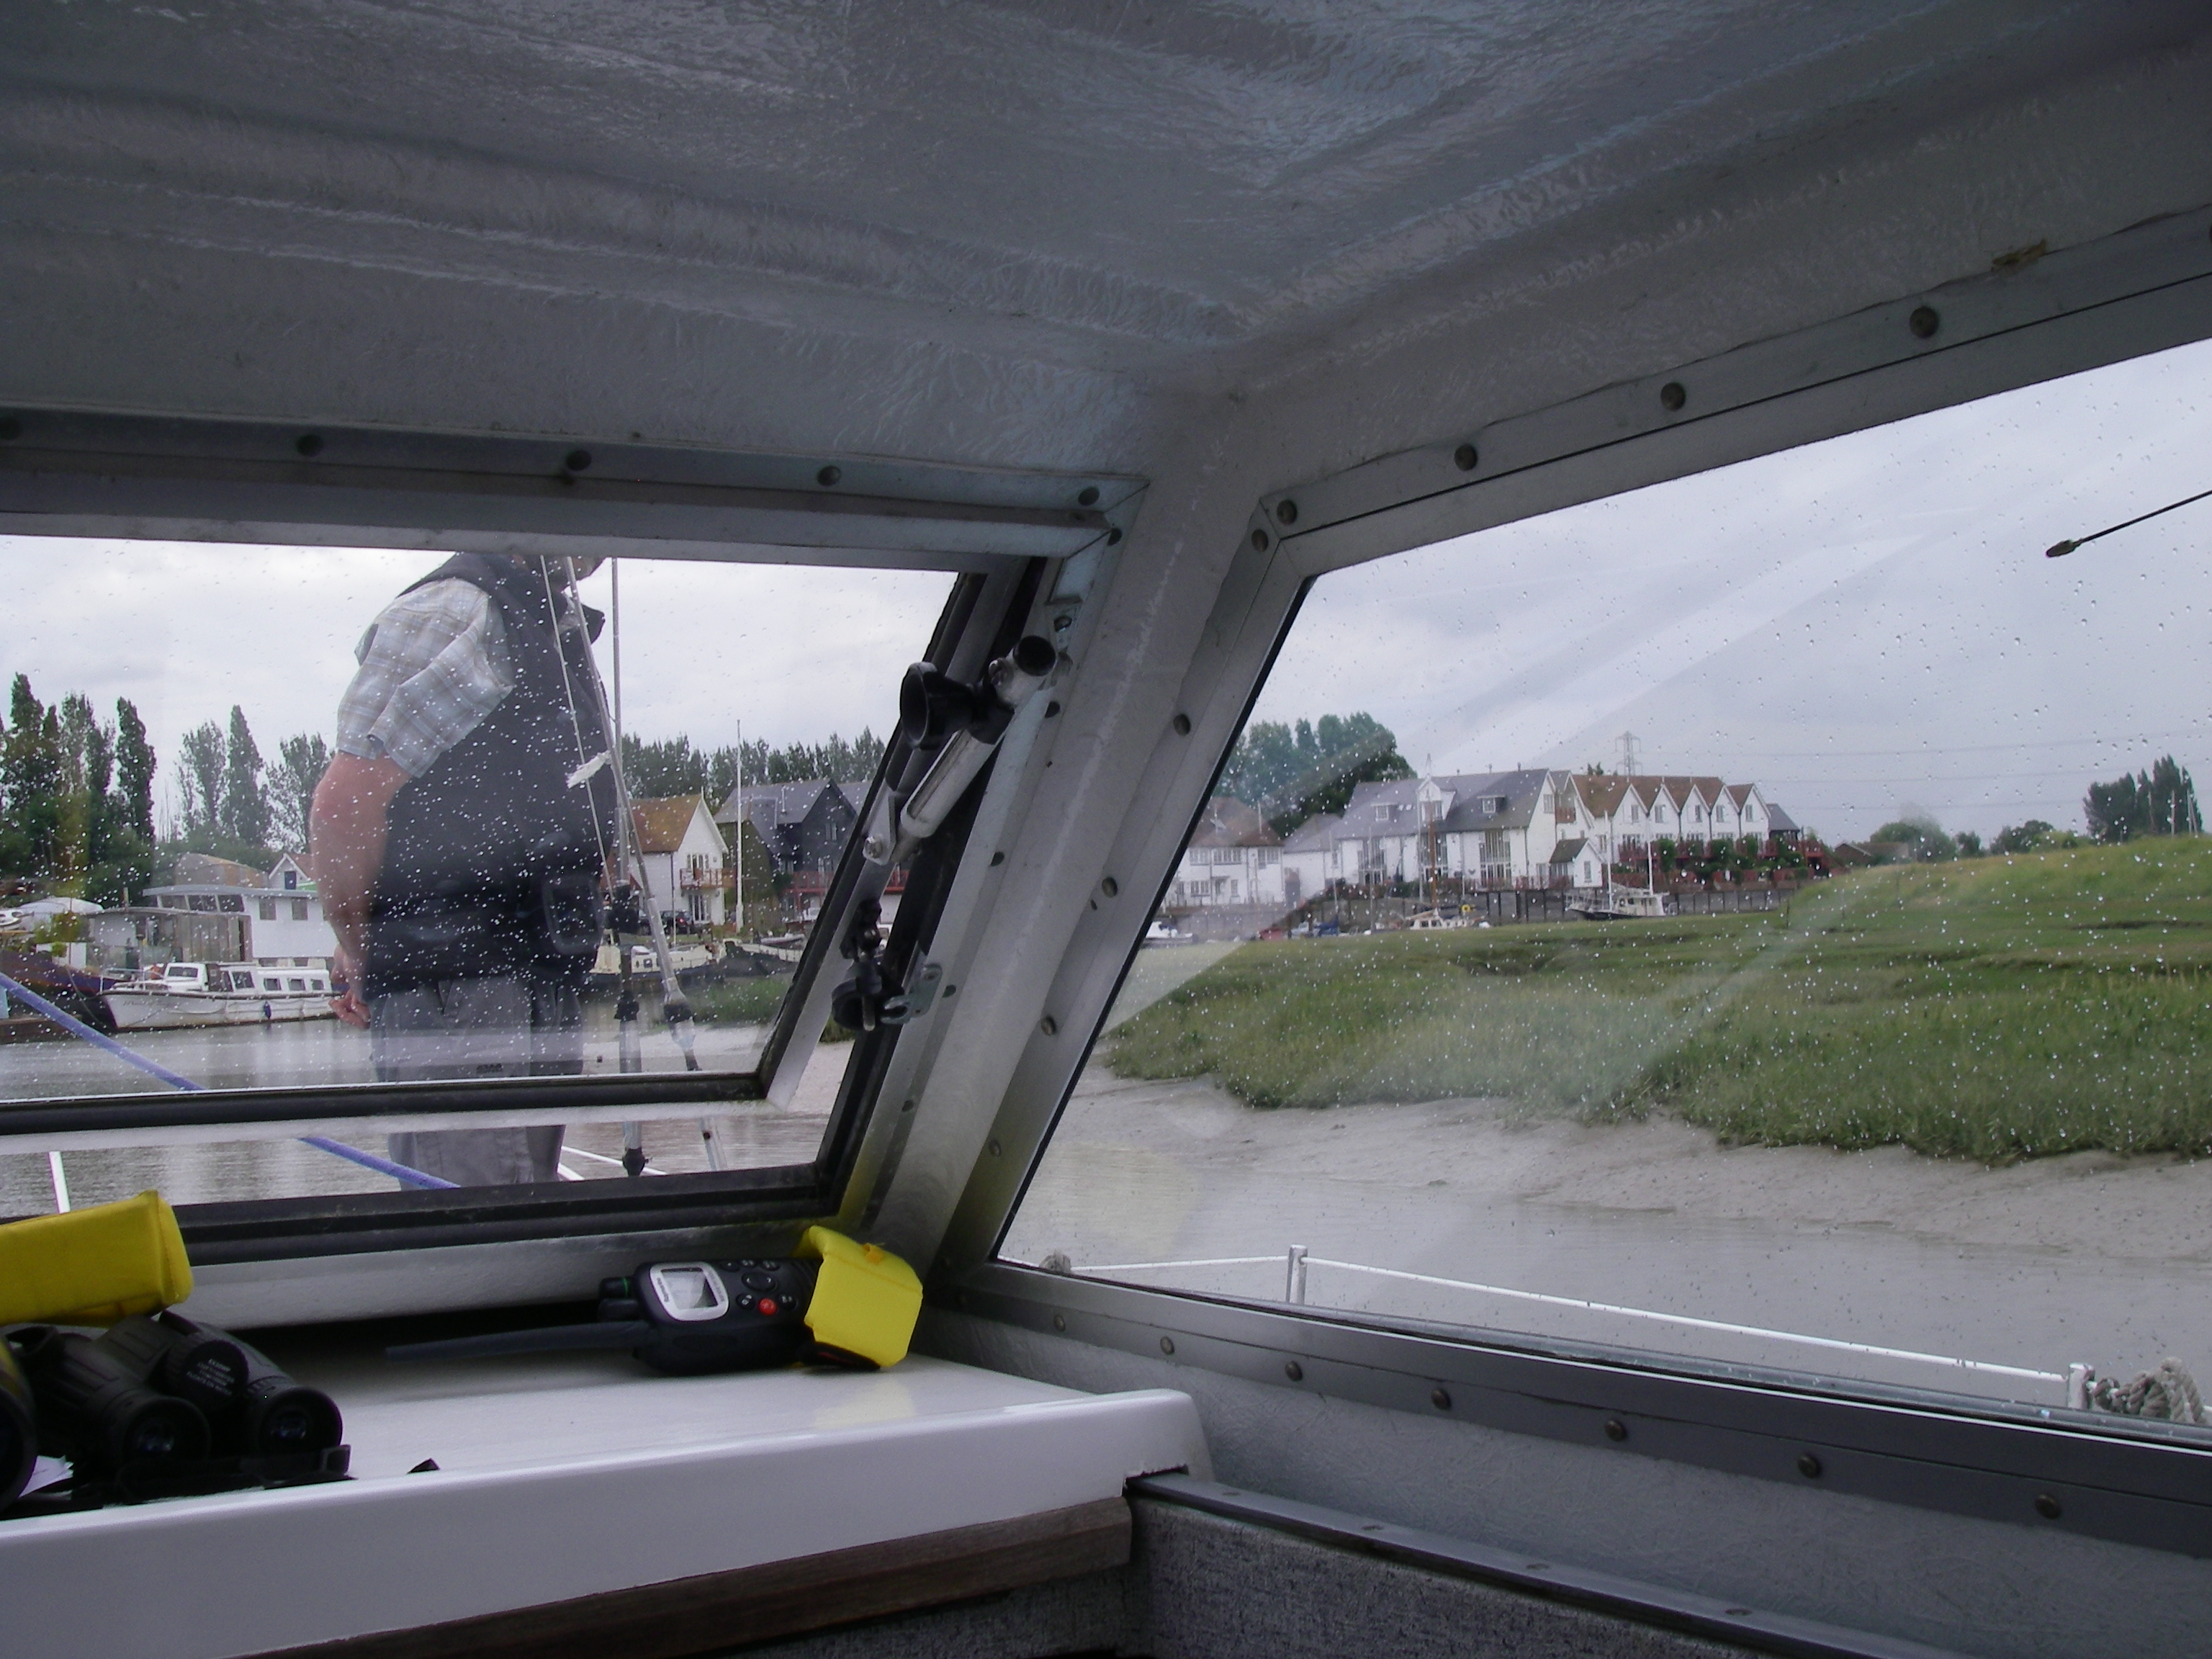
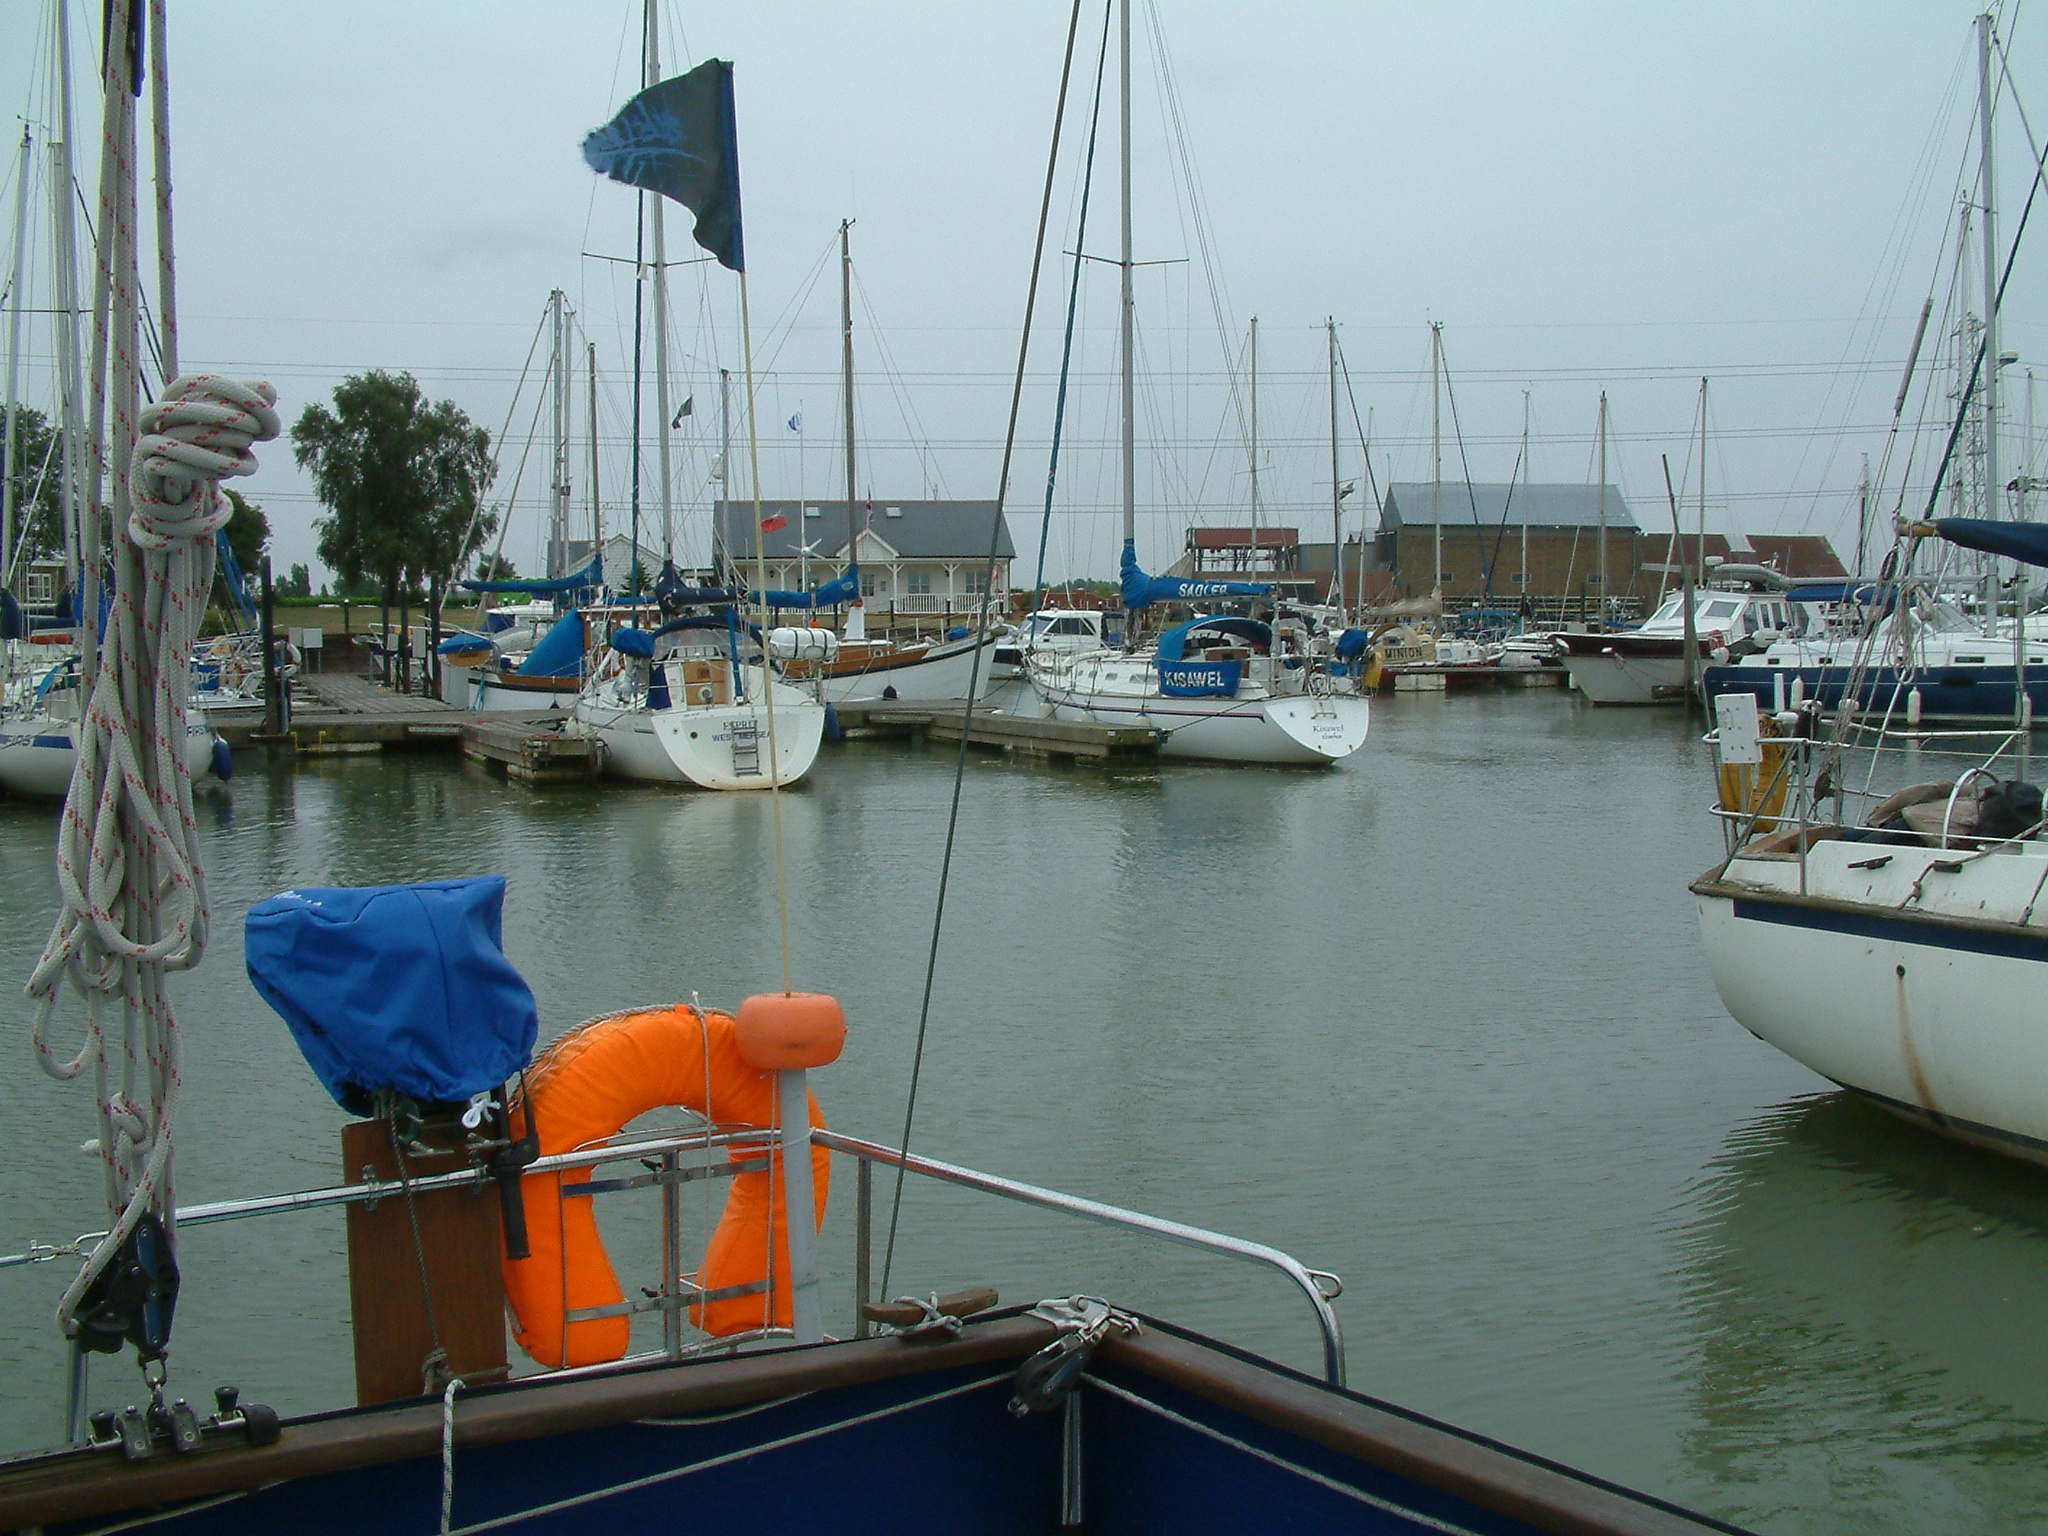
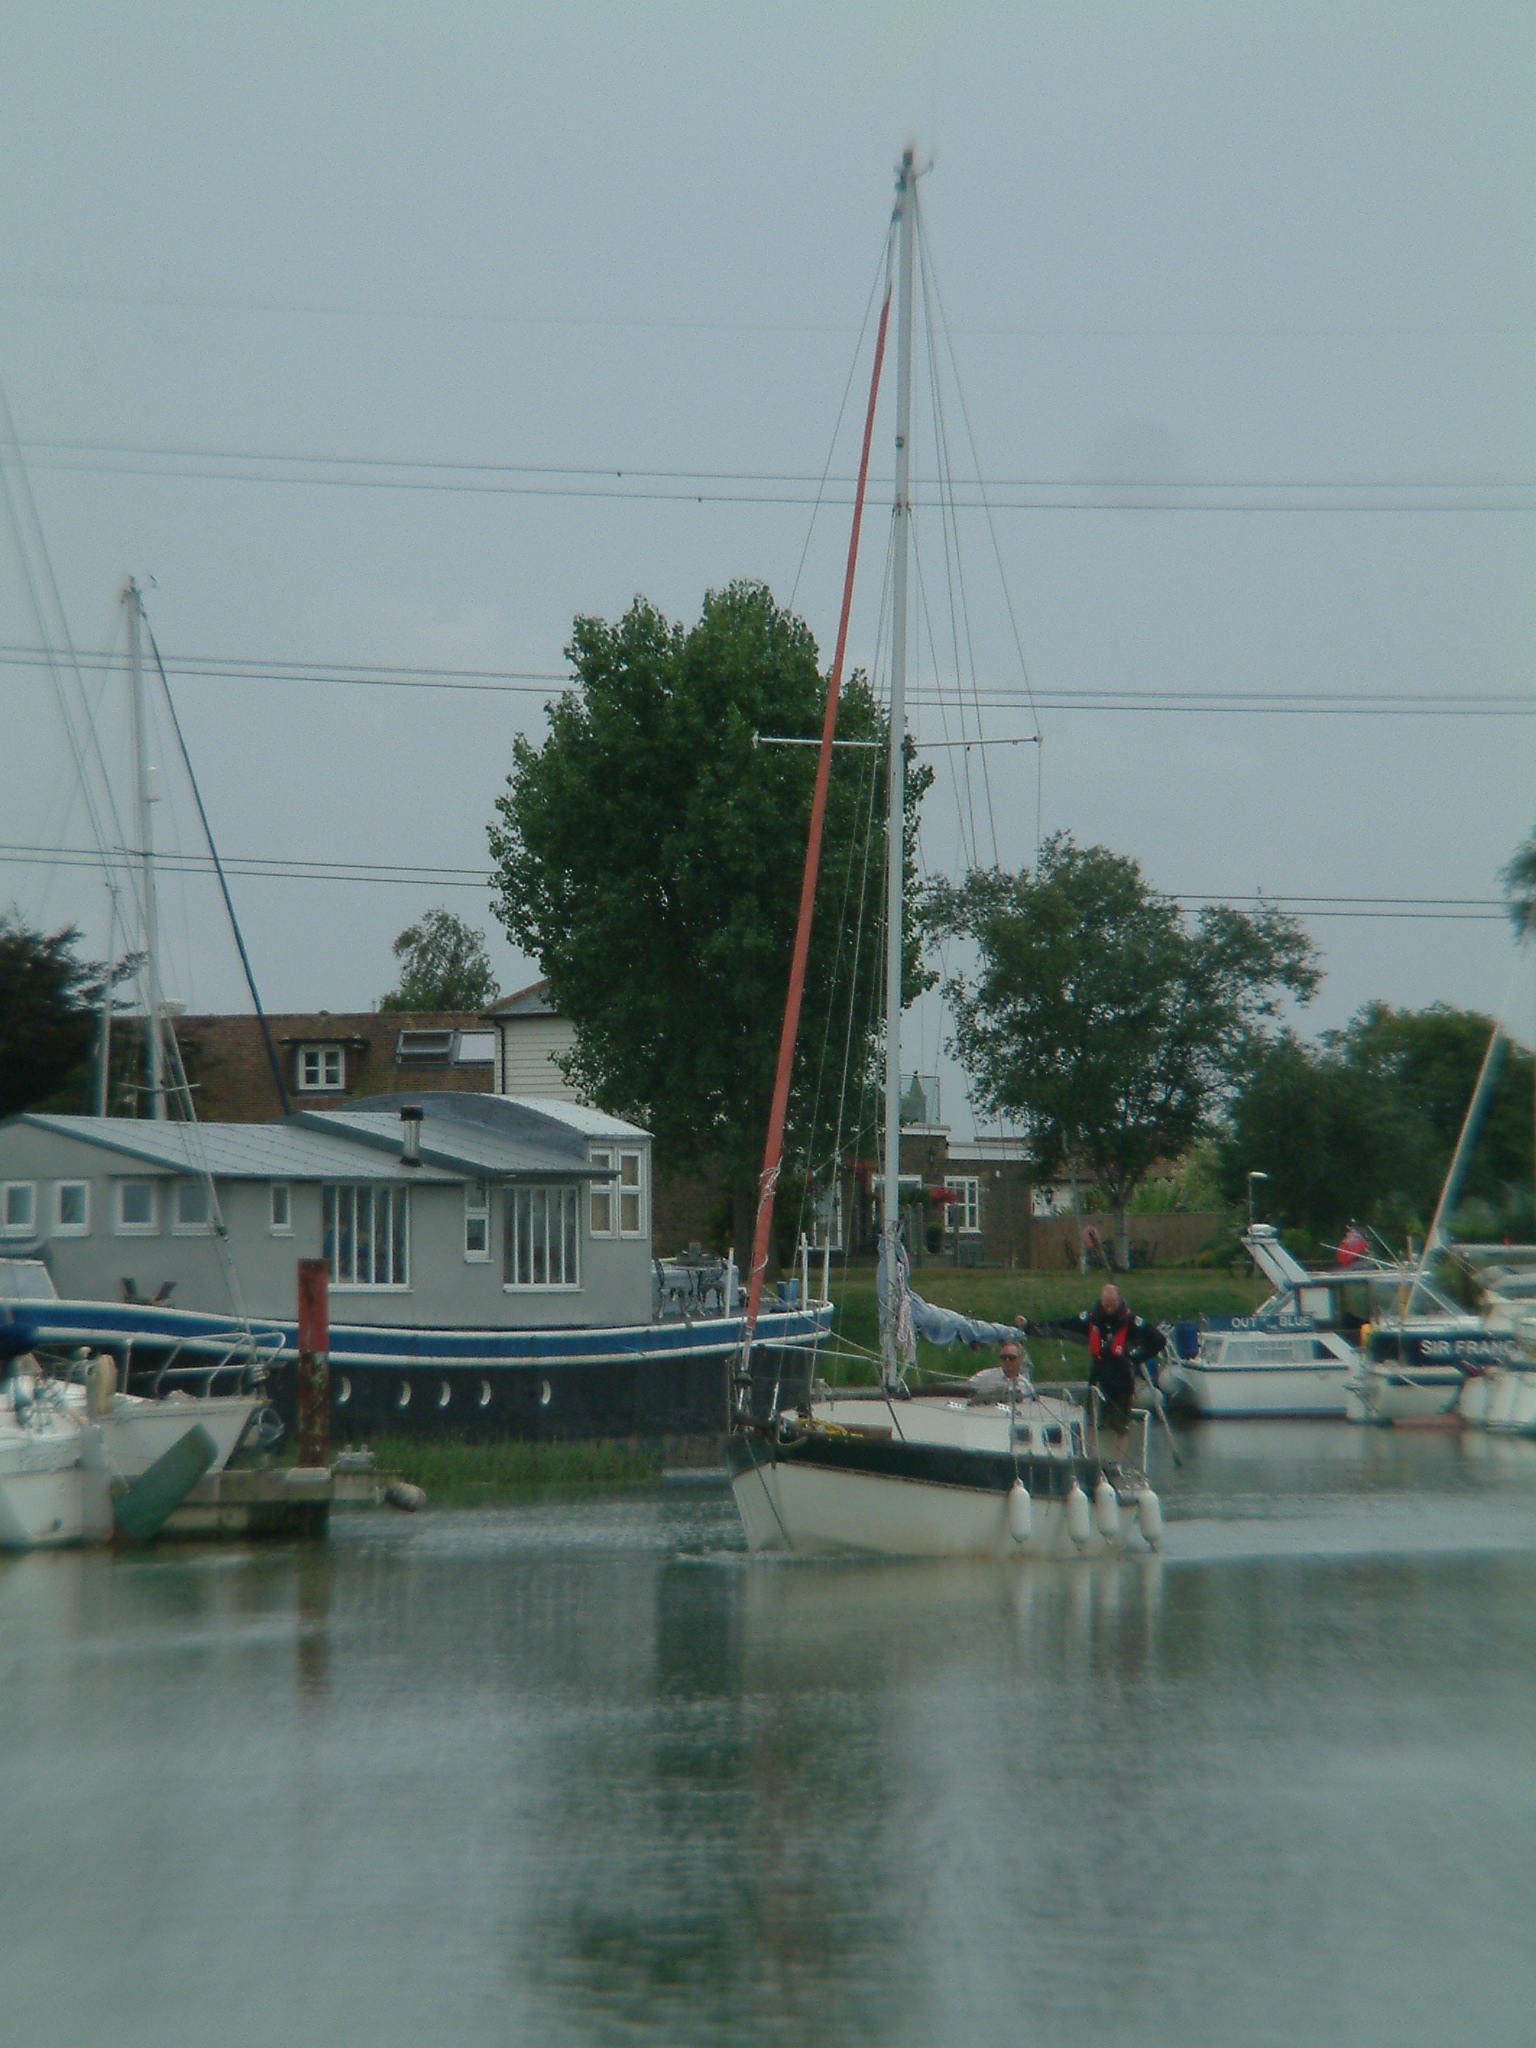
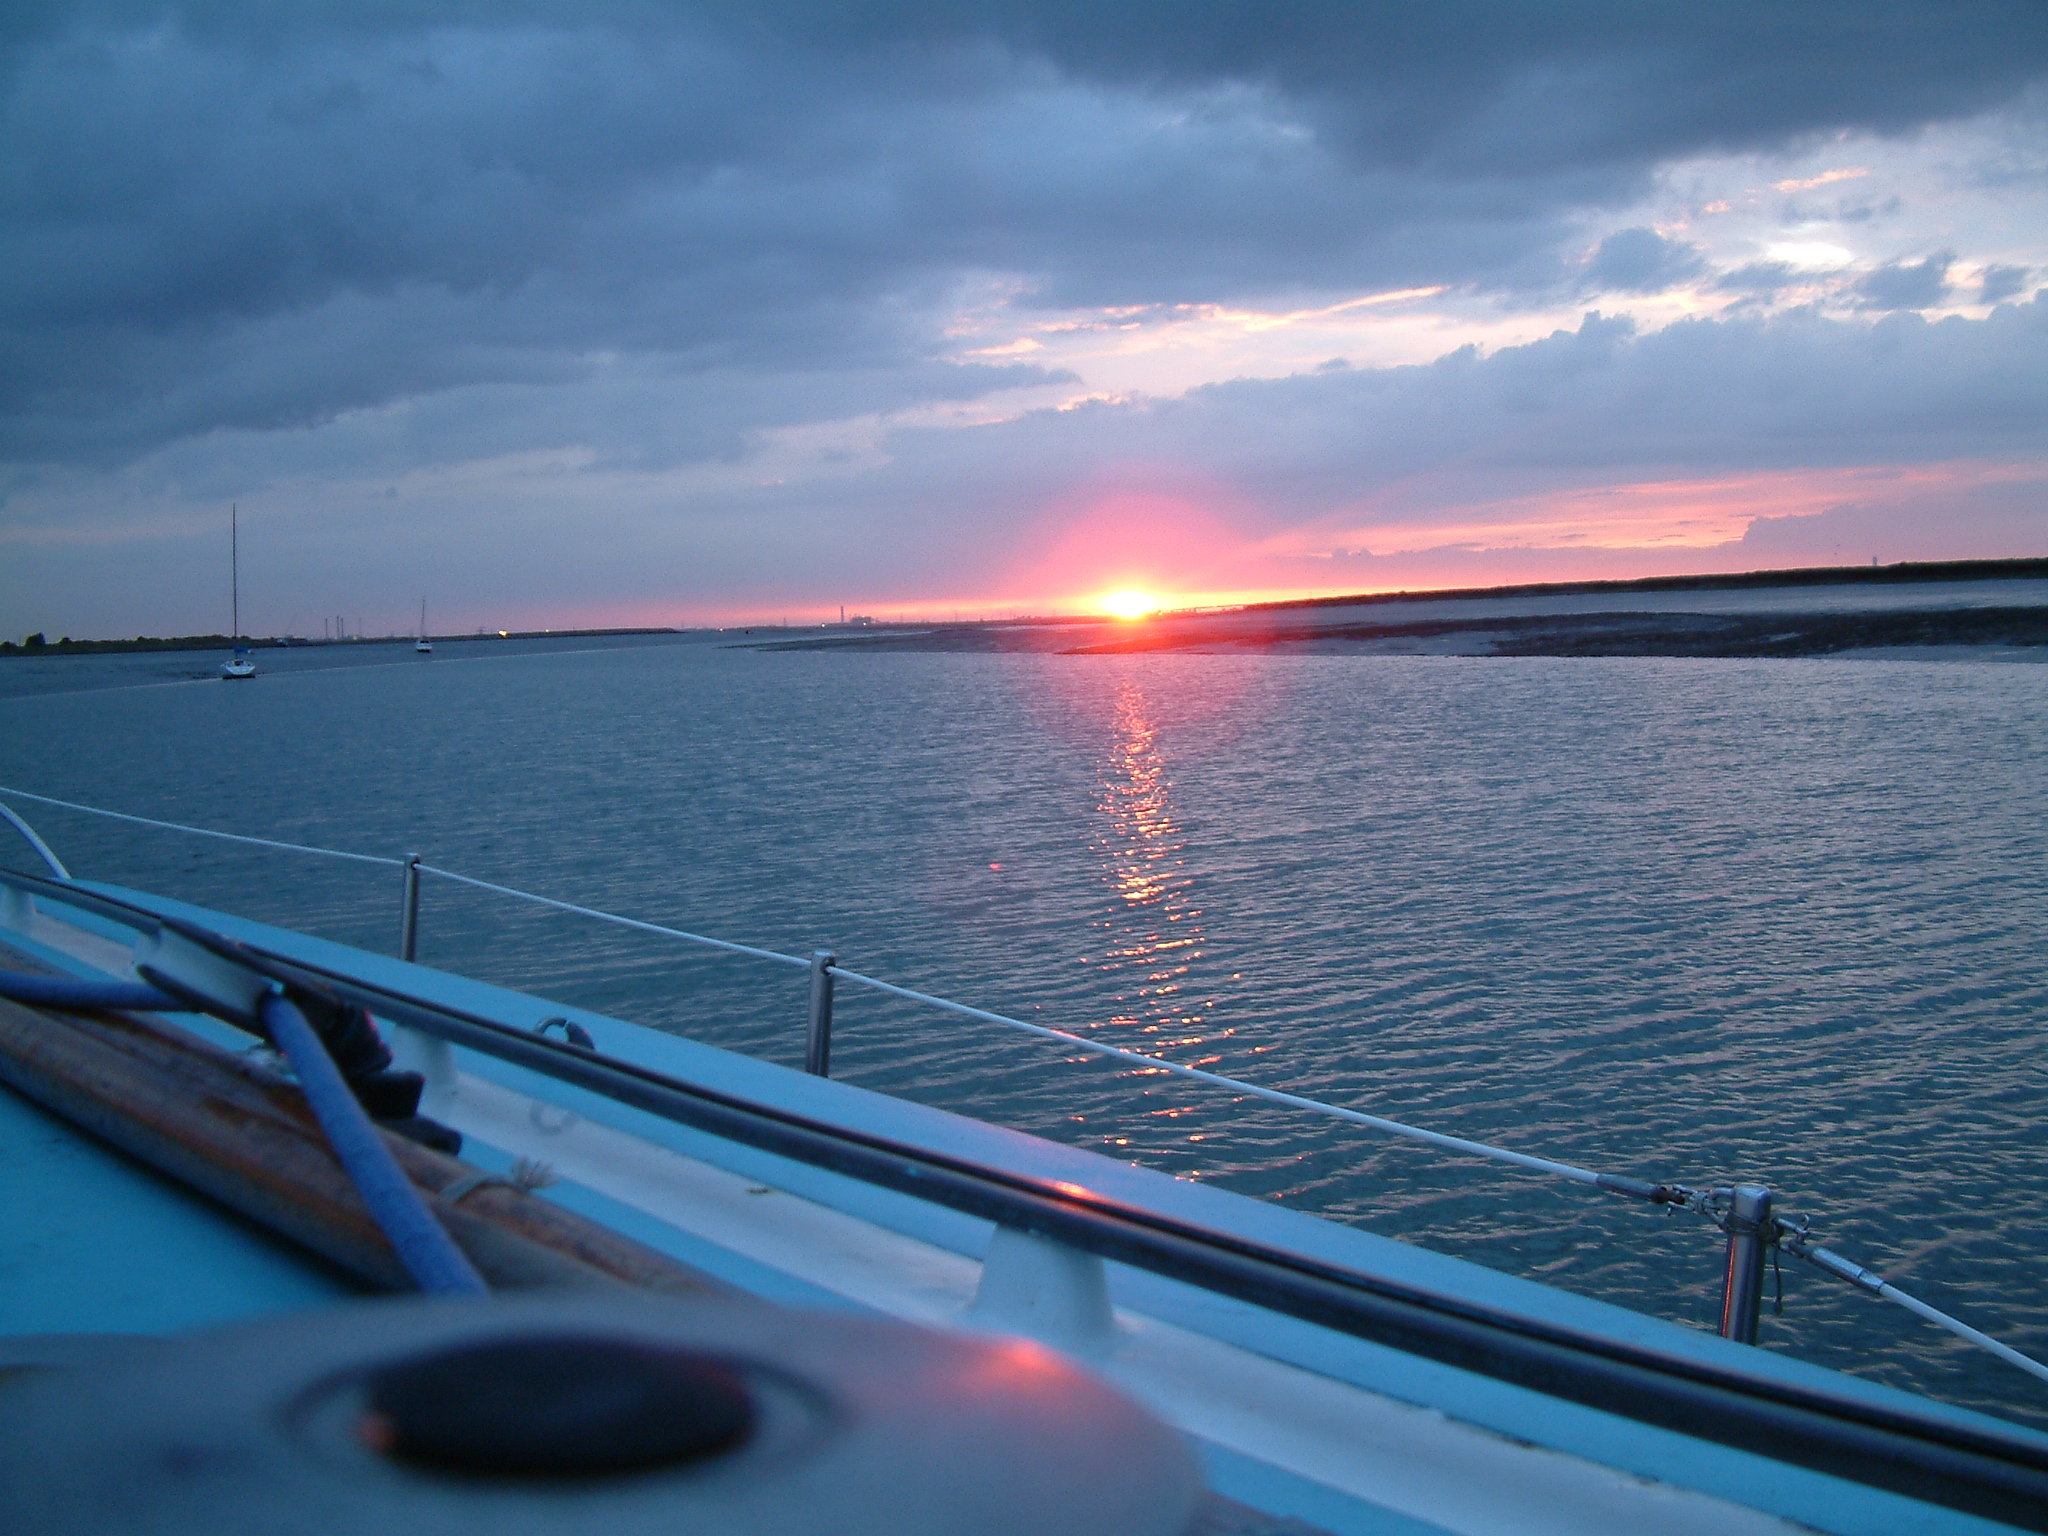
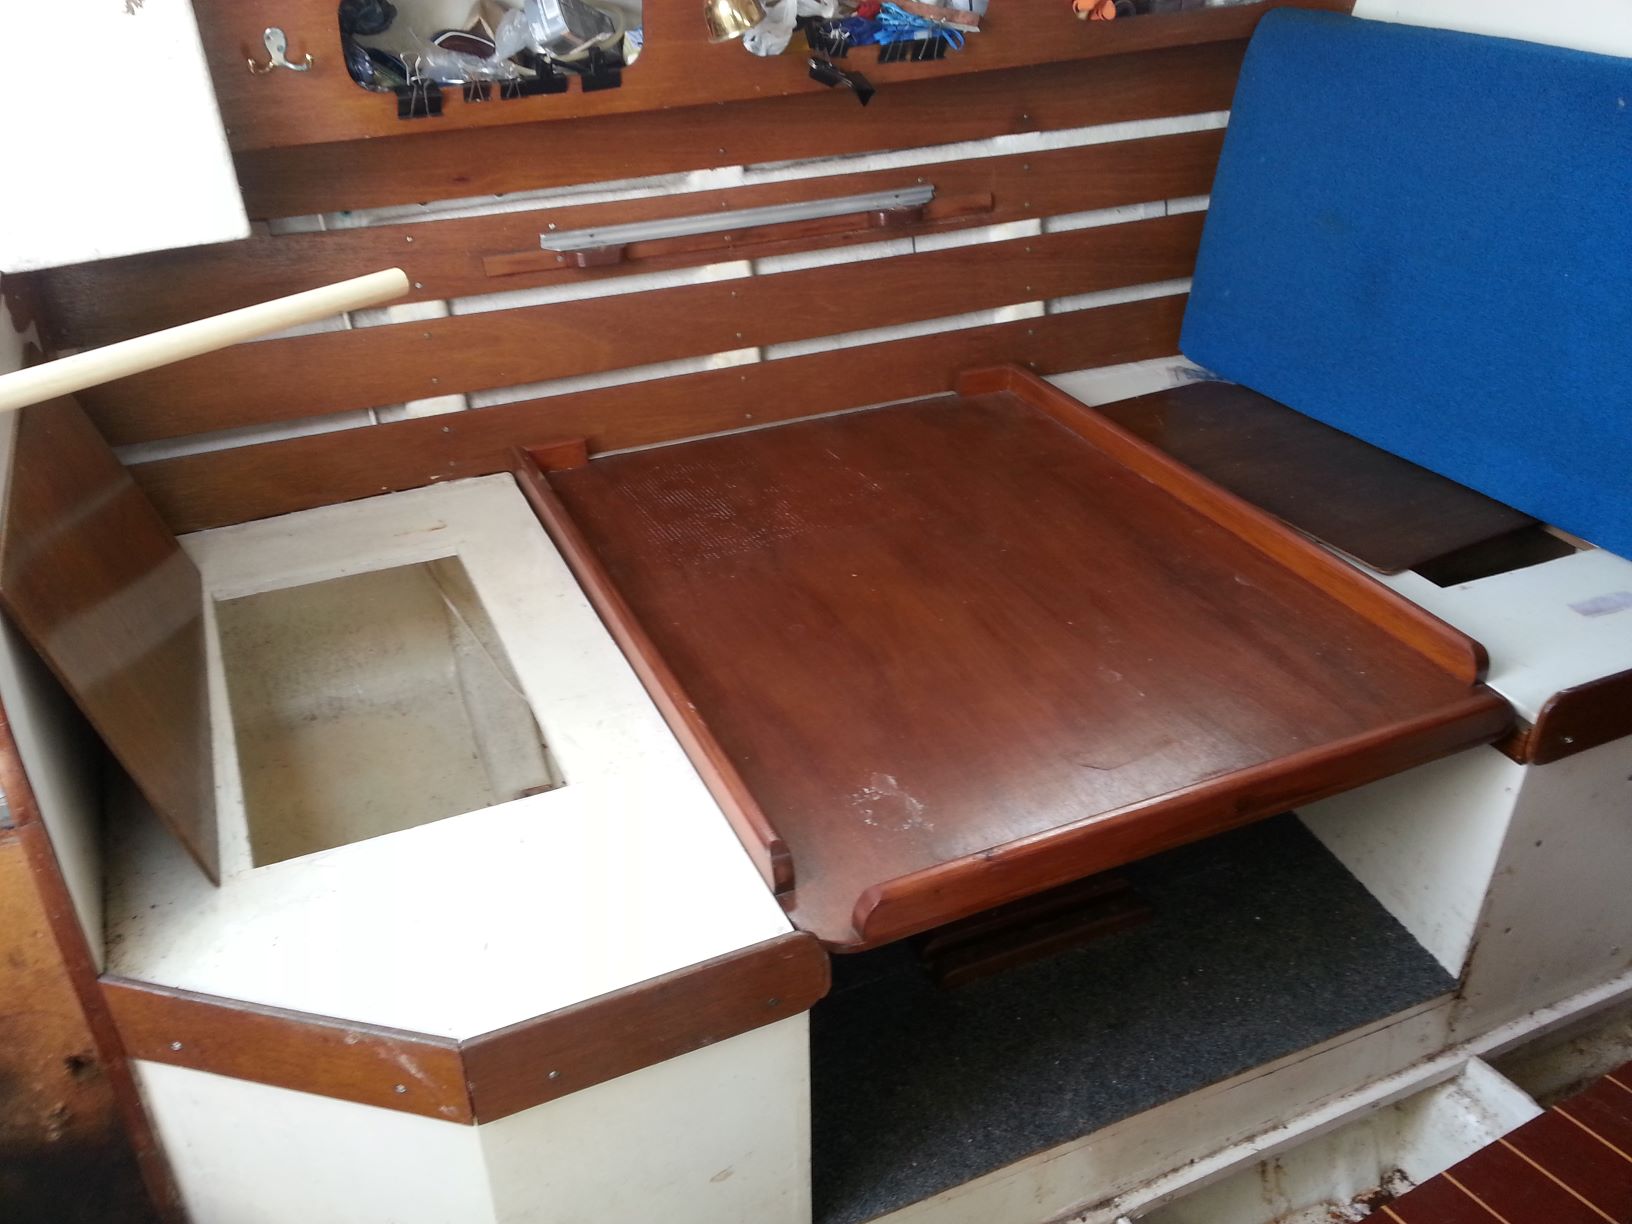
We arrive in the Blackwater and head for the Nass, it is still ebbing and there is little water, not enough to navigate the entrance to Tollesbury and the moorings, so we spend the evening at anchor in Tollesbury north channel, a quiet enough place if there is no south in the wind. In the morning on the rising tide, we putter back out, past the little East Cardinal mark on the end of Cob Island, and back round into the south, or main channel. We make for one of the marina waiting buoys off the entrance to Tollesbury Woodrolfe Creek, John and Brendan have set off a few moments earlier and instead of waiting, find there is just enough water to enter the creek and make it to Fiddler's Green's mooring buoy. About 3 hours before HW. She is to stay there for a while till a mud berth is sorted for her, 200 yards away.
We spend a little time tidying up on Mobri II until Brian is convinced there will be enough water up at his mooring right at the top of the creek. We drop alongside Glasstide to load the last of their gear, then set of, all 6 crew back on the Cat, for the last leg up the creek.
Must say I am quite relieved that all the planning and trial runs on Brian's boat has paid off. The trip was really quite uneventful, all gear seemed to work as it should and the trip was a good one for most to gain a little experience of the Estuary.
John W.
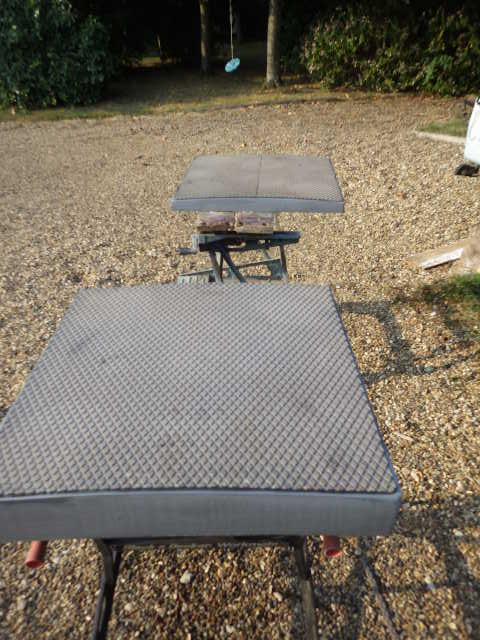
Damaged rubbing bands
More damage
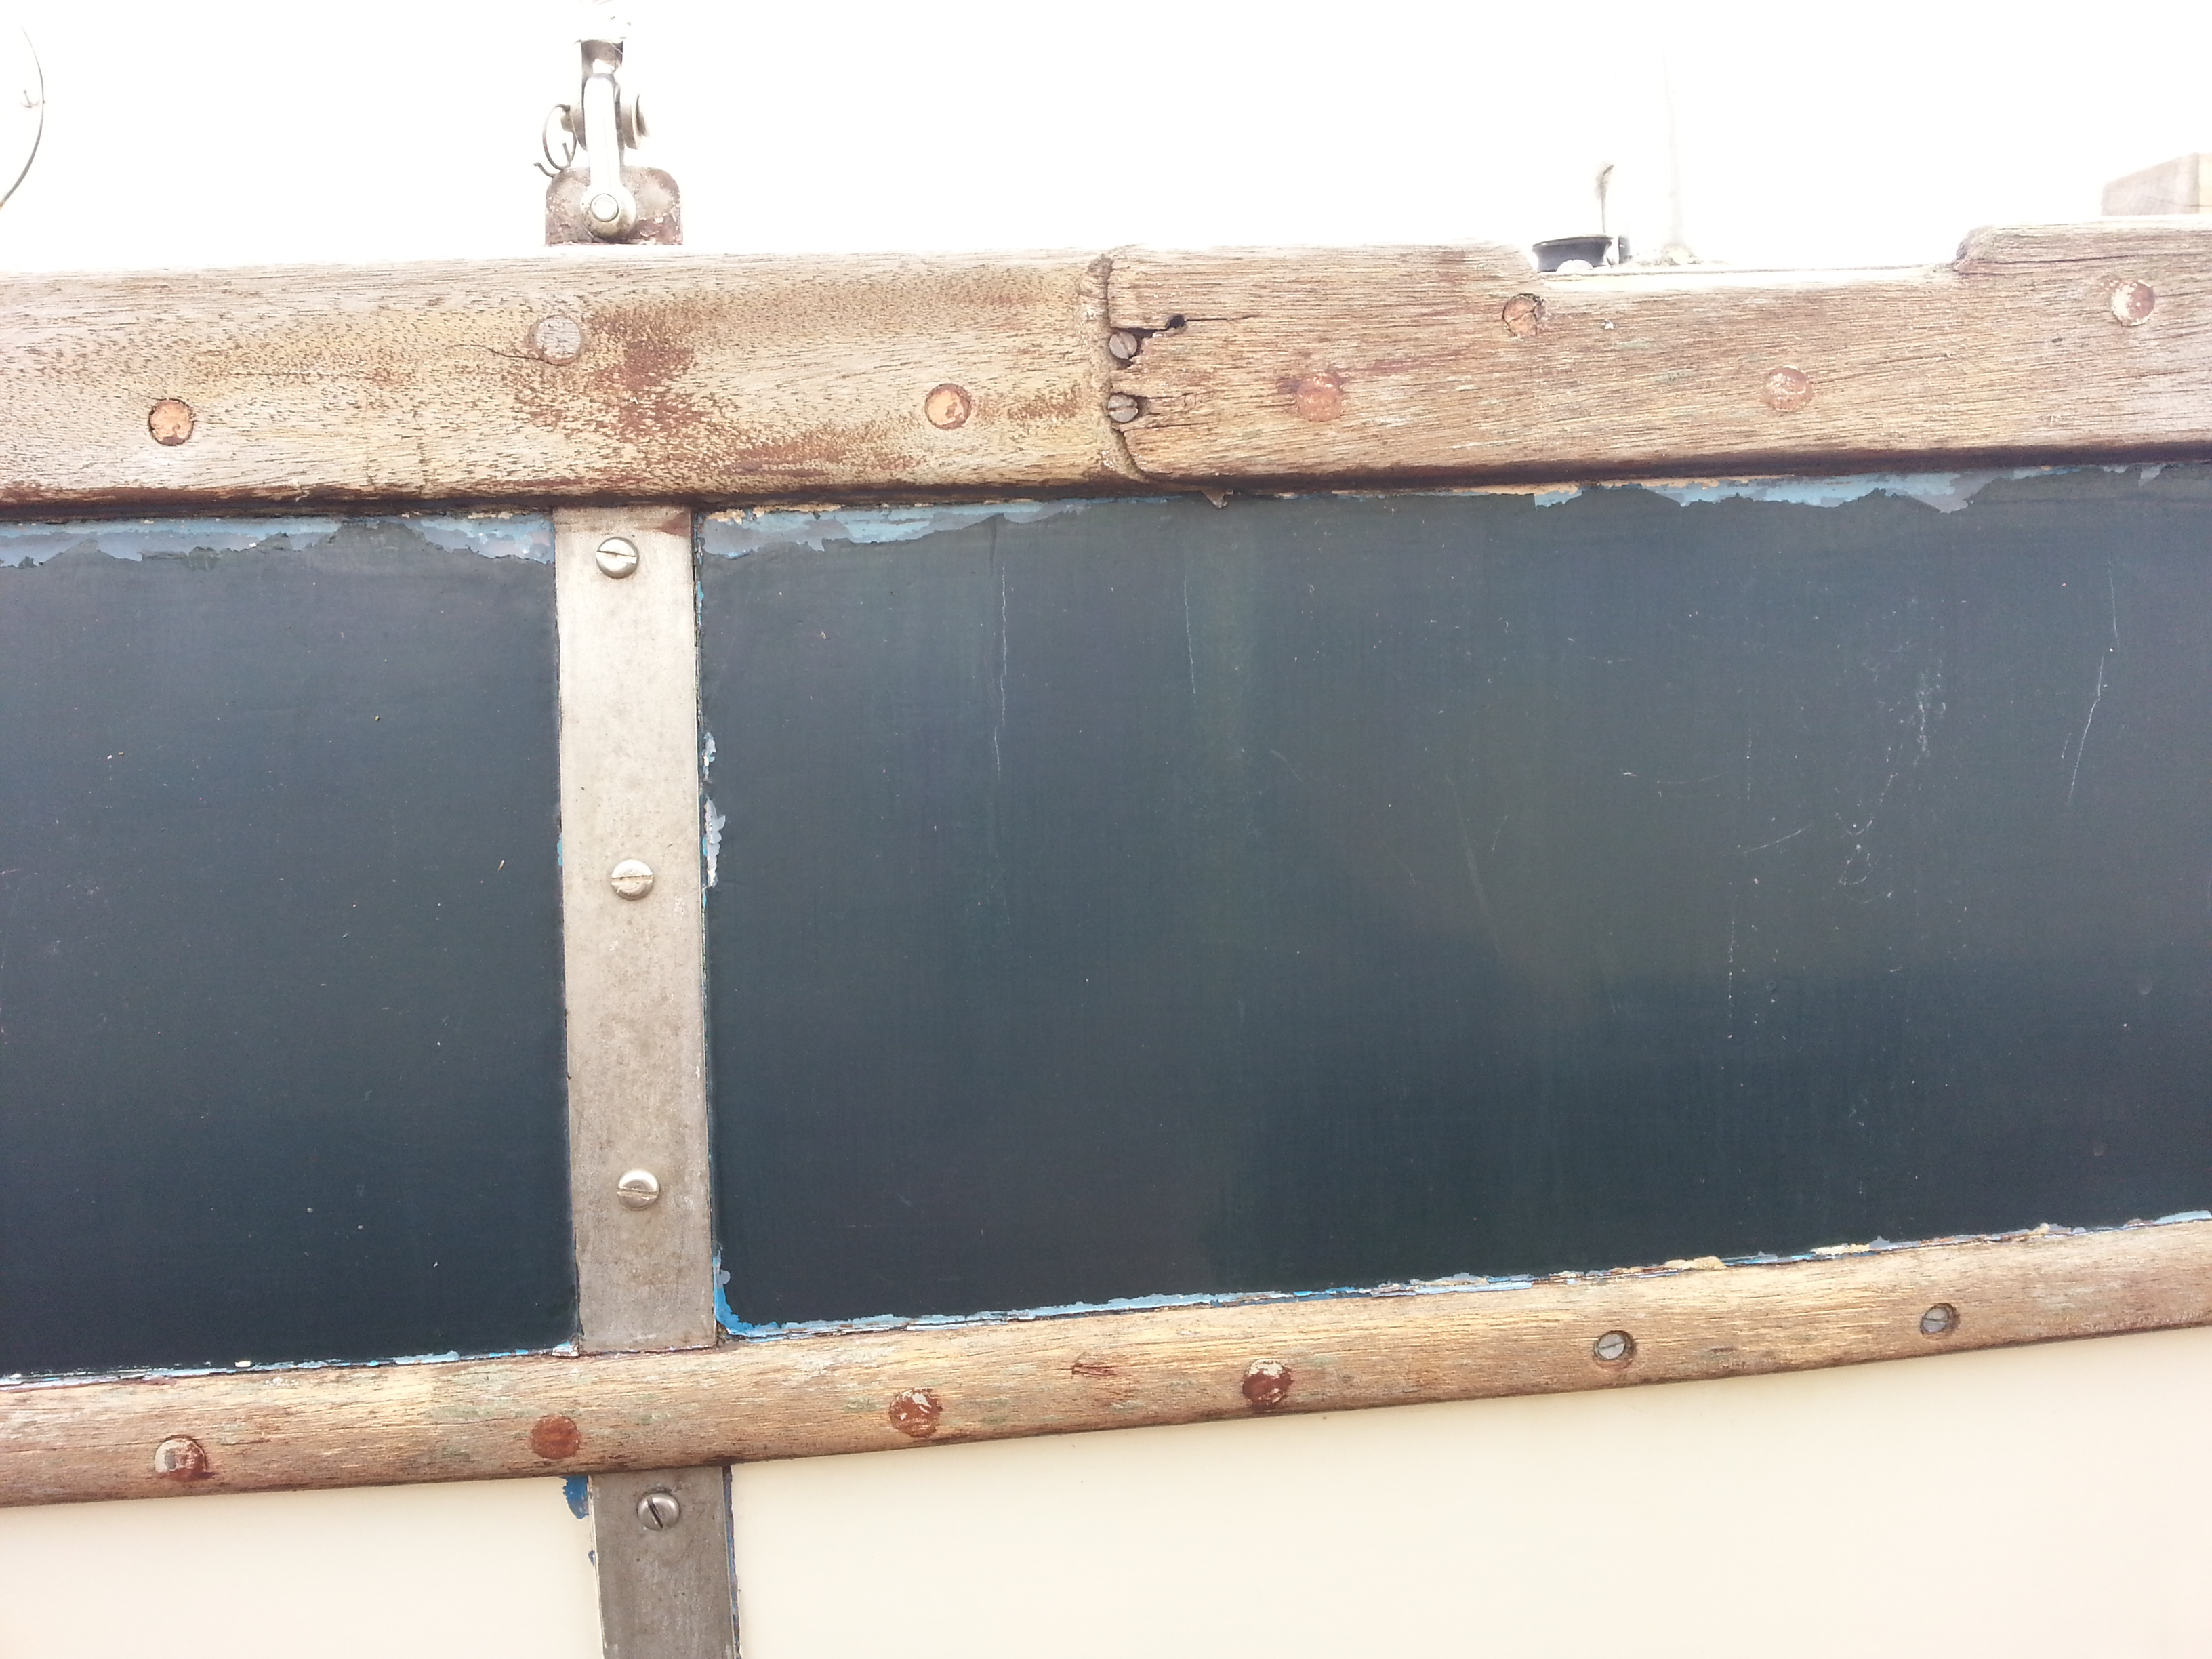
And more
Worse damage
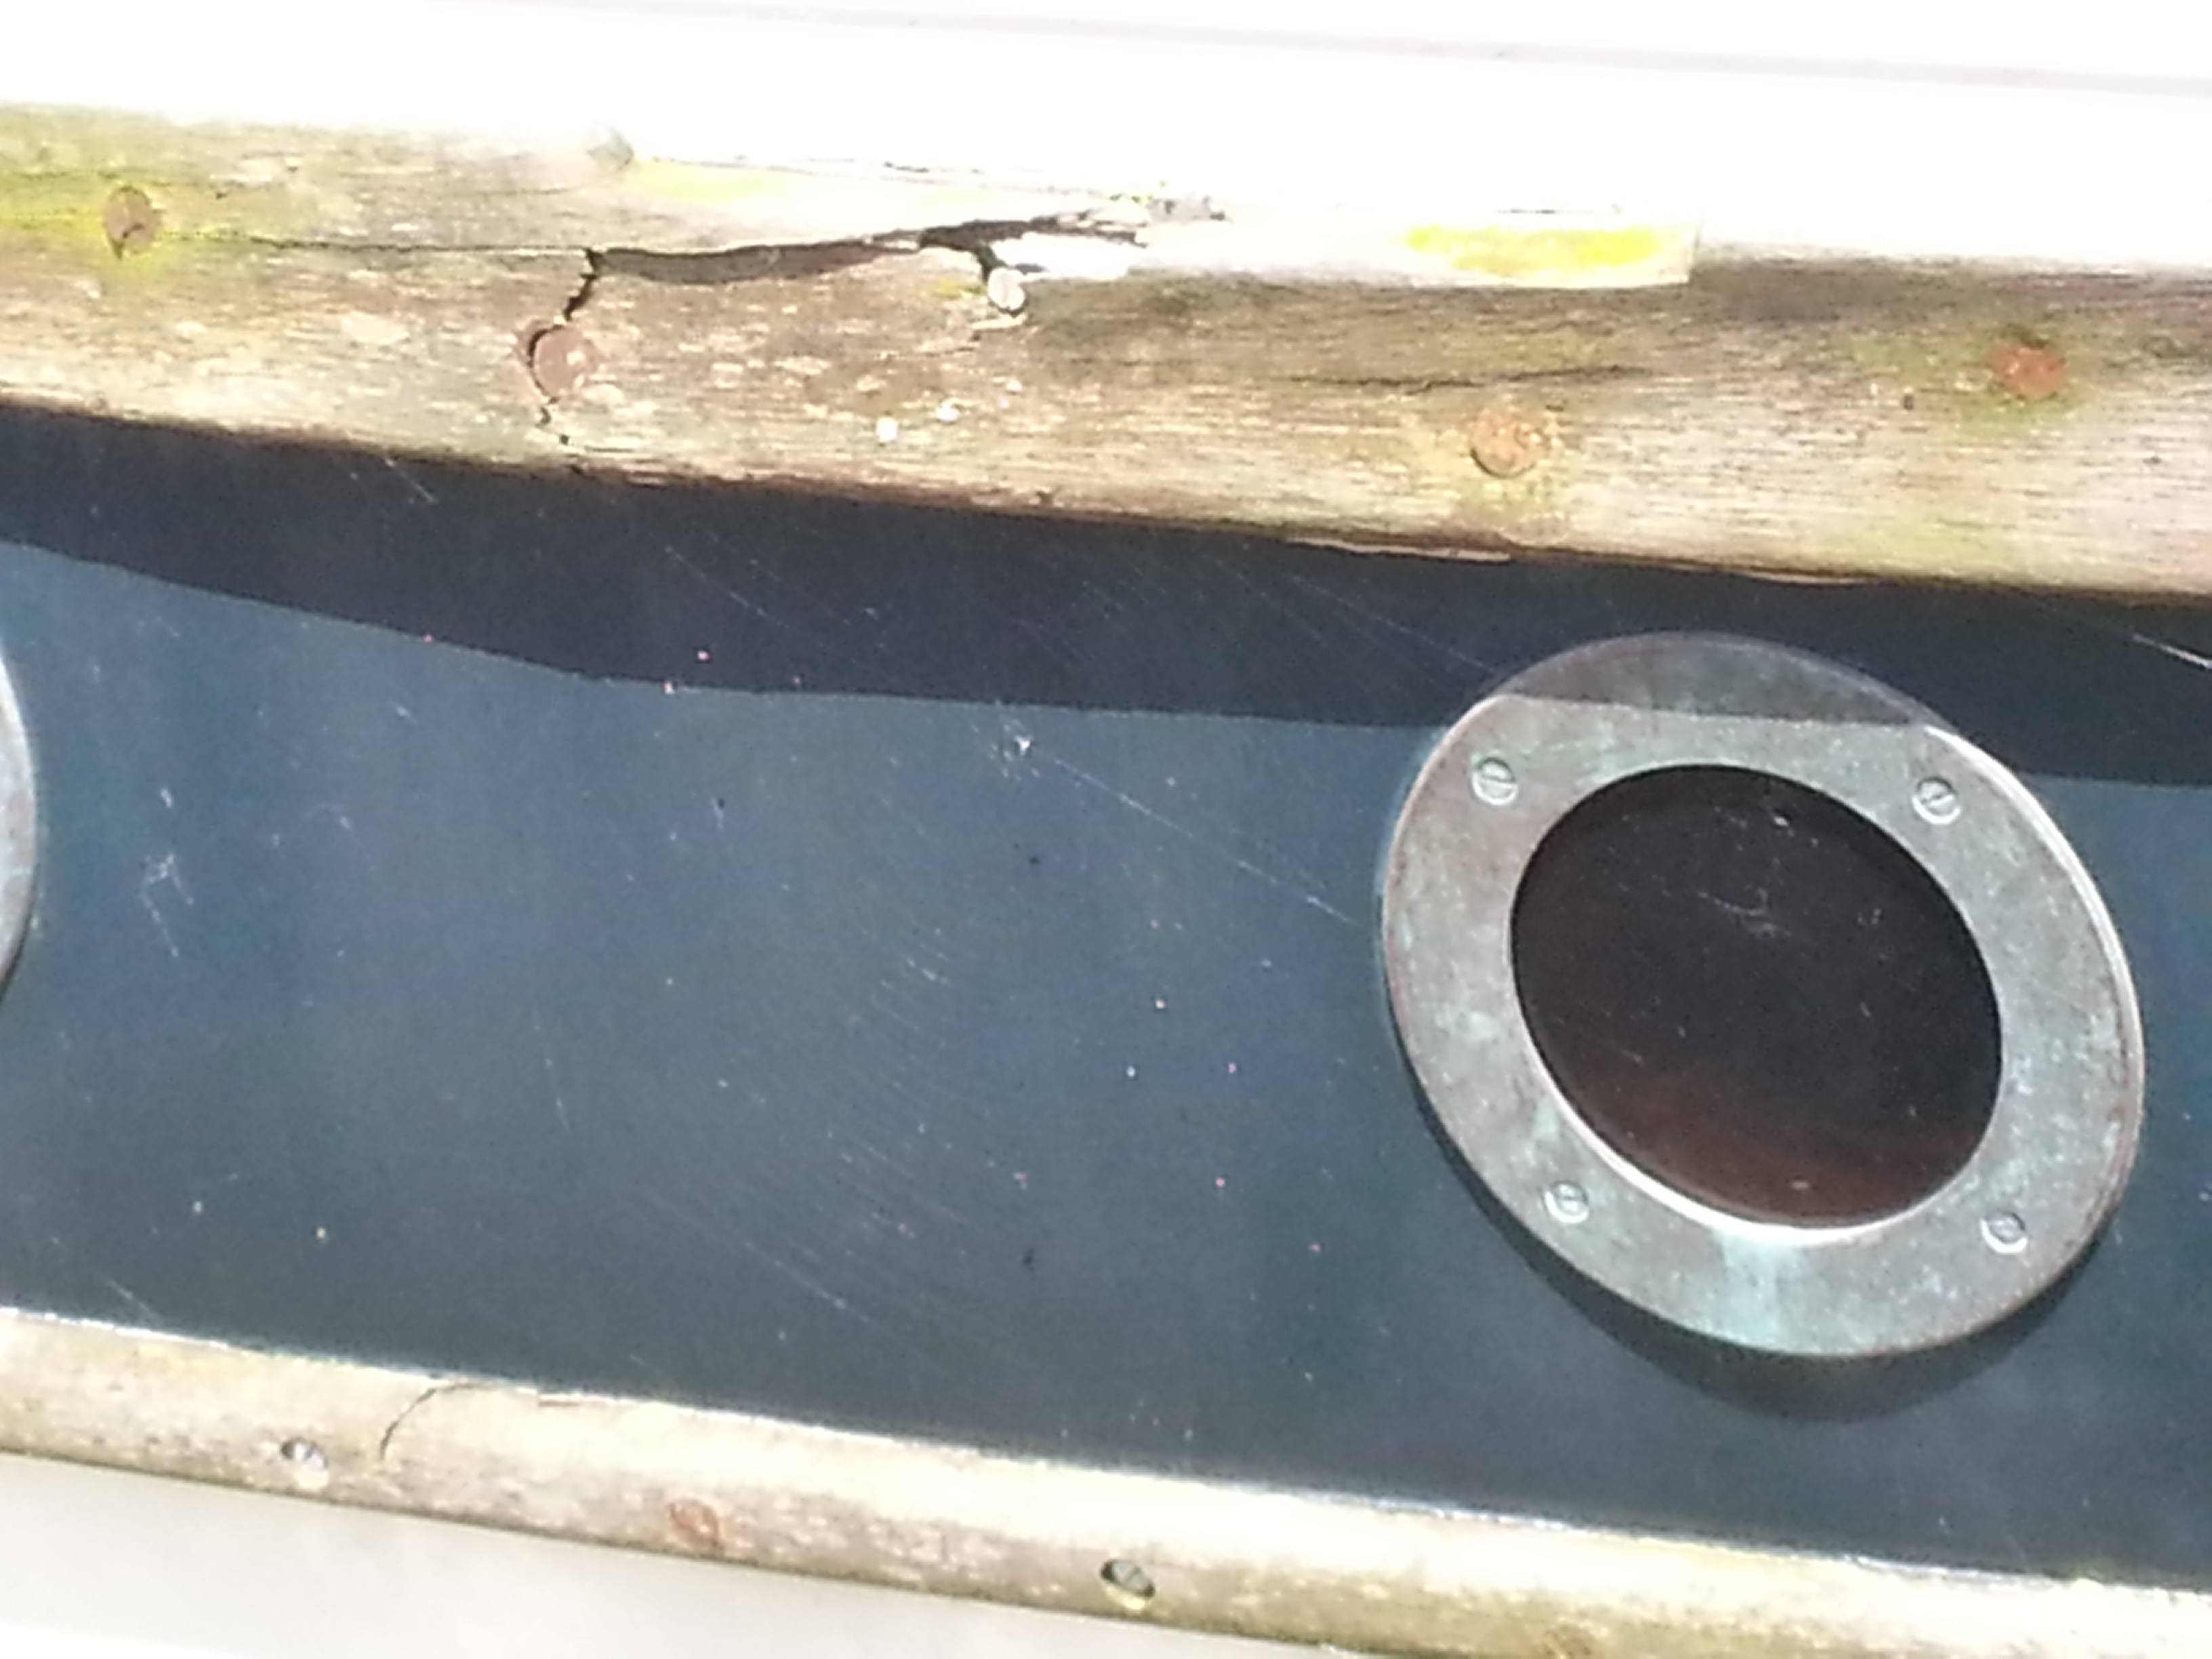
Hatch showing signs of distress!
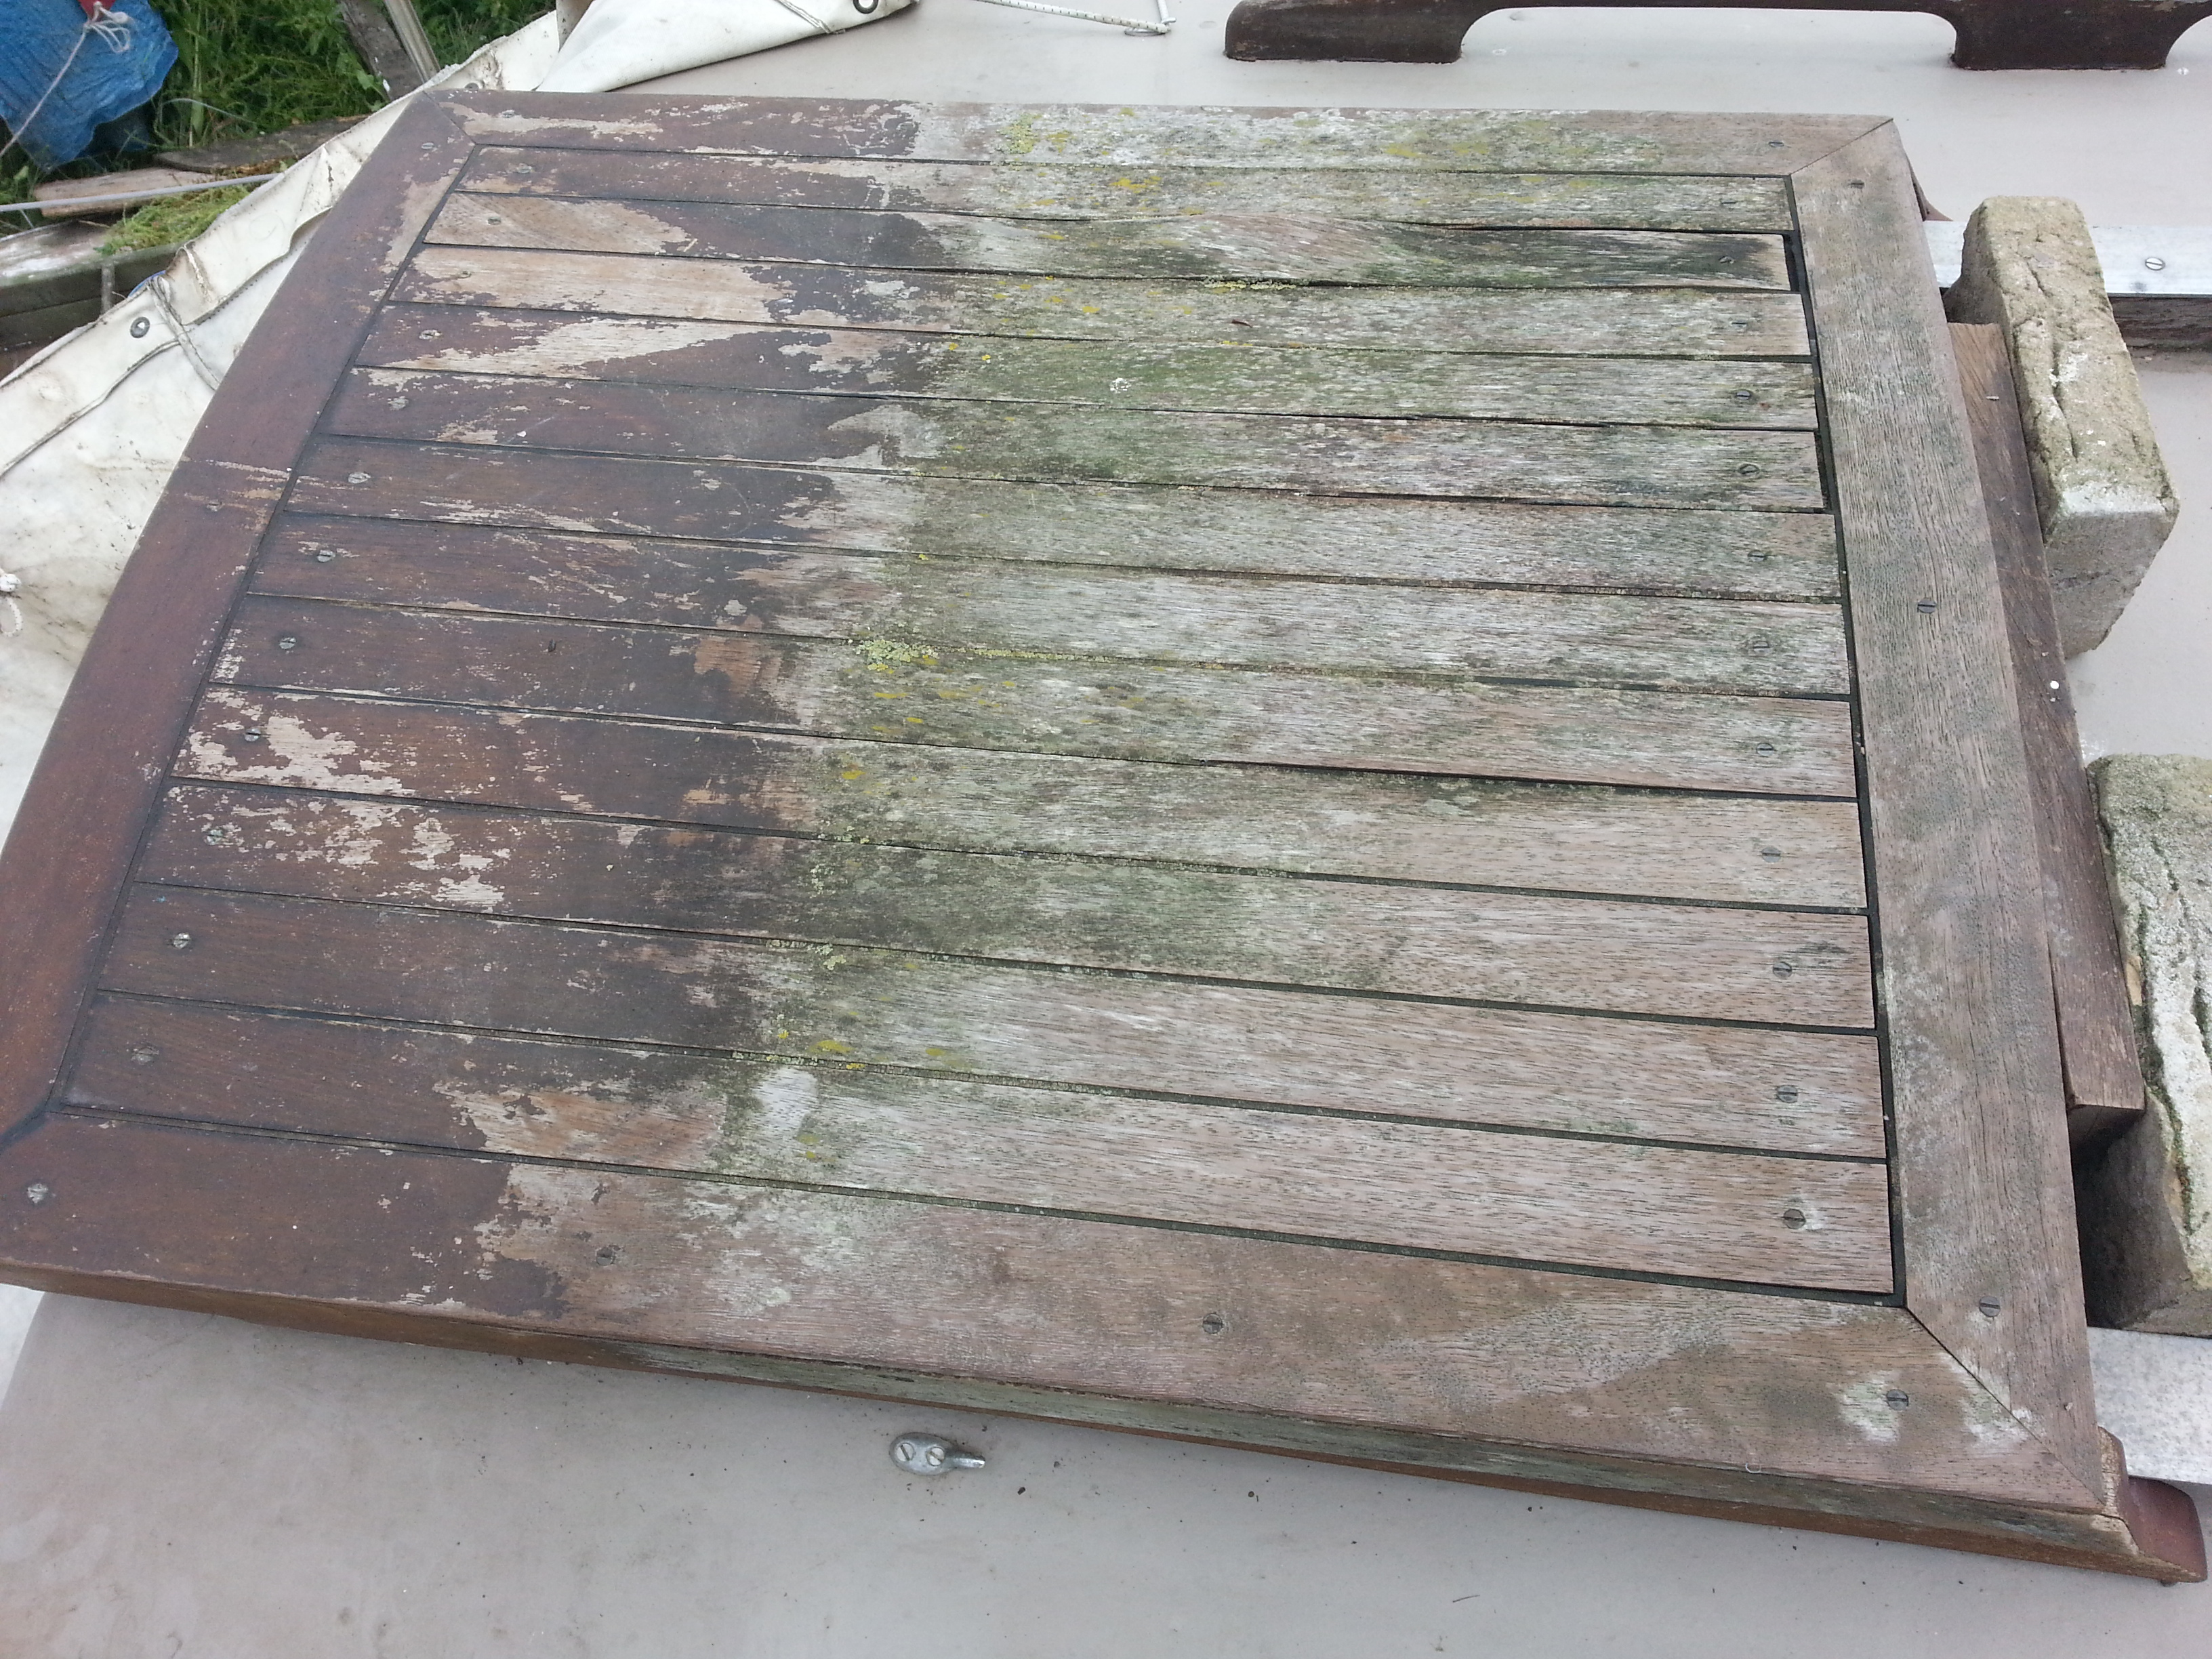
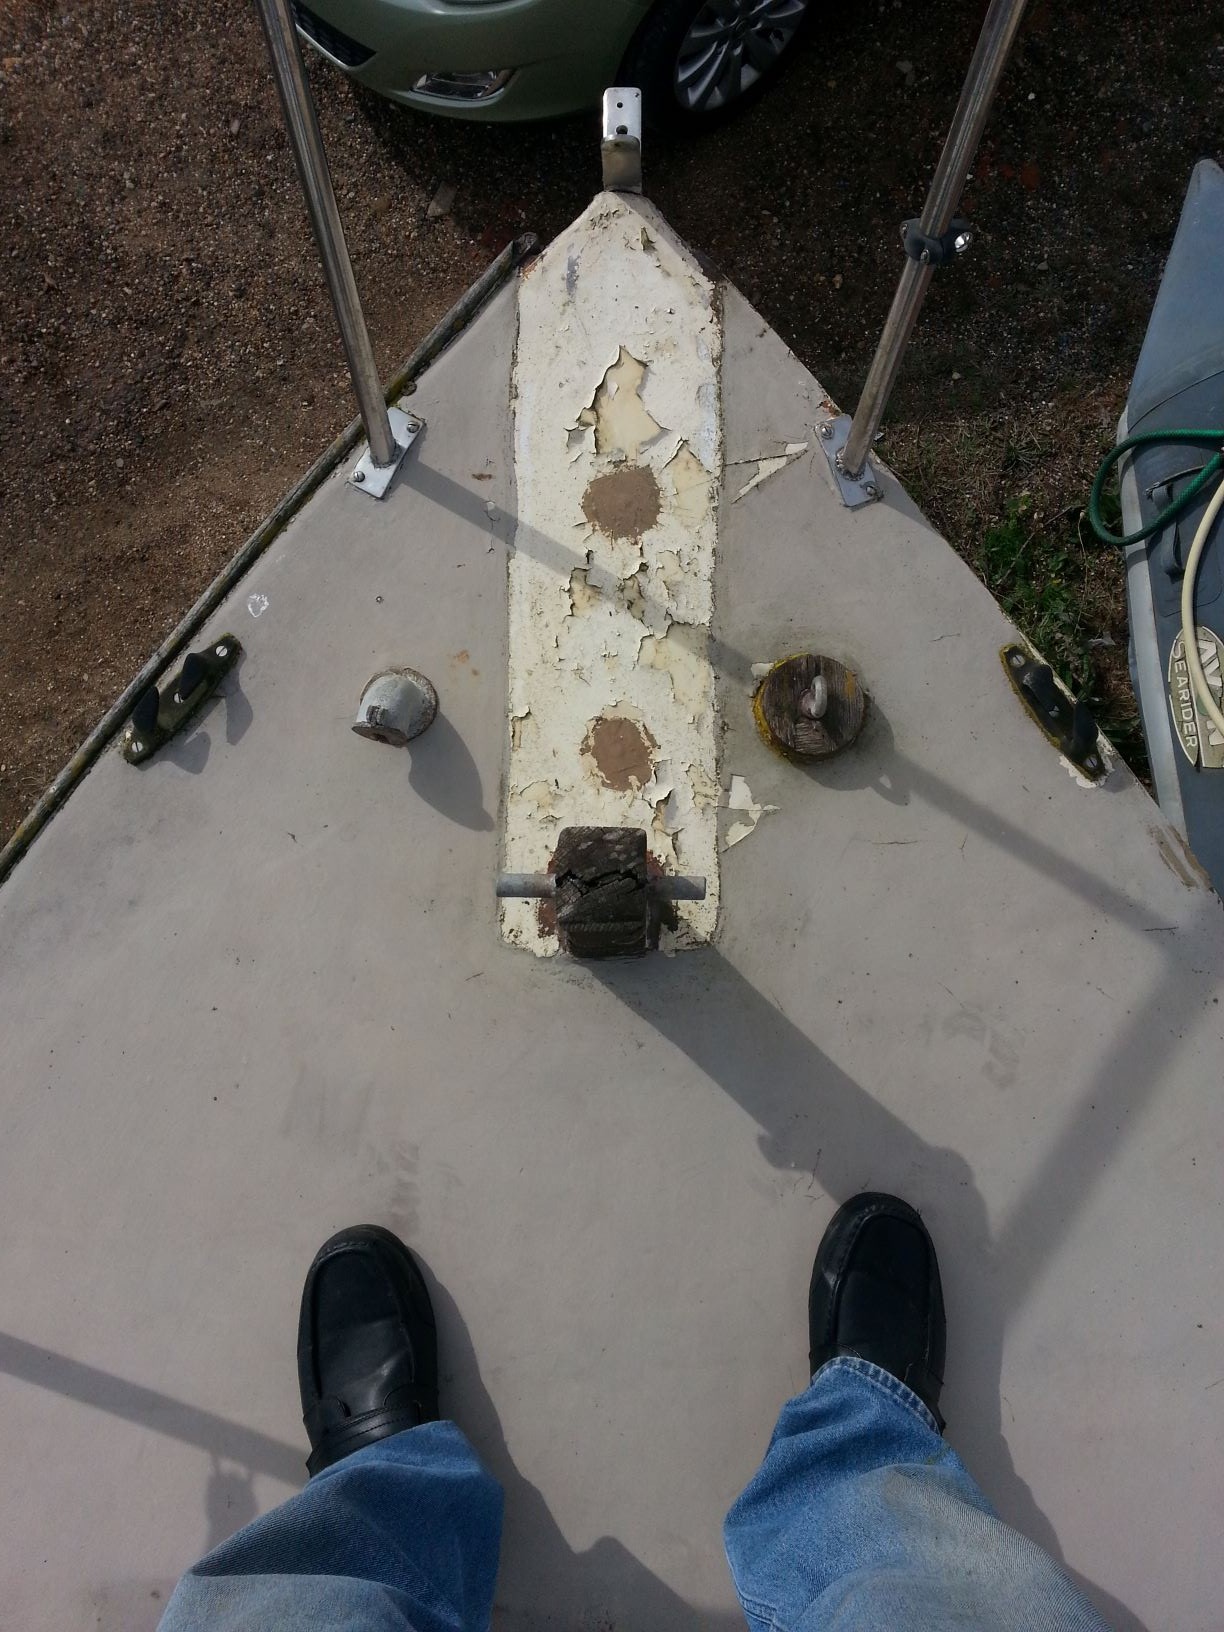
Bowsprit with deep cracks and delamination
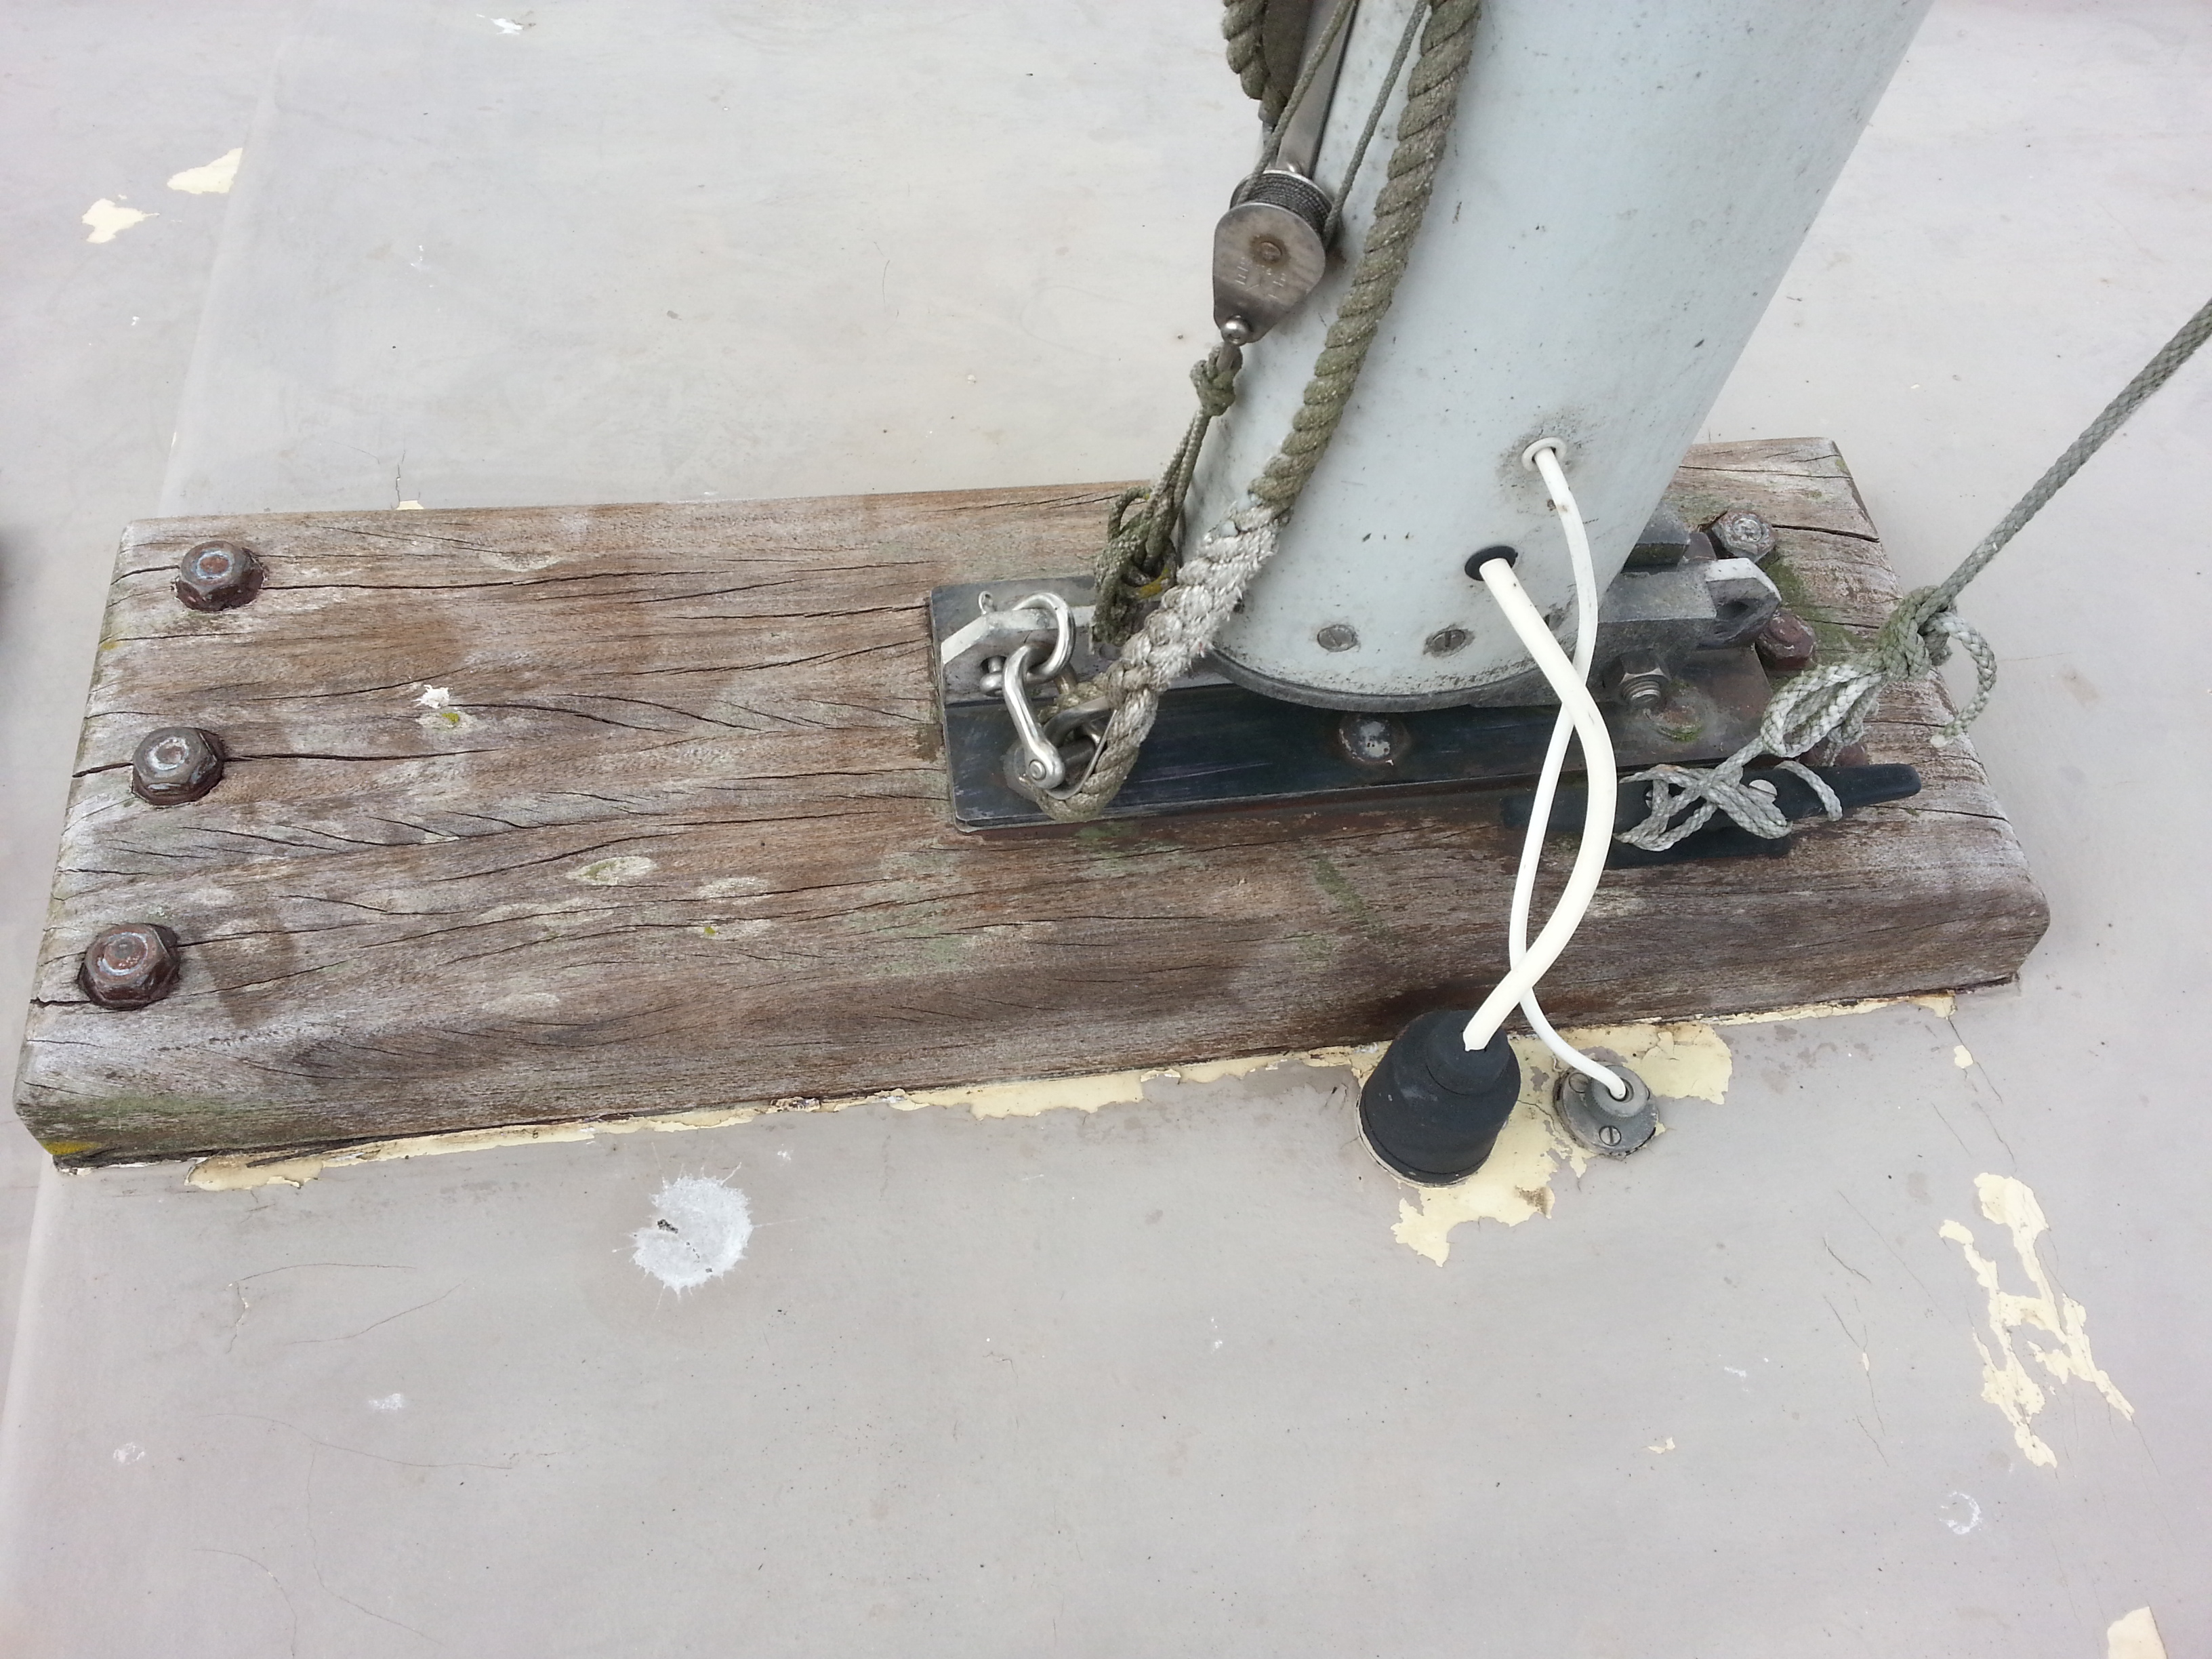
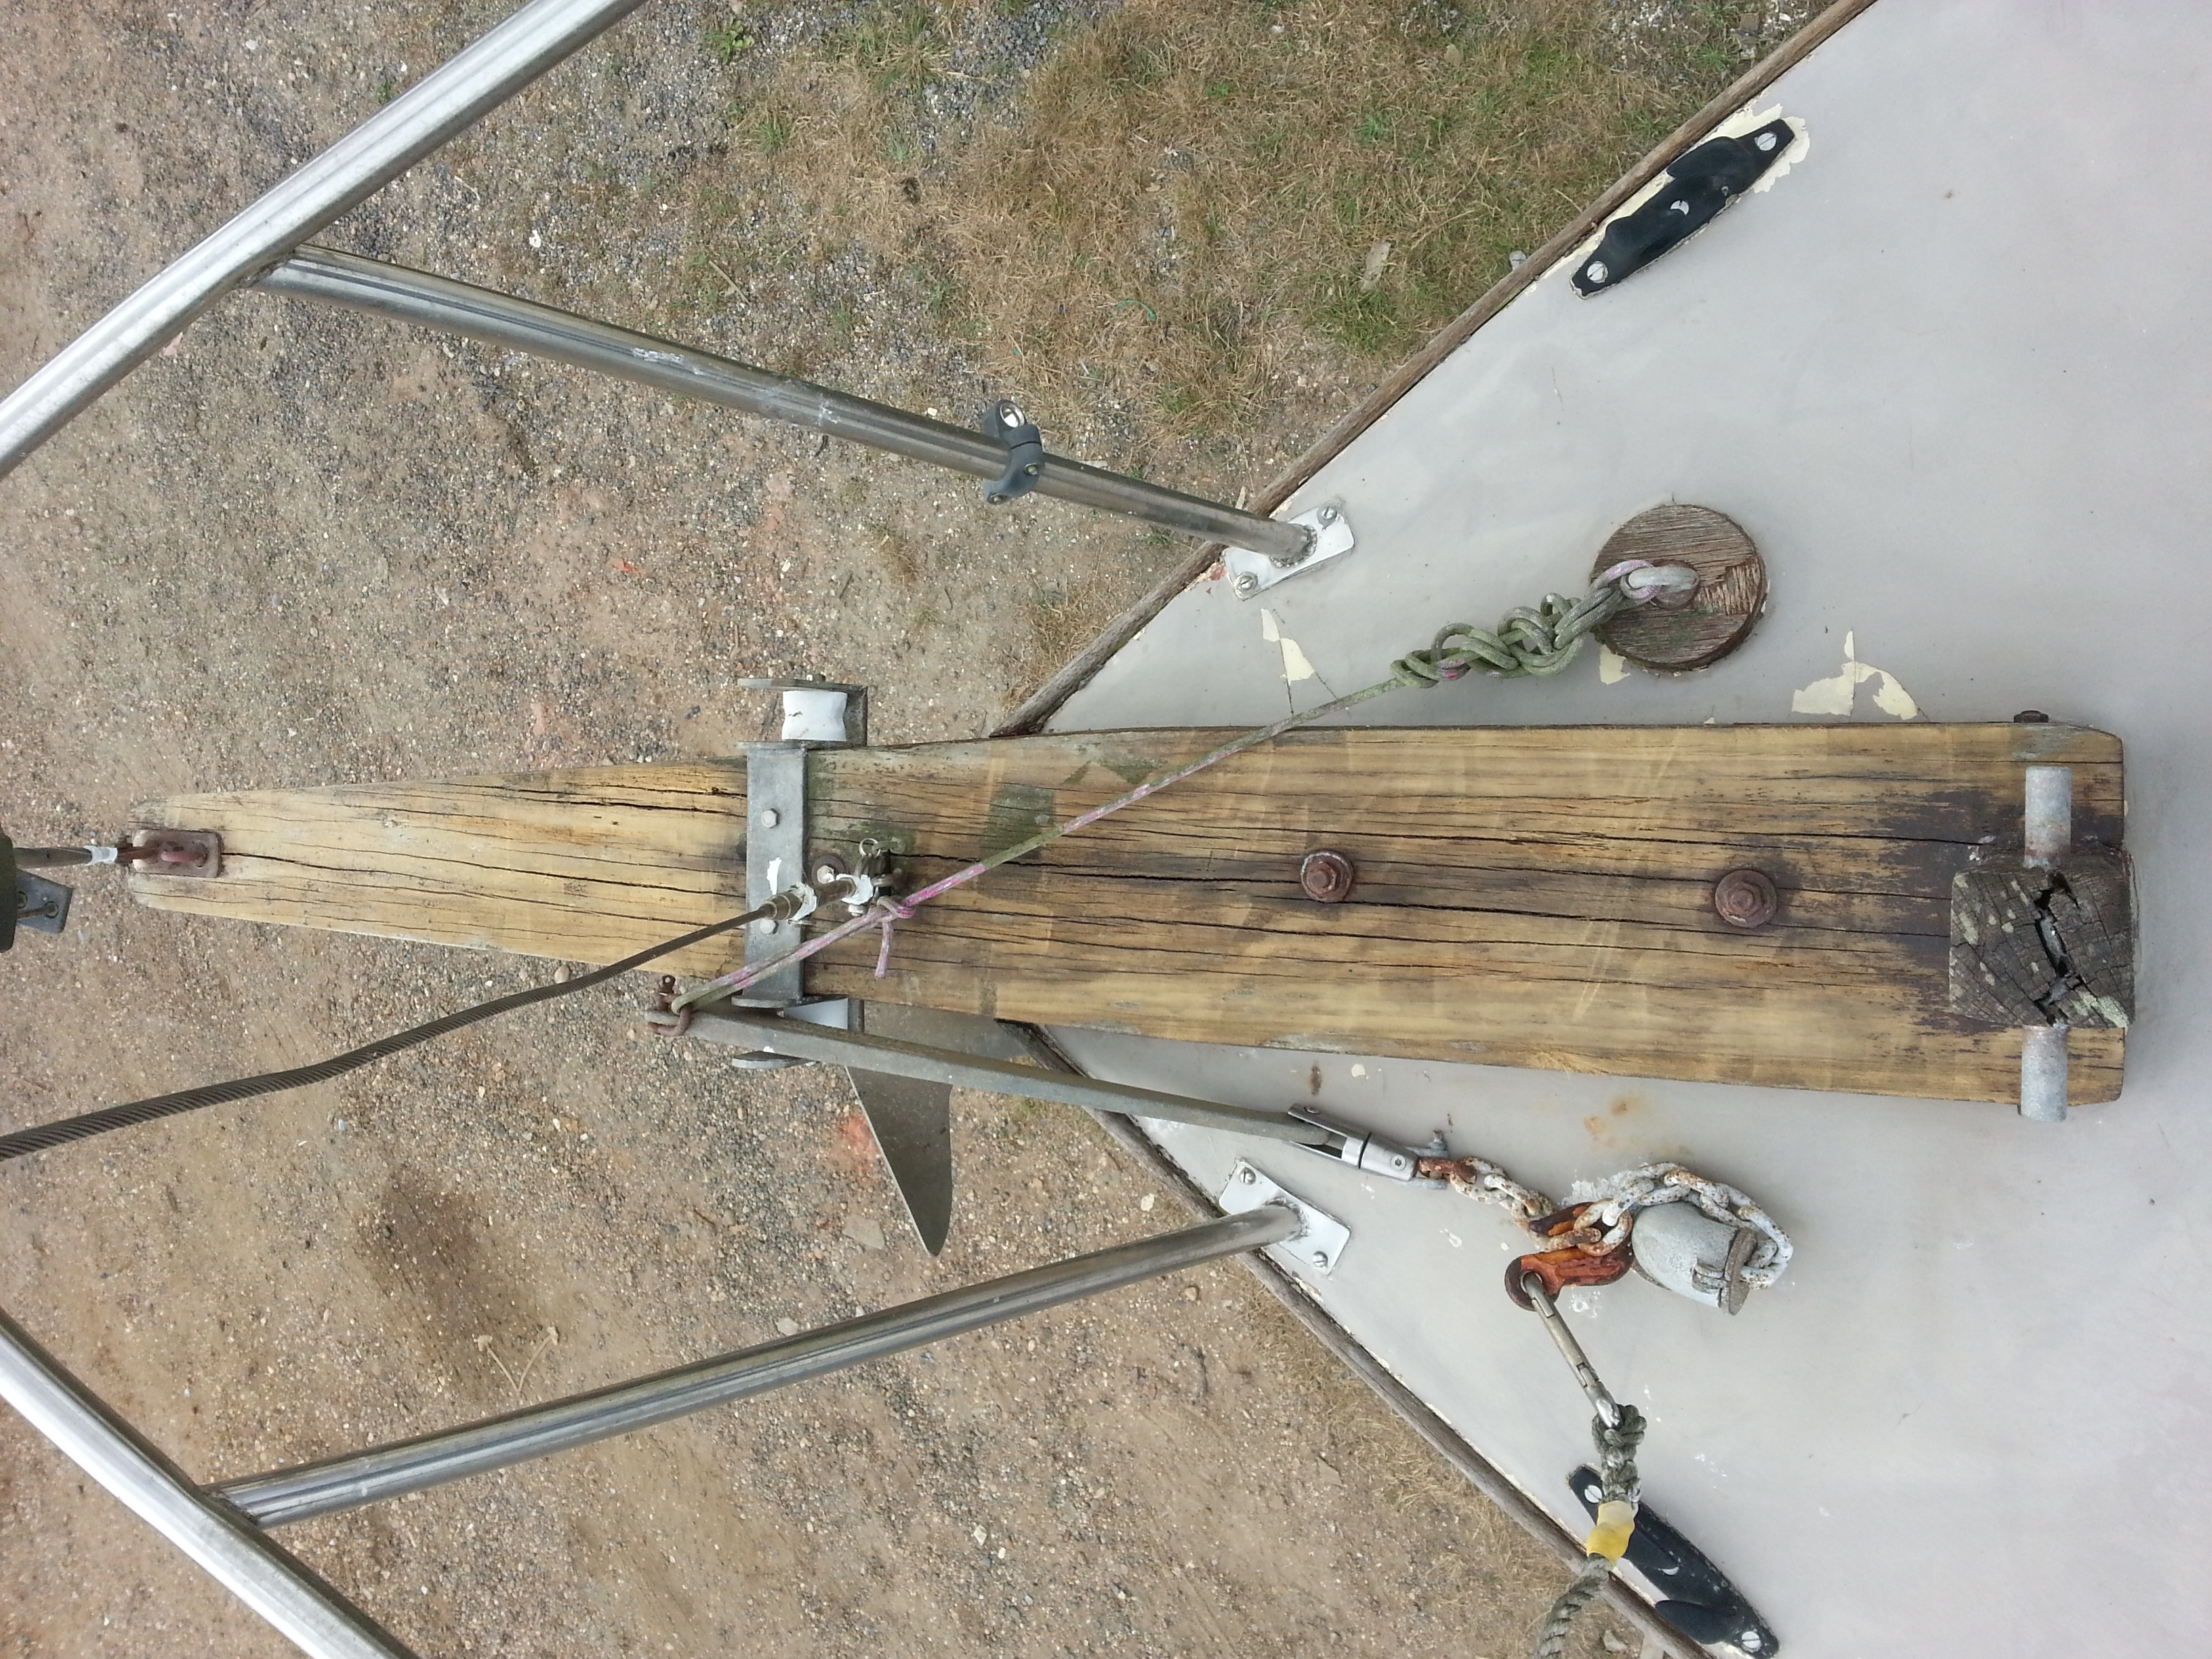
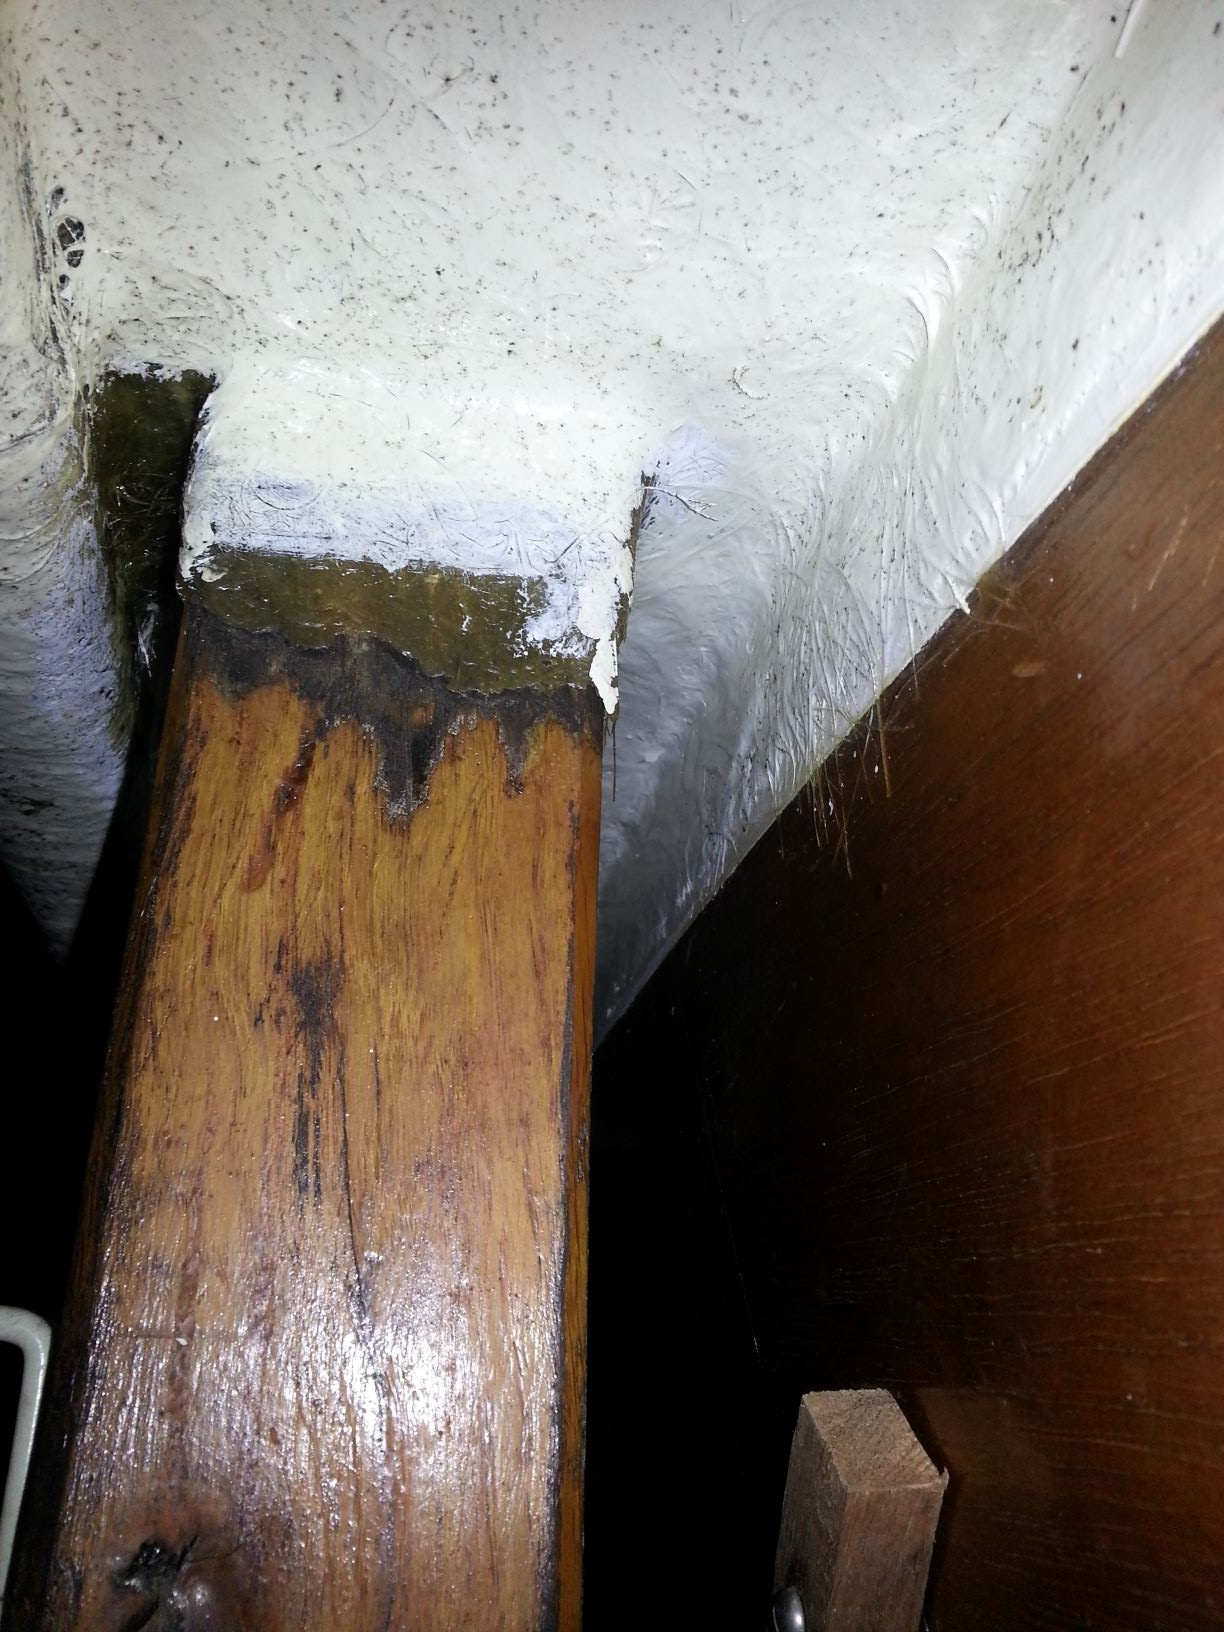
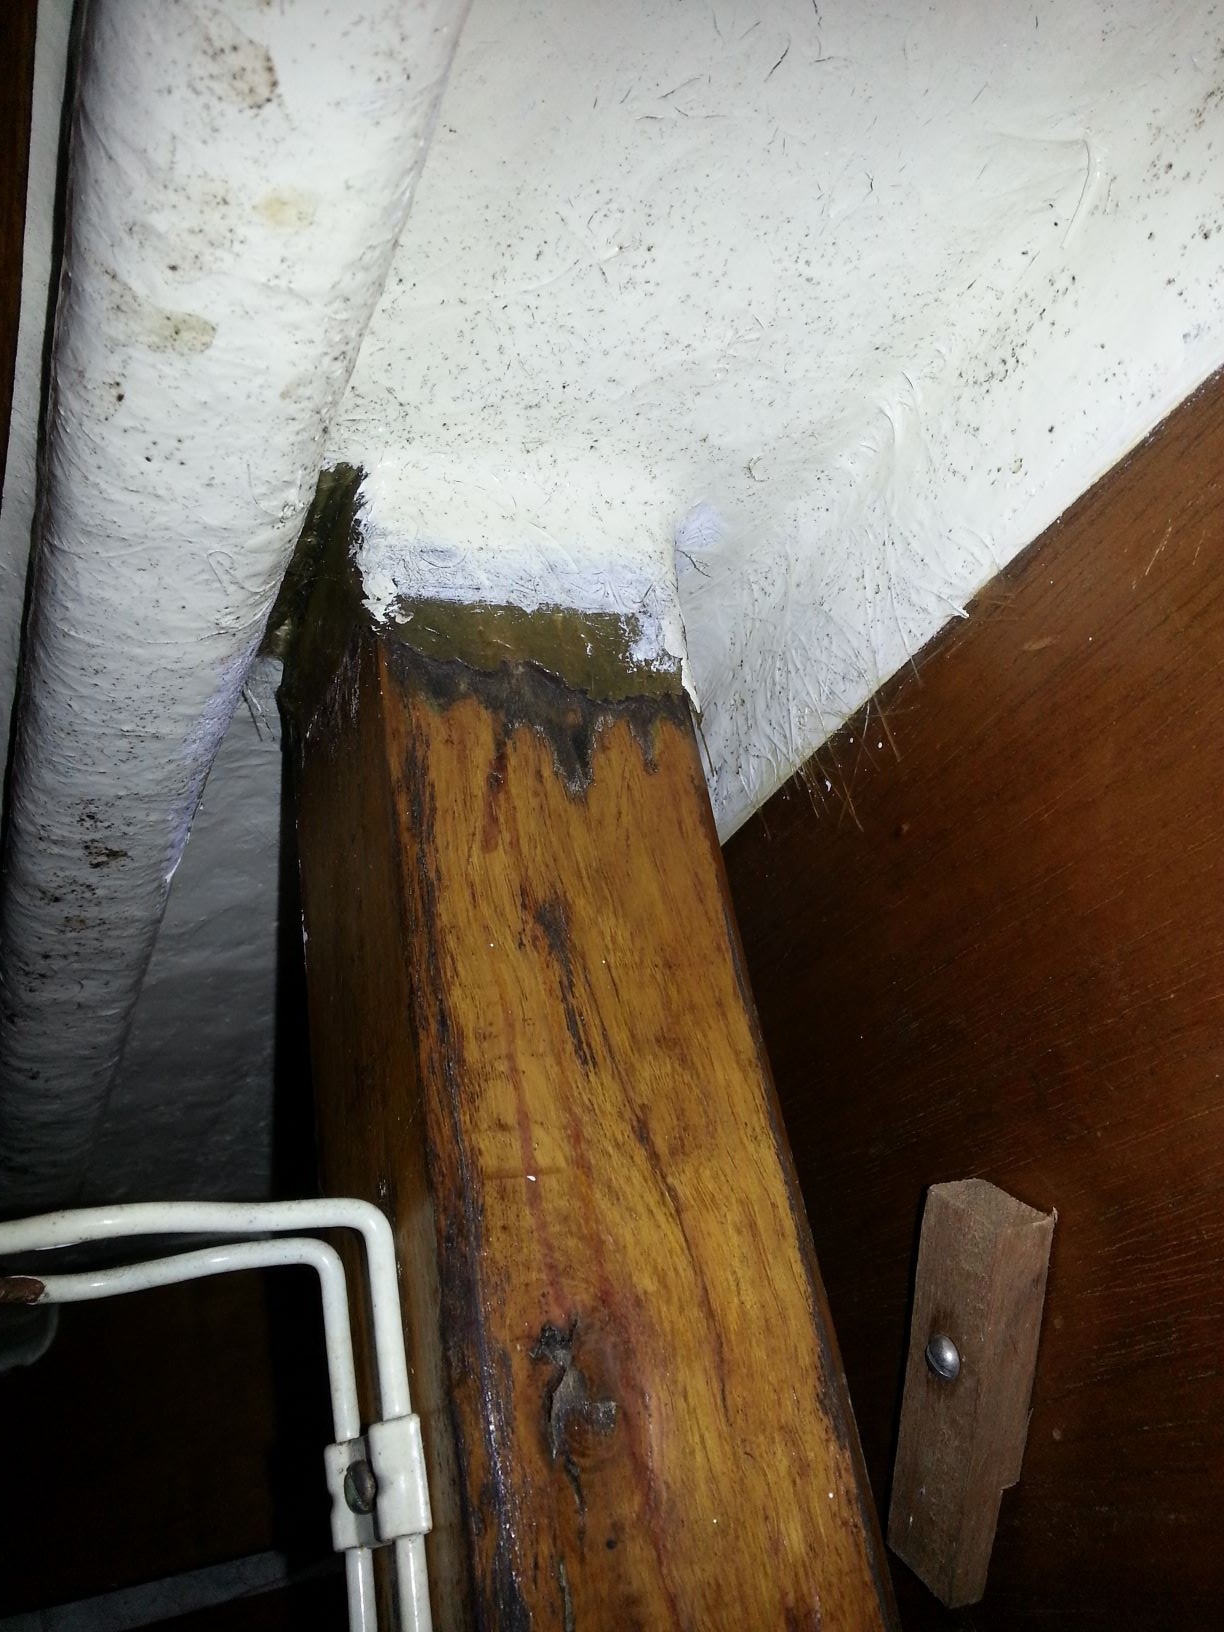
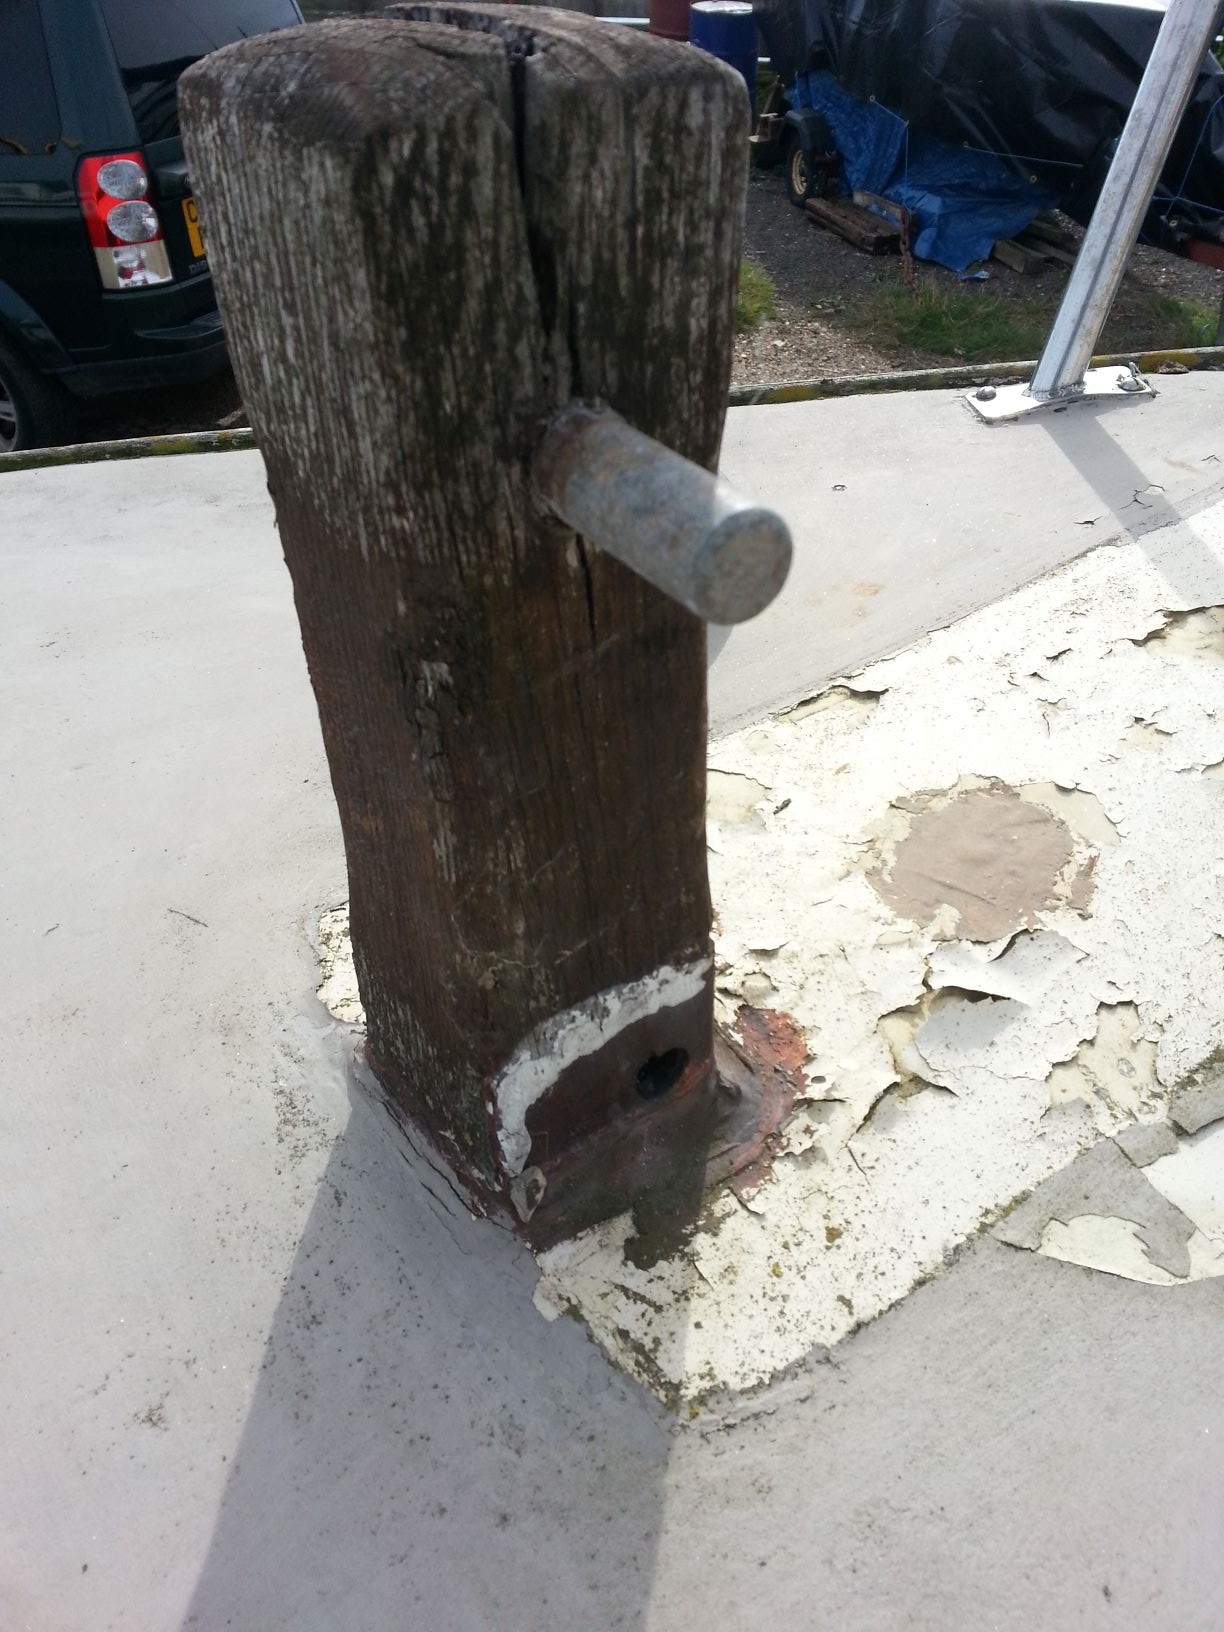
Mast base and timber support, tabernacle and wider timber support needed, will try to replace the rusty bolts too.
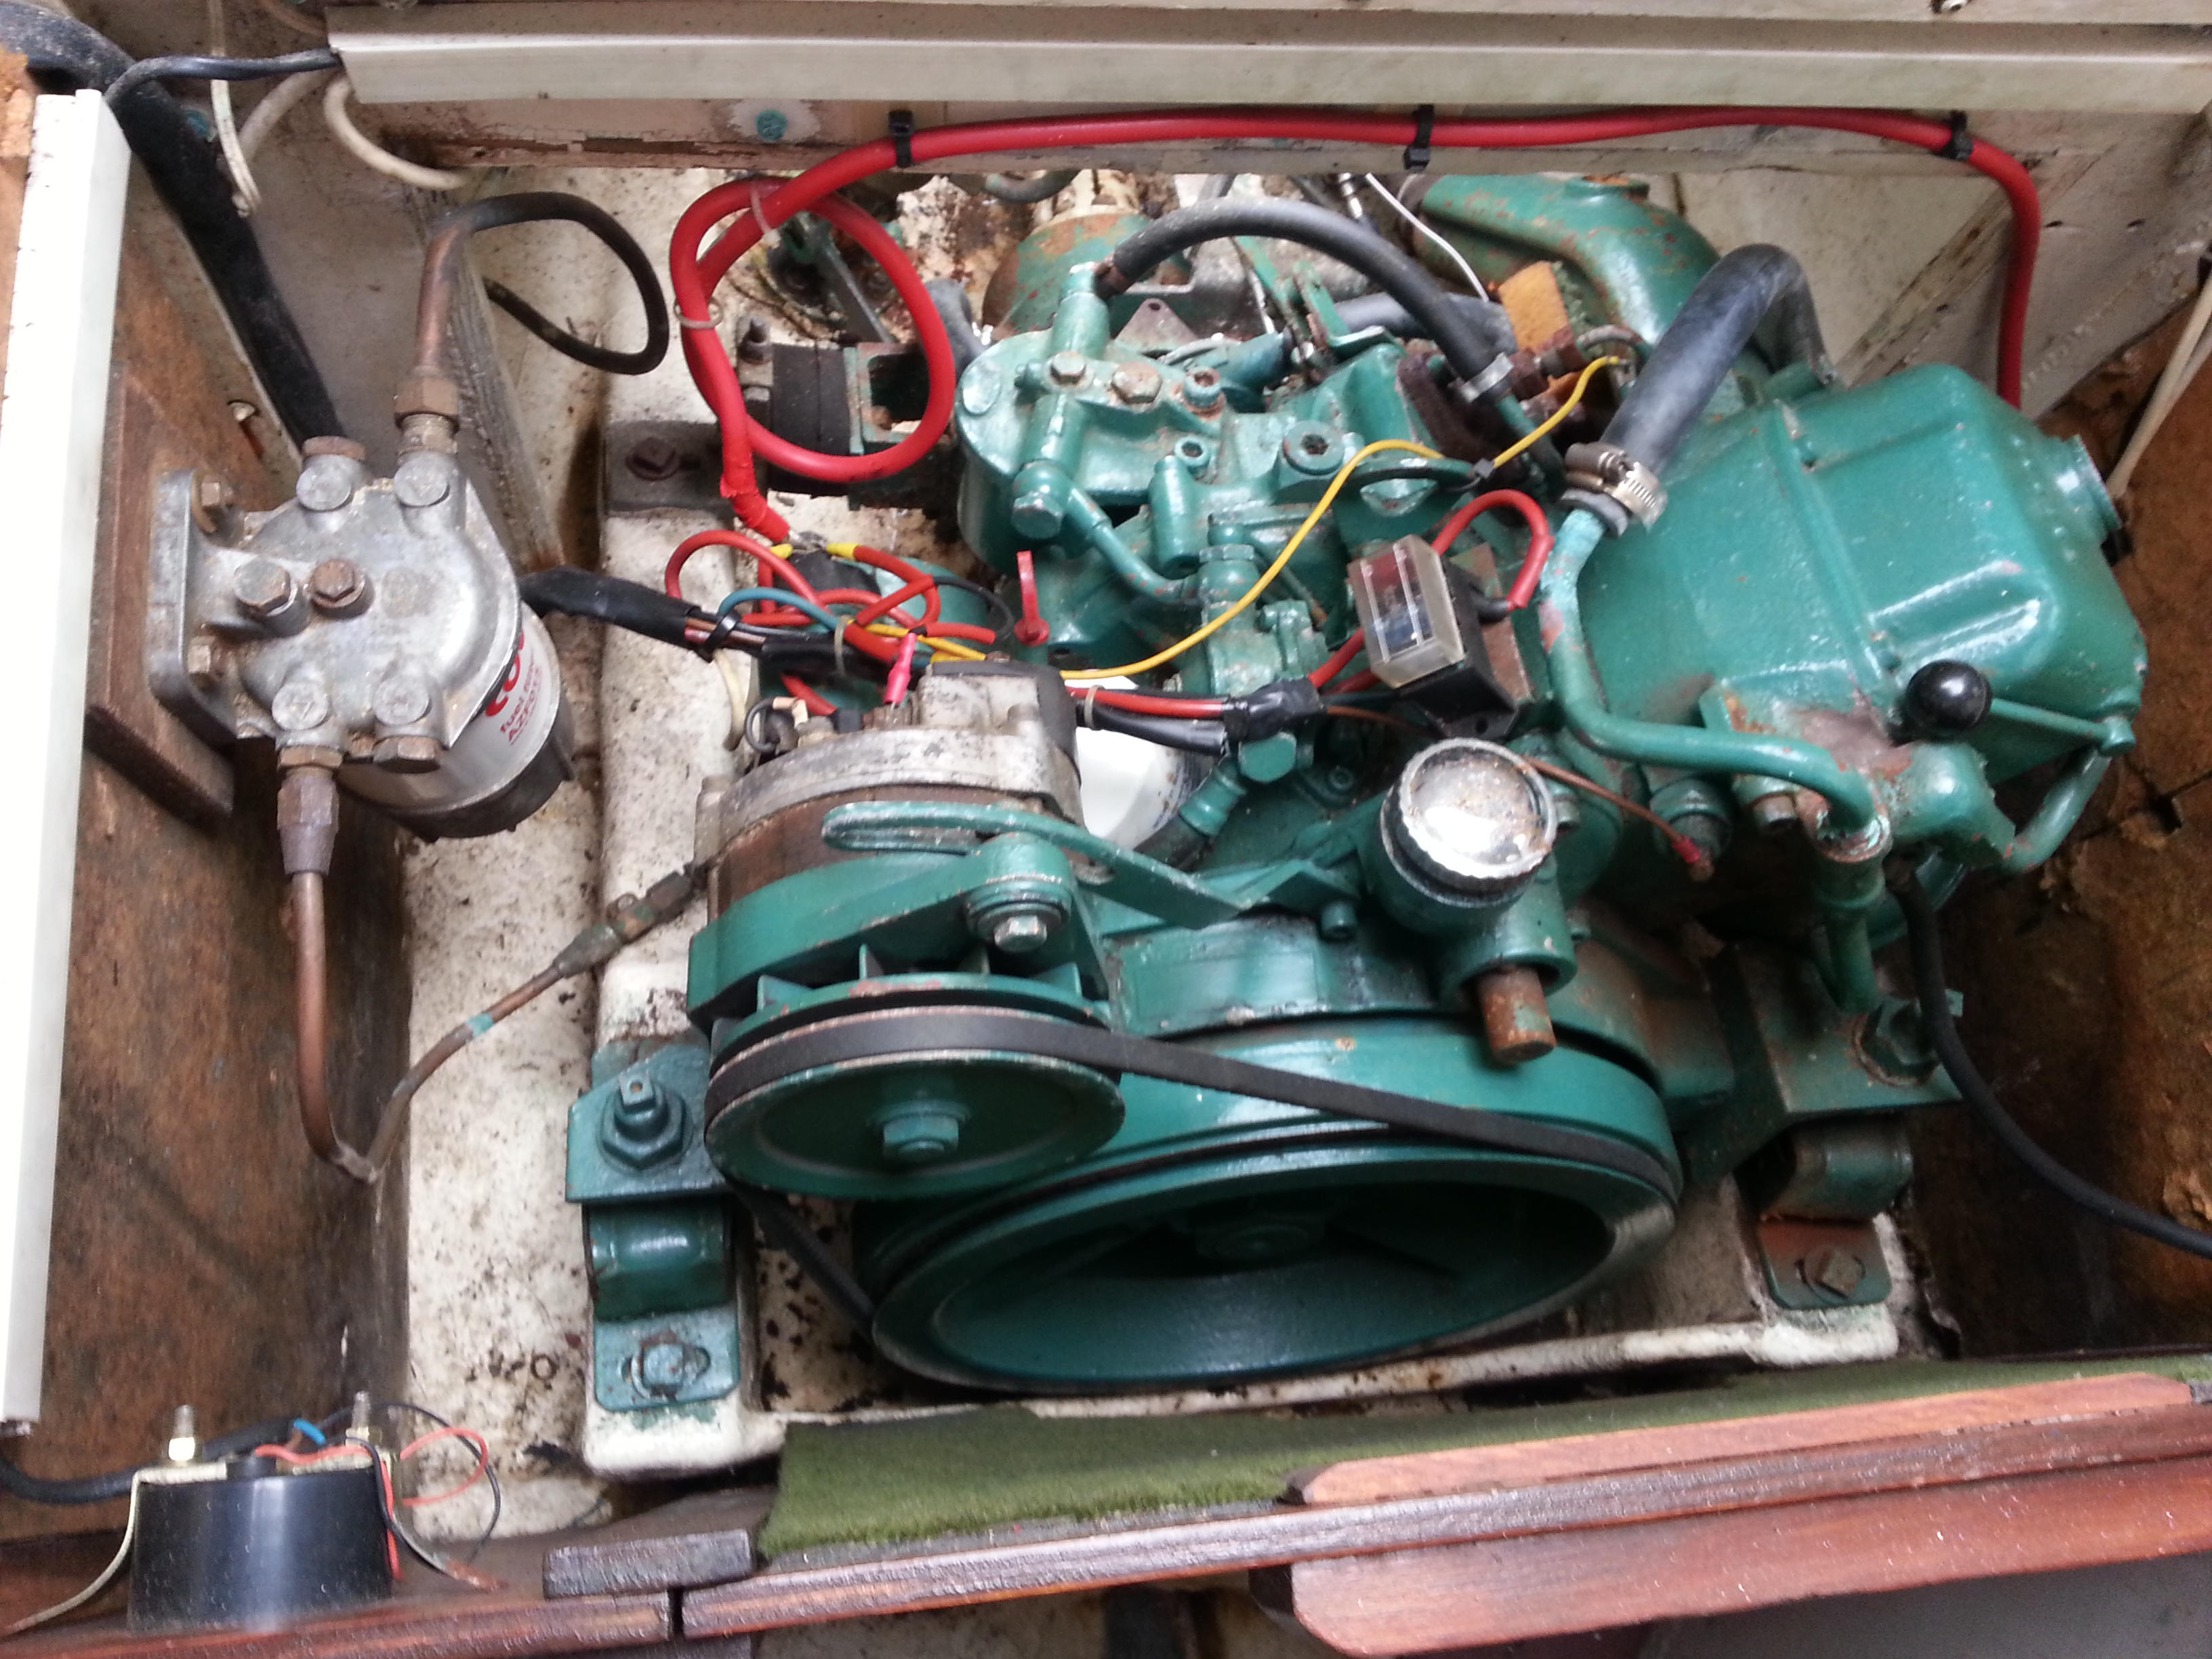
Little Volvo 5hp
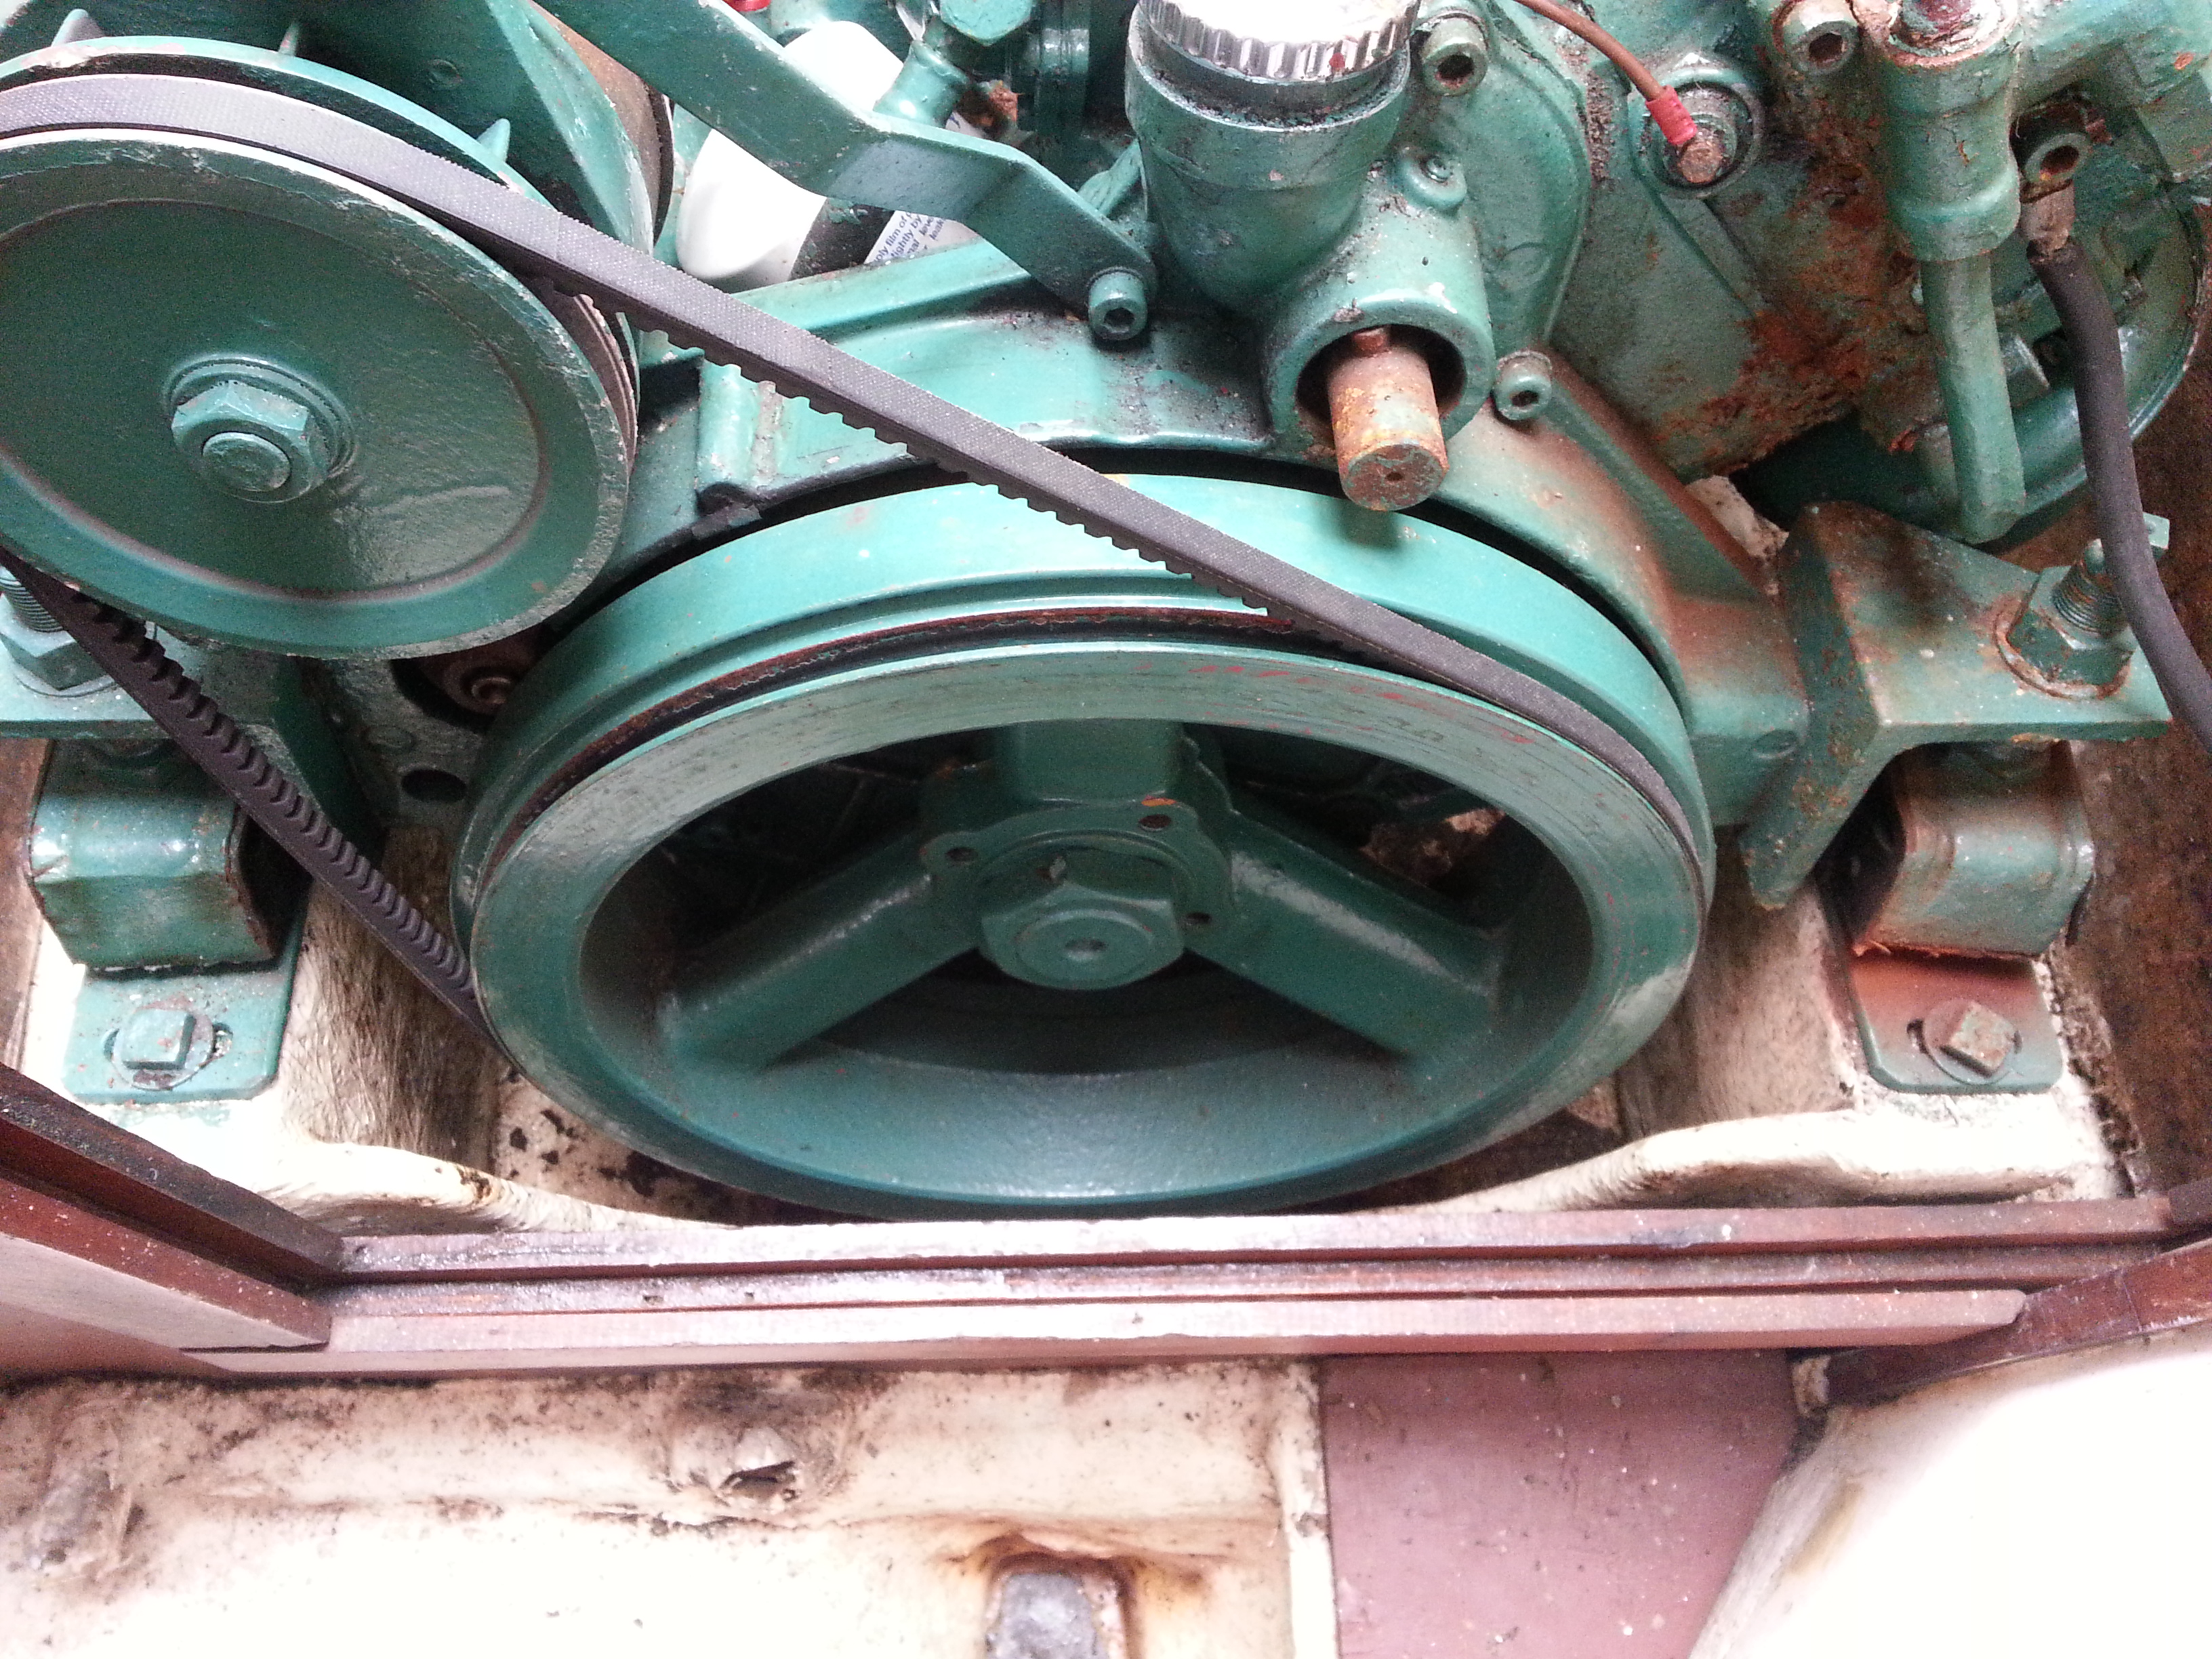
Big flywheel!
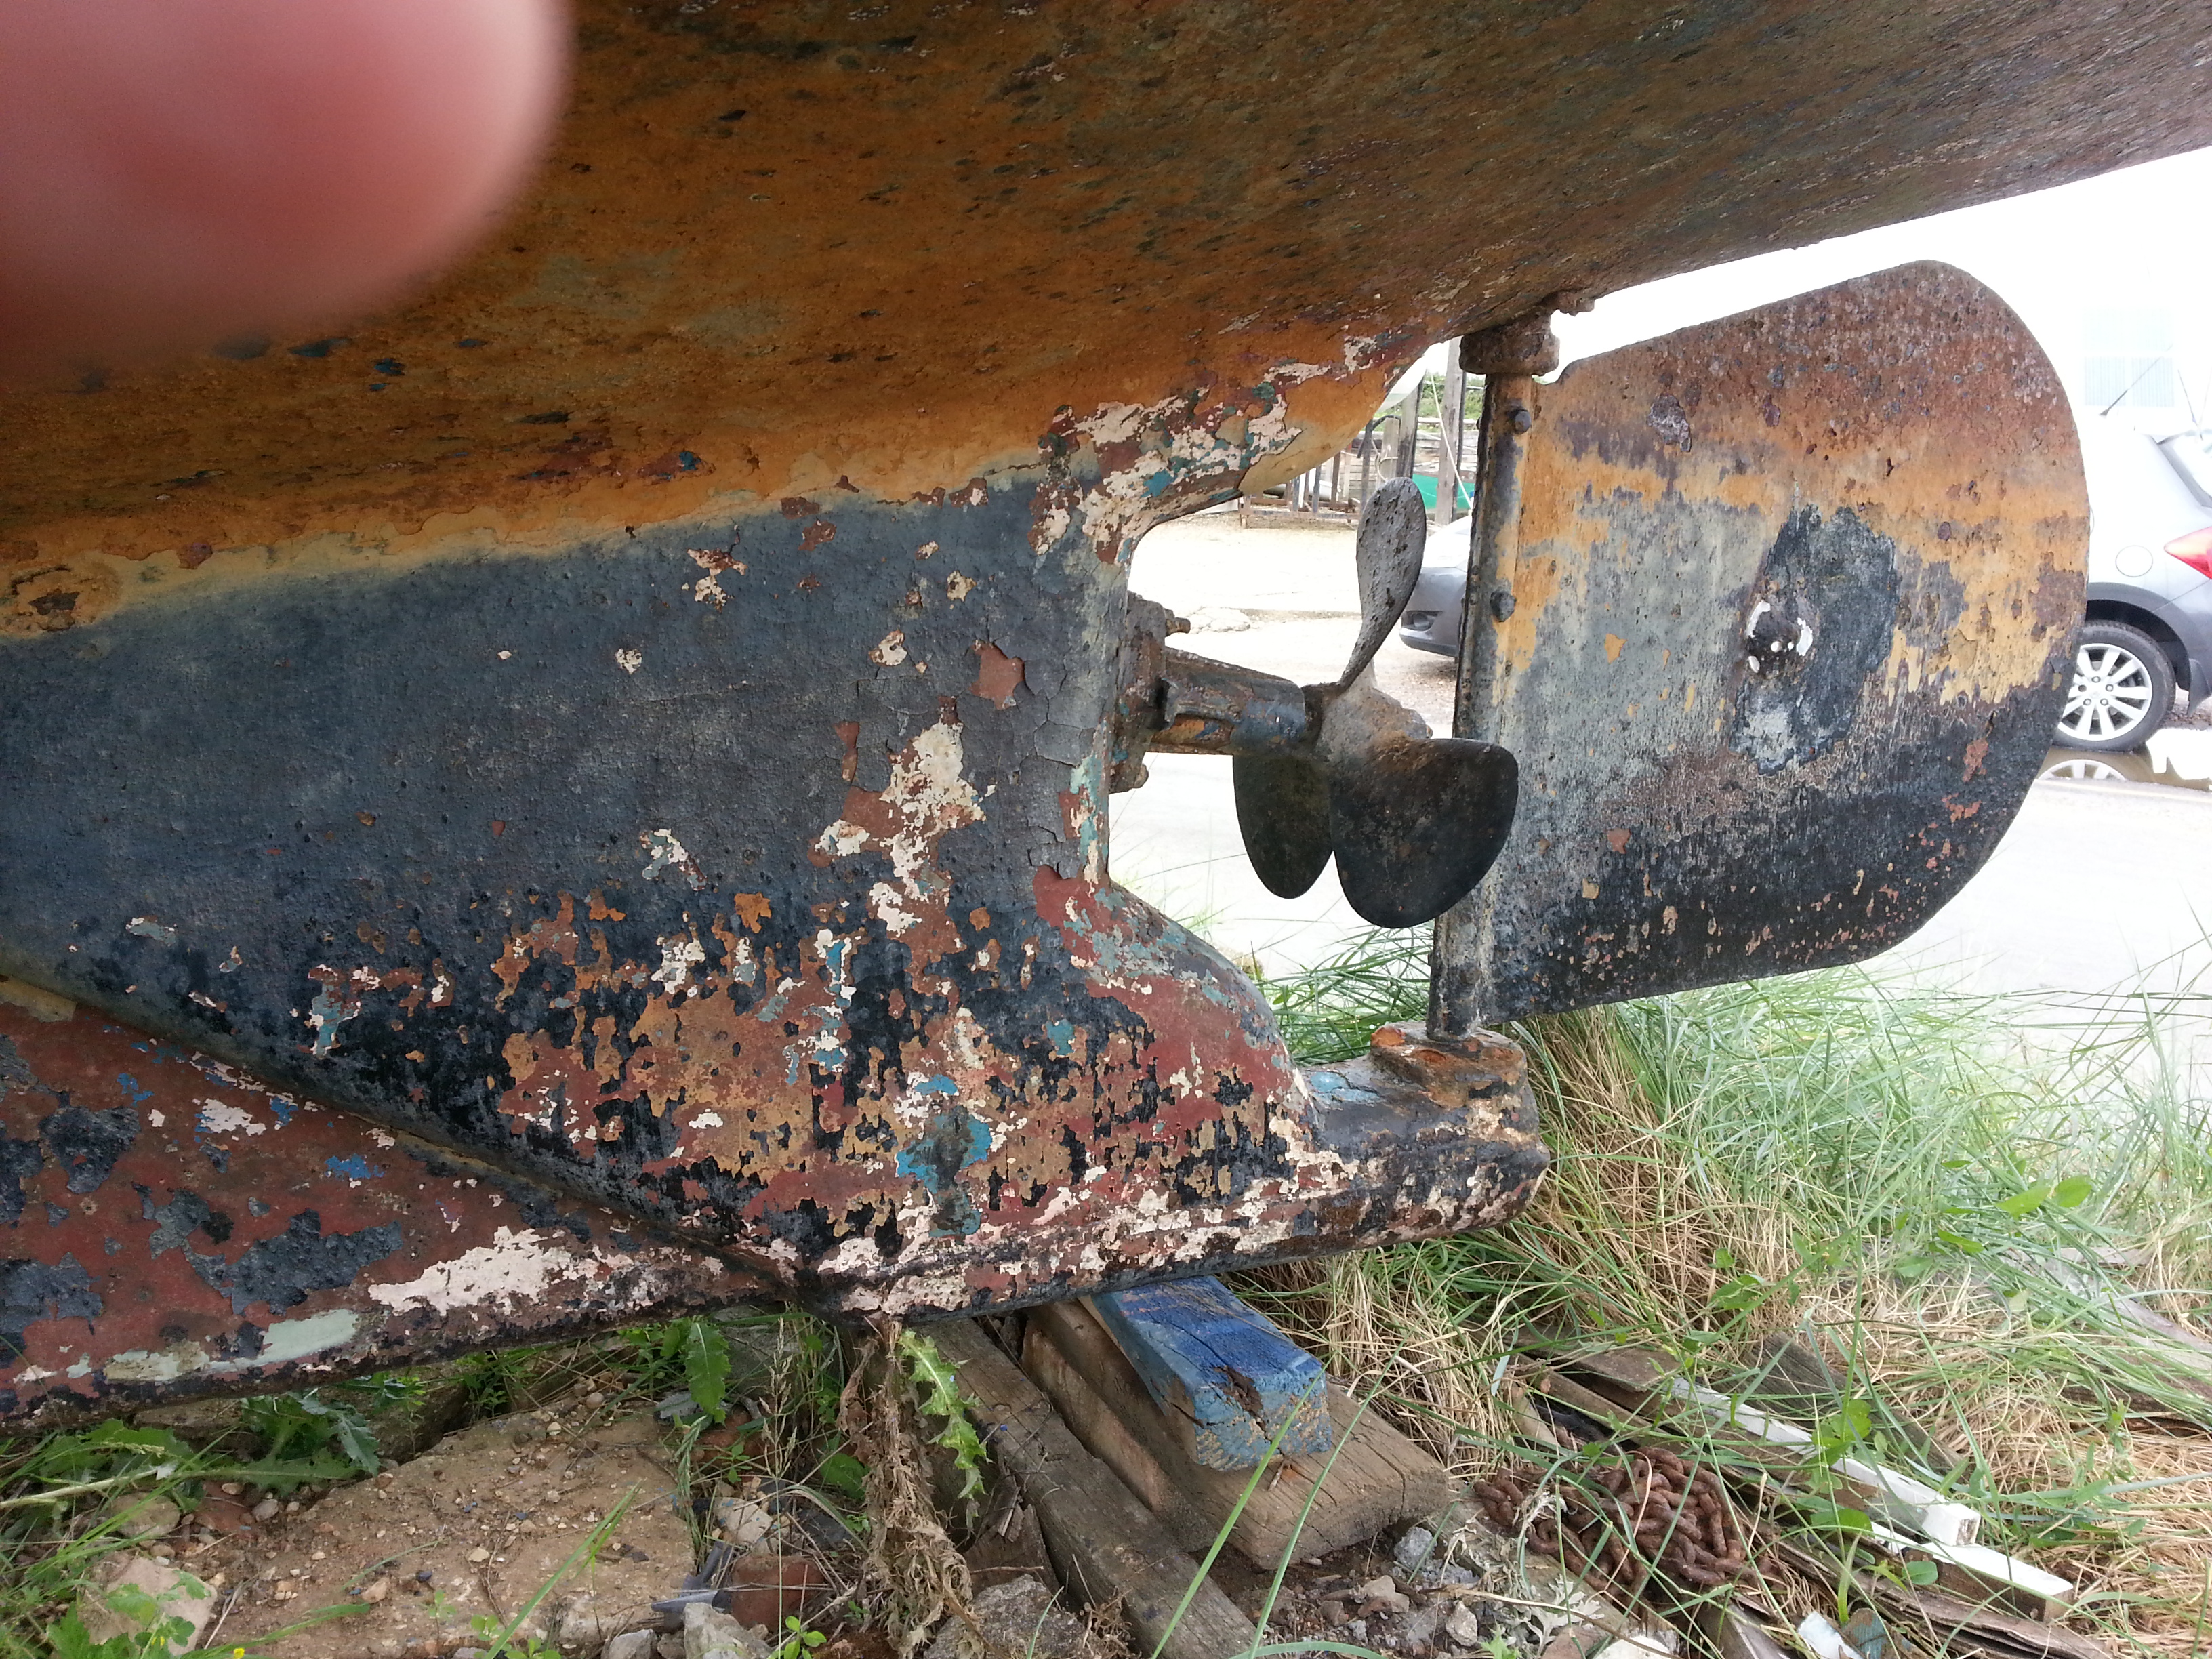
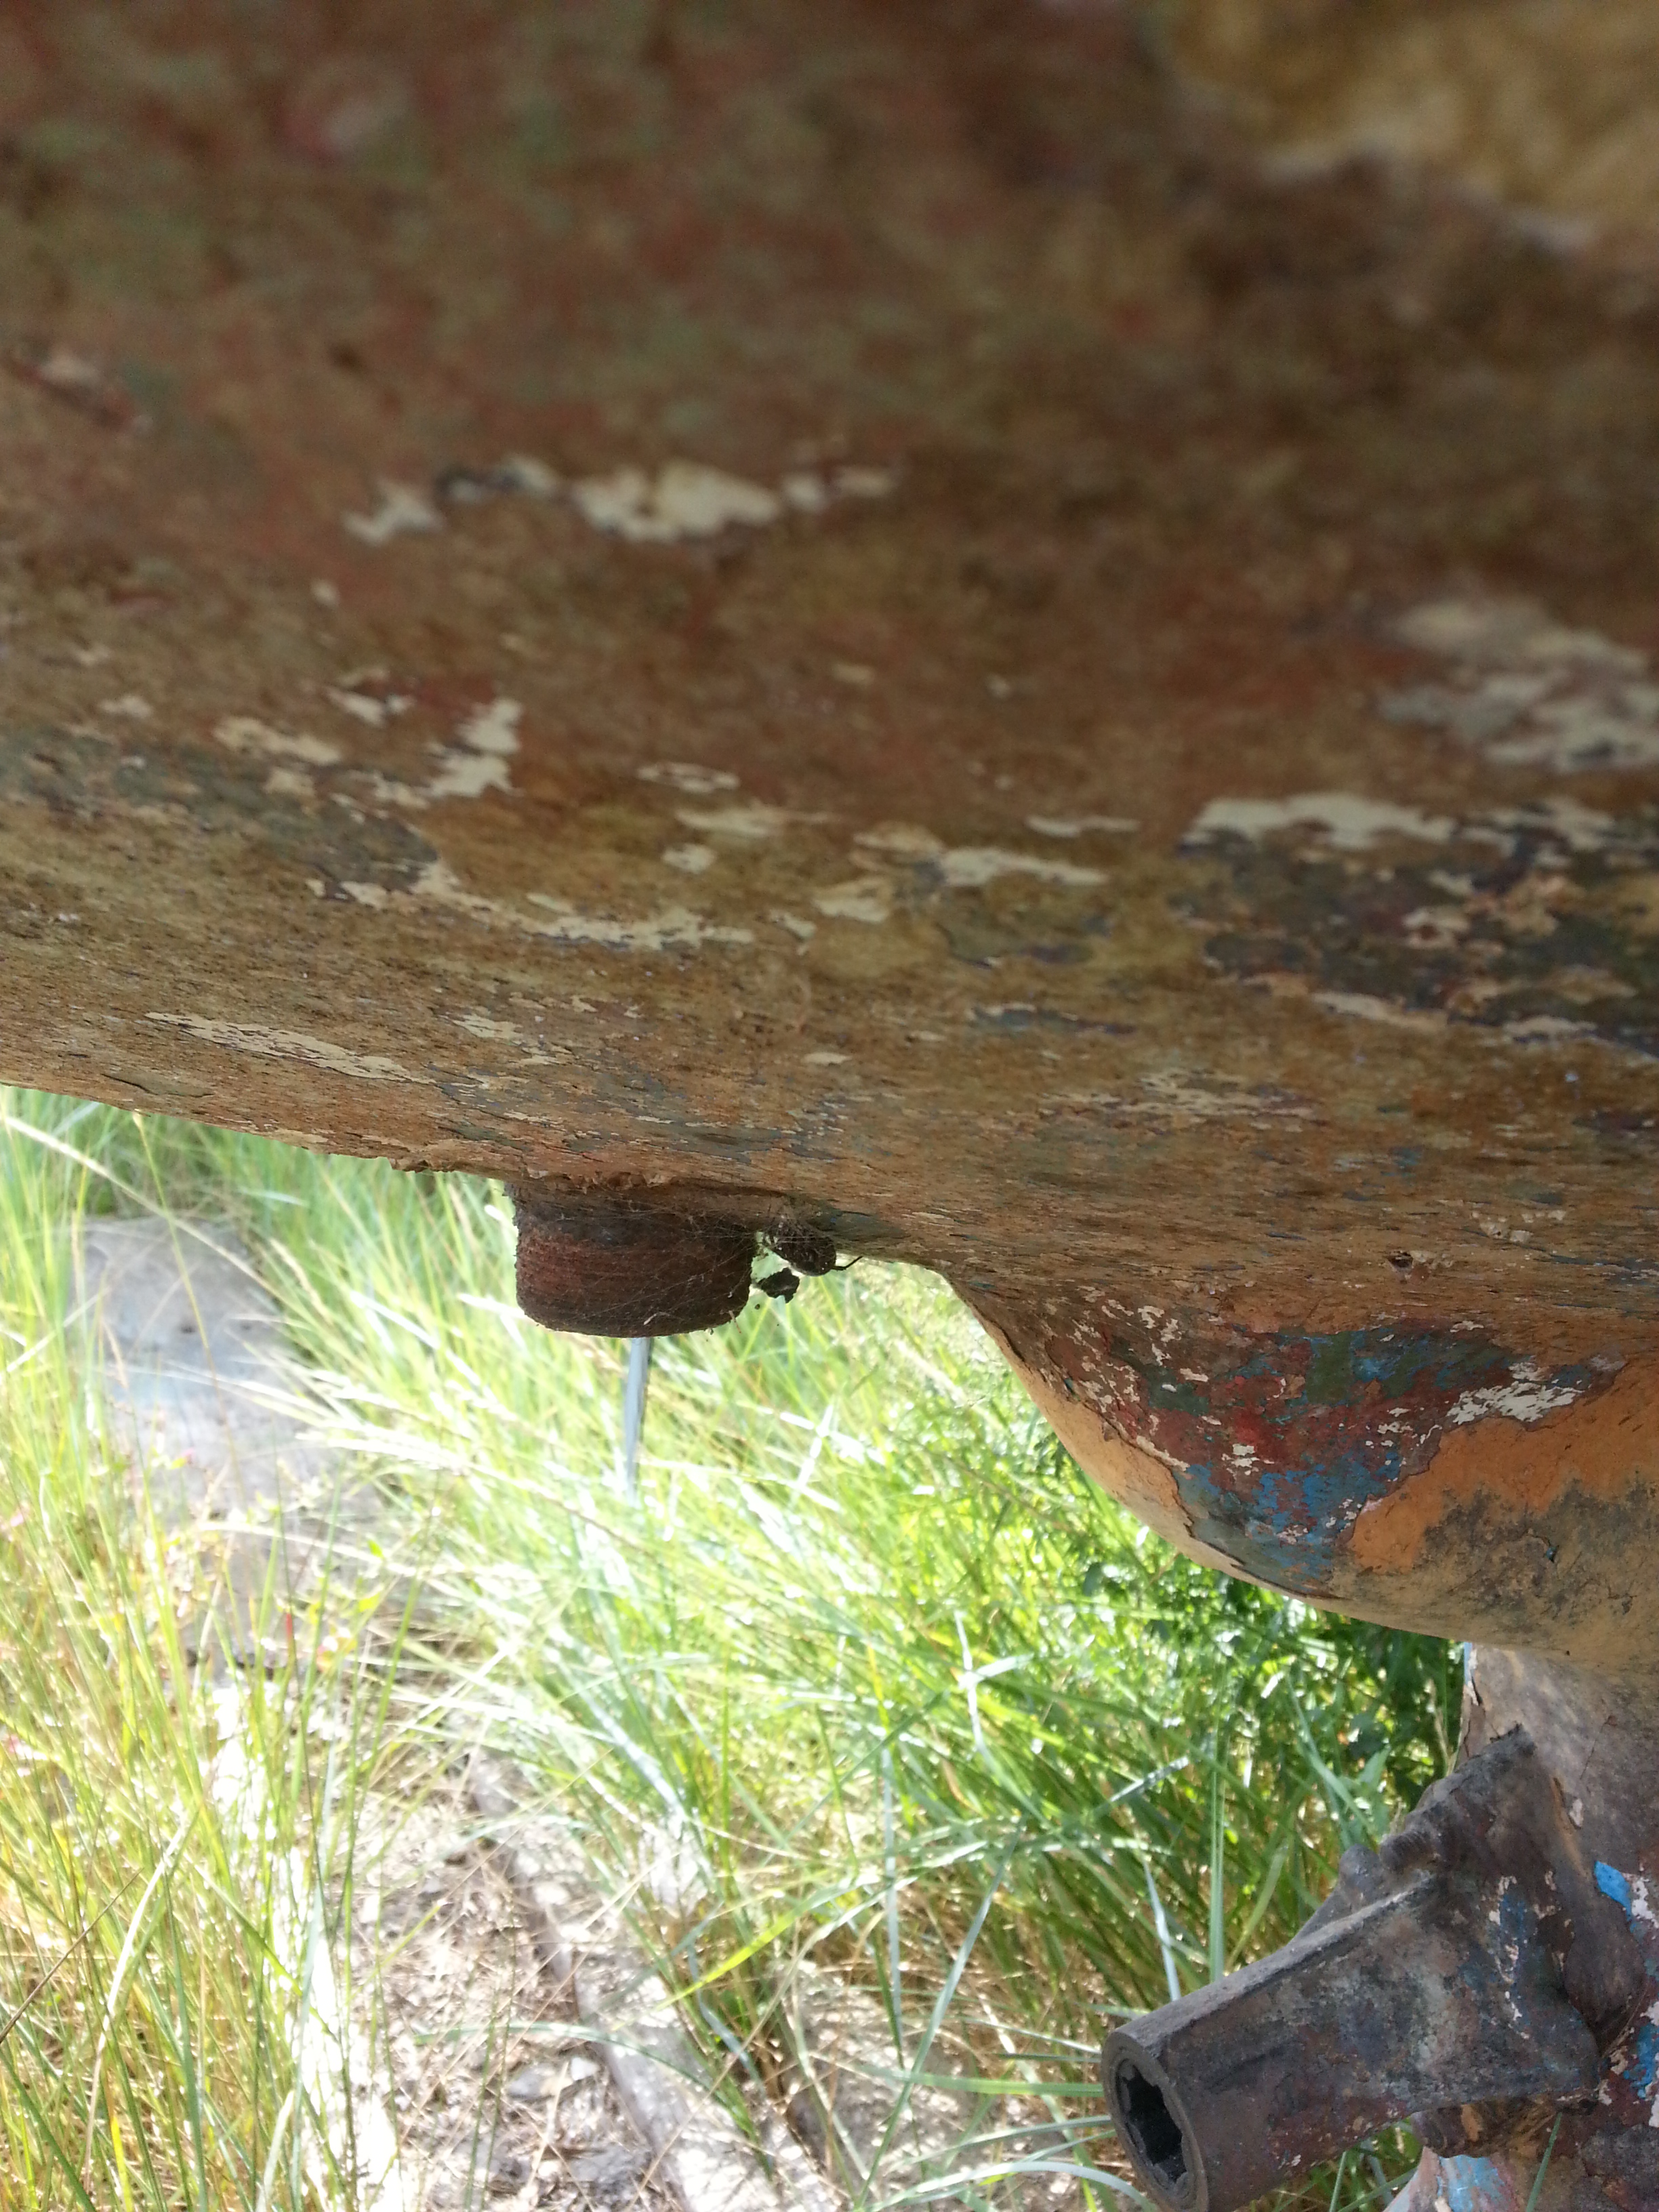
Stained underside, Tollesbury mud!
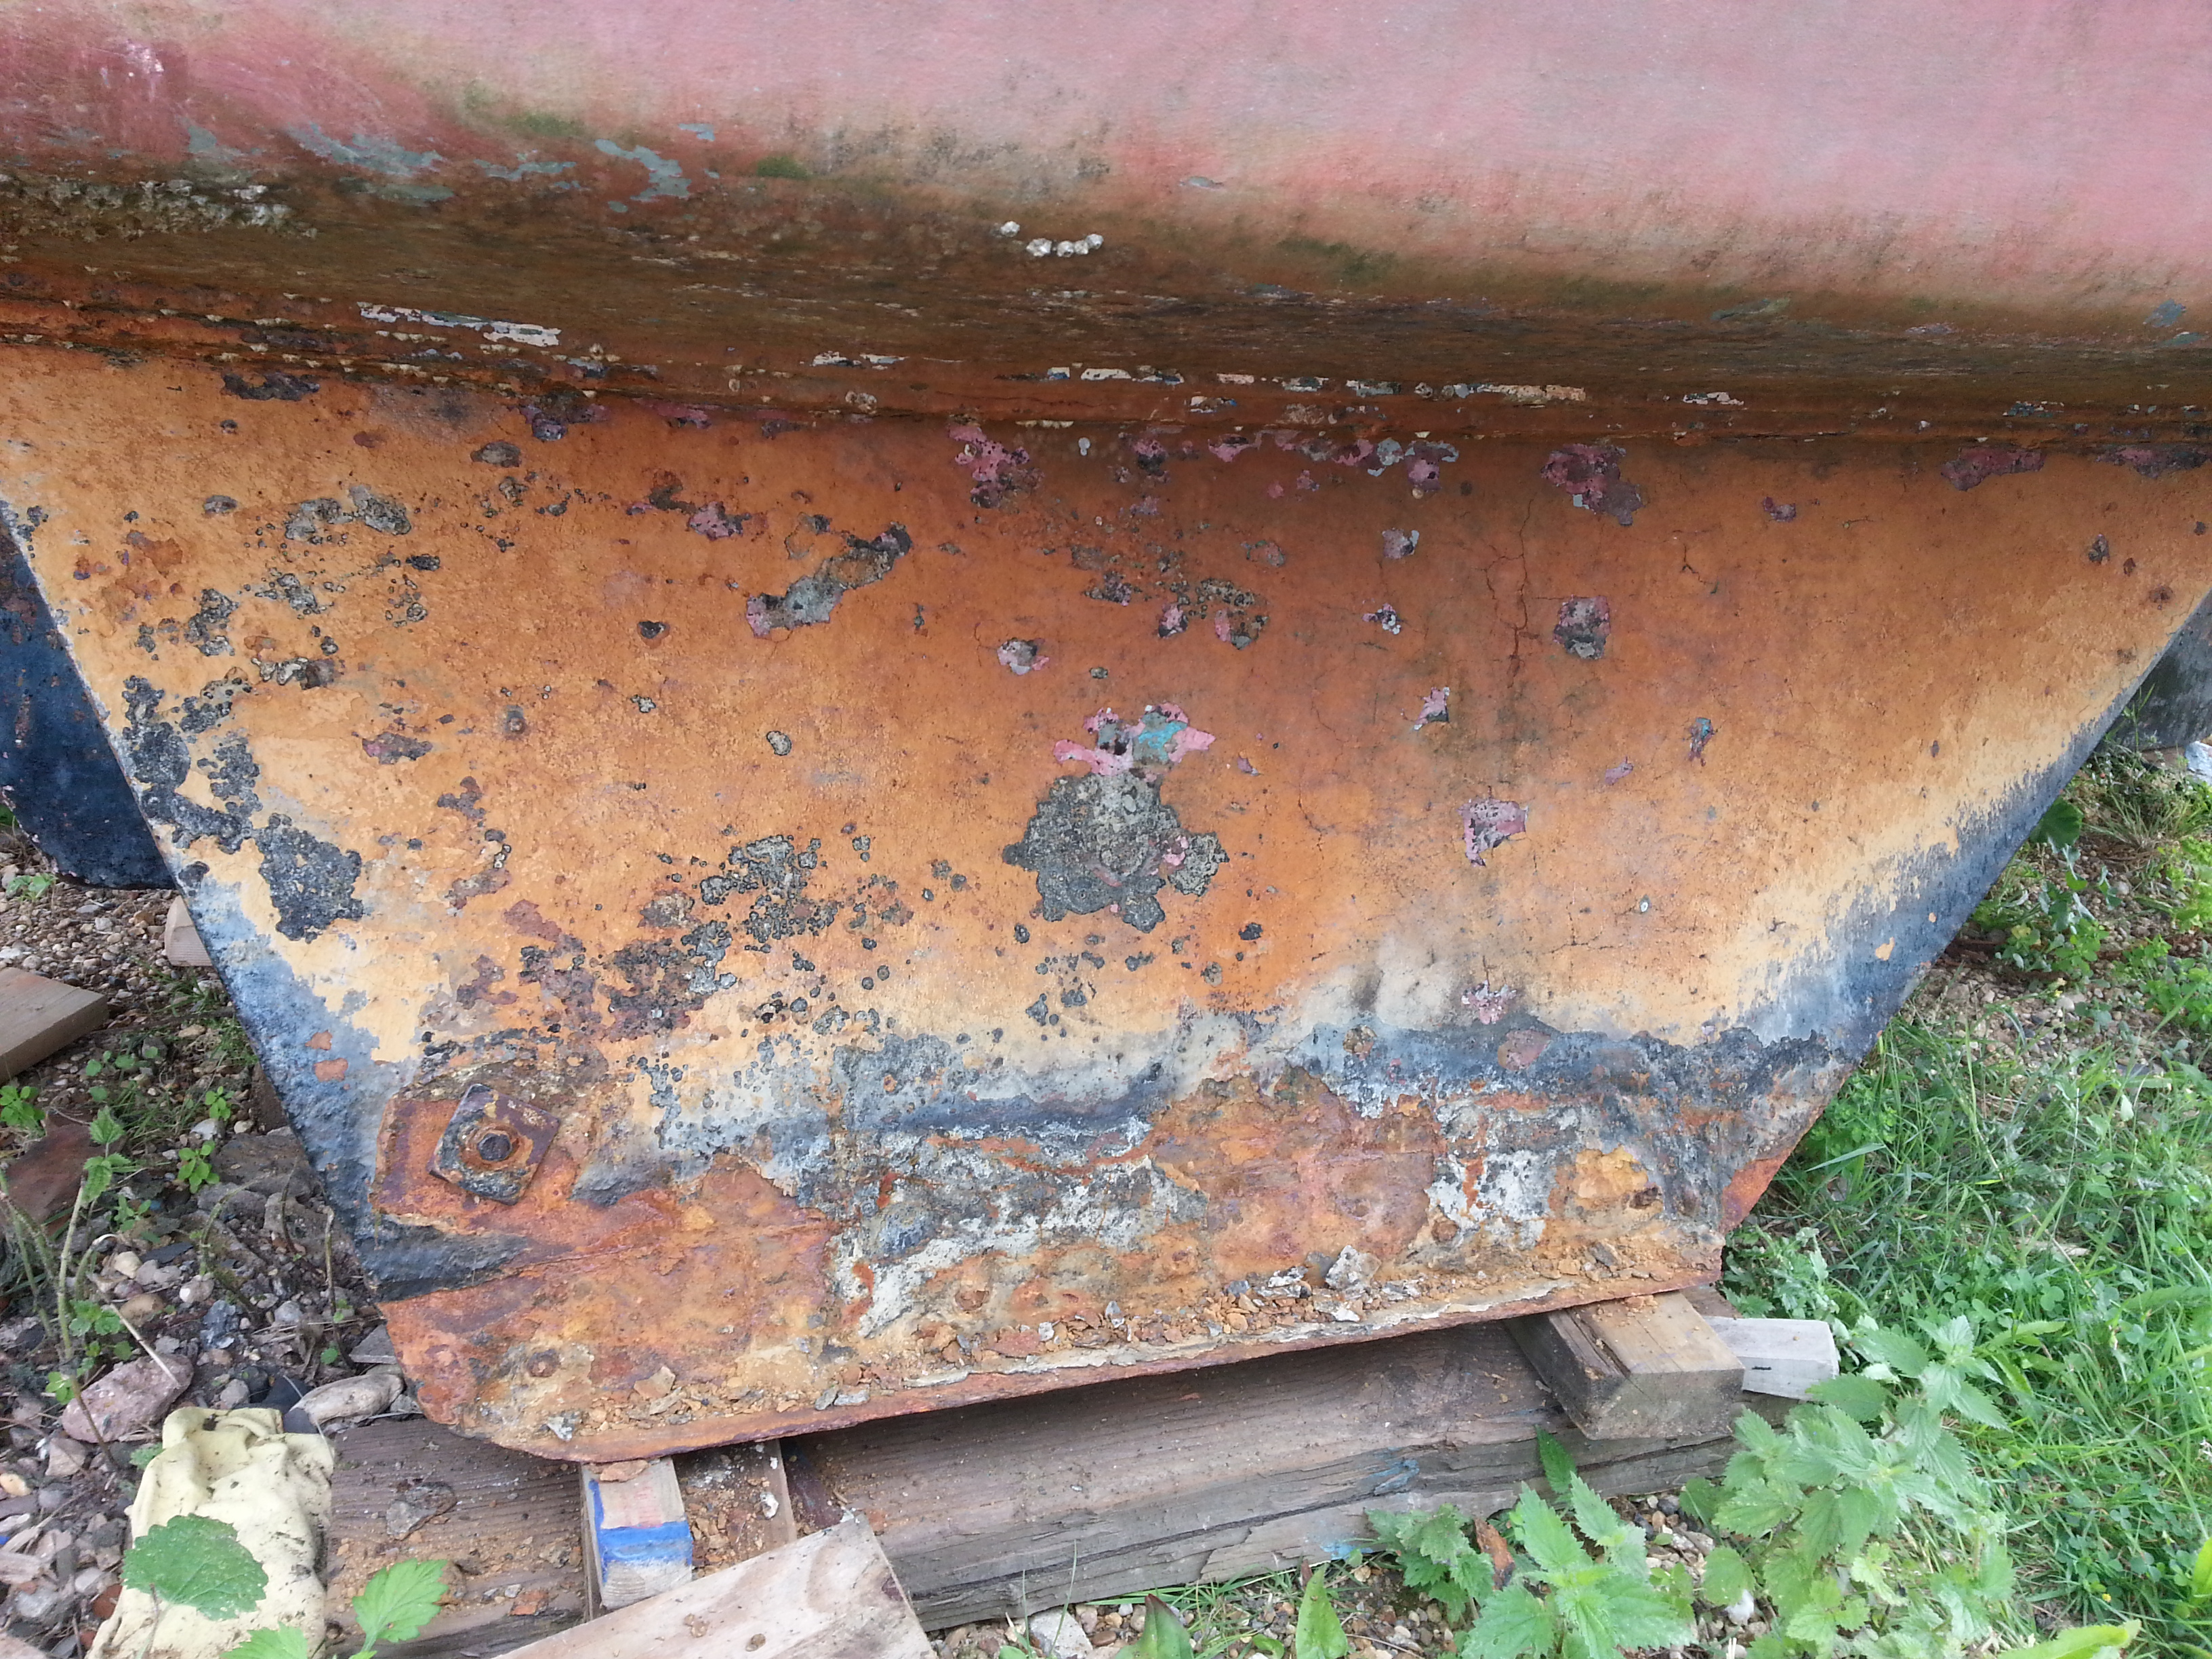
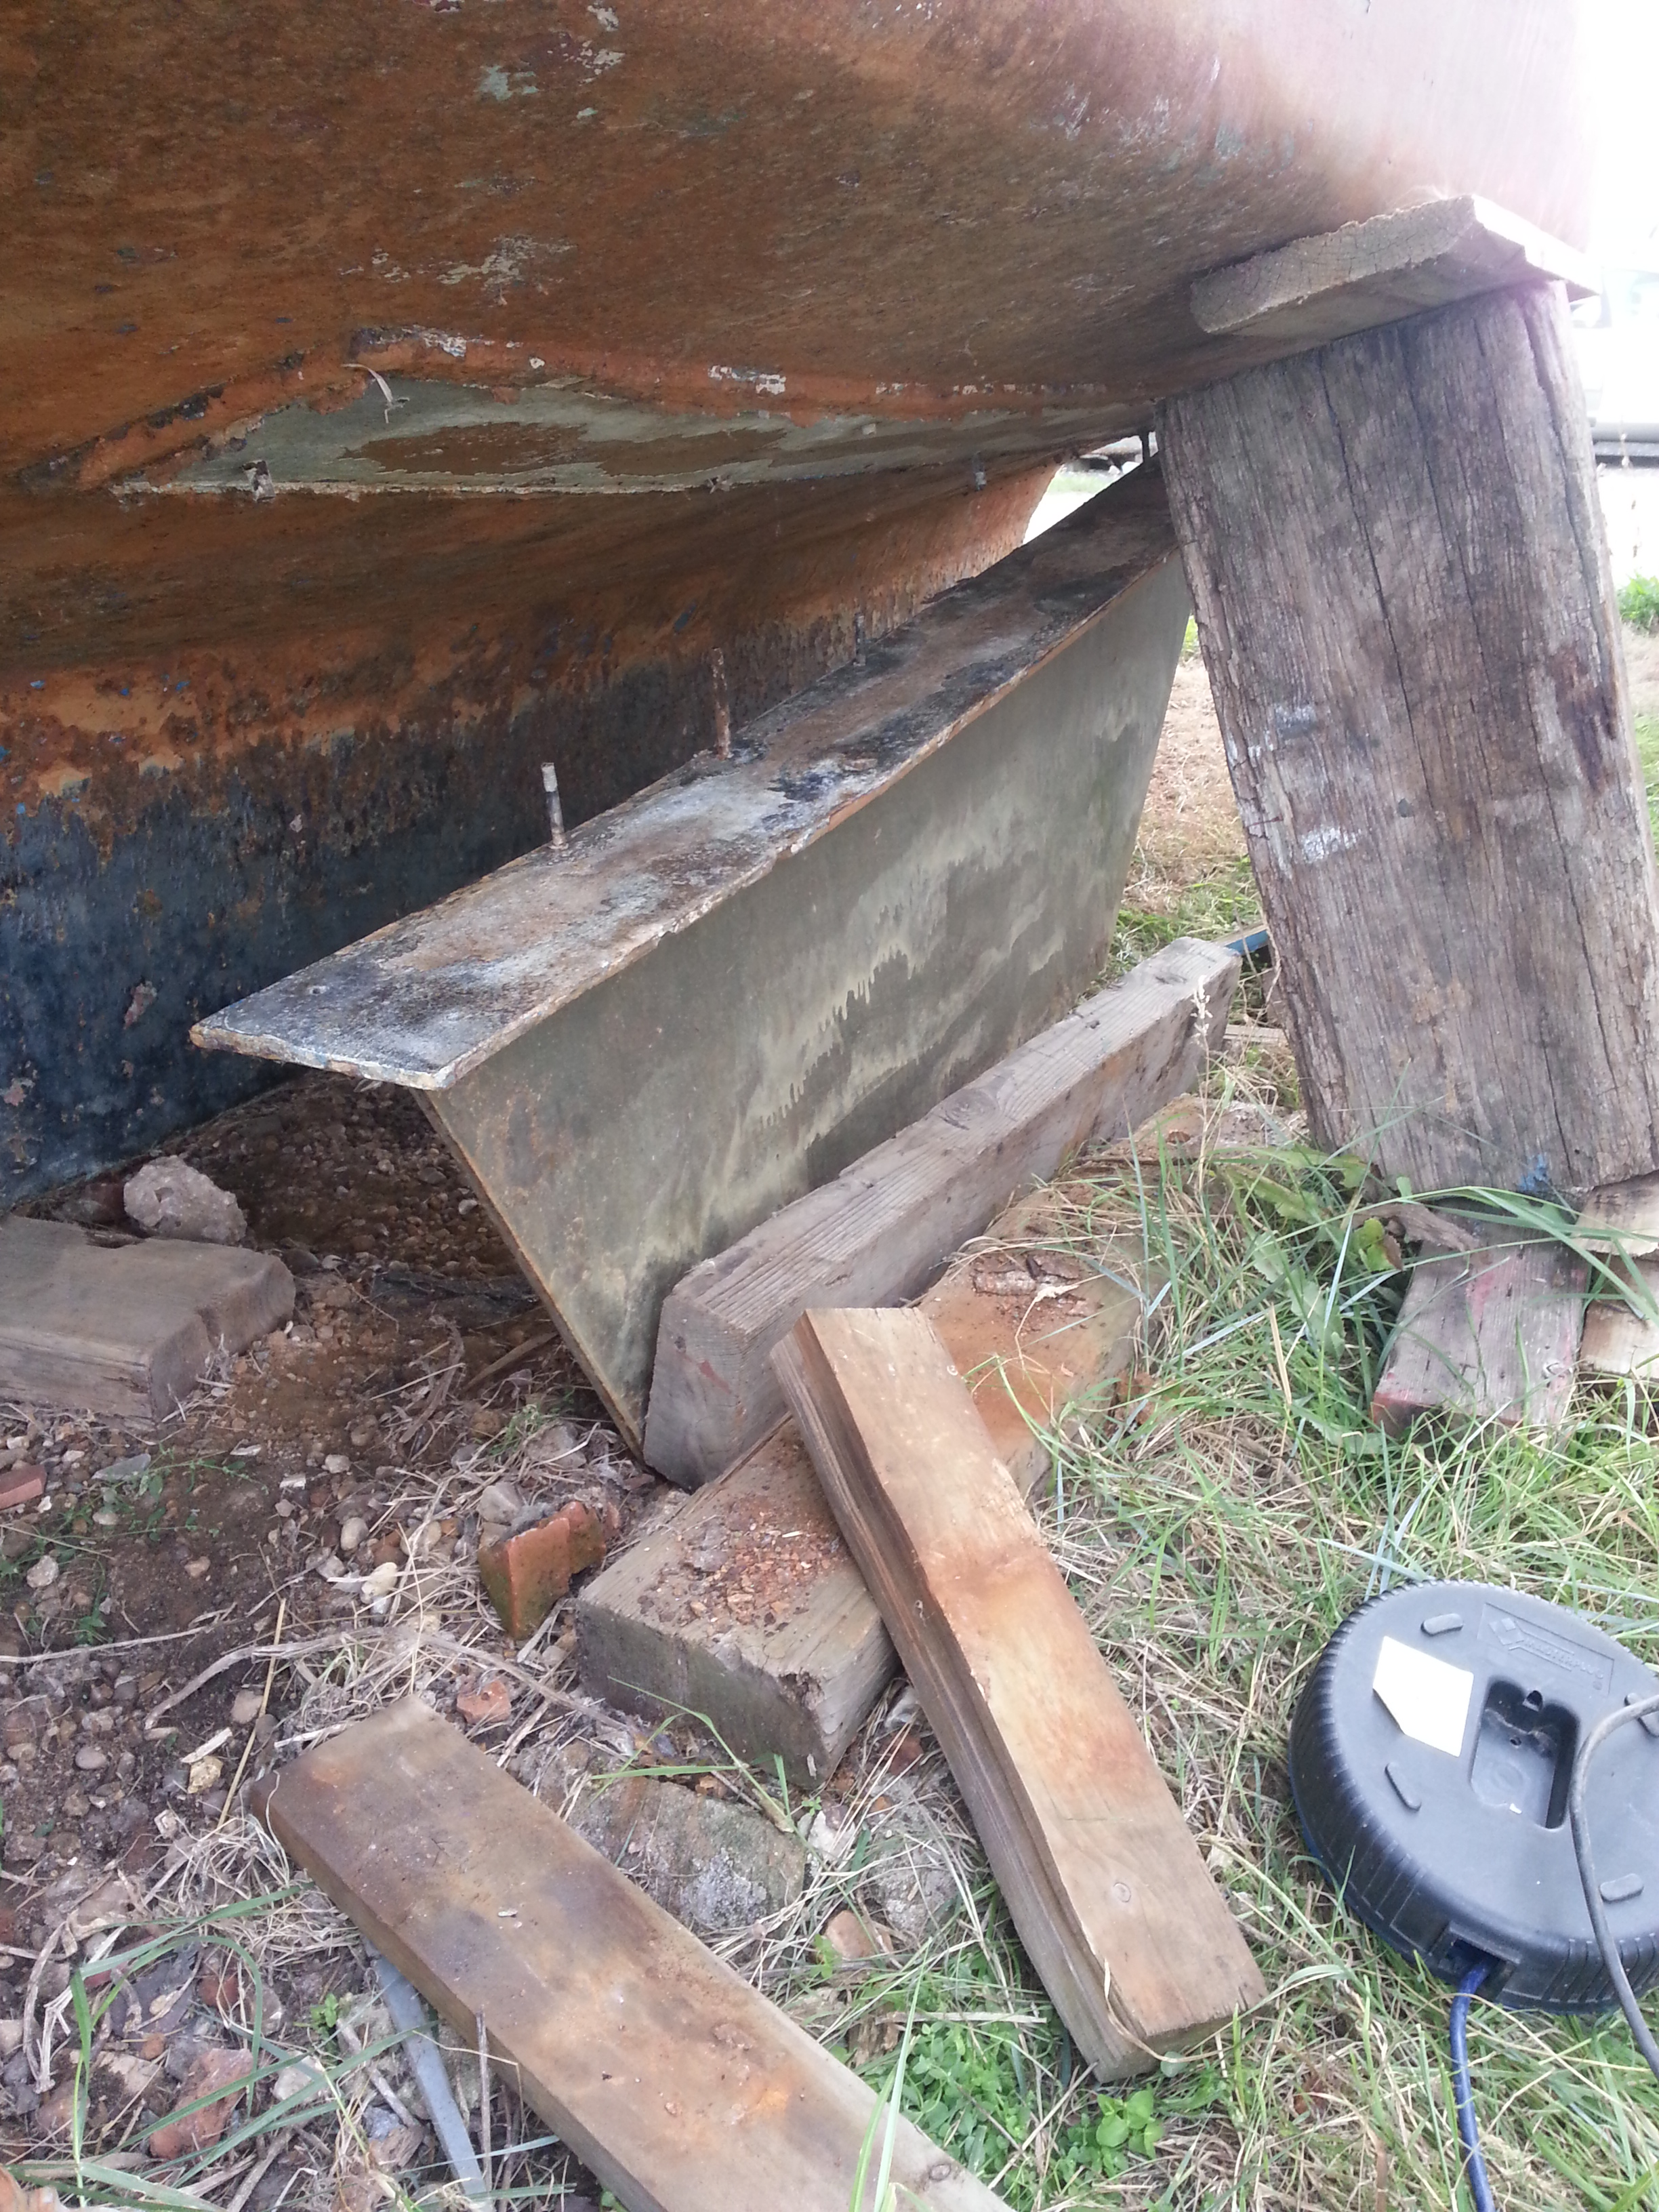
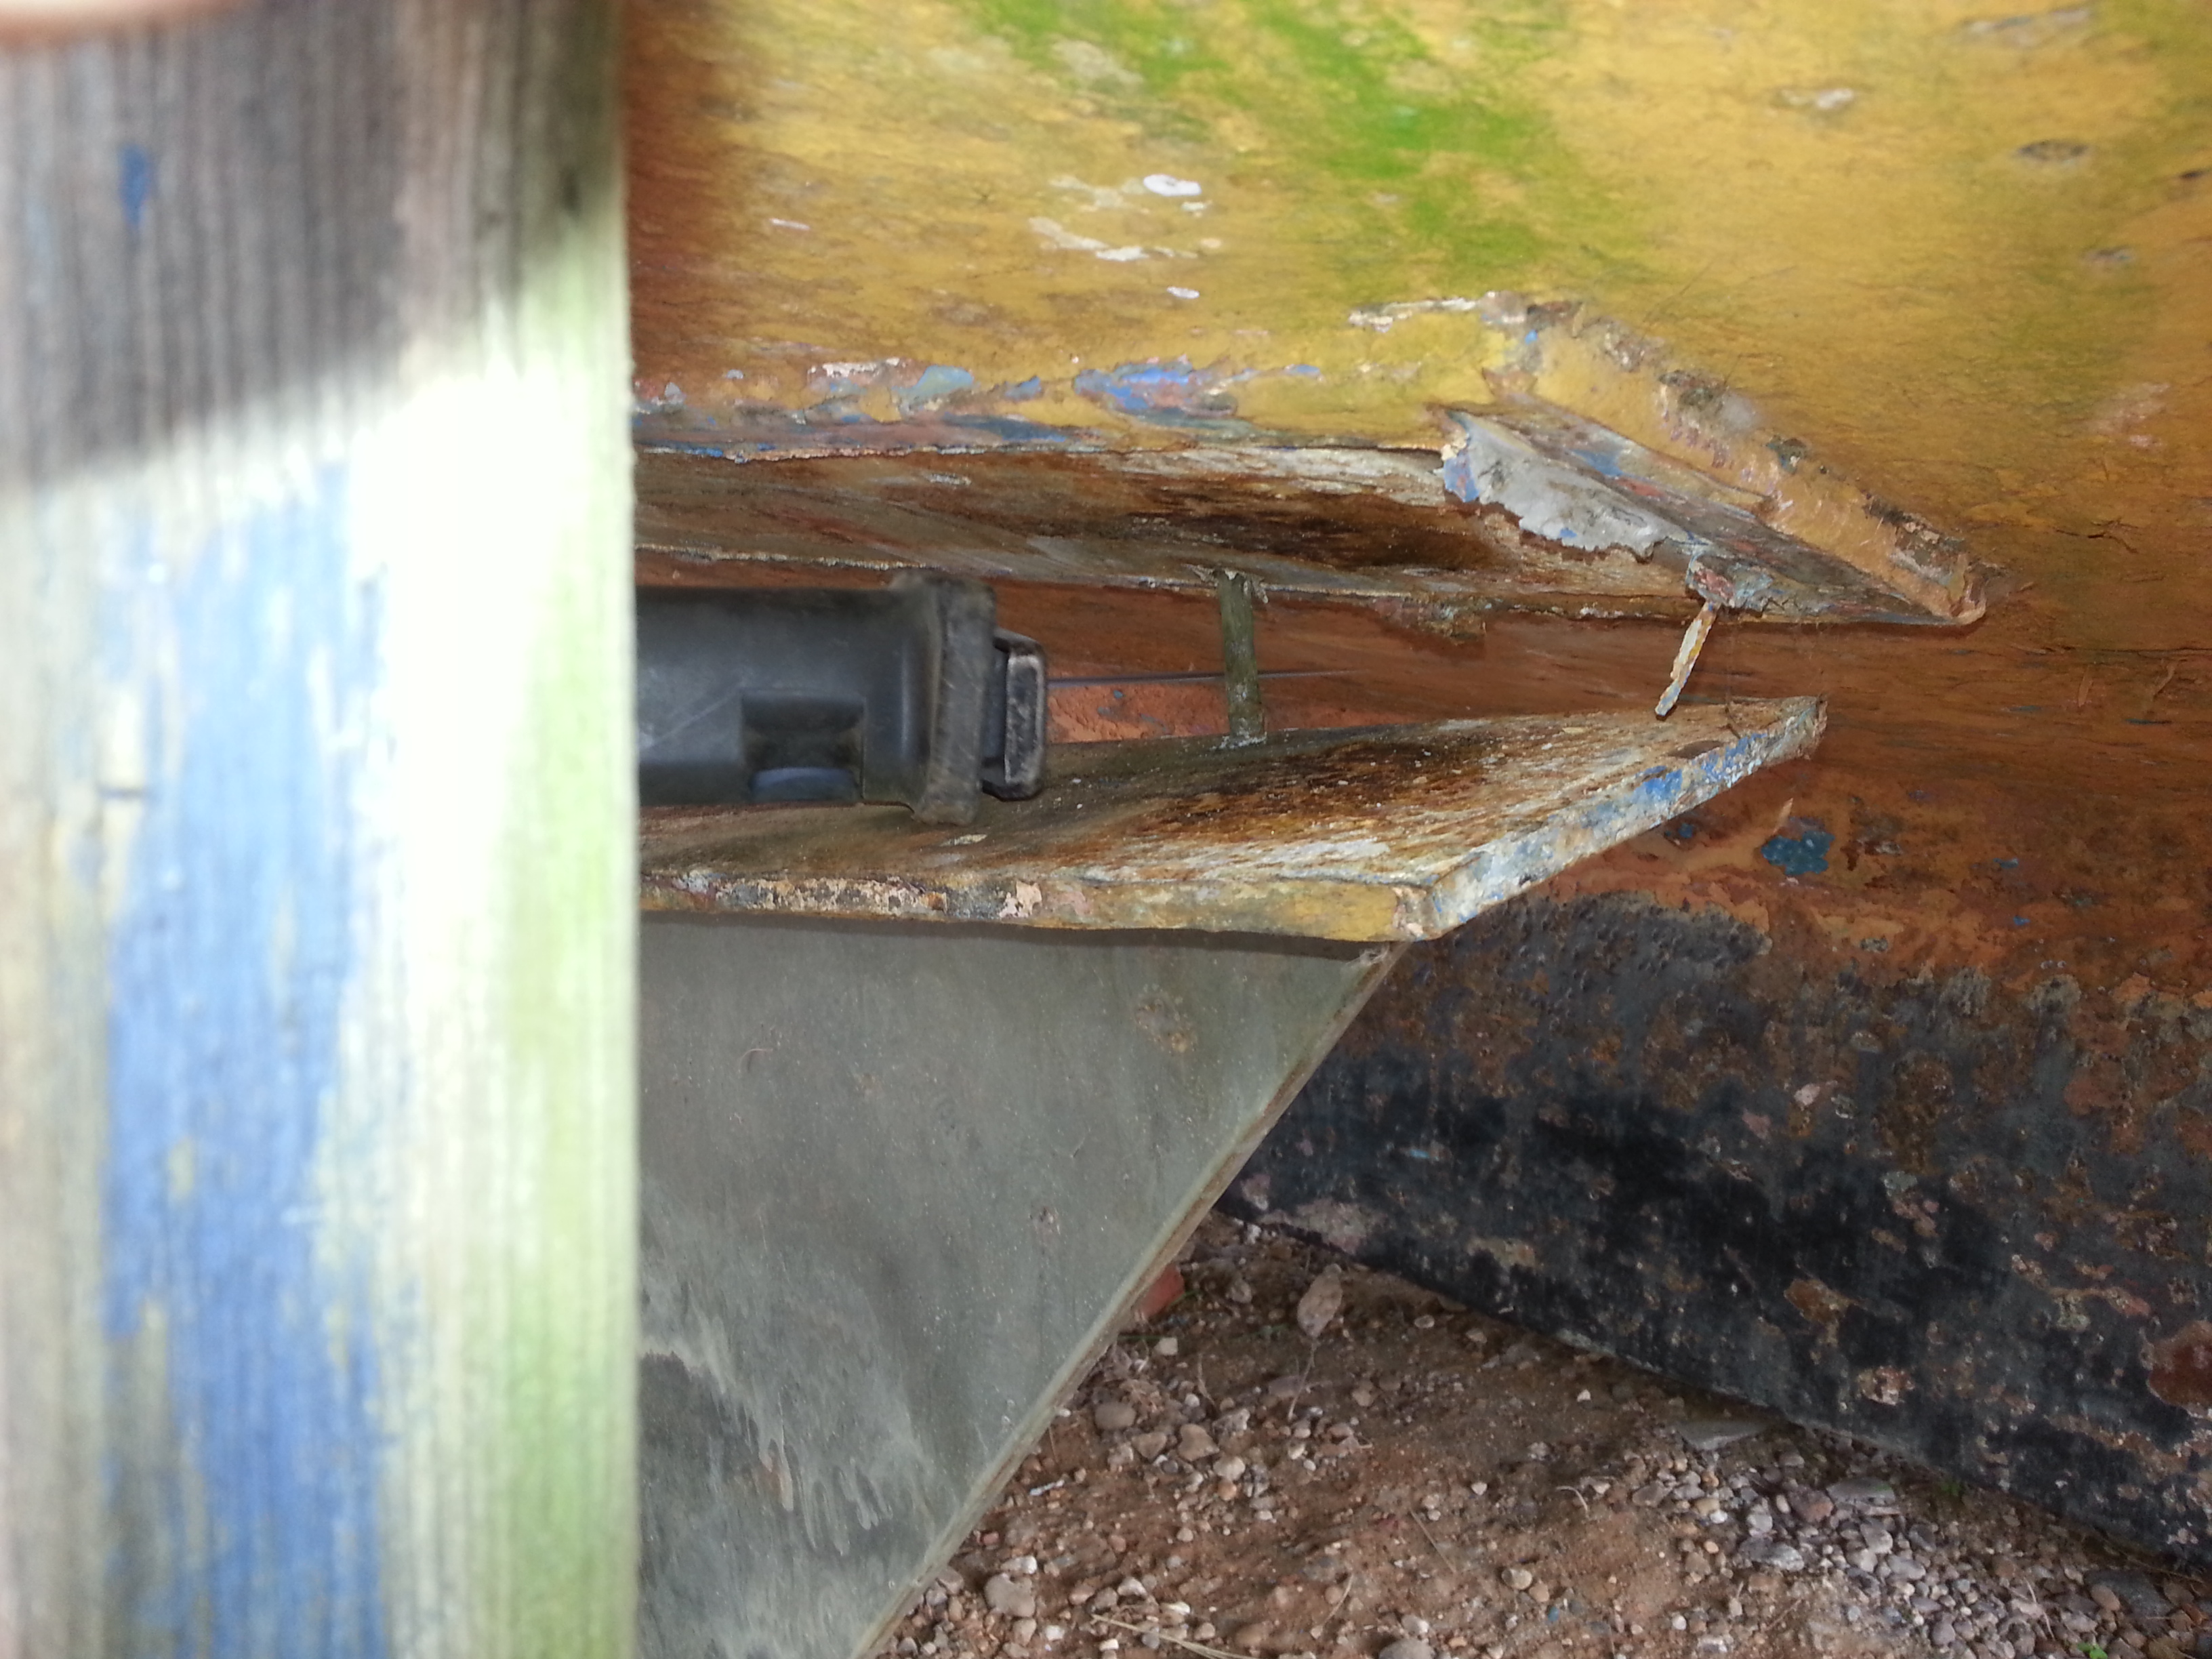
Rusty bilge keel, deep cleaning needed.
2016. Glasstide had been slumbering on a mud berth for years whilst John S was working all the hours of all days of the year and also suffering a few bouts of poor health, probably as a result of the stress he was under. Then came retirement day, slightly early retirement and at last the opportunity to enjoy the boat.
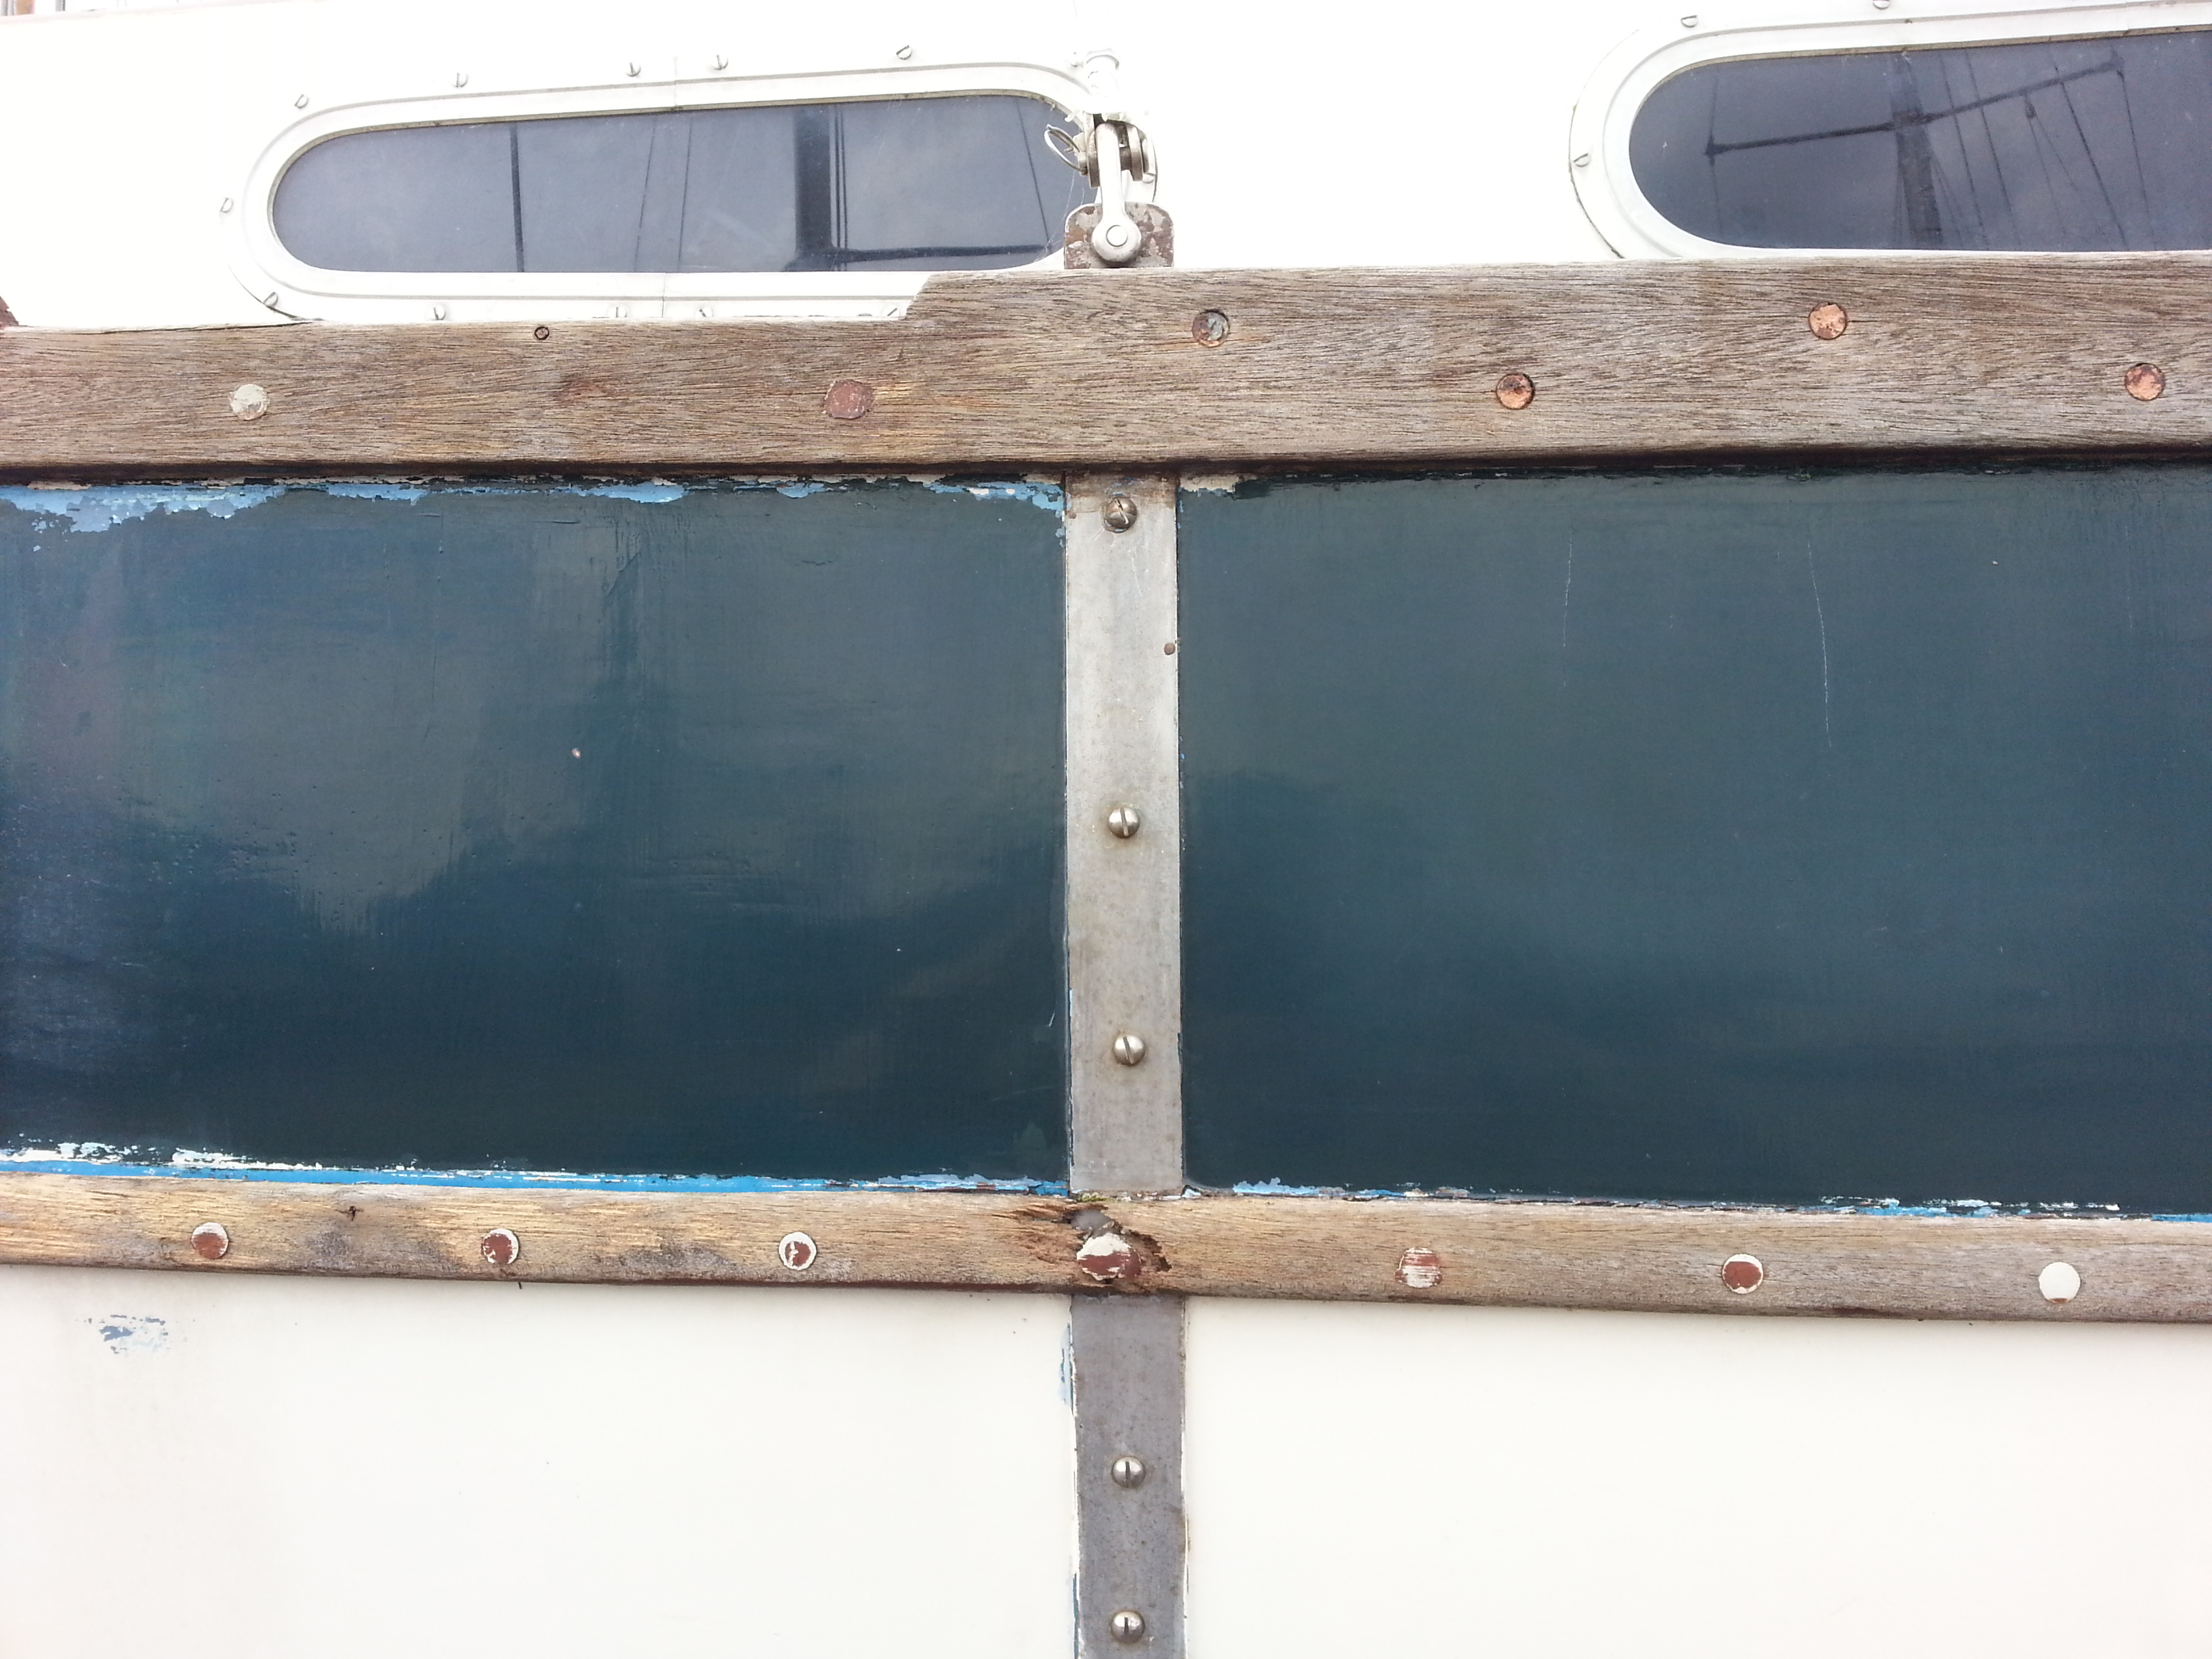
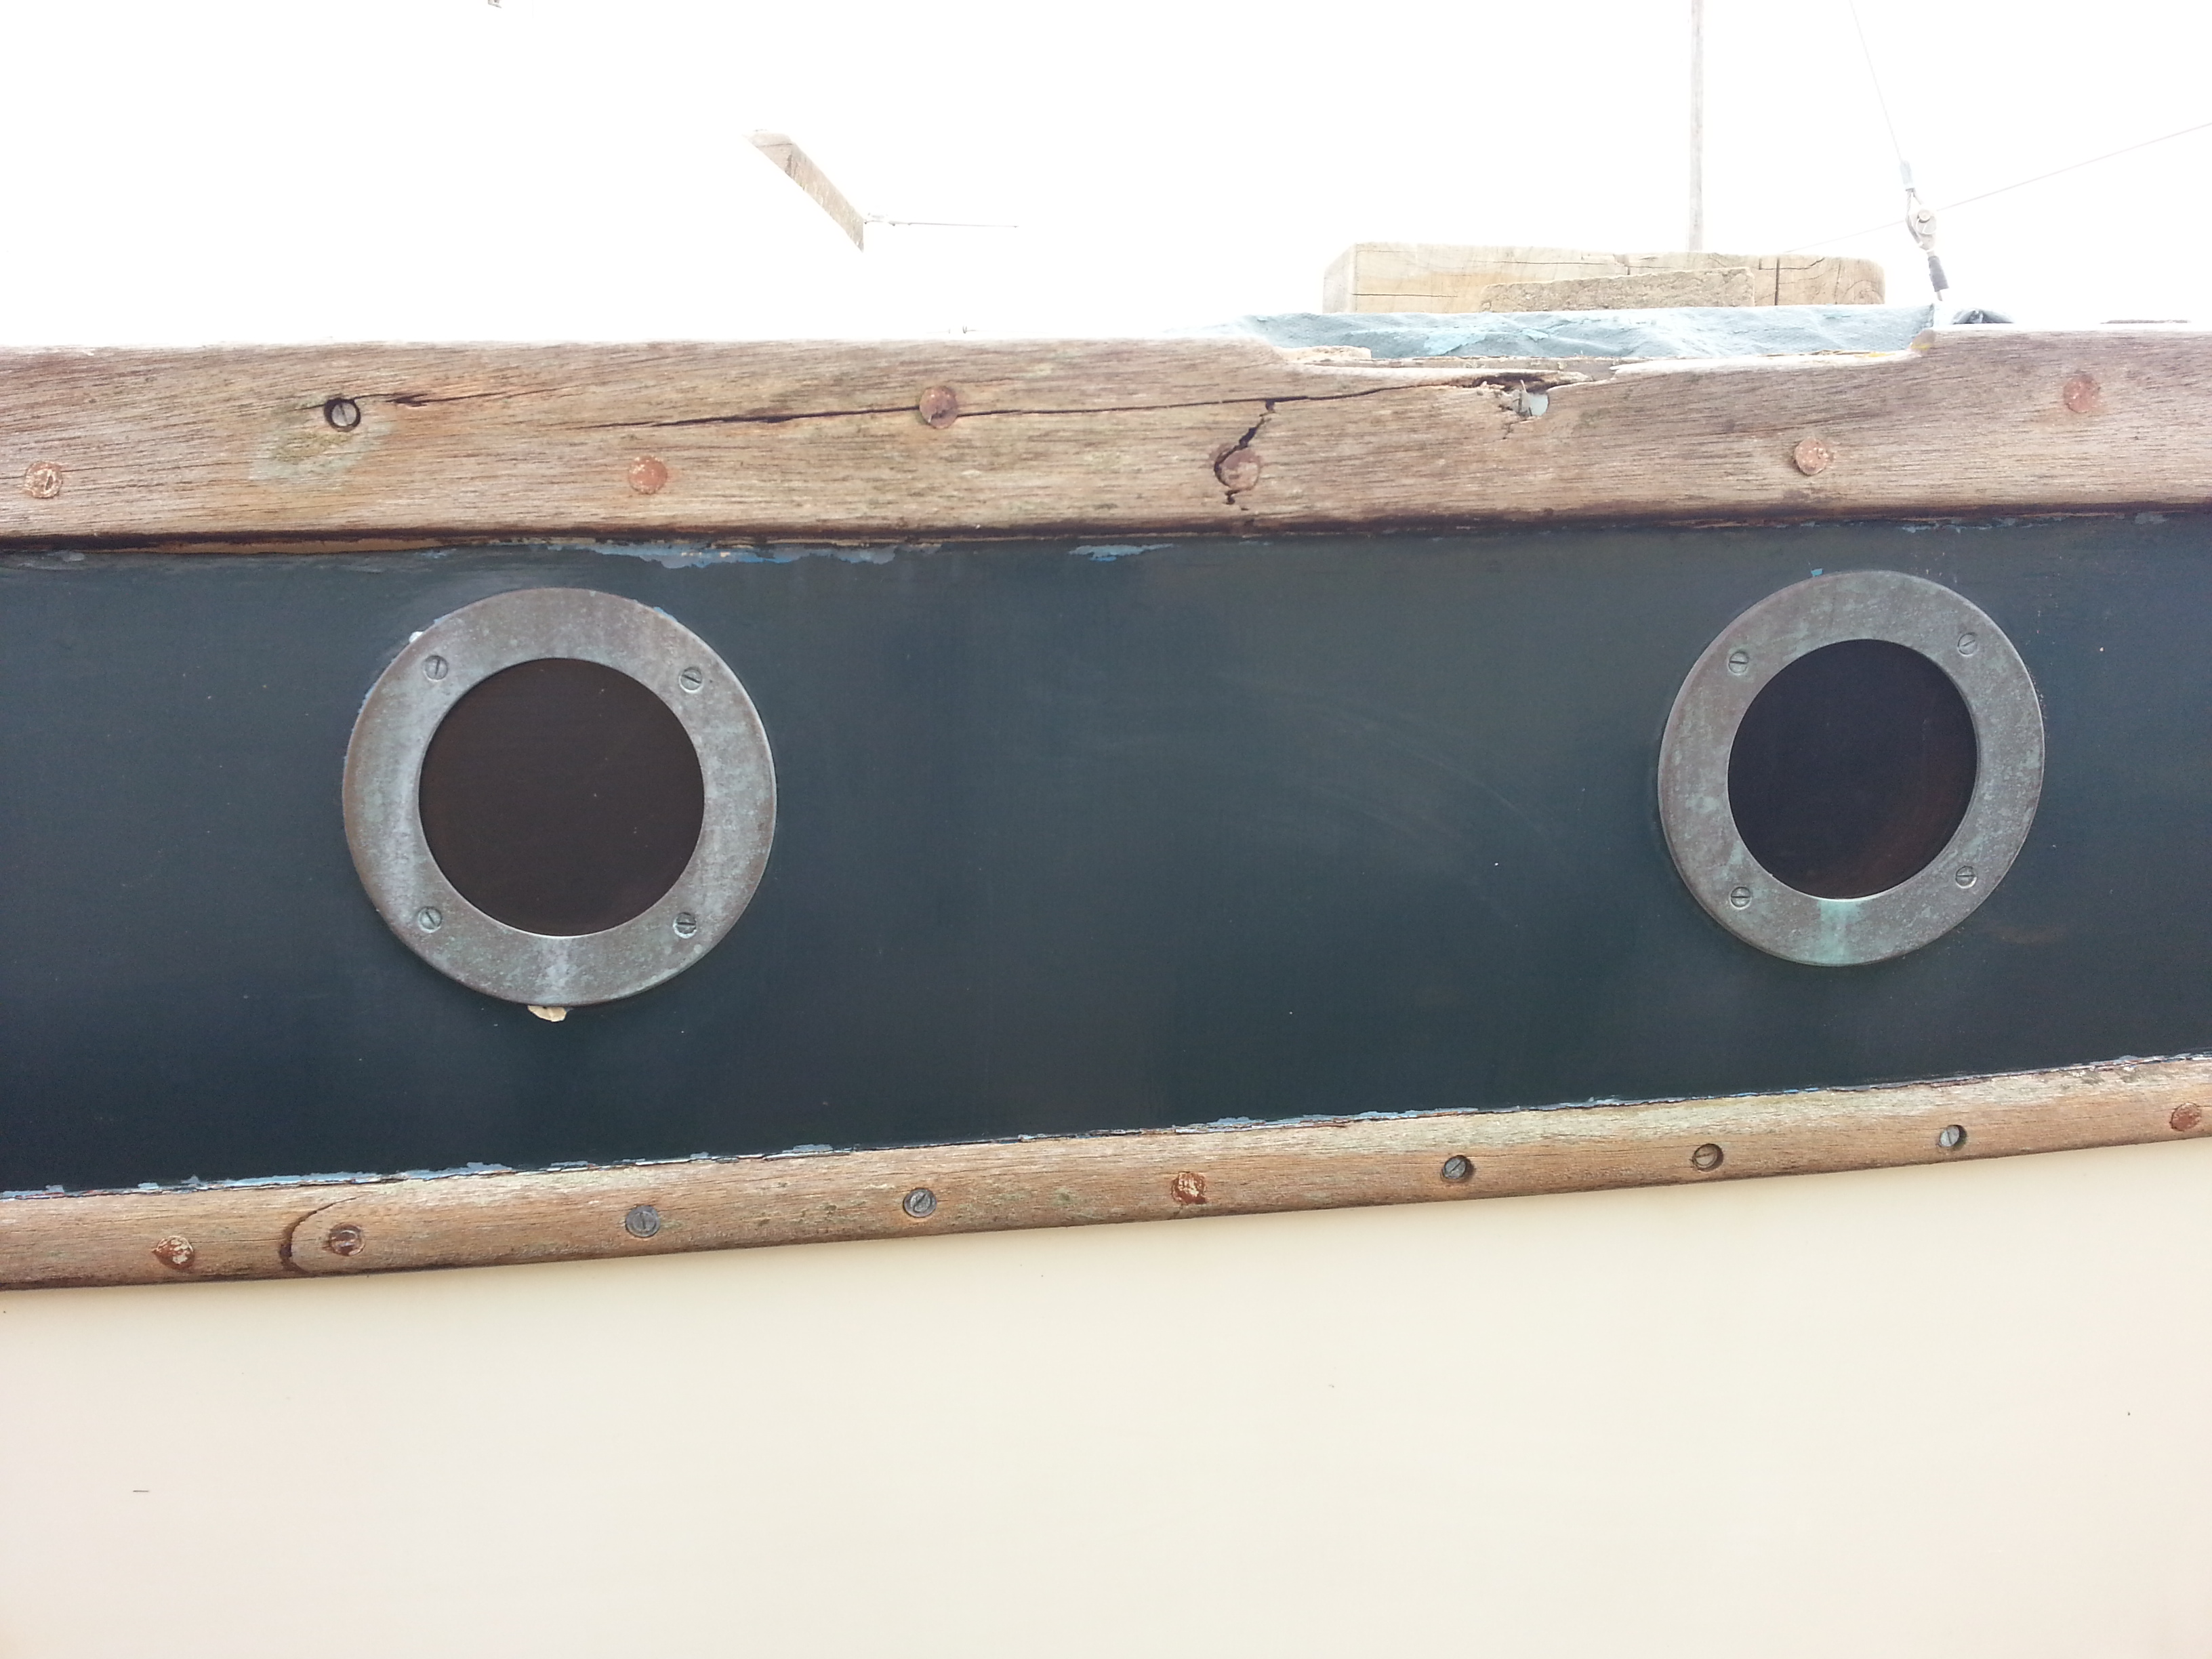
In early July 2016 I went down to meet with him at Tollesbury and walked along the sea wall to look at her. She did look a state, mud had splattered up the sides and there was green algae nearly half way up the topsides, lichen growing on deck in large patches, part of the rubbing strake had rotted off and other parts looked sad.
The hatches looked bad as the thin veneers added to the top had buckled and come away where they had been so badly glued. They had not withstood the elements as there had been no other protection.
But I had a plan! I offered to rebuild the main hatch and the aft locker hatch, removing the duff timber and then epoxy a grey Treadmaster covering over them.
The veneers are so damaged in places they are best removed and the whole lot sanded back to the underlying timber. Seems to me the veneer was simply glued onto an existing hatch in both cases.
The forehatch, well we had a stroke of luck, I acquired a very nice used Houdini glass hatch and John had bought this, so I just had to make a timber frame and epoxy it to the deck to fit it. (found later it would not quite fit, so instead I repaired his old hatch...).
The rubbing strake damage would be trickier but I had some suitable timber and another member, with a woodworking workshop, offered to machine it to shape, for the swap of a few other bits of timber I had lying about.
The bowsprit had split, but again I thought I should have enough good timber to make a new one. I will also make it longer to lessen the weatherhelm...
John S had his replacement motor in the back of his car, the idea was to have Russell the engineer check over the GM10 9hp diesel John S had purchased some time back and we would remove the Volvo, which was now running happily again and he could sell it, great for a 22ft boat maybe! (He has videos of it running!)
I went to see the Yanmar GM10 delivered to the engineer Russell at Tollesbury who soon declared it to be in fine fettle, but would do a top end overhaul, grinding valves and the like to make sure it would be good for years to come. Oil, Filters and some pipe work to be changed.
John S had started making plans and collecting kit, as had I. We traced a tabernacle that has once graced the deck of the Eventide 'Seawitch' that he owned for a while... He bought it back! (He owned Seawitch for a while, but it was found to be terminally rotten and cut up). I grabbed the tabernacle and would convert it for use on Glasstide. I would modify the mast to suit and John S would make mast lowering kit and buy triple pulley blocks etc.
Add to this the new cooker, new fuel tank, new loo and we had a major job on....
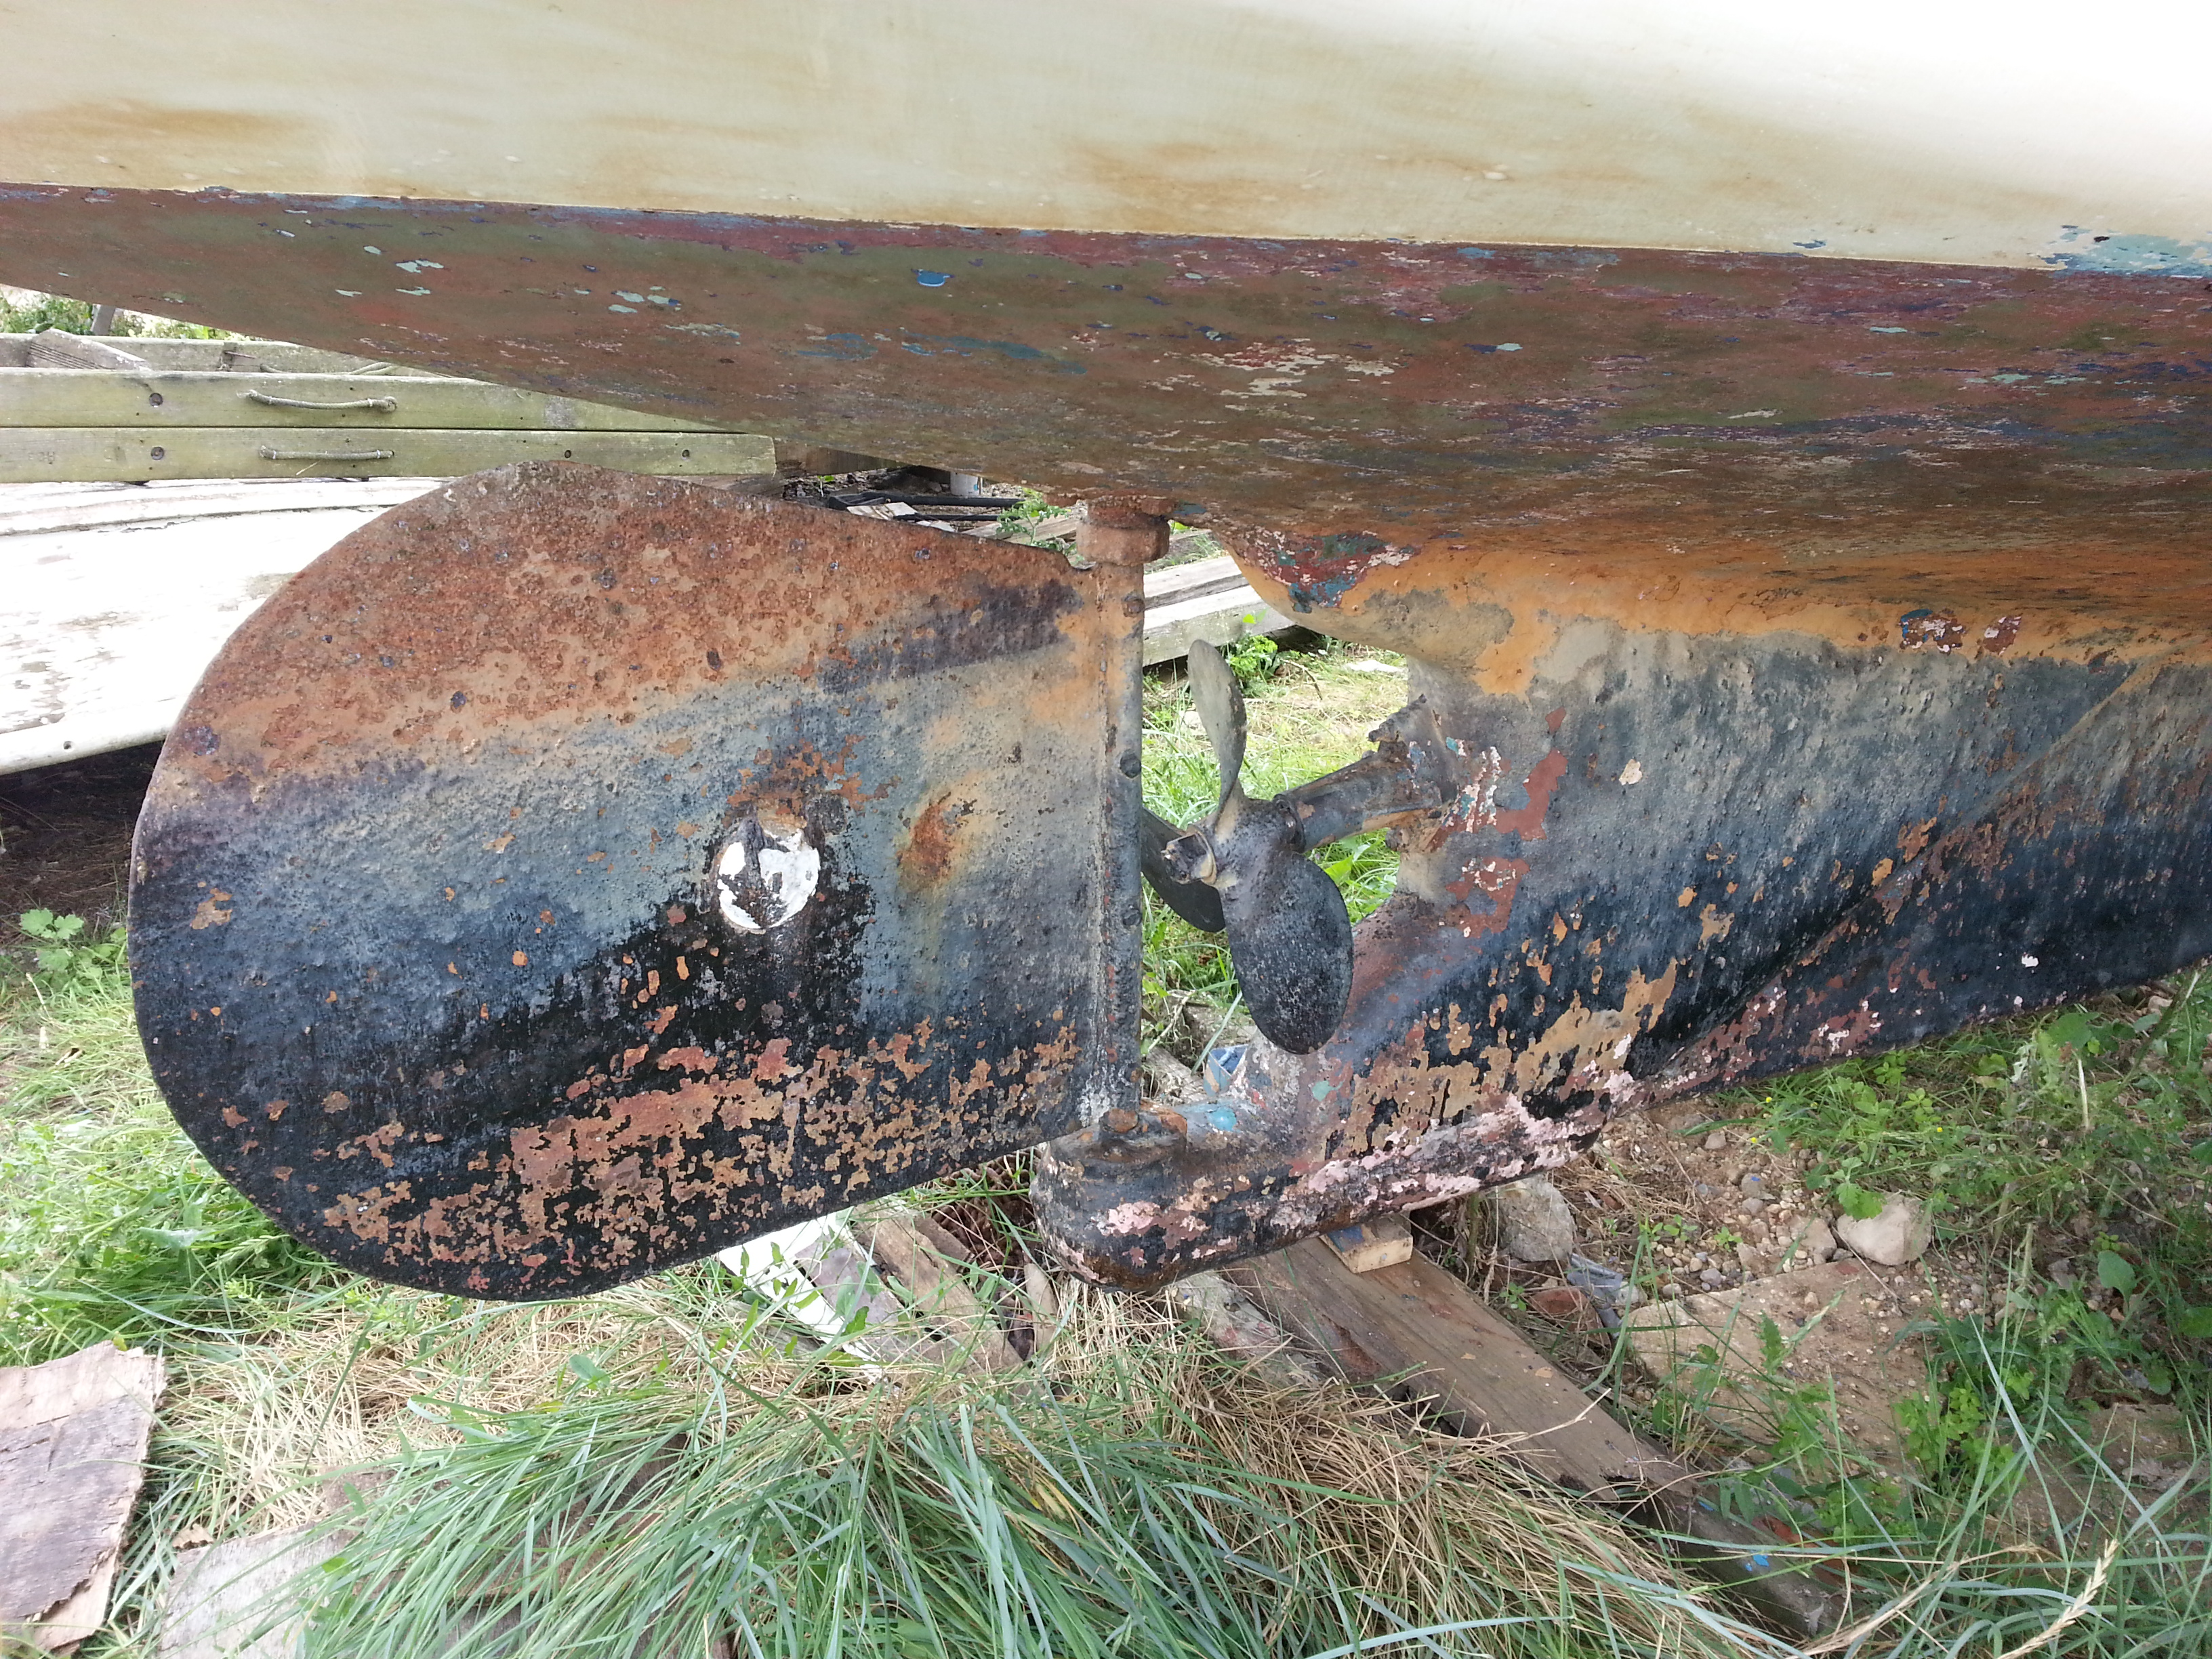
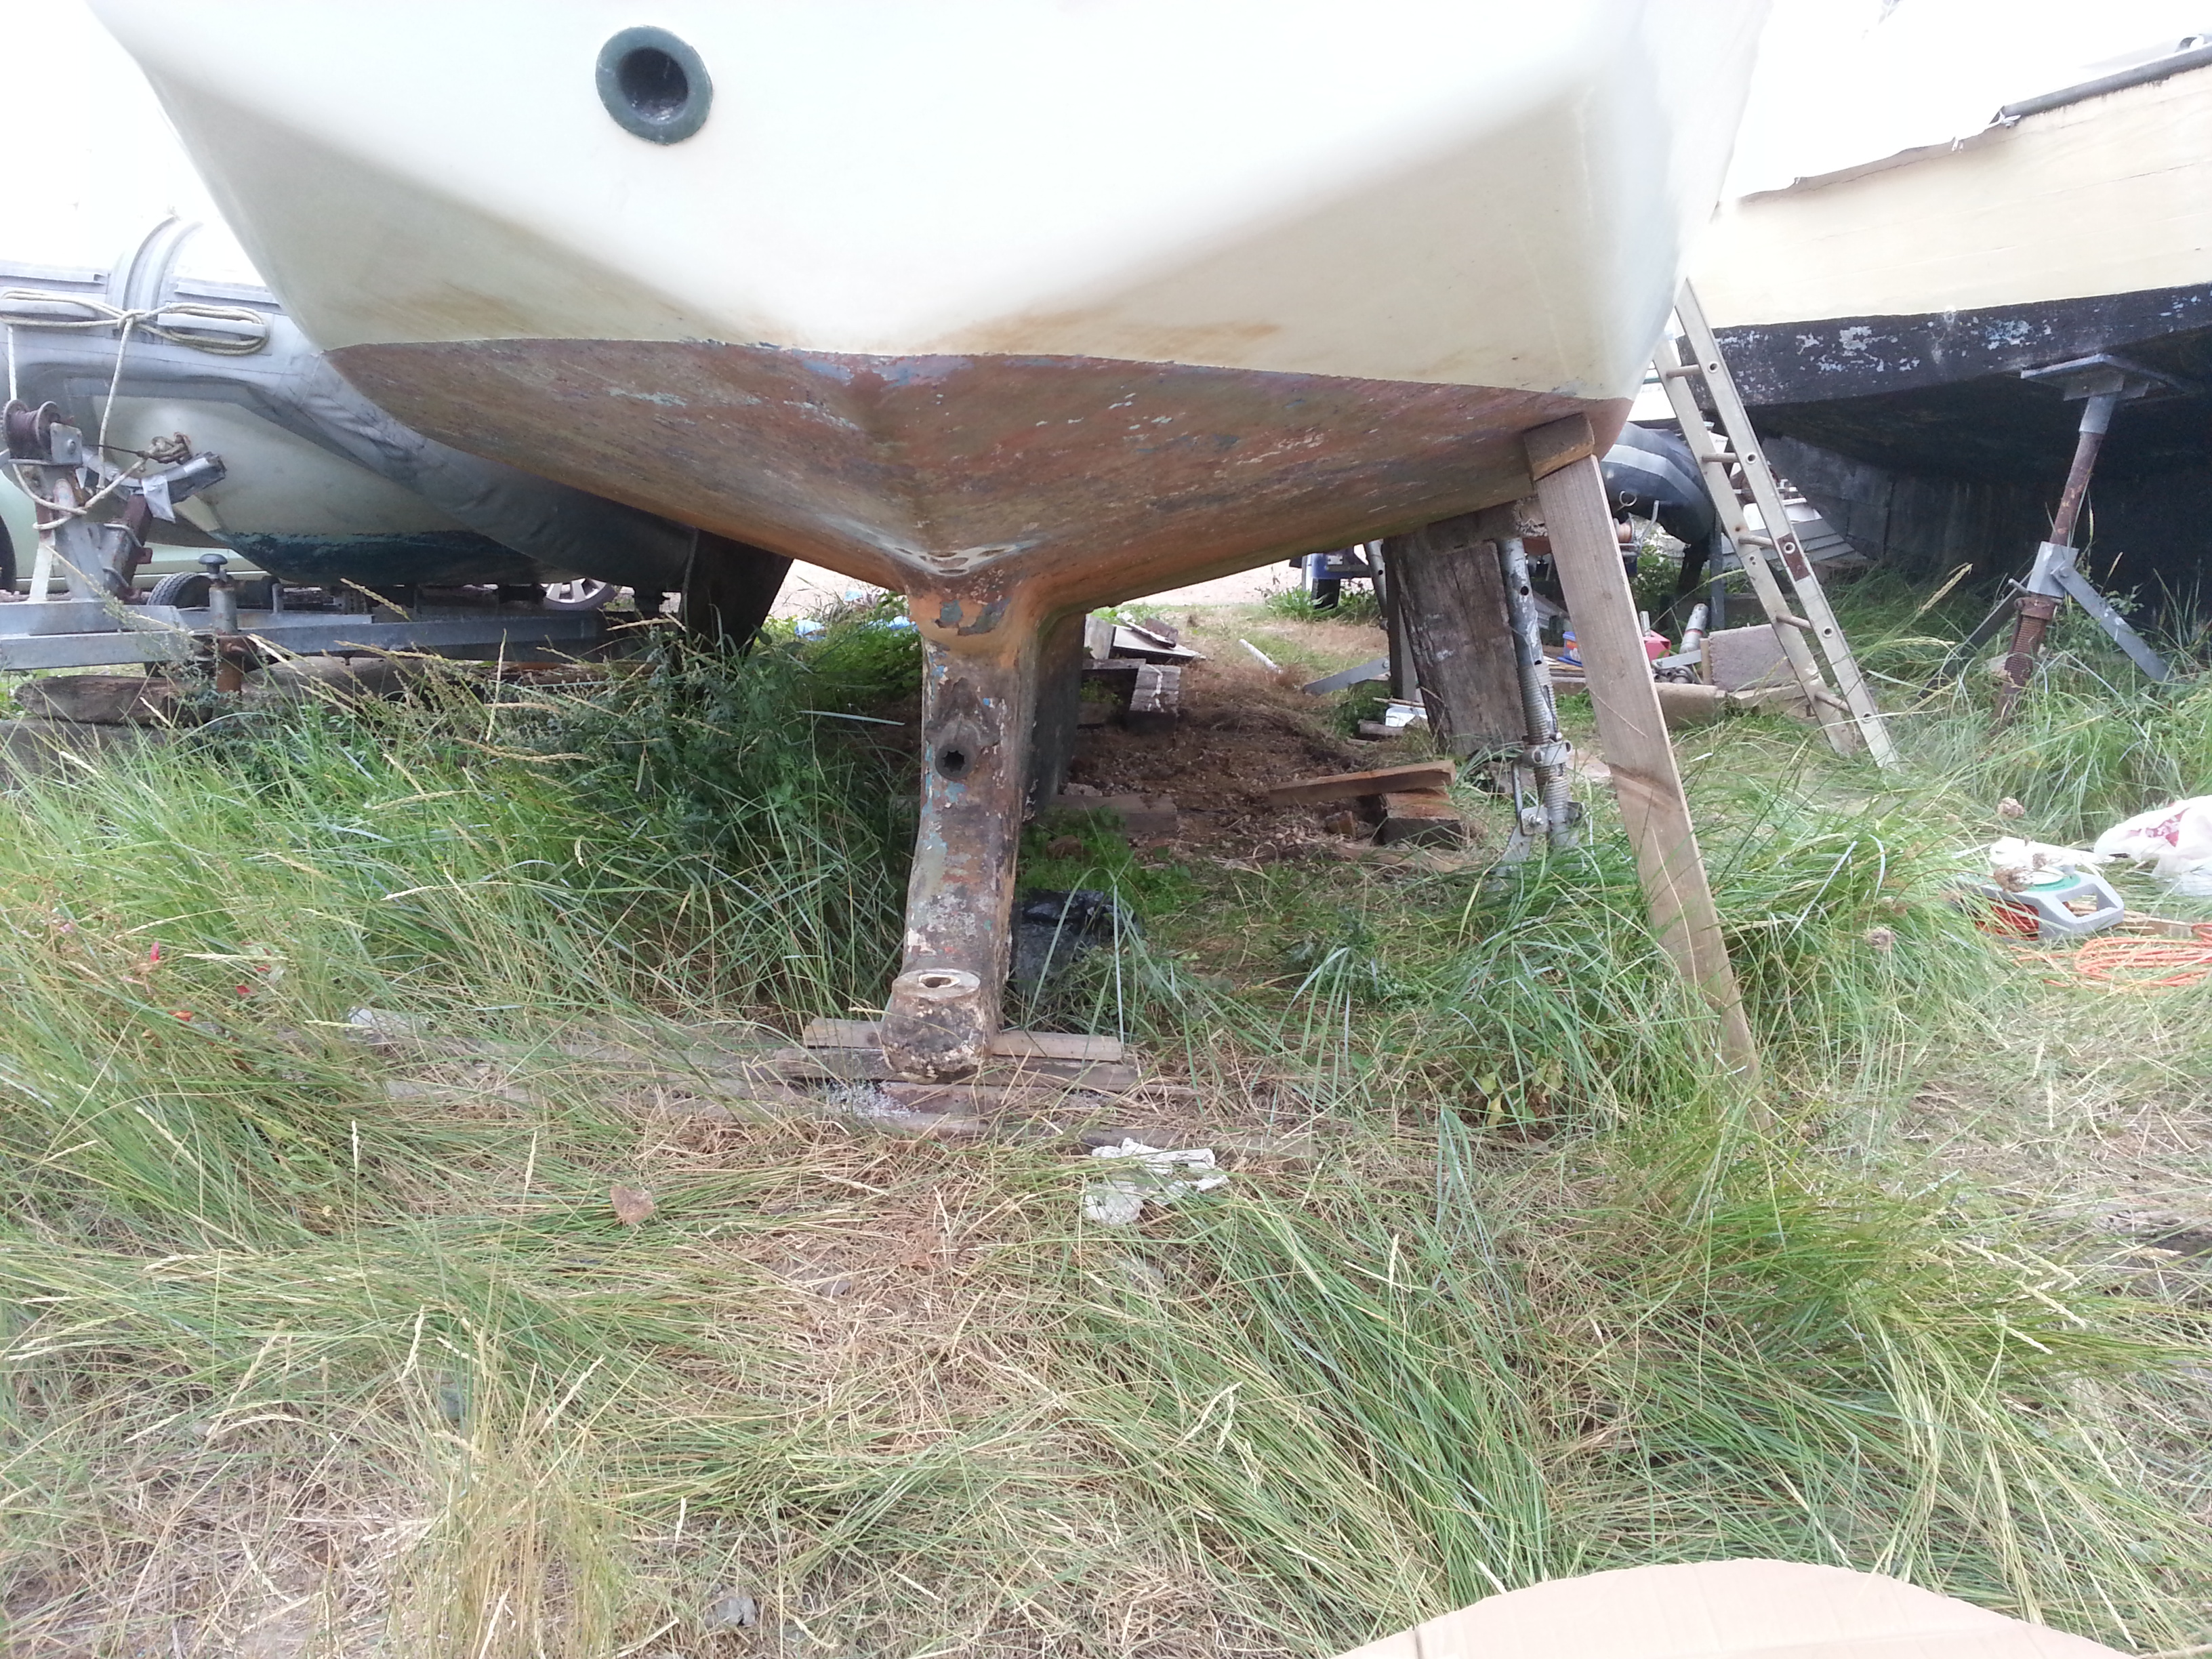
Sadly when John S saw the underside of the boat ashore there had been a lot of rusting on the bilge keels especially and on the rudder. The anodes had long gone!
I have suggested dry metal sanding, needle gun or rotary wire brushing them back and 3 coats of epoxy. Then heavy anodes along the bottom of the bilge plates as well as the bolt through doughnut shaped ones. With any luck if the epoxy holds the keels will not rot again. Left alone they will fall off!
Just painting with a zinc rich paint is another way, but then you cannot use copper based antifouling and have to resort to a less strong antifouling for ali. outdrives etc.
The prop has to come off to be replaced, so he is to start spraying with WD40 next week!
The engine hold down coach screws are easy to get at but the coupling bolts need loads of WD40 and they do not look as if they will give up without a fight.
We were all set.
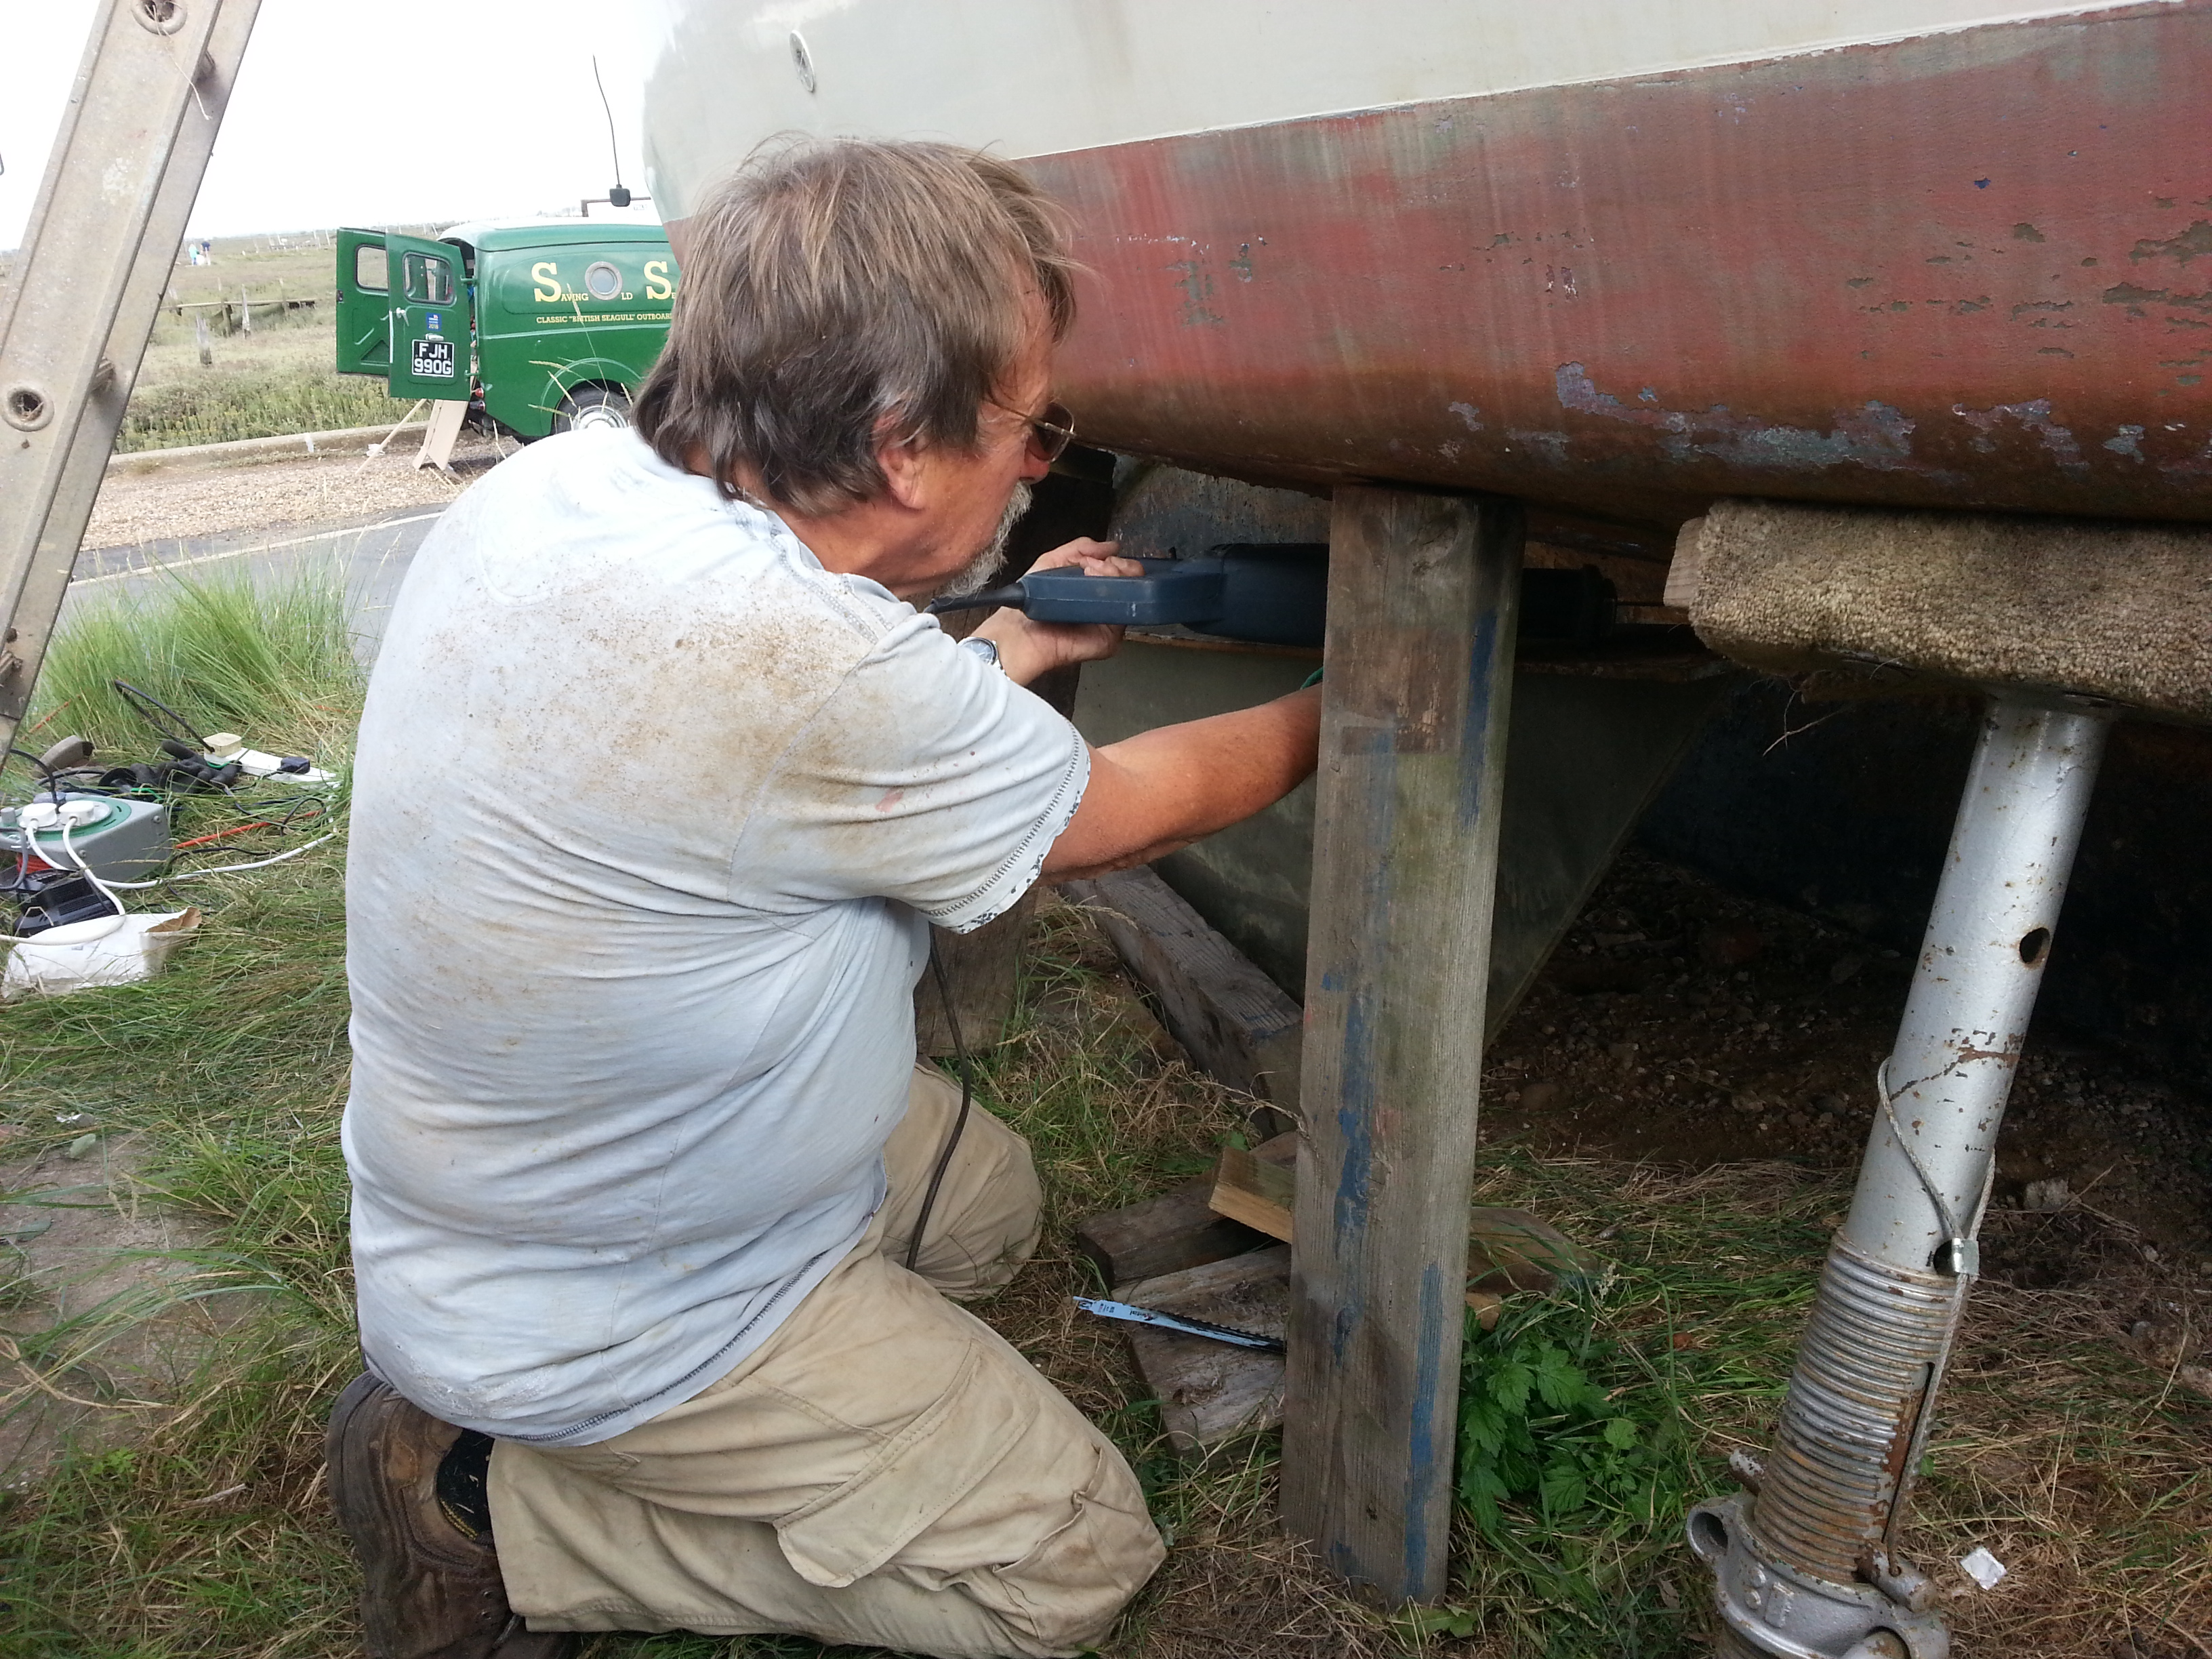
For the first time in 6 years Glasstide was moved from the mud berth pontoon mooring she had been on to the yard of Frost and Drakes at Tollesbury. Towed by the yard launch. Once ashore she was pressure washed from keel to mast support, removing much of the grime.
Seems that is is only the unprotected timber and the steelwork under the water line that has suffered really. The rest being GRP, was just grimy.
Over now to John S. for photos and updates
John W.

the top of the hatches, supposed 'laid teak', came off on sheets, not attached at all!
I met John S down at Glasstide at midday and we spent 6 hours on her, measuring and cleaning. We managed to disconnect the Volvo and ready her for removal. A job that certainly needed two pairs of hands!
Plus I removed all the sad and soggy timber trim and cleaned off the deposits of dirt behind them, (not sealant.. non seemed to have been used!!). I have left the dozens of brass machine screws for John S to remove so next time I visit I can plug all the holes and smooth all off ready for new timber.
In my garage I found lengths of 'Meranti', a lovely dense red hardwood that will do the job nicely!
I noticed the bowsprit had soft timber in it as well as cracks, so that has to be replaced. I will have that back at base once the mast removed and I have just heard that is planned for next week whilst I am laid up in hospital having my barnacles zapped, (kidney stones!).
In my garage I found a near new roof rack, I bought it to shift a dinghy, but it does not fit our new car, though the same make as the old one, Renault Scenic, as it has a full glass roof they have taken the roof bar fittings away. So have donated it to John to see if he can get the adapter fittings for his new Astra estate. Then he can transport the 14ft lengths of Meranti to the boat!
We took off the stern hatch for me to restore and also removed the forehatch, hoping the Houdini would drop straight in, sadly it would not and while it could be 'made' to fit with a few shaped timber infill pieces and by moving the hatch drains, John opted to just renovate the hatch, or at least have 'me' renovate it for him.!
When I got the two hatches home I found that none of the thin layers of teak strip were attached as they had been glued with what looks like Evostick! I will be removing all this now and sanding back the mahogany underneath so it can be coated in epoxy.
Job for a rainy day in garage.
Sadly this means the main hatch has to have the same treatment. Why is it that people go to such effort to cut and shape exotic timbers, then fail to do the gob with decent glue??
I had a call from my engineer friend to say he had modified the tabernacle, to my design and made it usable. Just needs galvanising now. Picked it up and it looks fine. We found all the anchor roller fitting on the bowsprit was rusty so will all have to be re galvanised too, so a job for John S to find a Galvaniser near him and get the lot done. The only one near here has closed now...
The parcel lady delivered a heavy box yesterday, a full set of brand new Yanmar rubber engine mounts, matched pairs. And at 1/3 the real price because they did not have cardboard boxes! A lucky find!
I measured the prop shaft for John S whilst I was there as he had been confused with his measurements. He need not have been, he was right. It would appear the shaft had been doctored at some stage. The engine coupling end was inch, but at the prop it was 25mm.
Bet at some stage they changed the prop and could only find a 25mm one. Bet the Cutless bearing is also 25mm.
Once motor removed and prop off will can remove the shaft, inwards, and will see at which point it has been altered. I am betting the inboard bearing and stuffing box, on a flexi rubber hose, (to be replaced!) is inch and only the cutless and taper are metric.
So the hunt is on for a Right hand 13 or 14 inch prop now, 13 x 8 or 14 x 7. £197 at Norris's of Isleworth! Hope we can find a used one. John S has a 13 x ? Left hand and a 10/ ? right hand to barter with..
More soon and pics when available.
John W.

with teak strips removed epoxy and filler
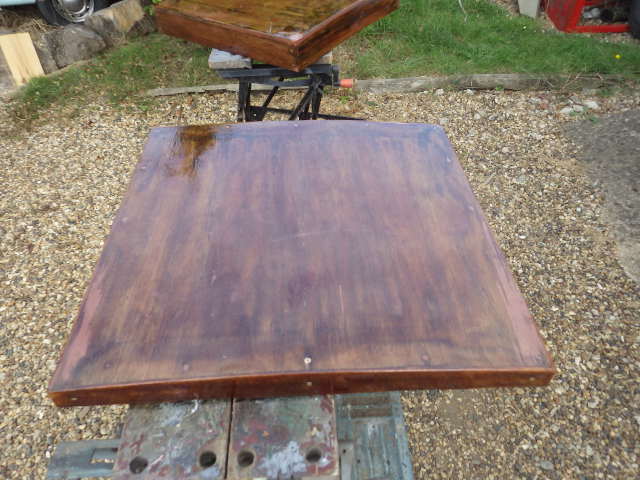
more filler
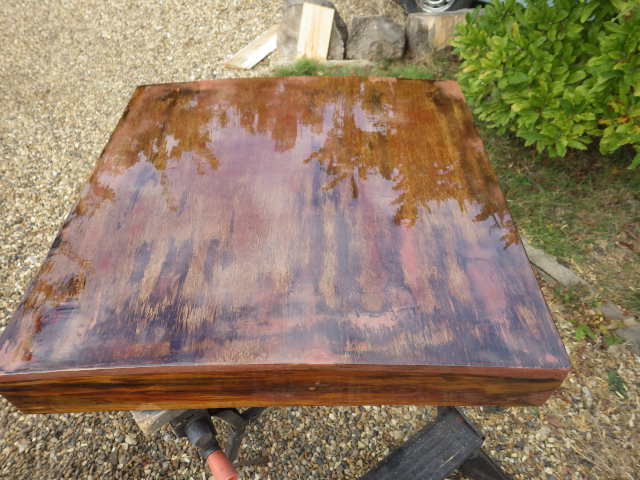
more epoxy
think I am getting there
last coat with ali powder.
I am on my feet again after my op and feeling better already!
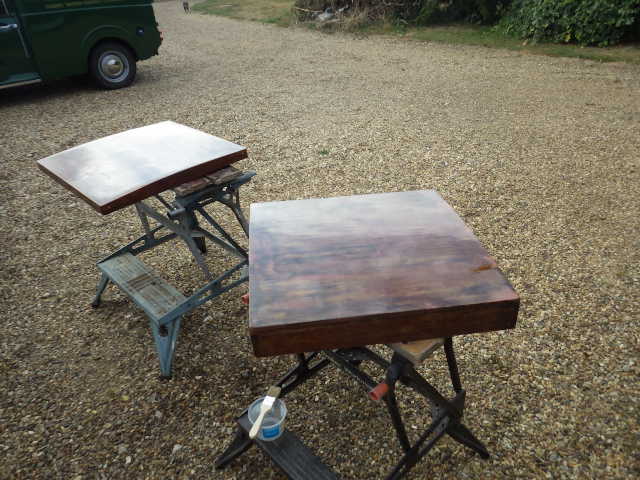
I have Glasstide's fore hatch and rear deck hatch here and have started to work on them.
To my amazement the pretty looking 'laid teak' effect was just that, an effect. It was screwed on and bowing, when I released the screws that were marring its looks, it fell off, not fixed at all and with the voids under it, the ply had suffered. Add to that I found a mix of soft and hard woods.
I hope I have been able to save the hatches. I have sanded and cleaned them off removing traces of what looked like Evostick from a few places and just brown paint elsewhere. I soaked the wood in thin epoxy that soaked in in placed.
I have applied several coats of epoxy and epoxy filler, filled sanded and filled and sanded again.
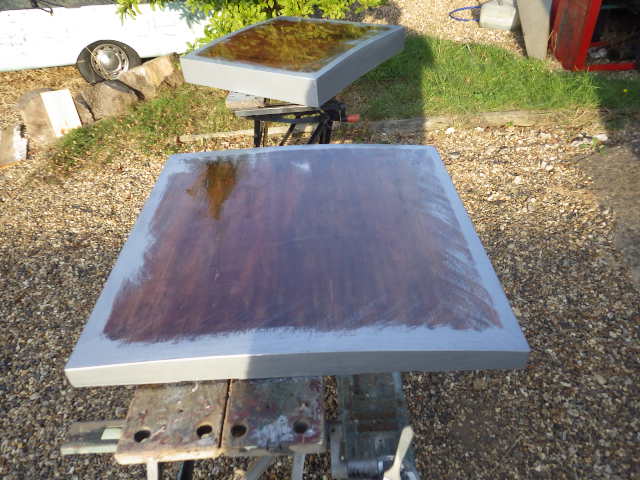
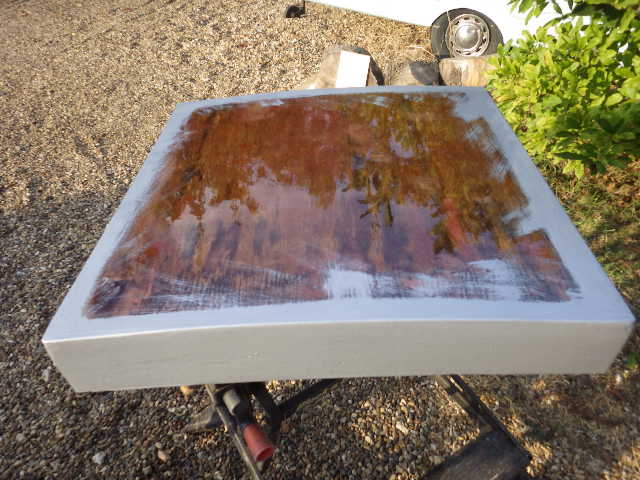
There appears to be a reasonable finish now and I have added a last coat of epoxy with Ali dust in it as an anti UV and hardener coat to take paint. Suggested that these now be painted round the sides with the same colour as the deck paint, grey!
I will epoxy grey Treadmaster to the tops.
Heard John has amazingly found a decent prop, RH and 14 inch but pitch U/K so I have to find my book with the pitch calculations in it...
He is coming over tomorrow so must sort out 3 leg puller for that prop!
John
Cannot help but think this rudder blade is far too long, fore and aft, will check the drawings. This may explain why the tiller is so hard to move when sailing!
Good use for Marclear antifoul, before it goes on a boat!
Near finished, not inspiring but very practical!
John popped over and picked up the tabernacle I had altered for him, also a pair of Thule roof racks that I bought for my last car used once and sadly cannot be fitted to the new one as it has a glass roof! He can get adapters from Halfords as it is a very good make, then he can collect the timber I have sorted out here to replace his rubbing strakes, at 15ft long just too big to hang out the back of my van!
John also picked up a new set of engine feet for his motor that I had bought for him.
And borrowed a couple of sanders, a triangular one and a 5 inch orbital that can be used to good effect on the deck and the topsides.
Also my 3 legged puller to get the prop off , but first the rudder blade than the stock has to come out. I have looked at the rudder and I am sure half of the weight in the helm he has is because the blade is overlong... and the tiller short! May be a good idea to alter the rudder....
I have found a neat pair of cleats in my spares box that he could fit amidships as he has nothing there for either mooring on his jetty or tying a dinghy alongside to.
I have carried on with the hatches, whilst the weather has been so good.. (not so good for sailing F5 Easterlies!). Tomorrow the rain comes back, so have to retreat into garage from now on..
I had put another coat of filler on, sanded it smooth then another coat of epoxy, finally a coat of epoxy with ali powder and then cut some Treadmaster and glued that on top with epoxy and graphite powder. These additives stop UV.
Once fixed I then filled a few pin holes left in the edges, where I had used small brass pins to stop the Treadmaster moving and turned the hatches over to fill and epoxy the edges. I cut and shaped a pair of hinge backing pads and one for the lock, on the rear hatch. Apart from a little sanding and fairing I am nearly ready to prime then paint the exposed epoxy with 'Toplac 'grey paint to match the new deck paint John S is going to apply.
John
Just had word from John S that the prop is not the correct shaft size!!! Seems the man gave totally the wrong measurements. So annoying.
The prop is clearly marked with the diameter and pitch and would have been OK at 14x8, bit over pitched but that is no bad thing, but the shaft size is 38mm not 25 as promised, John S investigating prop repairers for price of re-bushing....
John
Friday 23rd September 2016.
Spent the day with John Stevens yesterday working on his Eventide.
I wanted to remove the rudder and its stock for him so we could get a puller in to pull off the prop. (The prop is a 13 x 9 but left handed and he needs 13 x 8 or 9 but right handed. Shame the motor cannot use astern as ahead.....?).
I got the blade off easily enough and can see that at some stage someone had fitted a longer rear bearing housing with cutless bearing and as a result the prop had to be moved back nearly to the rudder and the balanced area had been sawn off the front of the rudder blade to give clearance, making it twice as difficult to steer. Apart from sawing off half the cutless bearing and housing I see no way of being able to put that balance area back. So the helm is always going to be hard... A longer tiller is needed and maybe a few inches off the back of the blade..??
Of course a transom hung rudder conversion would be the ultimate answer, but time and money....
I have never liked the flat steel plate rudders, they stall and 'hunt' for flow, far better the hydro dynamically shaped rudders, like two aeroplane wings, back to back. But making one and then hanging it is another job and John S. simply wants to make Glasstide usable...
John is finding the drawbacks of trying to work on a boat that is a 2 hour drive away rather than in the back garden!
Try as we might we could not remove the 1 inch rudder stock. It runs up through a 1 & 1/4 galvanised pipe, it is stuffed so full of rust so much so that the tiller is difficult to turn even with the boat out of the water! The rudder stock has to come out.. so we can get the puller on the prop...and so we can see the real state of the shaft, I am seriously suspecting it will be badly corroded up there, so much so that a replacement will have to be made...
Has anyone any good experience of using 'rust remover fluid'? I think this is about the only way I can see of freeing it enough, to be able to lift out the stock and clean all up... then I will drill that tube to take a greaser!
Having been thwarted with the prop we turned out attention to the sharp end of the boat as I had spotted some soft bits in the bowsprit. We removed the numerous nuts and bolts securing it. There were far too many! A bowsprit needs only to be lightly secured at the bow or stem of the boat and the heel pressed against a stop, in Glasstide's case, like my boat, the samson post. Johns has 3 bolts through the plank, two through the deck and one through the stem fitting, another across the inboard end and through the samson post and yet another under the stem securing it to the stem head. Of all the bolts that is the only one I may put back! The sprit cannot move up or down once the rigging and bobstay are fitted and to be honest should not be laid on the deck as his is, as water will get trapped under it. I am going to alter this. Will publish some pics. Where it has trapped the water, the timber has gone completely rotten.
There is a stainless tang on the stem that at the moment passes through the sprit, but is not long enough to protrude above it, so all it does at the moment is allow water to get into the timber, daft idea. I am going to change this. I intend to cant the sprit up at an angle so it clears the deck, make it 6 inches longer to help offset weather helm, and then use this fitting to secure a bolted through fitting on the sprit. Then on the top of the sprit there can be the staysail attachment and the tack fitting for the staysail, where is ought to be and not attached to the deck aft of the samson post, with that stay under the deck that gets in the way of everything down below! There will be a few modifications! Moving this sail forward will assist the weather helm too!
Sadly the bowsprits timber is quite inferior, it is soft wood, so never stood a chance. One good heave on the end and I could break it in two, but I'm keeping it intact so I have a pattern. (of sorts!)
Sadly the samson post is also suspect, so maybe now looking to replace that too. It is Sikaflexed to the deck OK and simply sockets into a square of GRP at the base, but not bolted anywhere? Now looking for a 3 inch square post in suitable hard wood long enough to do the job. (later it turns out the oak post is salvageable, so that saves a job!
As John S has not managed to get the boat ashore early in the year, for various reasons, he is now up against the weather, so concentrating on cleaning up the underwater steelwork so it can be epoxied and protected. With 3 coats of epoxy and then anodes and antifoul there is a chance the bilge keels can be saved. If nothing were done and the boat re-launched I am betting the lower 3 inches of the keels would not last very ling, though they have been re enforced with angle bolted on, that was never galvanised and that and the lower 3 inches that appears to have been welded on in situ, also un-galvanised and is severely rusted...
Epoxy needs 15 degrees to set and there are not going to be many days left this year when this is going to be the case... so hope he can get the crud of the keels with the angle grinder and the flap wheels so the epoxy can go on quick...
John S. is now considering getting the boat re-launched and leaving her on the mooring, with mast down, over winter? I can see this will save the fees in the yard but is going to present more problems and fees for launch and recovery and towing as she has no motor, (nor rudder at the moment!). If the weather is half reasonable the engineer can carry on with the motor installation and John could attend to the interior, as was his intention. The only things that cannot be done if it gets cold would be the protection of the bilge plates and rudder steelwork.
I suspect he will bite the bullet and leave her ashore and work on her when he can, seems a waste of time to antifoul and launch for the winter only to have to scrub of and re antifoul next year after she is ashore again...
I have the two smaller hatches back at my my place and repaired, the bowsprit is next. But that leaves the main hatch to be sorted and that is in a bad way... I fear it will not do it any good to leave it on the boat un-repaired and certainly not out in the creek/salt marsh where it could be exposed to the weather.
Seems to me that John S. has just caught this boat in time, provided all the work gets done to waterproof and update her... Not a minor task.
John W.
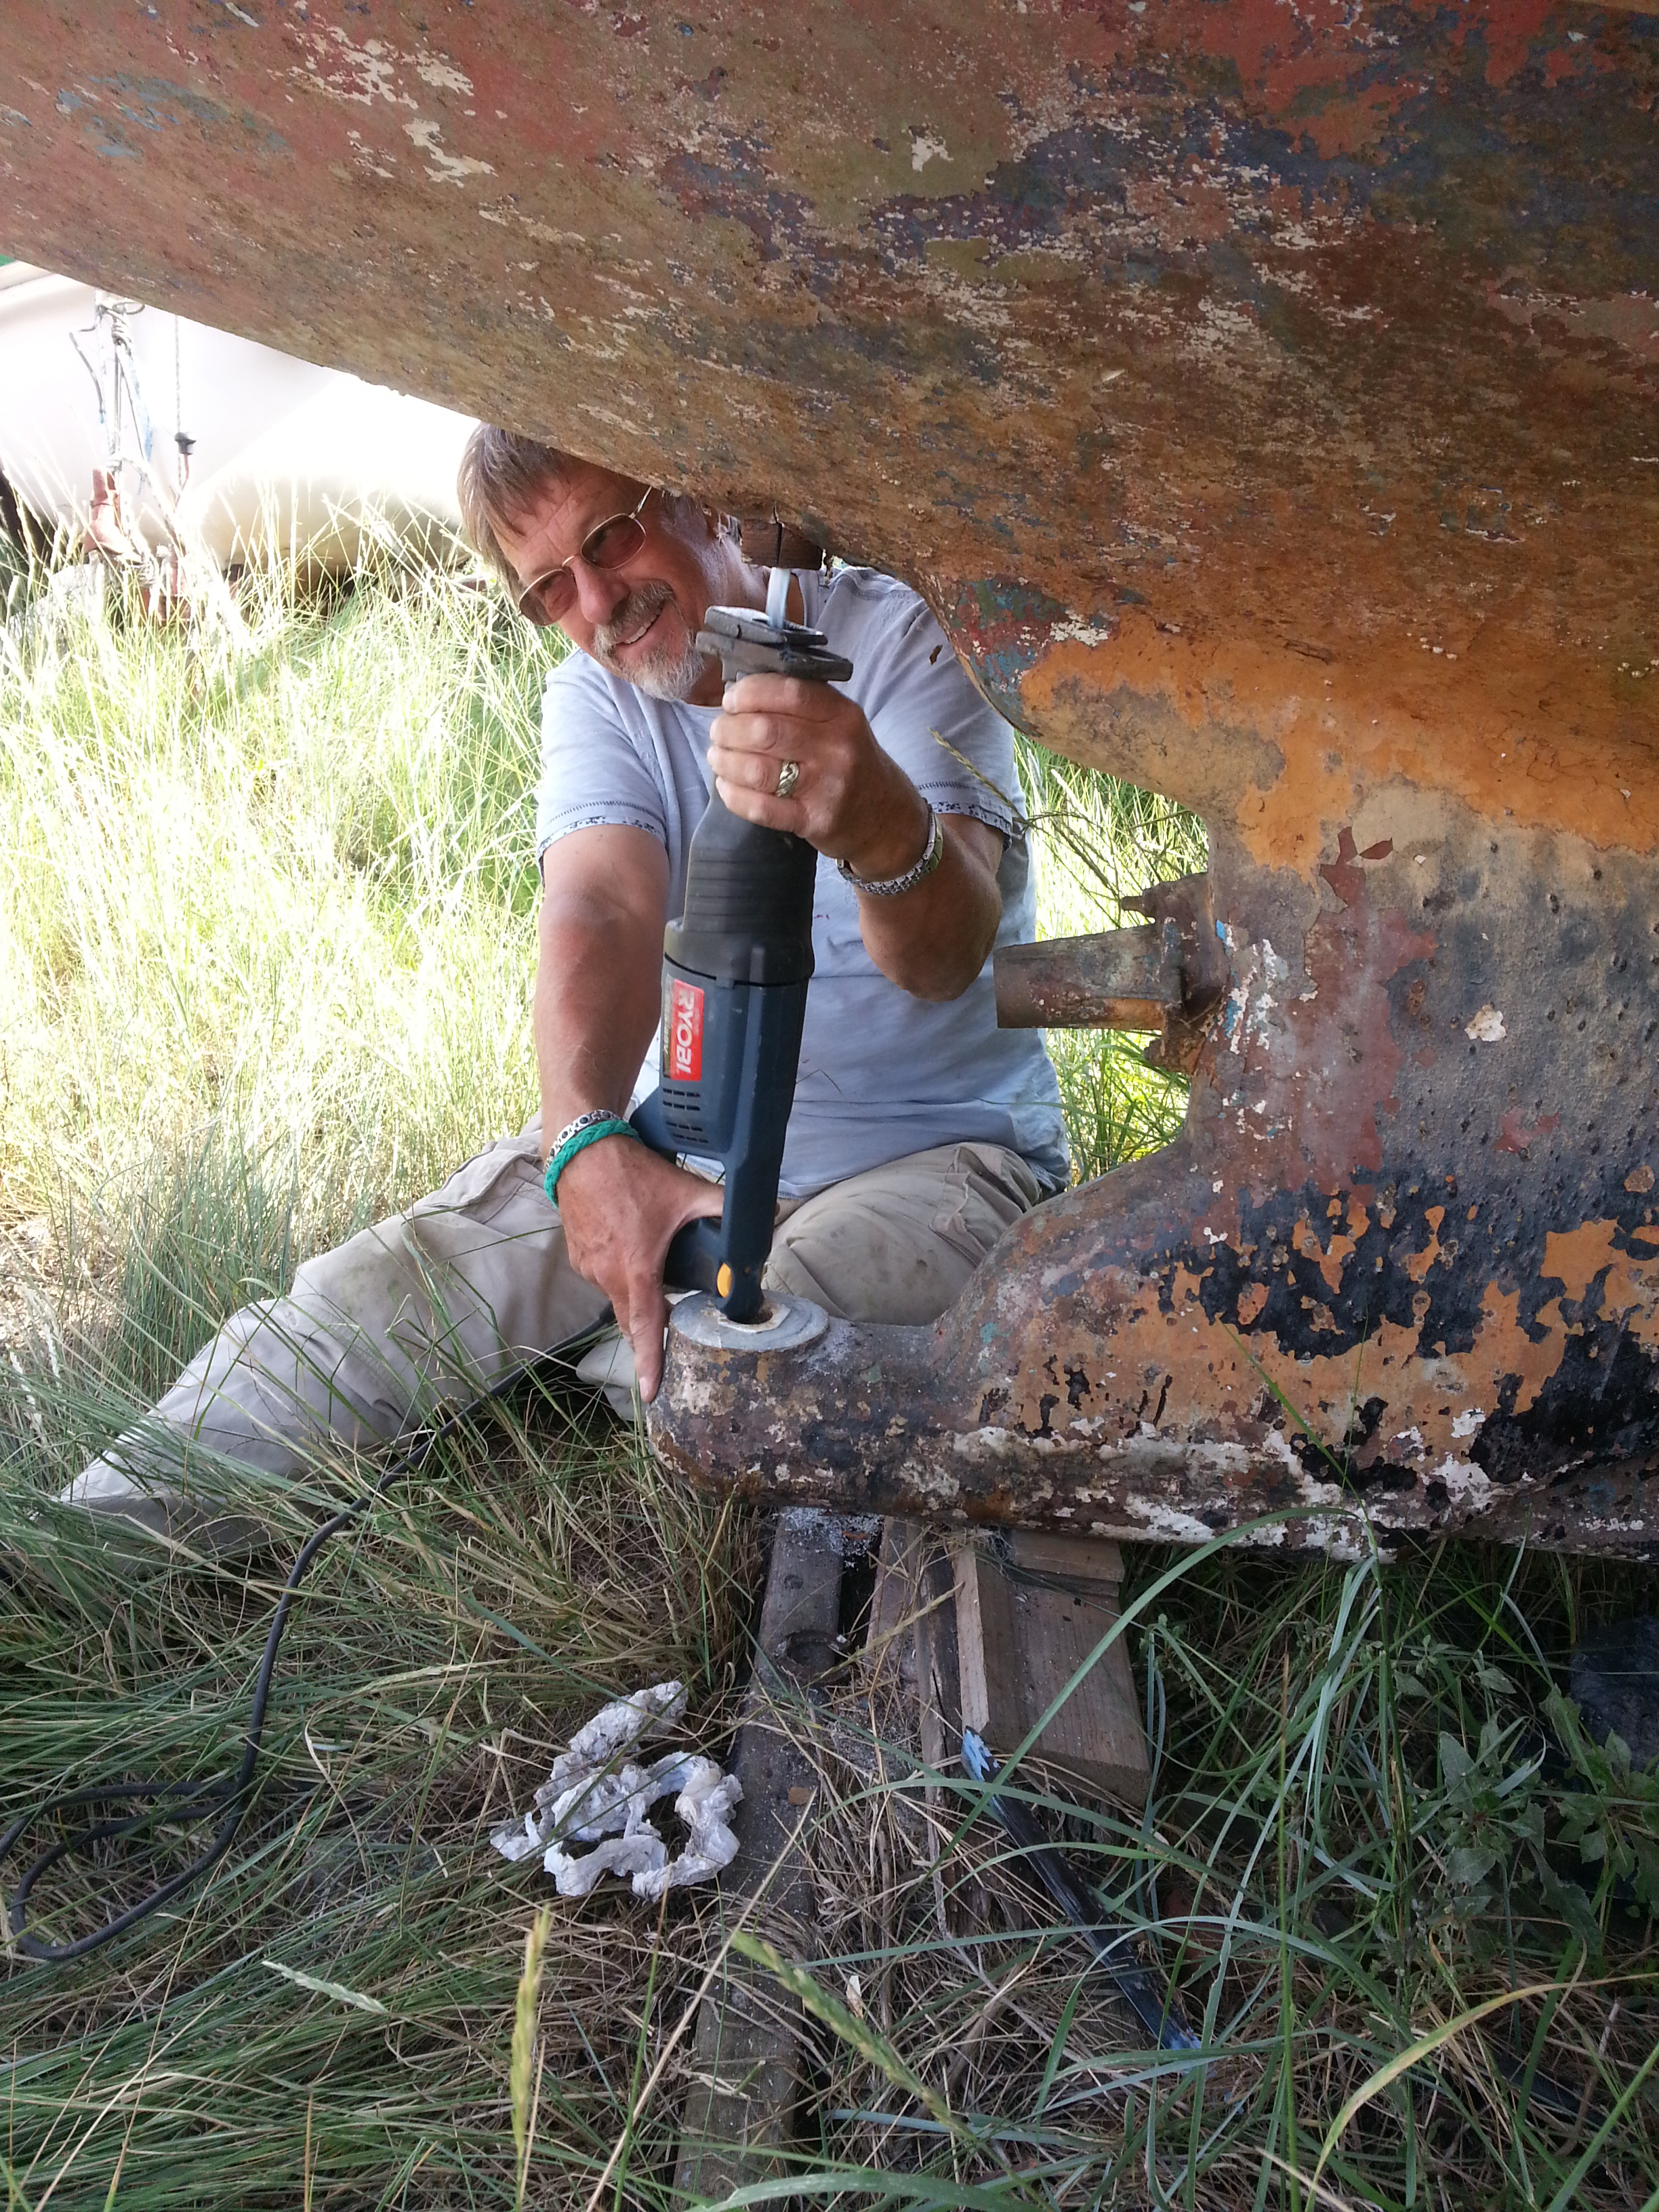
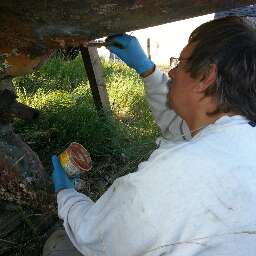
In blazing sunshine and temperatures over 22 degrees I assisted John S. again and managed to get the prop off for him. I had to resort to sawing it off. With my battery powered Bosch sabre saw. Tried the big mains one but it was difficult to get it in, as the stock was still in the way. Tried to cut down to the keyway, but the keyway was in line with the root of a blade so could not cut straight up it... Still I managed to do it without damaging the prop shaft! Cut as close as I dared then used a cold chisel!
Sadly a left hand prop has no value, so not much lost. Scrap value only. As it happened it turned out to be even less saleable when the engineer checked the taper on the shaft, a 1 in 20 taper!! Never heard of such a fine taper on a prop! 10:1 for 25mm or 12:1 for inch the norm..
When the prop was tapped it did not ring and you could see it was badly de-zincified, pink showing through... Not worth tuppence... Had no anode to protect it.... that will have to be addressed
The engineer said the wear on the shaft because of the stuffing box and the odd taper meant it was more than worth changing, had to be, it was useless, so a 25mm shaft has to be bought. More expense.
The 14 inch prop John S. bought is no good as it is for a 1 & 1/8th shaft, John still has this if anyone needs it, he failed to get his money back on that, it was sold as a 25mm prop. So John S. is looking for a 13 x 6, Right hand prop.
Whilst I did this John Gaffer taped an old fuel funnel to the rudder stock tube and poured in some 'Hammerite' rust remover. Hopefully this will penetrate the rudder stock tube and allow us to get the stock out. Hoping it can be cleaned up and replaced... Though it may need machining and a greaser fitted. It has to come out so we can see how much strength it has in it and if the tube or shaft has corroded, I recall the one on Bluenose 40 years ago, it was so bad I had to scrap the lot and went for a transom rudder. Good move!
Removing the stock will make fitting a new prop shaft so much easier as then the shaft has to be fitted from the inside! No good once the Yanmar is installed!
That transom rudder option is of course open to John S. if it turns out to be badly rusted in there. John S. refitted his tiller and with the added leverage was able eventually to turn the stock 360 degrees, so something is happening in there. He hopes to top up the funnel and leave it to work for a week...
After I finished with the prop, took less than an hour! I set too cutting off all the heads of the screws where the rotten timber rubbing strakes had been, knocking the remains of the little brass bolts in, then sanding the area to take off high spots with my battery Bosch palm sander, brilliant bit of kit!
As the day was so warm I had bought the tail end of a gallon of my Epoxy and mixed up a filler mix. I spent the next couple of hours filling and fairing the sides of the boat so when I come to fit the new timbers we will have a nice smooth flat surface to fix to. Having tapped all the old screws in and filled their holes I have opted to screw the new timber up with short s/s self tappers. Not prefect, but it will work.. With a decent bed of Sikaflex I suspect the harder timber I have selected, will last for ever!
I began to shape the top of the remaining timbers that abut the deck, they had a silly upstand that just acted to collect rain water and direct it down the gaps. Daft idea. In future there will be no upstand, instead a small slope to shed water.
I also turned my attention to the deck where the old bowsprit had been fixed, I cut off the two rusty bolts and punched the remains inside. Reminder to John S., go up the sharp end and find them or they will leave horrible rusty marks! I cleaned the holes out and then I gaffer taped the holes from underneath, back on deck I cleaned off the area around them and epoxy filled them to seal them. I will not be reusing them. Showed John S. my ideas for refitting of the new bowsprit I am to make...
I started to investigate the forehatch frame on deck, found the same rubbish strips of timber had been placed on this. I decided to attack them and they just fell off, got side tracked at this stage, so that is a job I have to go back to and sort so the repaired hatch can be refitted properly...
I am hoping John S. will buy some inch or so square hardwood garden plant posts, I have given him a sample.. these are Iroko and can be bent to fix to the deck as a toerail, in short lengths to allow for drainage, but still allow for a good footing, to prevent him sliding off the deck!
John S cleaned off the outside of the stbd bilge plate enough for me to get a coat of epoxy on. He went on to work on the port keel that I had started on last time, but did not get far enough for me to epoxy it. Shame as there are going to be few days with the temperature over 15 degrees this year now......
Sadly he also found that most of the bilge keel bolts had lost their heads! So little holding the keel on!! John S. is going to try unbolting the nuts on the inside and drifting out the remains, one by one, and replacing one by one with new galvanised bolts. Seems they are not the smooth dome headed bolts normally used, for smooth water flow, but hex head. Shame. I told him to check the top plate on the bilge keel when he gets the first one out, if by chance it was properly made with square holes then the nicer more hydrodynamic coach bolts can be used. We are lucky here in that we still have a chandler in Maldon that stocks galvanised, not plated bolts!
I had to rush off at 1700 as I had a meal booked and had to get back to base and washed and changed, but John S. was going to stay on for a couple of hours so he should have got the old paint and rust of the outside of the port bilge keel and even started on the insides.
Hope he remembered to WD40 the tops of those bilge keel bolts/nuts...
Await the pics John S. took...
John W.
John W. joined John S. down at Tollesbury after 4 months away.
After 2 days I am just beginning to recover from helping our Database Manager John with his Eventide 'Glasstide'. I spent most of the day cramped in his lazarette grinding and sawing at the rudder shaft and tube. Could hardly move the next day!
At least now we know why the helm was so hard to turn... Someone in their wisdom has inserted a bare steel inch shaft into a mild steel, un-galvanised inch internal tube! There was no room for rust, it was an interference fit! And no room for grease, even if they had of thought of fitting a greaser, which they had not! I ran out of metal sawing blades for my power saw before I could finally cut the last remaining 4 inches of tube out of the bottom of the hull, very frustrating..
However more blades bought via our EBay page, so next time I go down there that offending rudder tube will be out.
If he fits a new rudder stock and tube, it will have a bearing and a greaser! And have a longer stronger tiller to fit!!
Whilst we were there we realised the mast was missing! It had been moved a couple of hundred yards away and left beside the road on a grass verge!!! Amazed that the rigging screws had not been stolen!
We stripped the mast and brought it back. I realised it was a 'Bowman' mast, the sort supplied as a kit 40 years ago. What ever happened to kit masts... suppose they disappeared along with the 'backyard boat builders'. Very few have the time, inclination, money, expertise, to build or repair a boat these days, especially it seems a wooden one!
We took the rigging wire off, must be nearly 40 years old and several wires were loose and kinked, would have been condemned and relieved we got the boat across the estuary safely!
All to be replaced before the mast goes back up. As we stripped the wire off I put aside the flexible baby stay that had been fitted, it was attached at the spreader height and on deck to an eye aft of the samson post, which meant it got in the way on deck and below deck a rod link to the top of the forward bunk was a real pain, and not half strong enough to work safely... now that can be scrapped to allow better access below!
All the other wires and rigging was labelled and put aside to copy but with an allowance to be made for getting the mast more upright, to lessen weatherhelm and for the new longer bowsprit I will make for him!
The backstay was a split one, but daftly split only 5ft off the deck so putting a very unfair side load on the rigging chain plates.
I suggested twin backstays would be better. Easy to lay the old wires out on the ground then overlay a pair of wires on them to fashion the new backstays to the right length.
When I got home I searched my boat stores and found a pair of stainless tangs suitable to convert the single back stay to twin at the mast head.
The topping lift was a length of 8mm line passing over a plastic side mounted pulley a HA fitting, only made for 6mm, got to go! I found a suitable stainless tang to hang from the back of the mast for a larger, stronger, 10mm block!
John S is going to make a trip to the boat soon to empty out the interior. Has to be done as we cannot get at all the bilge keel bolts and those bilge keels have to come off and be modified. The lower 3 inches have rotted away! Not a difficult job for the steel fabricator to cut the bottom 3 inches off and replace...
I feel it would even be worth welding a triangle of extra steel to the aft edges to extend the plates aft, to further lessen weatherhelm, a trick we know works! Front and back edges could be parallel.... or just make the back edge vertical...
Sadly we could not reduce the length of the cutless bearing holder to move the prop away from the rudder, as the skeg gets in the way, so sadly no balanced rudder. (The 2" balance area in front of the stock had been removed at some stage to allow the fitting of this longer bearing holder and assume larger prop). Maybe when launched the boat had a Vire or Watermota with tiny prop....?
John S brought down a large Iroko plank for me to shape into a new, longer bowsprit, job for the future...
We went and picked up the old 5hp Volvo motor from the engineer Russell, it took 4 of us to lift it into the back of John S's car! My back twinged! Hopefully John S can arrange some assistance at home to slide it down a plank and get it into storage.
He has a video of it running in the boat so must be able to sell it on EBay. Suit a 20ft boat.
John S. took a few pics so hopefully they will appear on this page shortly! Broad hint John!!
John W.
Remains of steel inboard rudder tube to remove.
Brutal but it worked.
.jpg)
The SOS van and tool carrier!
All the old rudder fittings sawn off and hull cleaned..
Bilge keel being removed for repair, one bent bolt holding it!
Reluctant bolt.
J.W. attacking last bolt. Had to use the angle grinder eventually!
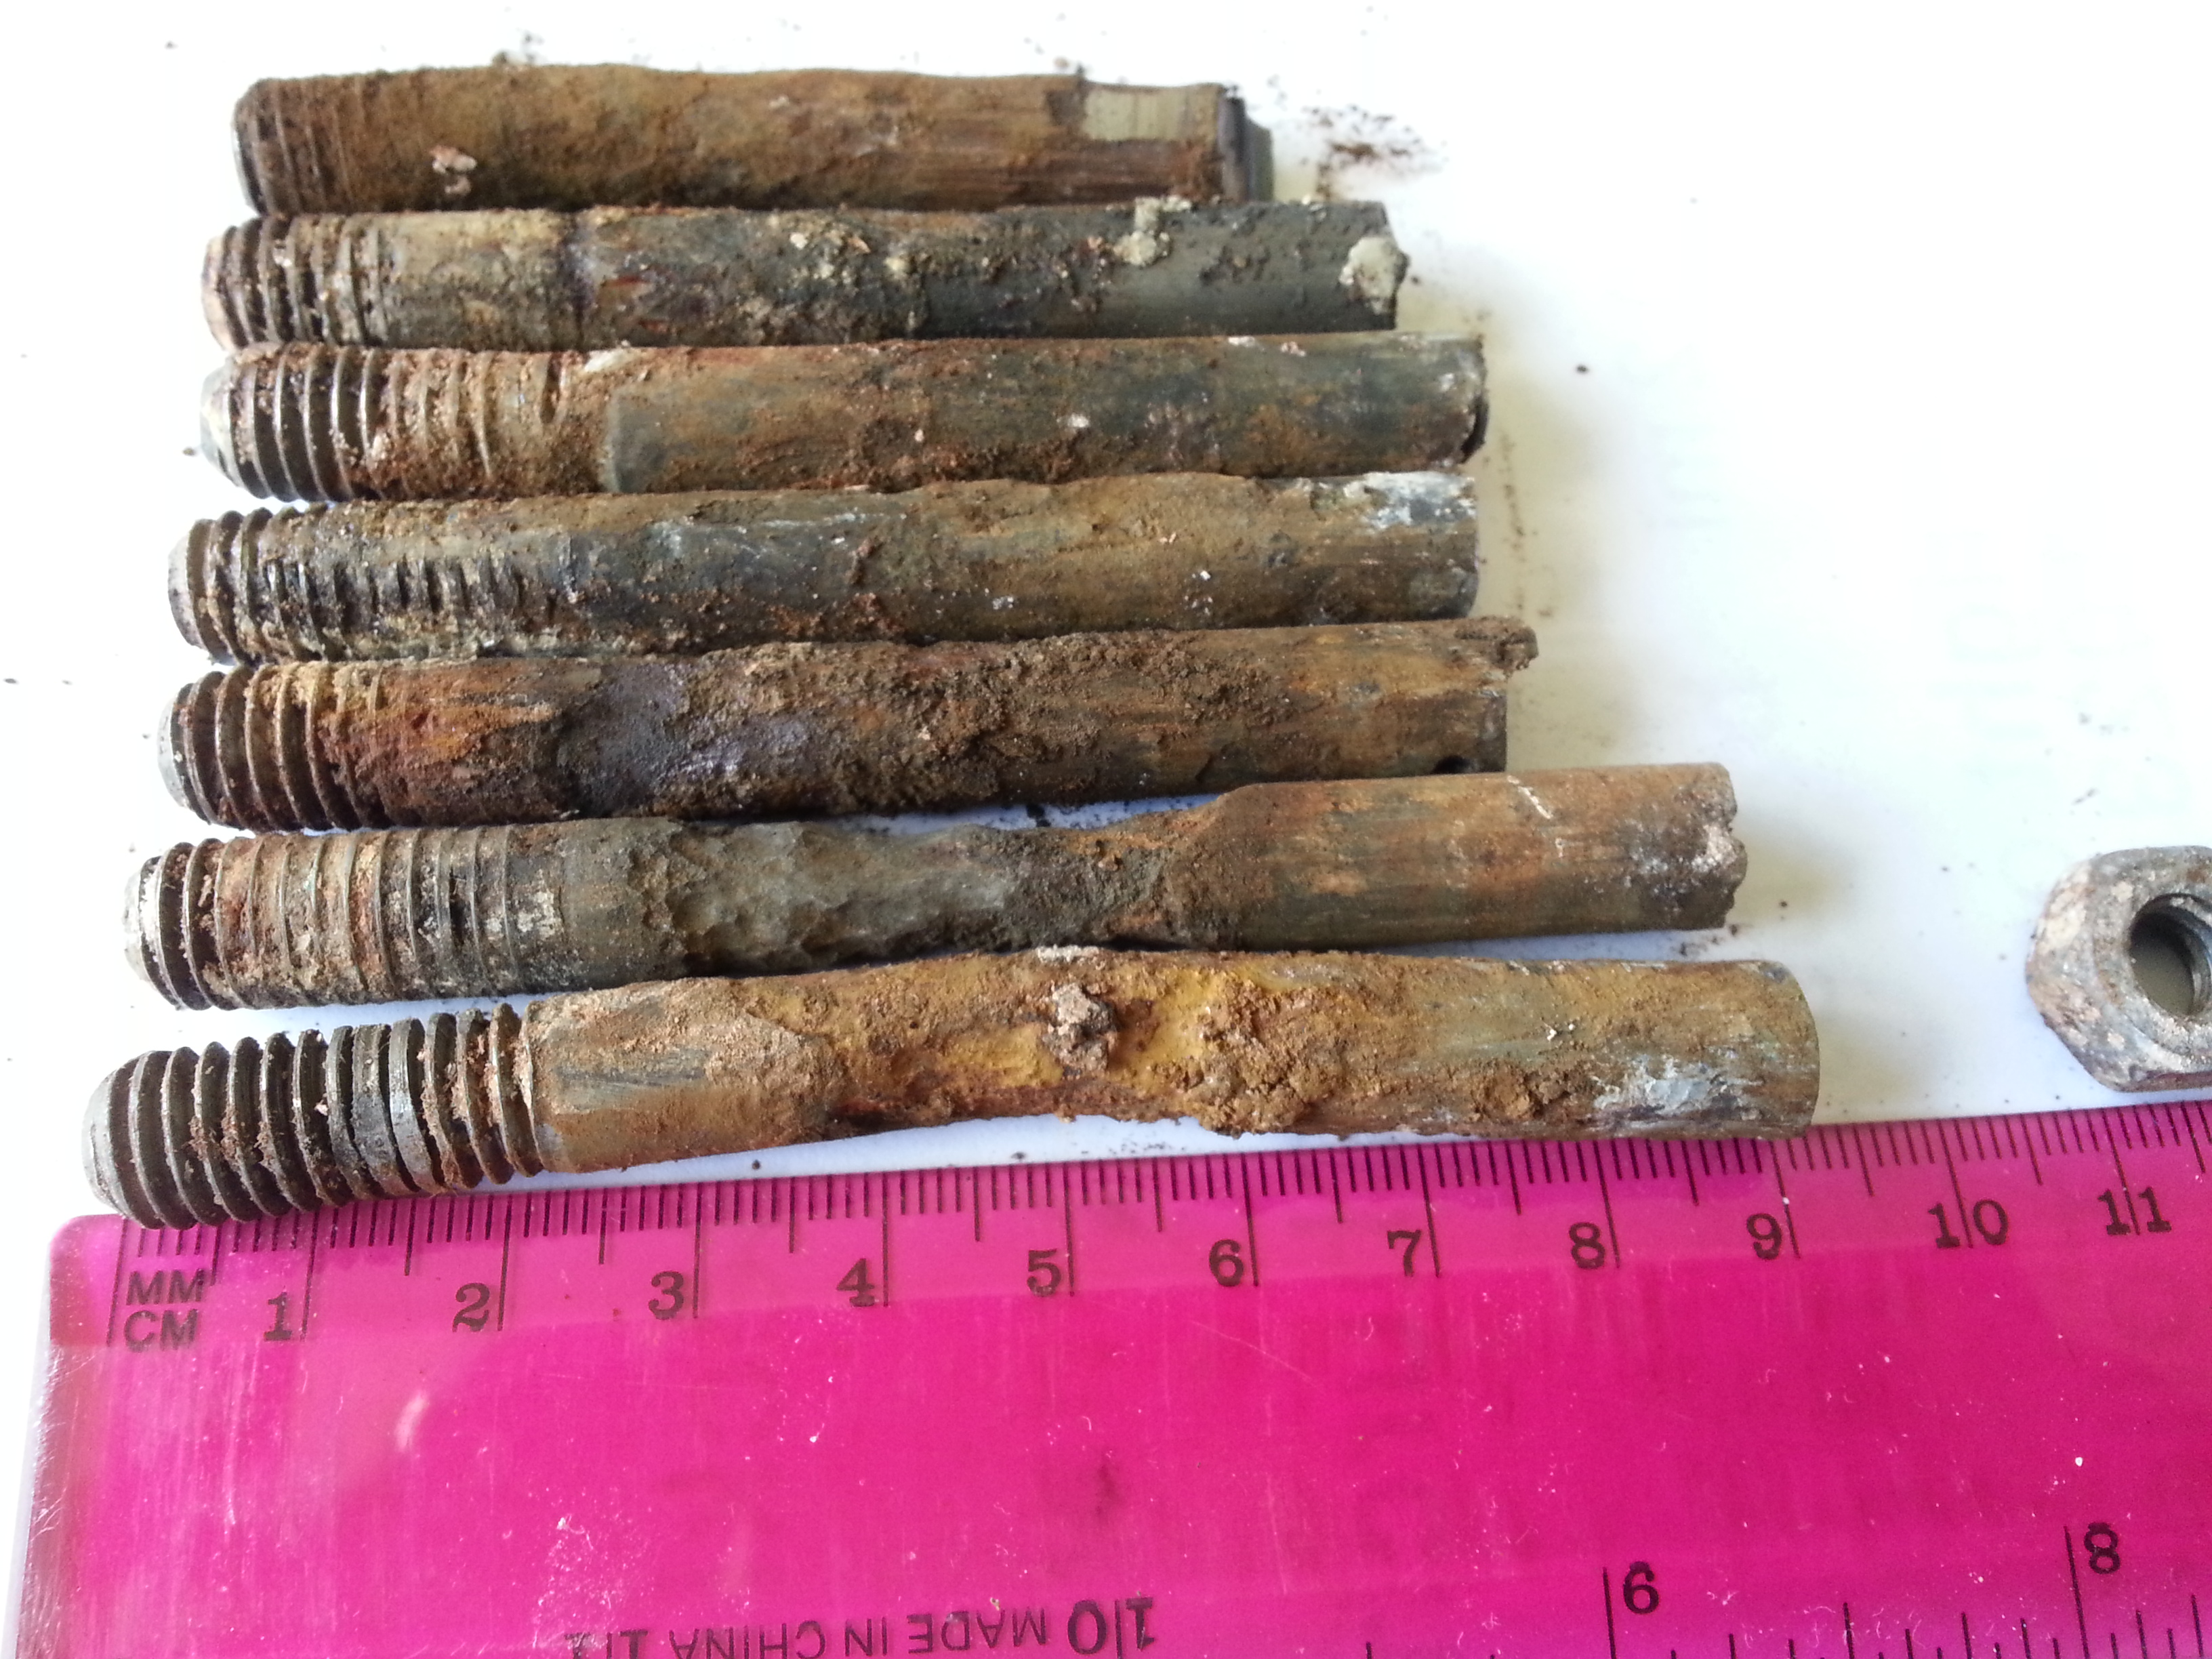
Apart from a lot having no heads left, some were severely corroded inside!

The plate removed with rusty bottom section placed underneath it, the majority of plate like new!
Using the free MG drawing on this site to design a new rudder.
Template made, s/s ladder removed, will be replaced, but offset to port.
With slight alterations we have a pattern!
As a final hurrah I carried on bevelling the rubbing strake, taking off the water trap at the top.
John S. was back in rude health, as was I and we had just completed the last leg of my 1680 mile, round most of the UK, trip, the last section with John S. as crew.
So with both of us fit, no excuses for not getting on with GT.
I turned up at 1100, no John, delayed by traffic... Really.... a 2 hour or in this case a 3 hour drive to do a days work on a boat is a real waste of time. If only John would put the boat in his garden... there is plenty of room....
I see 2 months hard work to finish this and get her afloat, all re-rigged, new rudder and keels refurbished, hatches recovered, rubbing strakes and associated woodwork replaced and Sikkens coated and all topsides repainted, antifouled, replacement motor and stern gear fitted.... but not at arms length, if you can only do a day or two a week, no it is going to take forever.
Hey ho. So in his absence I set to with my battery powered sabre saw and by the time he arrived I had done 4 batteries, 3 more to go, then he got the mains on and I went over to my mains powered one. In all it took another 2 hours to cut out the remains of the badly designed steel rudder tube. Badly designed? Yes the builder had fitted a one inch OD bare steel shaft in a one inch ID tube, no galvanising, no bearings and no greasing provision, as if there were any room to get it in. Result rudder seized solid!
Looking on line, I had seen some very nice rudder fittings for a transom hung rudder and after a little cajoling John S. bought them, had he not, I was going to as spares for F.G.!
They had not arrived by the day we were working on the boat, but they will fit. I had to insist on removing the centrally placed stern ladder as it would get in the way, but worked out it could reuse at least one of the old holes and move sideways OK. So John S. took it home to clean up and we will refit later. The holes will be plugged, or maybe reused for the gas bottle storage?? (That is dependent on where John S's compass and auto pilot will mount though... though we have worked out it will not matter too much if there is some deviation, the tiller pilot would still work!).
John had been to his boat in August and noticed that the bottom of the bilge keel, a 3" strip roughly tack welded on, had bent. Whilst inspecting boat on my arrival, I gave it a wiggle when I adjusted the support chocks, and it fell off. Good job John S. had used my adjustable supports to support the stbd side!
So I told John S. to get on removing all the bilge keel bolts and I finished off removing the remains of the rudder tube. By the time I was finished it was just the heads of a few bilge keel bolts that had to be ground off then we could start removing the keel.
After using a punch on some and finding others stuck I resorted to kicking the darn thing, that worked, it dropped an inch or so, just at the back, enough to get a wedge in, then after I used the angle grinder on the last bolt, it fell off. The remaining bolts were then easily removed. Some were severely waisted!
We found a mix of sizes, 5/16 and 3/8 by the looks of them. All holes will be re-drilled to 10 mm and all bolts will be 10mm and larger stronger internal pads fitted!
All new galvanised bolts to be refitted and the lot bedded on Sikaflex, the old sealant looked like old putty on a sheet of fabric, ceased sealing years ago!
The plate however was in excellent condition, as new, except for the bottom edge, John asked if it could be reused, save making a new pair. Yes if it were all re-galvanised after! Then weathered and then epoxied. Shame was I had already applied the last of my epoxy on these keels, which of course will now all have to come off before it is re-galvanised.
My Bilge keels on F.G. are like new after 28 years, galvanised, weathered then epoxied. But also with an anode, just in case. The Anode has no wear in 20 years or more, so the epoxy works! (You cannot paint bare galvanised bilge plates with copper antifouling, the resultant electrolysis would rapidly eat the metal!)
The bilge keels will have the rear edges extended to add lateral resistance and off set the weather helm, as per the article about weatherhelm on the 'hints and tips' page. John opted to make the back edge of the plates vertical, not sloped back, but every little bit of area aft will help.
John S. to organise the fabricator.
One of the jobs I started to do a year or so back, was to plane off the top rubbing strake's top edge. It had been fitted with a 1/2 inch upstand above the deck, this was useless as a toe rail, but trapped water beautifully, which allowed several lengths of timber to rot. We cut all these out and I had a few lengths of hardwood that we will use to replace it, once all coated in sikkens doubt you will be able to tell! I simply used a small plane and walked round the boat, in a couple of places where chain plates etc. get in the way I will resort to a chisel or small sander!
I an suggesting John S. fashions a low hardwood toe rail, in sections and screws it to the deck from beneath with Sikaflex seal. Need only be 1.5 inches high to work. Maybe 1 to 1.5 inches wide... thinner it is, the easier it will be to bend to shape...
Hoping we can get down to his boat in the next week or so and remove the other bilge keel. Get them both to the fabricator. Then when finished, both keels, the tabernacle I had altered and the old bowsprit chain roller fitting, together with the new rudder fittings to be made for the skeg extension and rudder heel, can all be galvanised. Any other steel work or anchors and the like could be thrown in at the same time the charge is nominal!
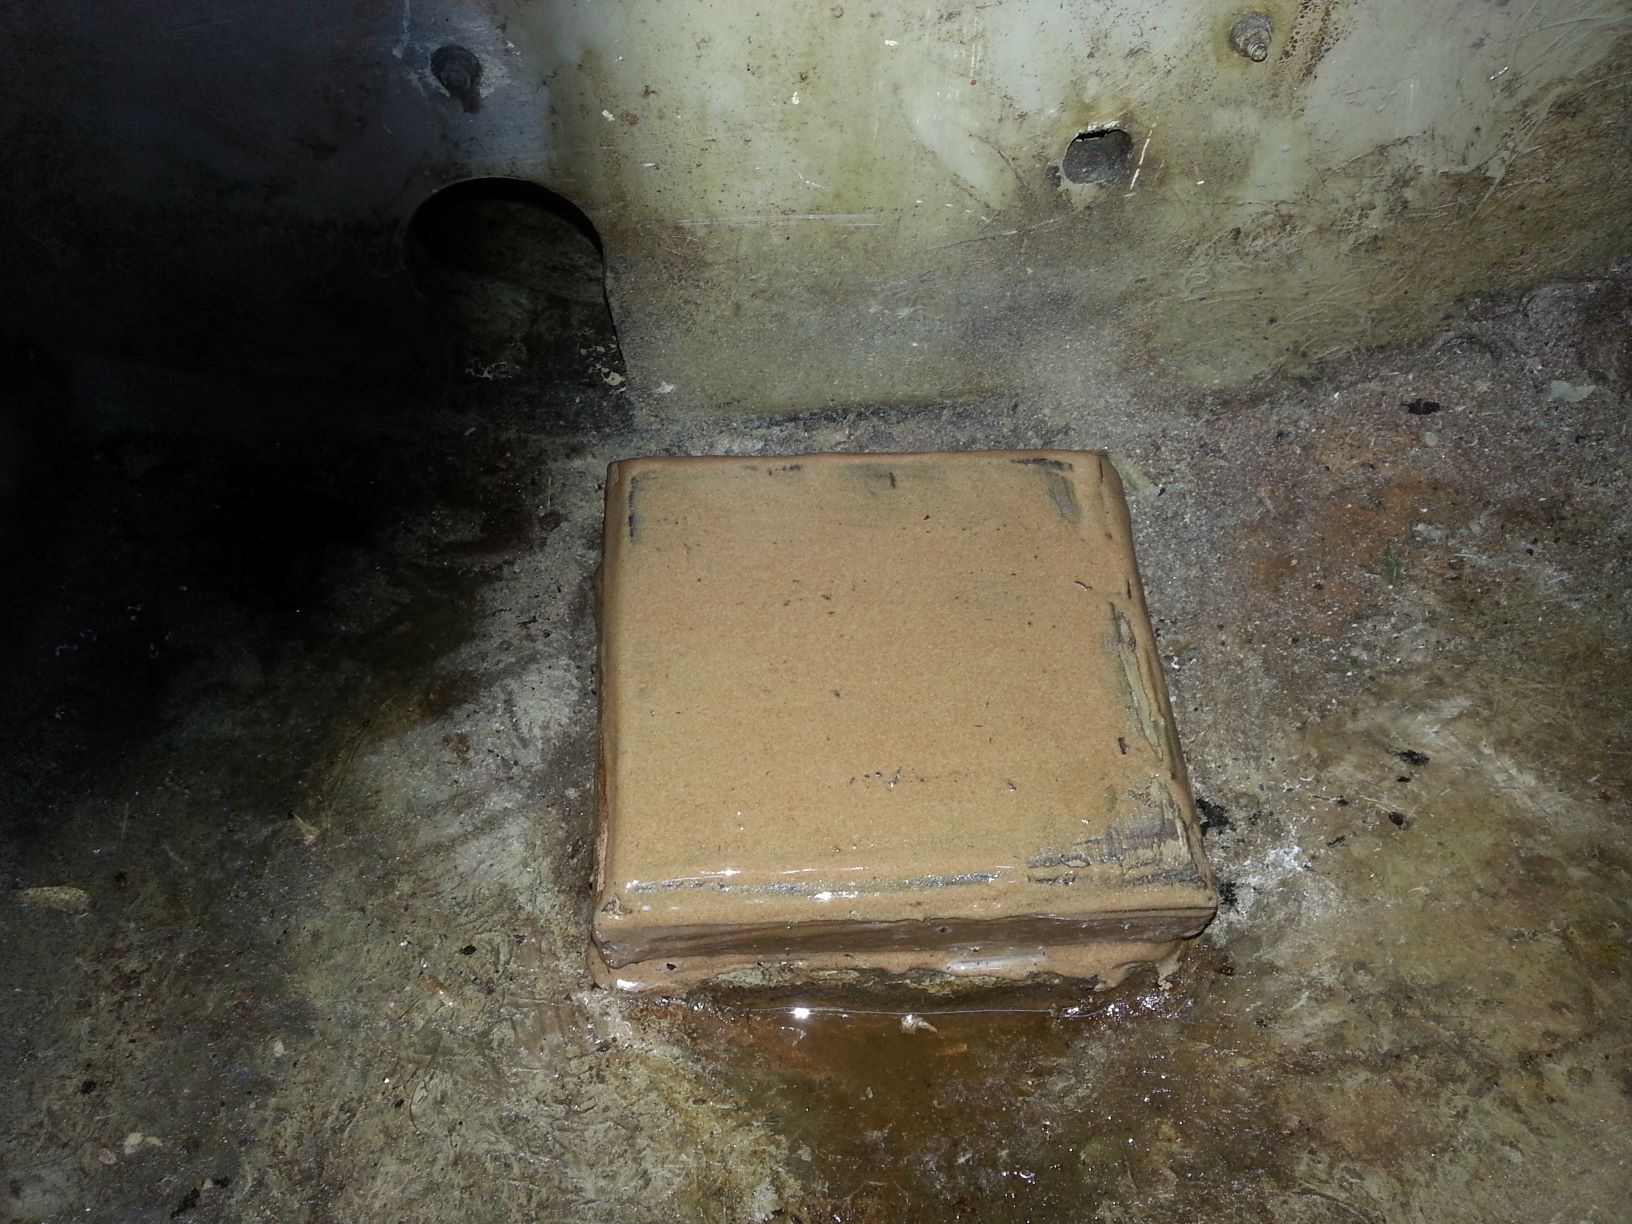
I have already fashioning a block of hardwood to block the old rudder hole, to be epoxied in place next time we are down. I have lengths of hardwood dowel to glue into the 1/2 inch bolt holes and a large timber pad to cover the lot inside the boat, that will not leak!
I have already started to make him a new bowsprit. It is 90% shaped. The original was made of soft wood and so rotten I was surprised his mast was still standing! The new sprit is Iroko! Will outlast everything!
John W.
Hidden under the dinette are the port bilge keel bolts.
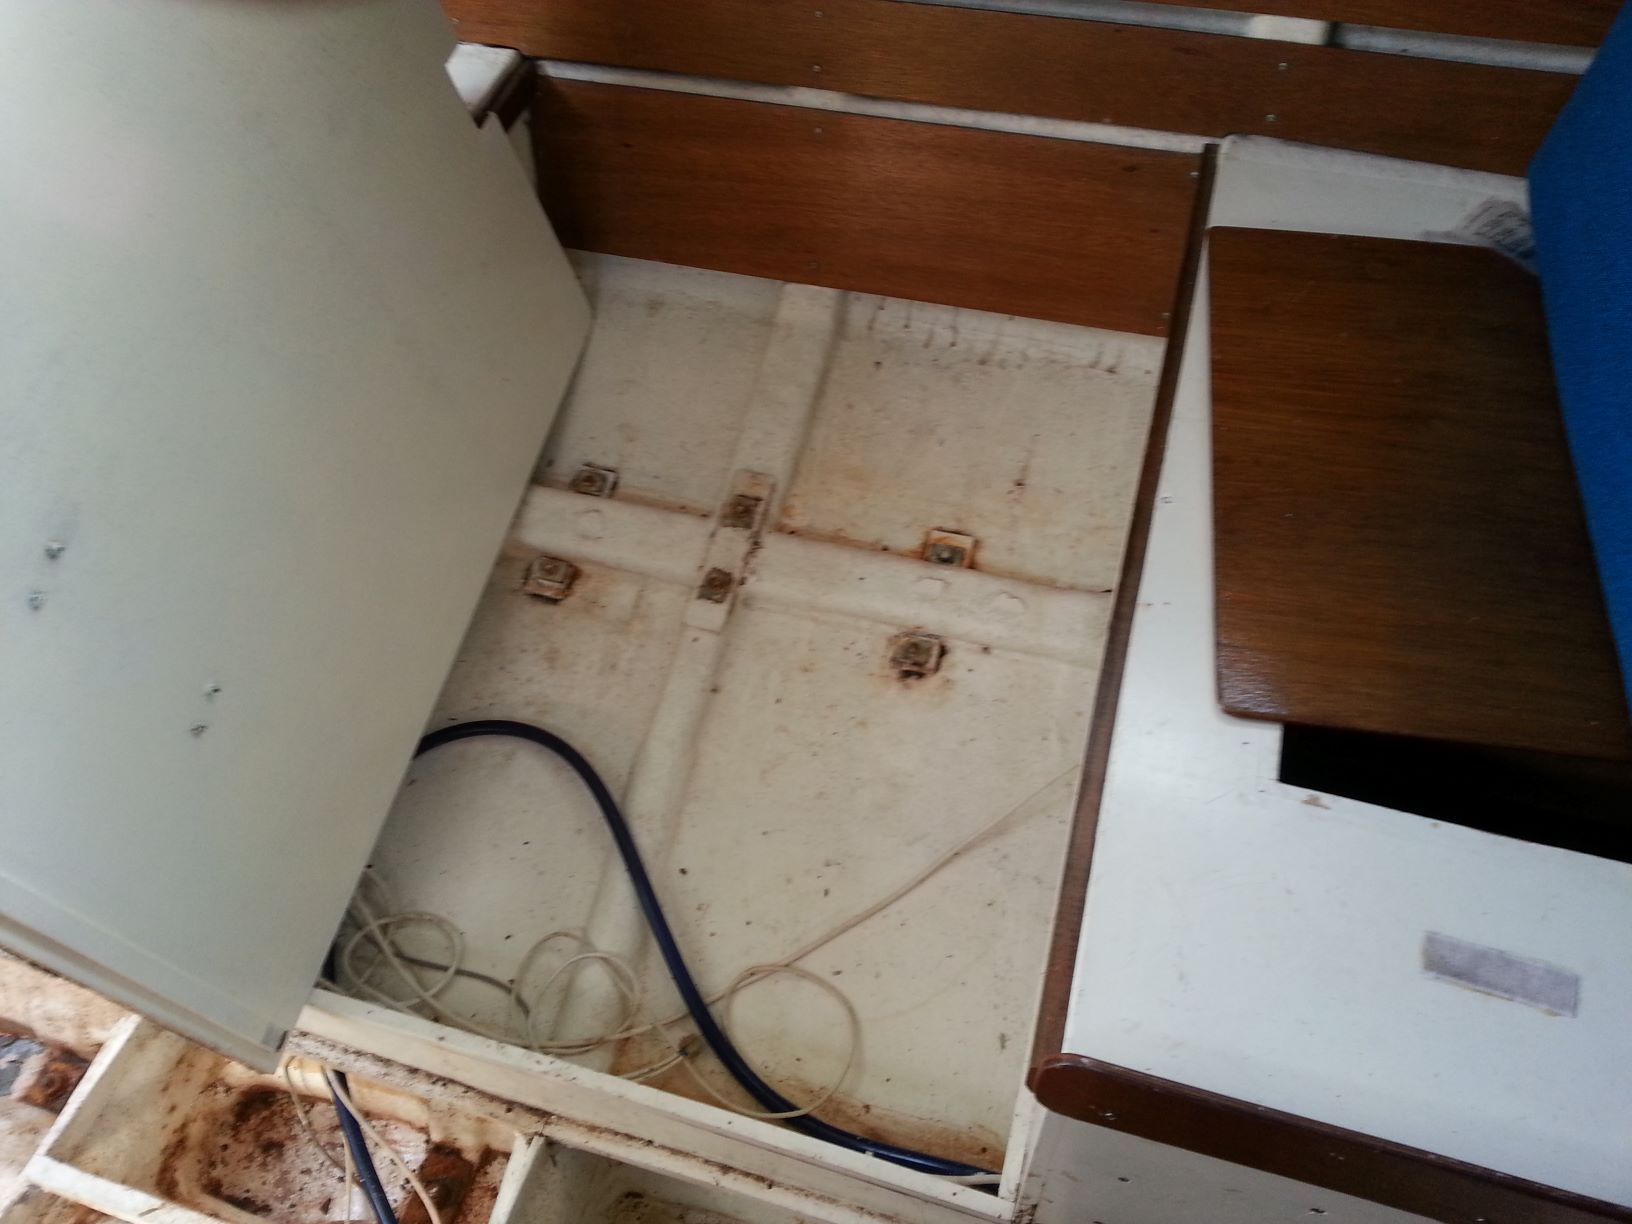
The bolts revealed.
![]()
Some are really difficult to get at!

Where bolts pass through the GRP frames there is a steel backing plate

The old rudder tube cleared out and ready to be sealed.
The blanking plate epoxied and screwed in place.
Filling and fairing off the outside of the old inboard rudder hole.
As John W. worked underneath he nearly got his feet wet!
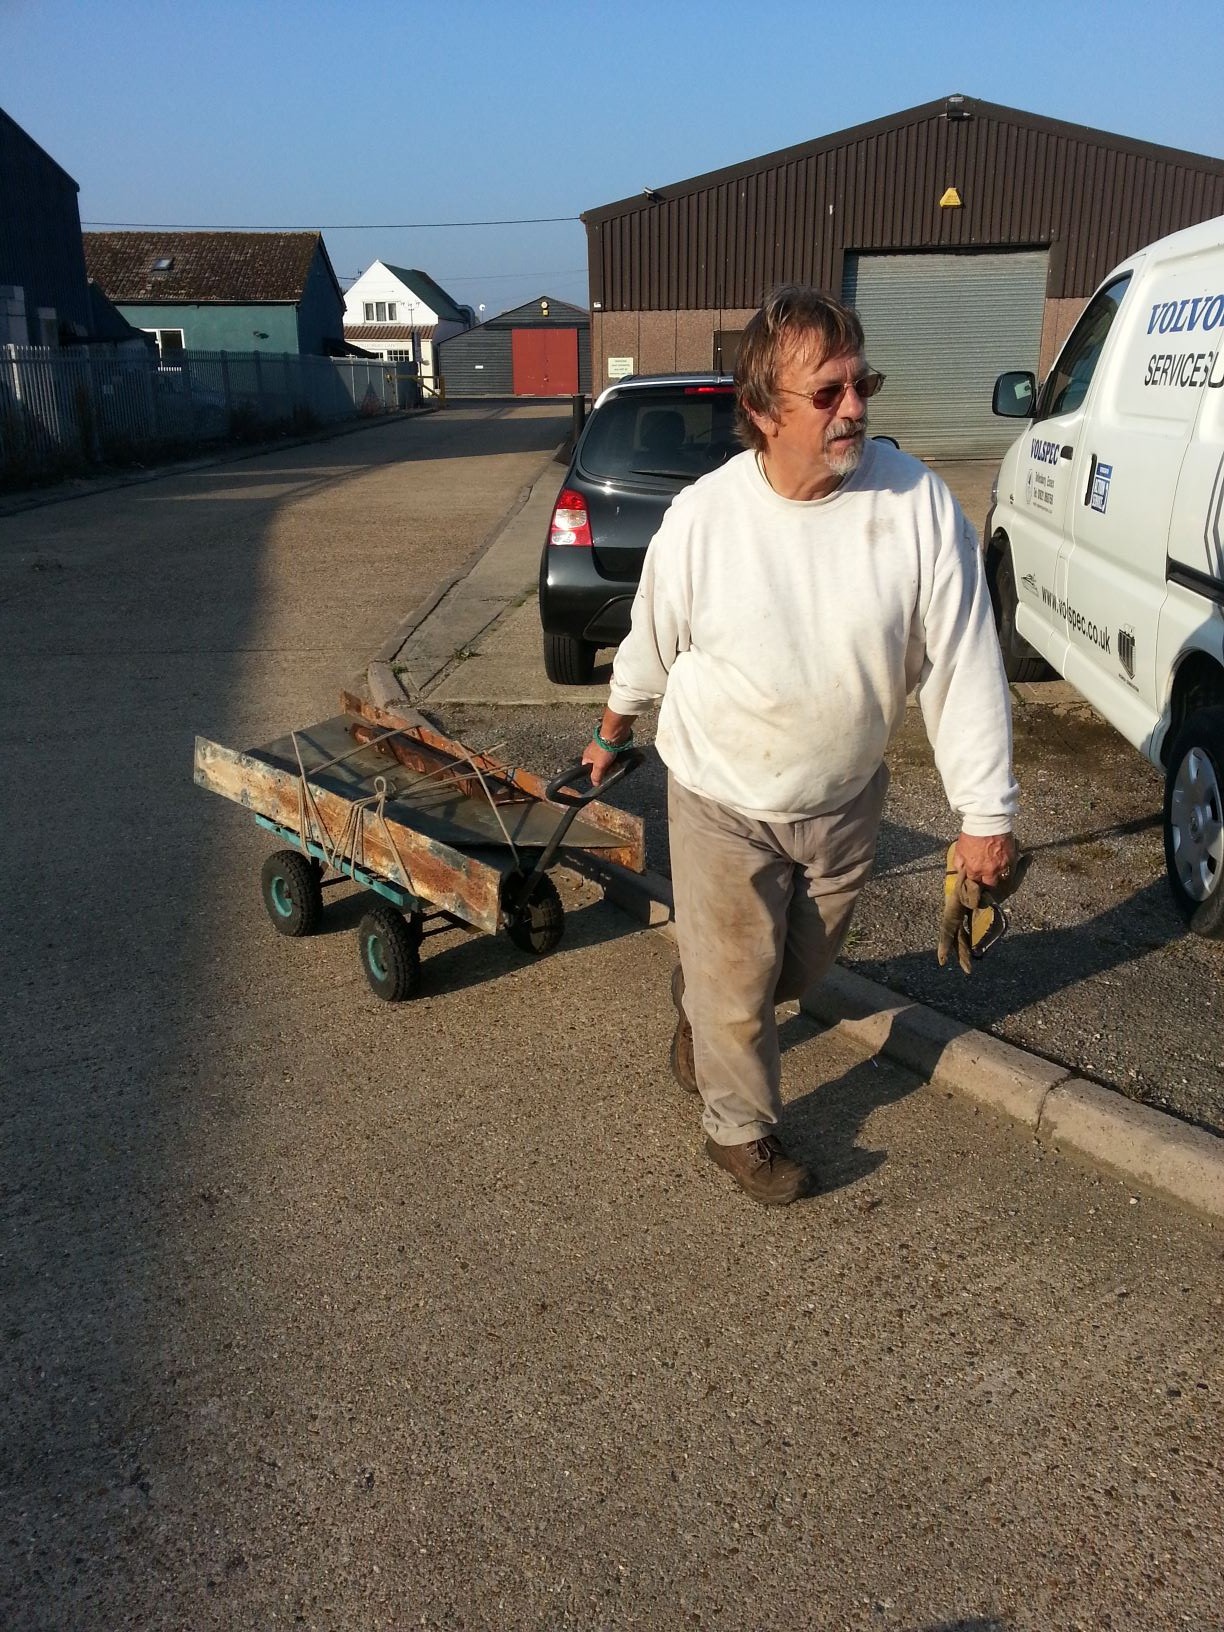
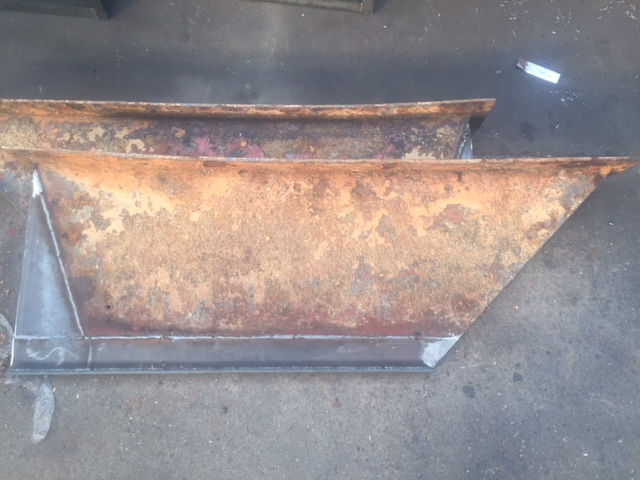
Hauling the old keels up to engineer, heavy work!
Keels on bench ready for inspection.
The odd bow fitting before modification.
John S's feet and the foredeck!
![]()
The view inside the transom, where we are to fit rudder fittings. Two holes can be seen from the ladder that was removed, they will be utilised again, one for ladder the other as a gas drain!
The underside of the samson post.
ditto.
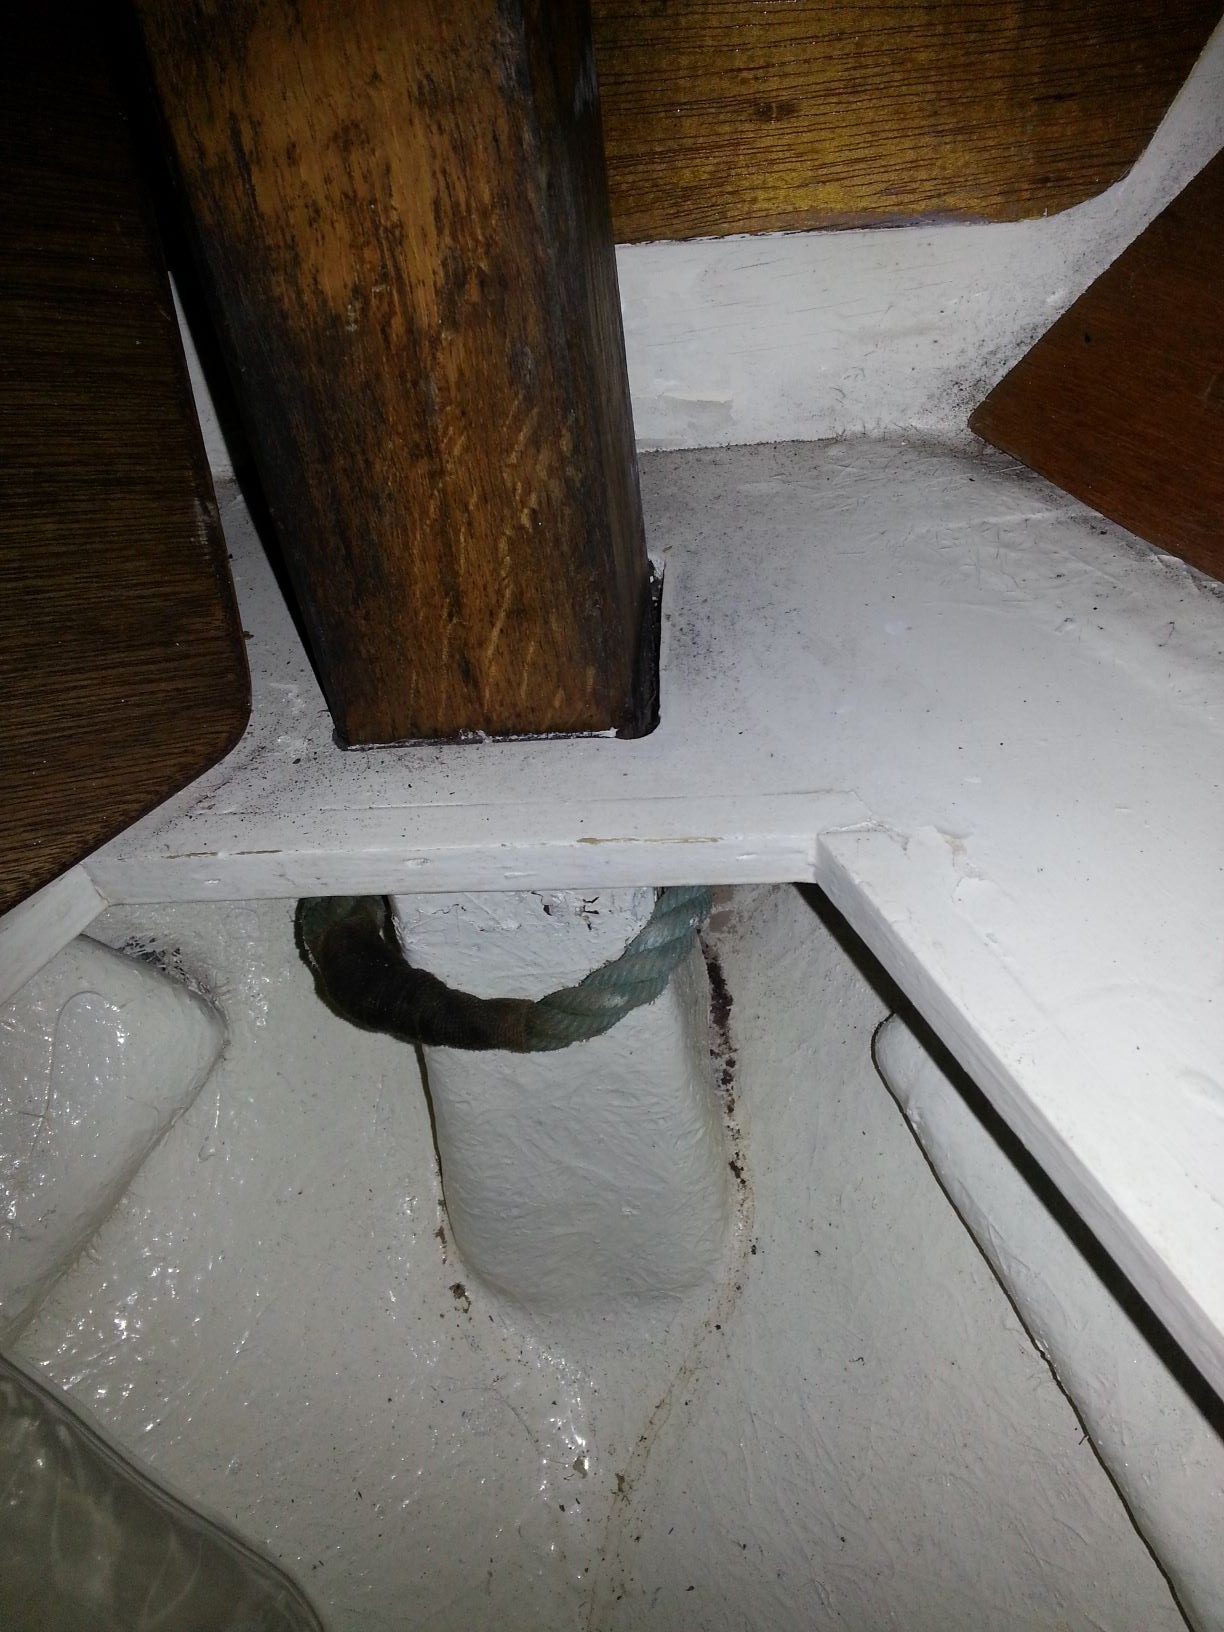
Where the post lodges on top of the GRP hog, note rope for bitter end of chain!
Top of the post. Sound, but will be renovated and protected with a lead cap.
Wednesday October 10th 2018.
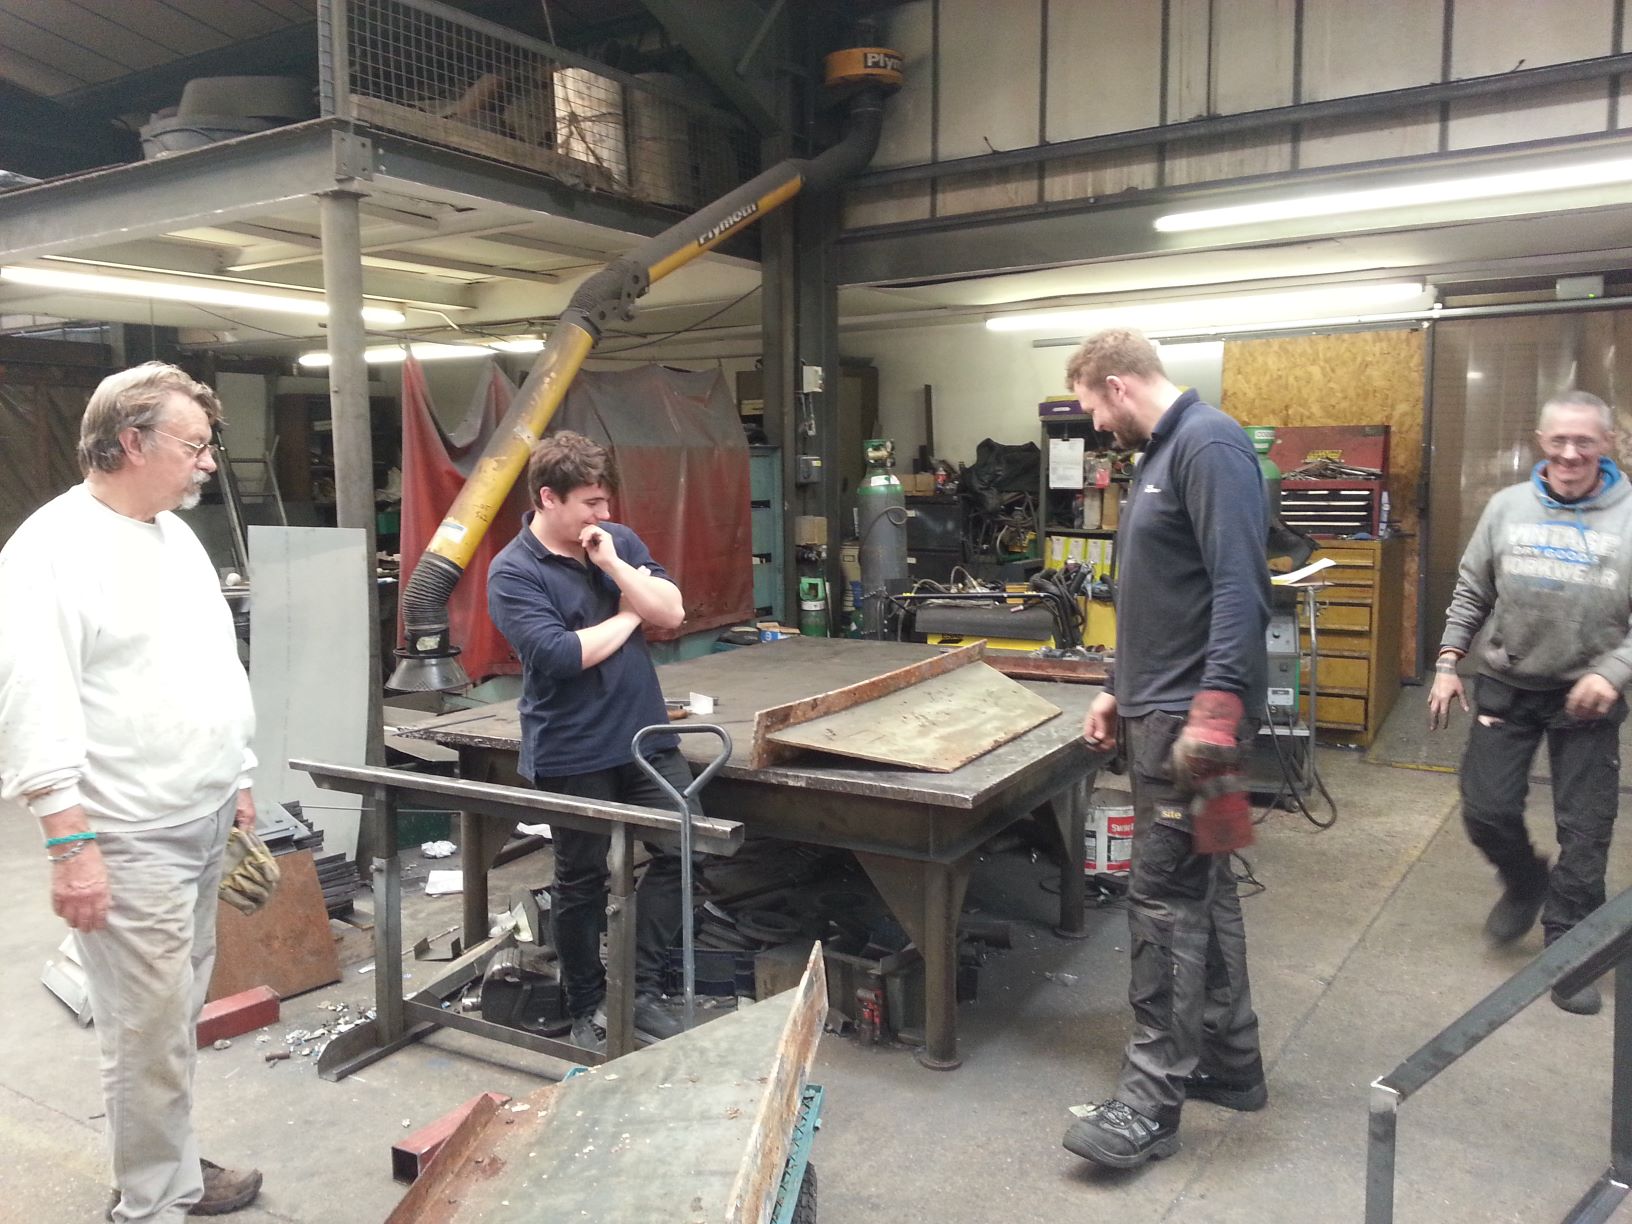
I was down assisting John Stevens with the refit on 'Glasstide' again today, he got on and removed the other offending bilge keel, whilst I was busy sealing the old rudder hole in the bottom of the hull...
We then loaded both the bilge plates onto a little garden trolley I had brought along, (after we used some of his puncture spray on the flat tyre), then I dragged the keels up to the local engineering shop. They were heavy, as much as we could lift together, one plate at a time!
We had discussed the shape of the keels and John's weatherhelm problem and he opted to add a small triangle of steel at the back of the plates as well as replacing the bits on each side that had cracked off on the bottom edge!
Seems a previous owner had tack welded strips of 8mm bare steel to the bottom of the plates, in situ, and of course they were never galvanised. The stbd side collapsed with the weight of the boat just sitting on the hard, when the rotten weld corroded through, the port one cracked apart as John removed the keel from the boat.!
Few of the bolts were actually holding it! Many had no heads, most of the ones that had heads had rotted through just inside... Looking at them I am guessing they were just plated, not galvanised... how the bilge plates had not fallen off on the mooring, let alone whilst sailing across the estuary, amazes me!
Two days later and repaired keels now have a triangle of 8mm steel added to the back edge as well as the bottom 3 inches of rusted steel replaced. The main steelwork was galvanised and still is as good as the day it was made. When all is re-galvanised it will last and last. (First they have to be cleaned back to bare steel though....)
All the fastenings are now to be 10mm so some of the holes in the top plate are to be opened out from 8mm and all made large enough to take a 10mm galvanised bolt. In practice this means the bolt holes will have to be more like 11mm so when coated with galvanising and fitted with a 10mm galvanised bolt, there is still room to fit them without binding. This allows room for some mastic round them too!
There is also a case for drilling a pair of 12mm or 1/2 inch holes to take heavy 3/8 shackles front and back of both keels, for hold down chains, should the boat ever be moved by trailer, and of course one low down in each of the plates to take the through bolted anode. Drilled overlarge and then galvanised these should be preserved by the coating and not rust. (Mine have not in 30 years!). If not used, the purist can plug the hold down holes, if they feel they are going to slow them down!
I would really like to see galvanised coach or carriage bolts used for re-securing the keels, these have domed heads, for ultimate water speed and ease of painting etc.! Chances are John may not opt for these though, so may have to settle for galvanised 10mm hex head bolts.. The only mod to the keel top to be able to use coach bolts is to use a square tapered punch and square the holes, a remarkably easy job to do! Remember doing mine 30 odd years back. Will wait to see if we can source proper galvanised coach bolts.. If the holes are to be squared, they have to be done before galvanising of course!
Hex head bolts are OK, but they provide a foothold for barnacles and then more fouling, not easy to remove...
Using hex head bolts is that 'happeth of tar' in the saying..... I have always used the adage 'If a job is worth doing, it is worth doing well'. Never been disappointed if I have done my best..
John now has to remove the nice coating of epoxy we put on two years back, easiest way is by getting them shot blasted. Abrading by hand would be a laborious and long winded job! We coated them with epoxy thinking the keels were OK as they were.... so I used up loads of epoxy coating them..... gone to waste, shame.
Then they will be galvanised, along with some other steel items, the tabernacle I had converted for him and the bow roller to fit the new bowsprit I am making. As the family keep telling me, I love a project!
After weathering, the bilge keels will be epoxy coated again, 3 coats will last 25 years... you must coat the galvanising before painting with a copper based antifoul, or the electrolytic corrosion will be severe...
The conversion to transom hung rudder.
Before blocking the old rudder tube hole, after all the duff, seized, steelwork was eventually removed, I roughed up all the exposed GRP in the hole and shaped a hardwood blanking plate to screw down on the inside of the hull. Four 1/2 inch hardwood dowels were shaped to fill the old bolt holes, and from underneath, in the old tube hole, I screwed up an off cut of teak to the blanking plate fixed inside.Then I bedded the whole lot in on an epoxy paste and forced it into all the voids. When it has fully hardened I will sand it all off and refill any slight depressions, then it will be sealed for good and later painted with antifouling. On the inside the hardwood block and the gunmetal screws securing it, were covered in a thick layer of epoxy with filler, when smoothed off, this can later be painted with bilge paint...
Felt very pleased to have at last sealed this area.
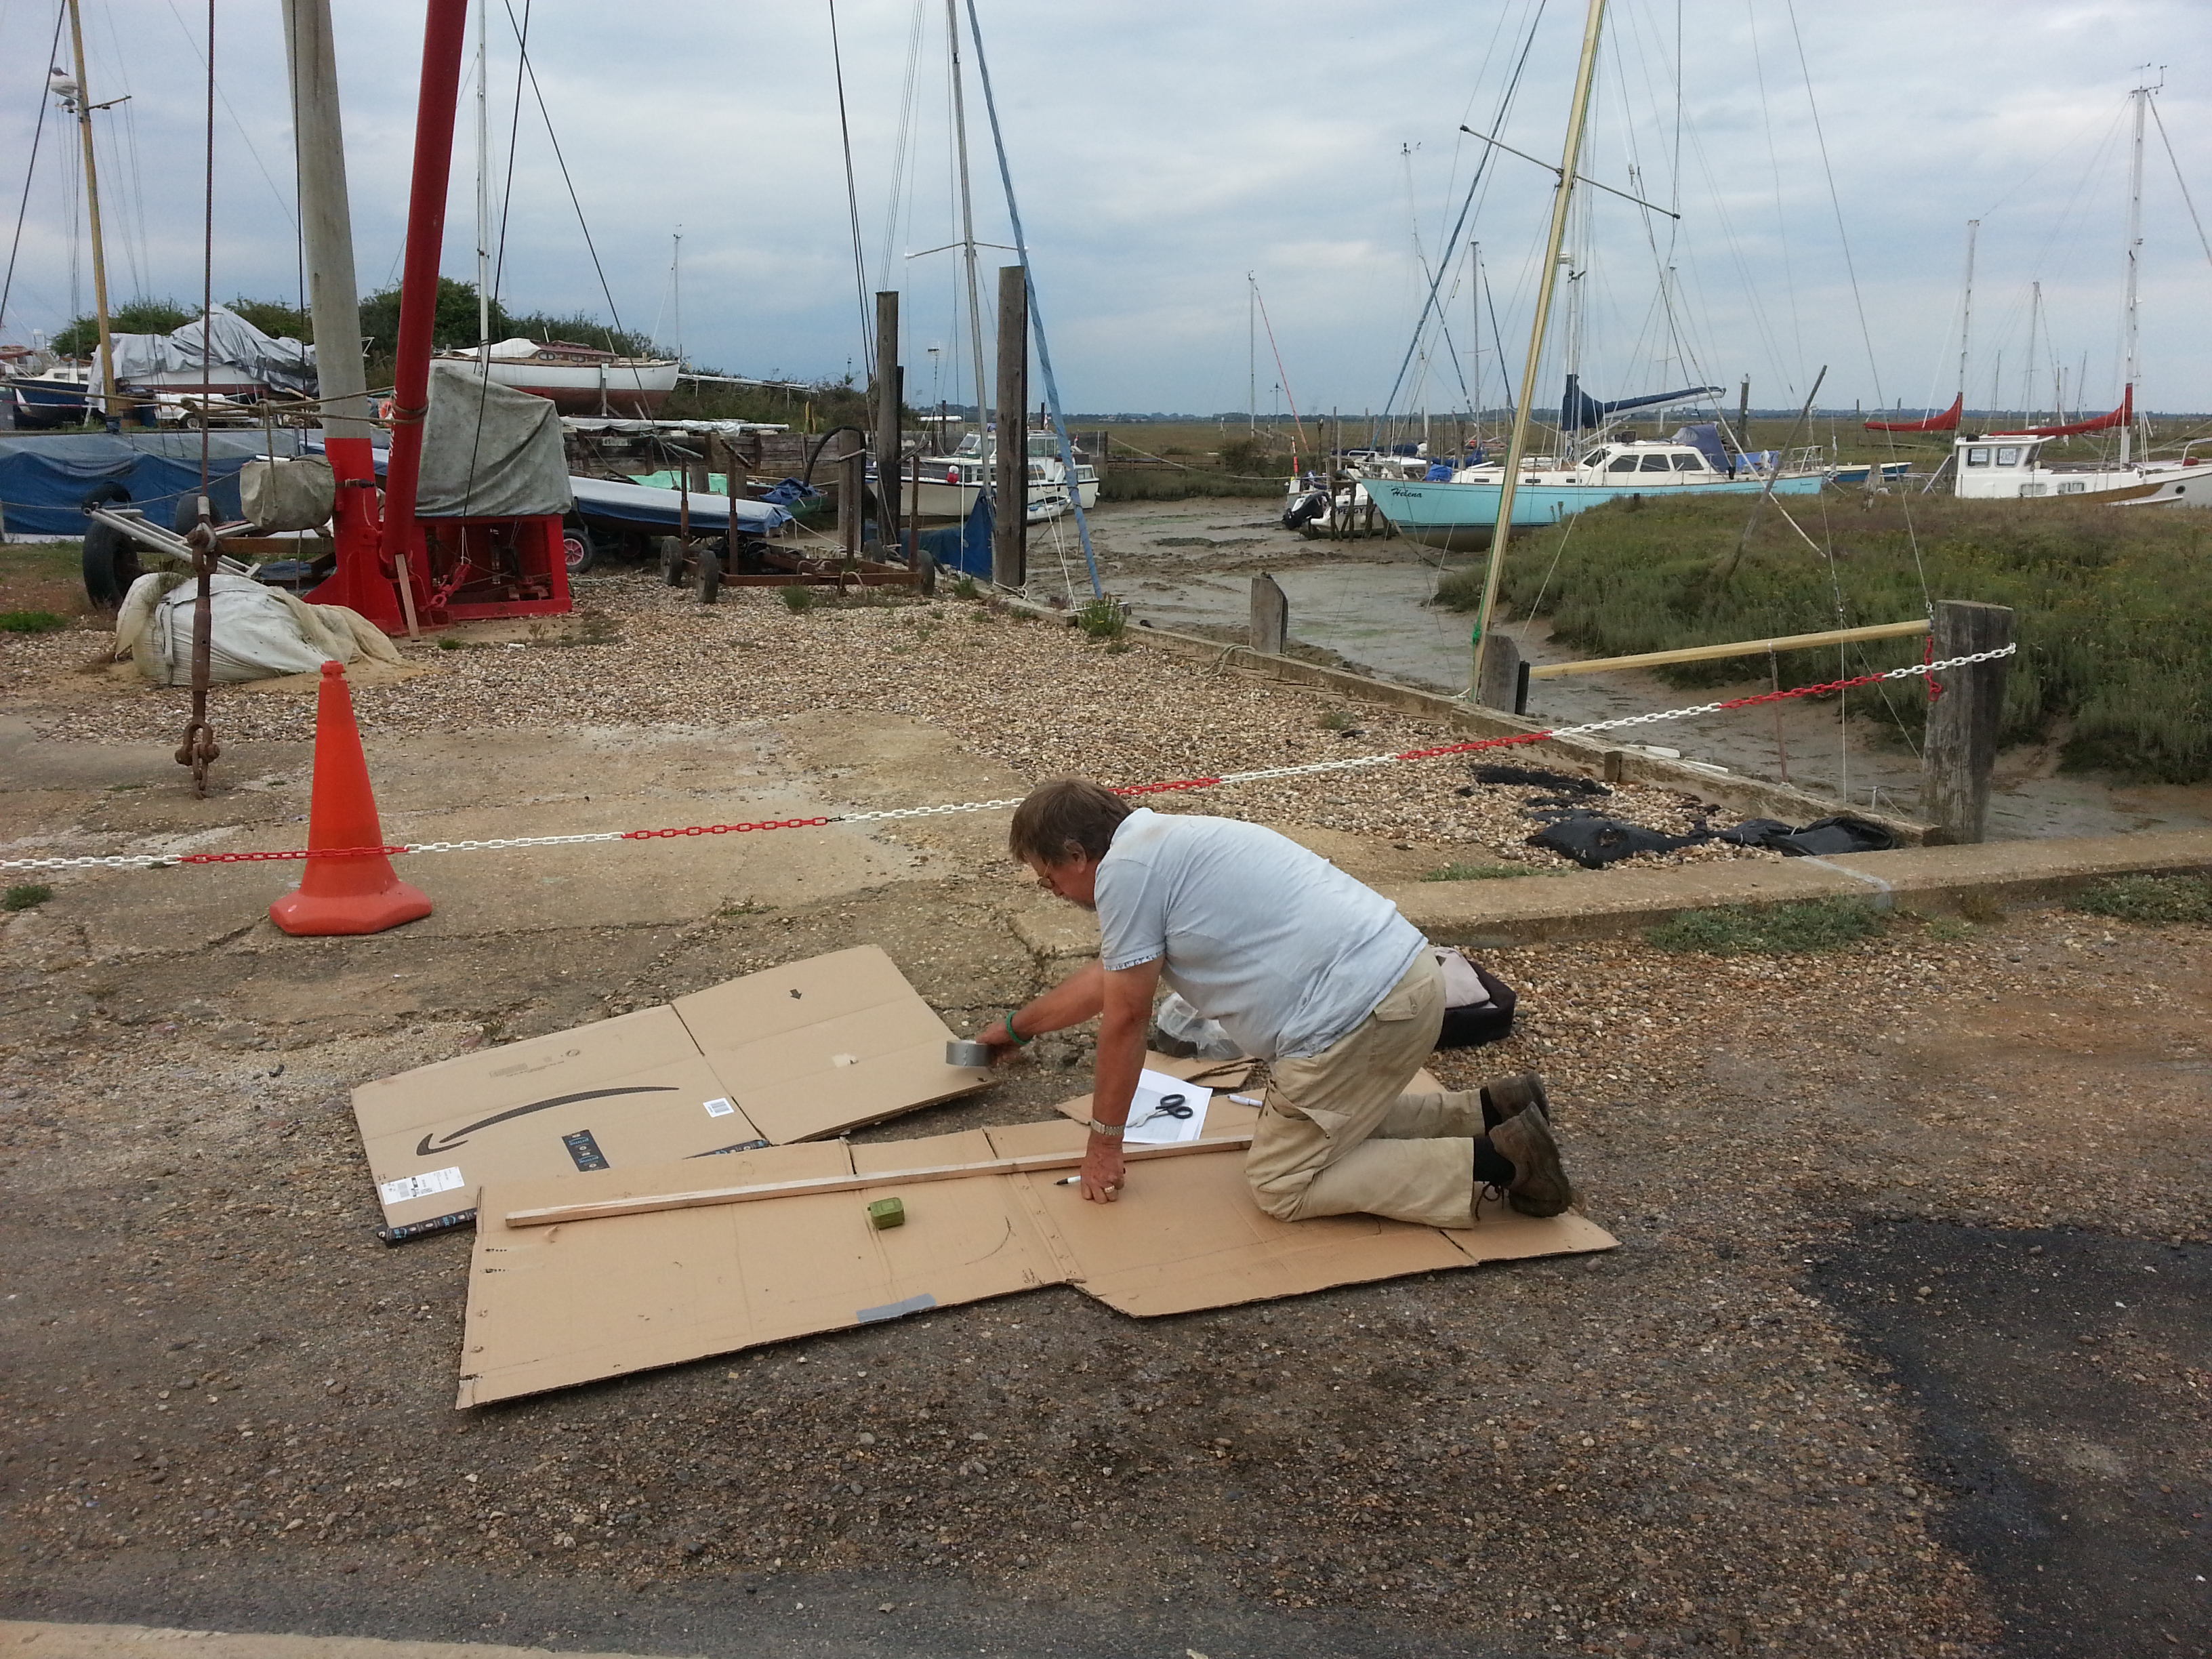
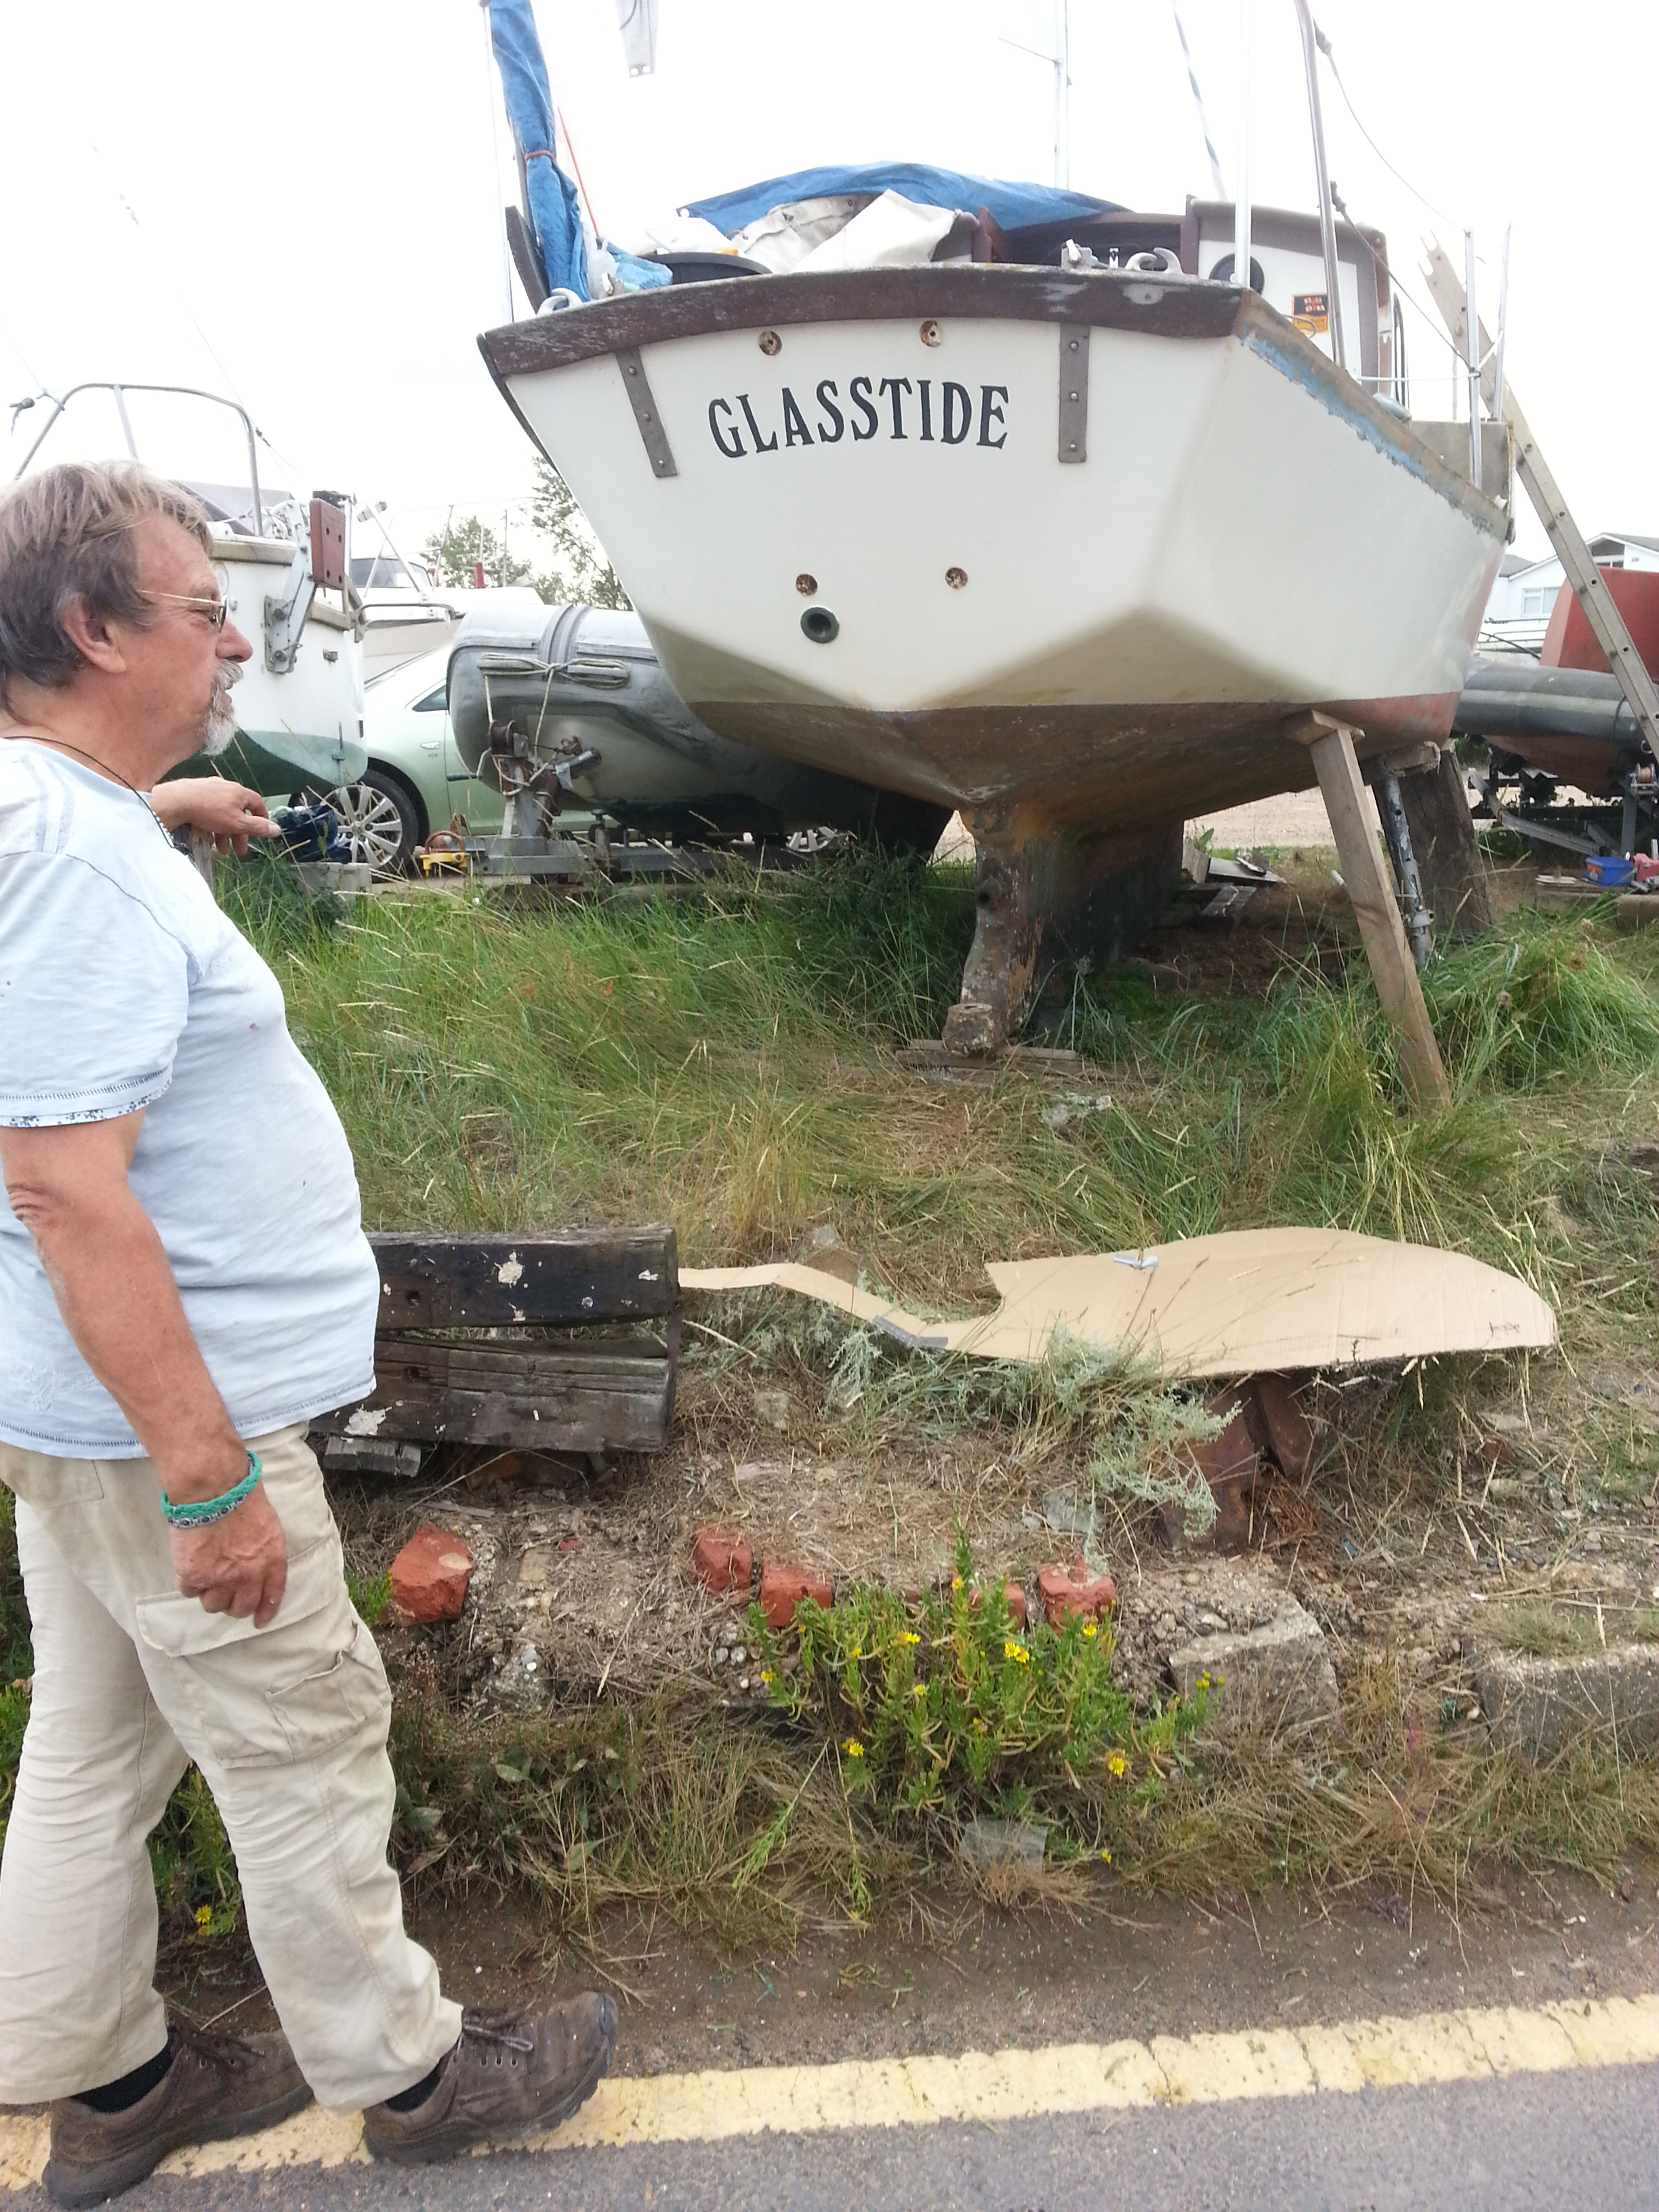
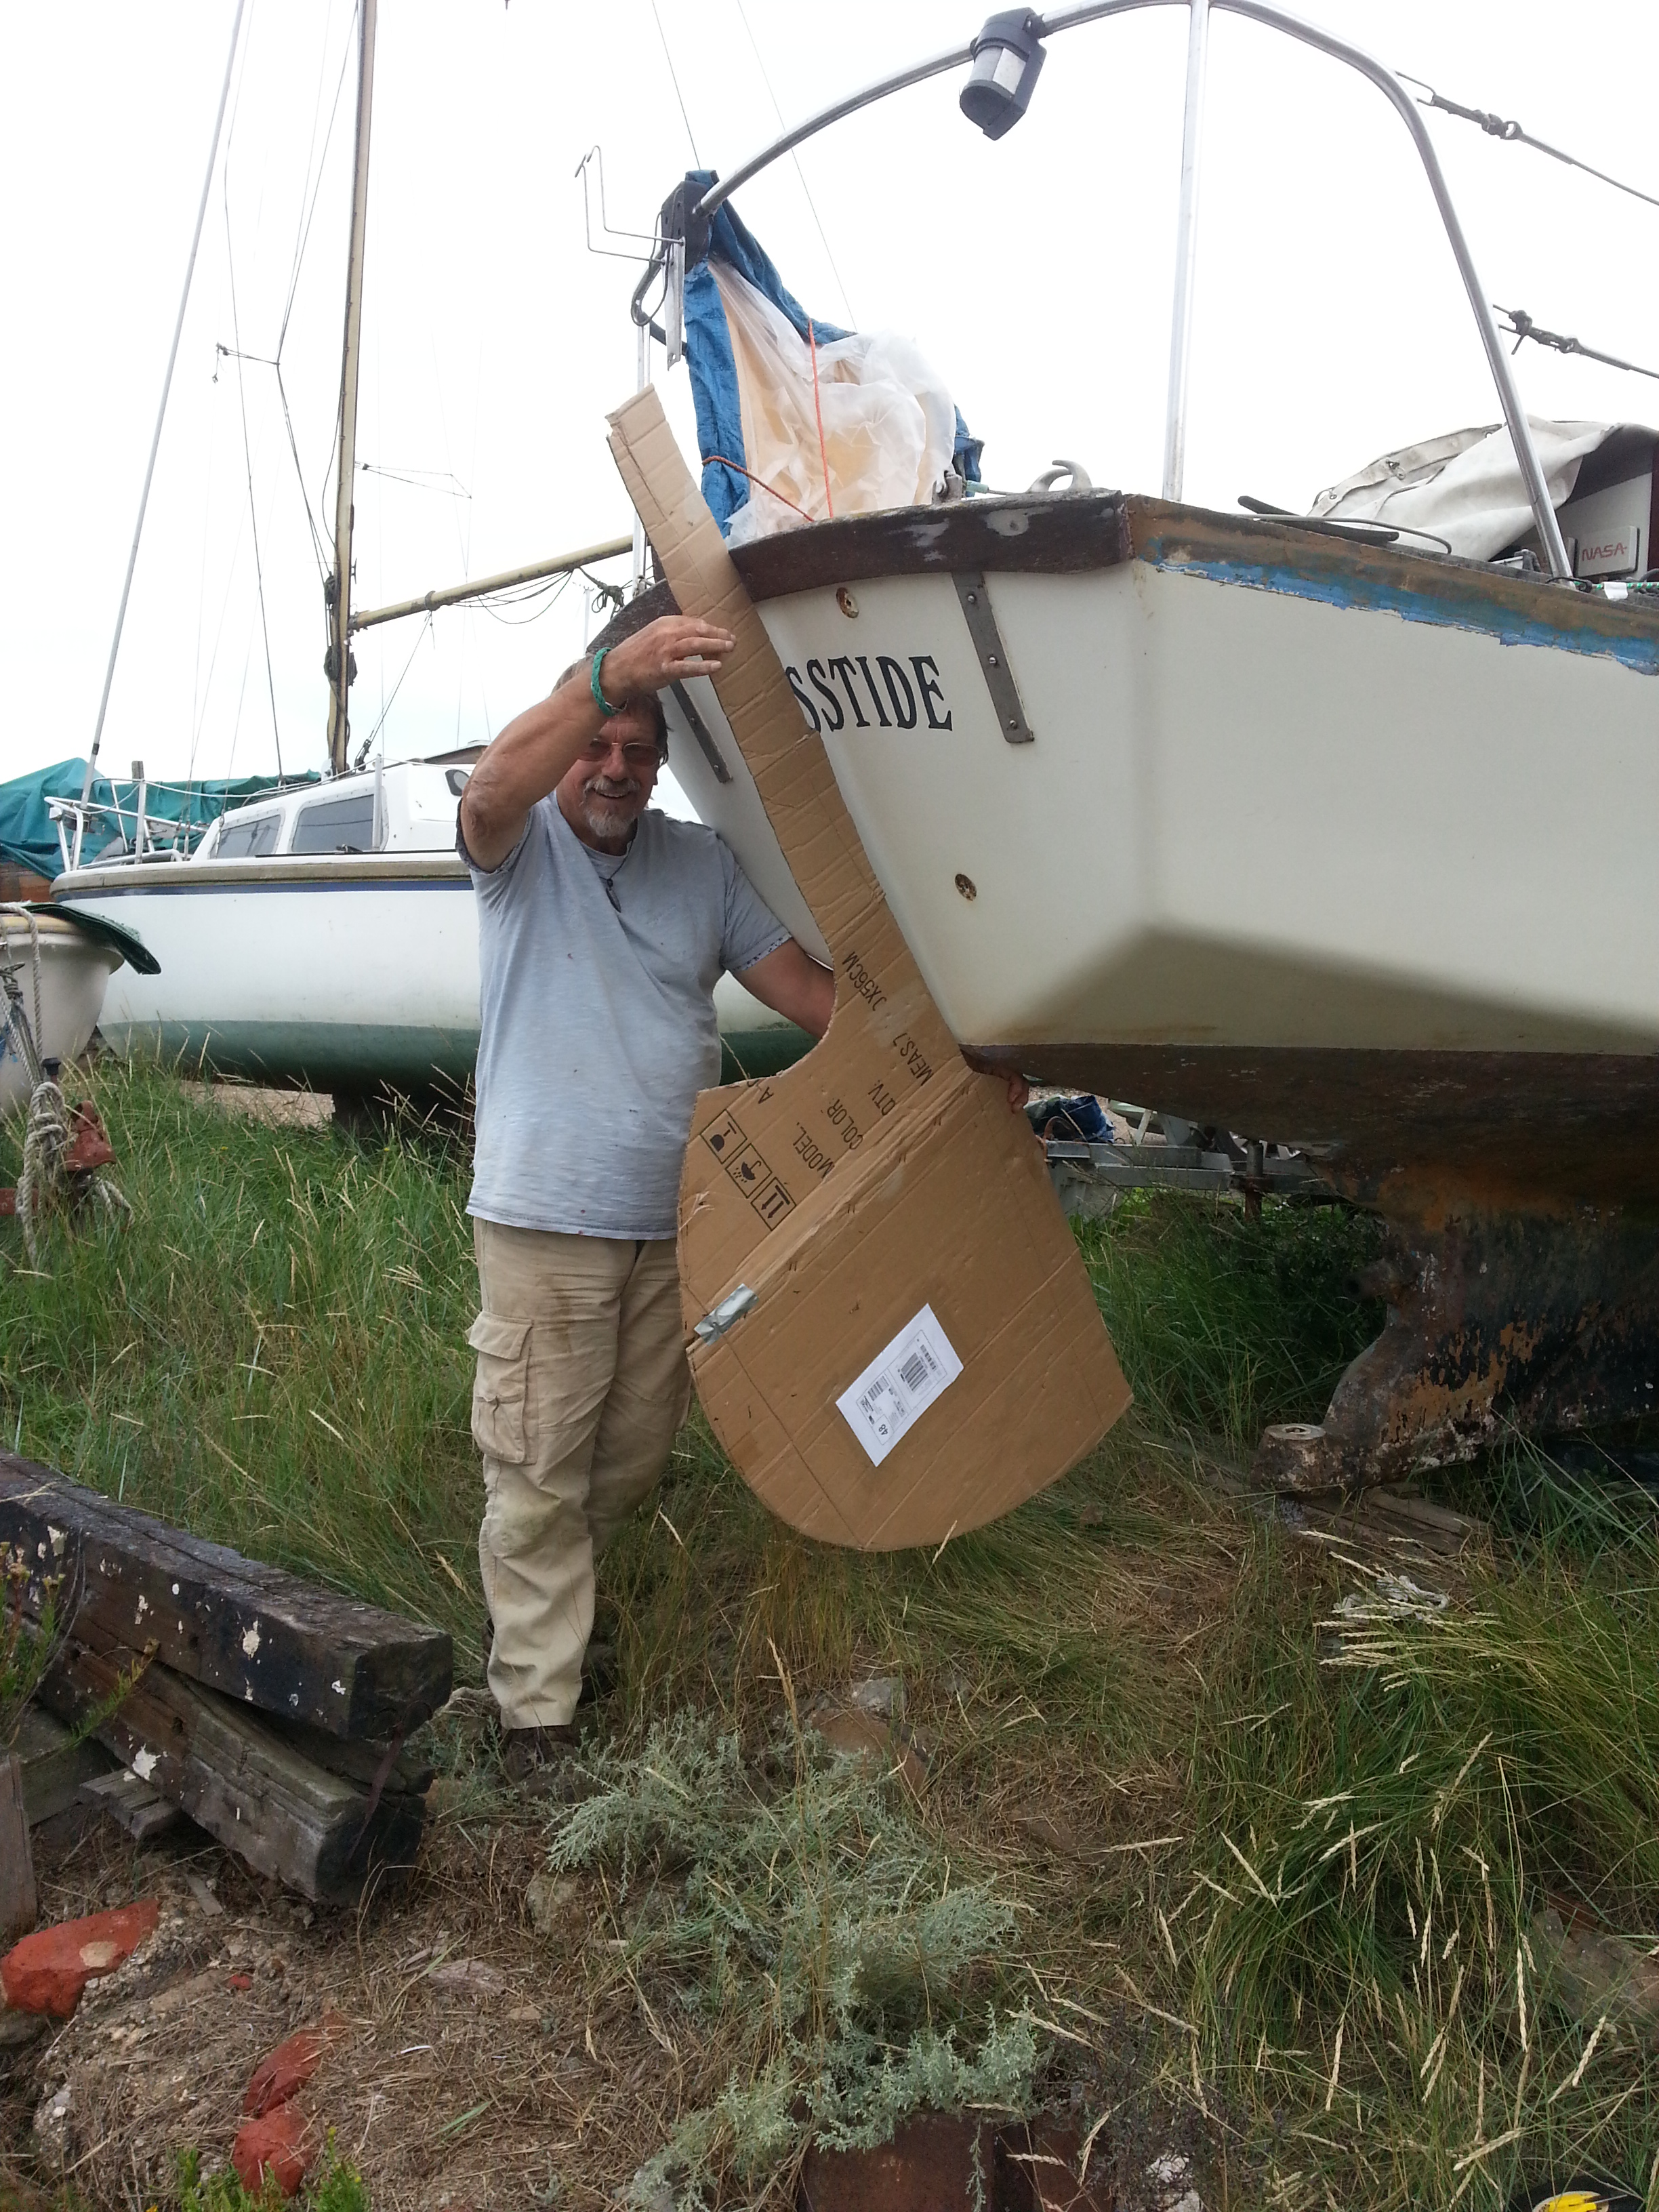
Then I turned my attention to the new rudder's template. I had realised it was not quite the right shape at the bottom. We held up the cardboard mock up and with a batten from the skeg aft, worked out the correct level for the bottom of the rudder and amended the cardboard template. Now it looks better! Job for John S. to do over winter in a warm garage!
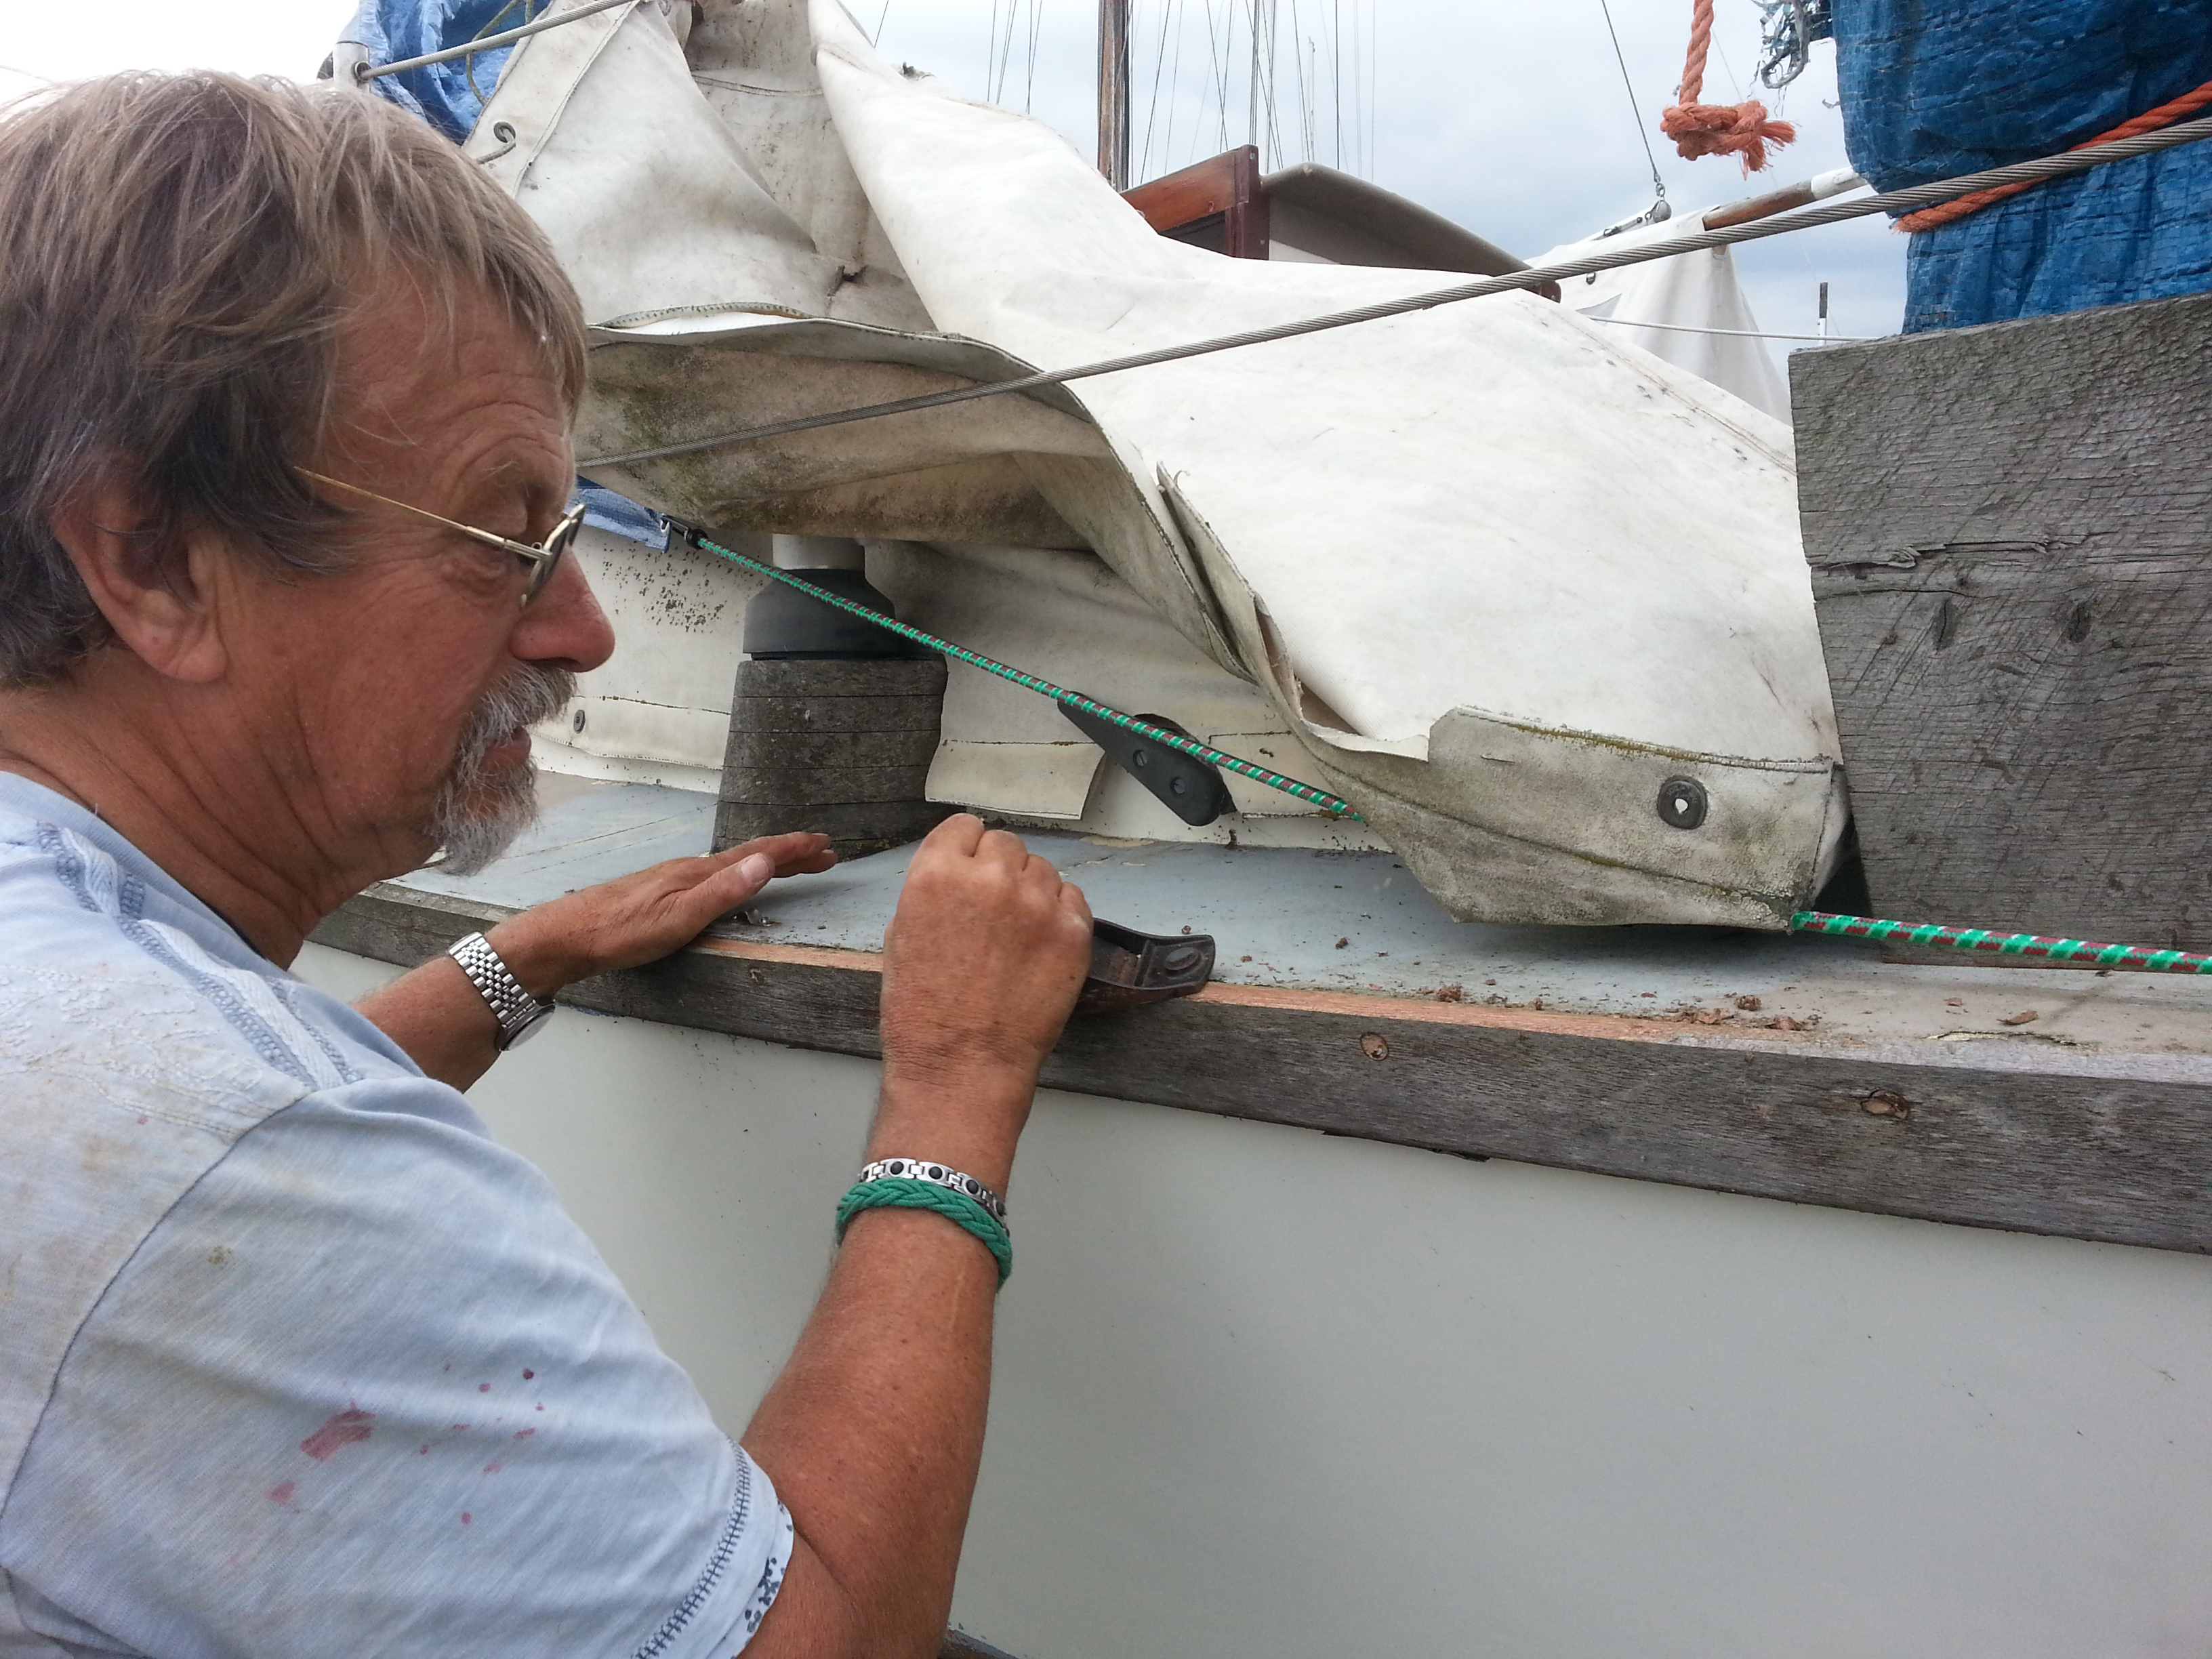
Next we assembled the new s/s rudder fittings John S. had bought and offered them up. The centreline of the transom was measured twice and then double checked with a batten by eye. Made to measure! With the top plate fitted neatly just under the timber edging at the top of the transom, there was just room for the lower plate to be fitted just above the waterline on the bottom of the transom and still have 1/2 of the pivot pin showing!. The pin for the pivot was almost exactly the correct length. That pivot pin now just needs a hole drilling through it so a stainless washer and split pin can be added to secure it.
Next job will be to make the backing plates and fix it all, dry. I turned out my wood store and have found some 3/4 marine ply for backing plates and some hardwood to make the 6 x 3 inch backing pads for the new rudder fittings.
Then when John S. has made the new rudder, it too can be fitted to the bearings, dry, so the heel fitting can be made. Already sketched out my ideas for him, a simple device made from 2 lengths of 2" angle joined together and about a foot behind the old skeg a 2" diameter bit of pipe welded to them at the end to take a section of tuphnol as a bearing. Has to be offered up when the rudder had been made and is dry fitted... Getting there!
Safe Gas storage.
There is so little space, vertically, in the stern locker, for a proper gas locker. It must have one. Before a gas bottle was found rolling about loose in the aft locker, a recipe for disaster and a fail on any survey! To enable us to stow 2 bottles safely and be able to use one of the 4 existing holes in the transom, from the old stern ladder, as a drain, it may be necessary to use slightly smaller Camping Gaz bottles instead of the larger Calor ones. I brought one down to offer up, yes looked a better bet!
Access to the top of the open topped gas locker/shelf would be through
the aft deck hatch, but as you only need to be able
to lift one bottle in or out at once, the locker need only have a small part
of it immediately under the hatch for access. That will not overly restrict the access
to the rest of the locker.
Remembering too that John S. has still to fit an under deck fuel tank in there
too.
Re that central stern ladder that I removed earlier to fit the rudder. I figured I could reuse two of the four securing holes by simply shifting the ladder sideways, to port, a third hole could be the new gas locker drain, low down to stbd. Leaving me just one hole high up to stbd, to fill and disappear, result!
Hoping John S. bites the bullet and extends the cockpit back a foot or so, making a new aft bulkhead for the cockpit, so that the new fuel tank can also be fastened to it , roughly where the old rudder tube was.
I know John S. is concerned that doing this sort of work will delay re-launching, but with all the myriad of other jobs, doubt it will make any difference. As always when doing this sort of work, it is so often better and easier to start with a blank canvas rather than try an do a 'workaround'. At the moment you cannot see the wood for the trees!
The benefits will be a cockpit long enough to stretch out in lengthways, and extra locker space in it where it is easy to use. A shorter stern deck will also make the new tiller needed, a shorter one.! That may have to be fabricated from a half dozen 1/4 inch strips of 2" wide hardwood, bent to shape! I suggested buying a load of door edging strips, in hardwood, maybe two different colours. Easy enough to work out what shape is needed, then make a cardboard template, then use a heavy base timber and clamp one end of the pile of slats to it, raise it over blocks of wood then pull down the end with a Spanish windlass. Wrap it in old towels, then pour kettles of boiling water over it to soften it. When dry, take apart and glue and shape for a perfect tiller! A really rewarding job... Well at least I think the one I made for F.G. is perfect, my daughter helped do that one!
Last job for the day was to get up on the bow and sort out the fixing points for the new bowsprit. Looking at the samson post I realised it was not loose as I had been led to believe, but sound, apart from a few deep cracks in the top, OK, so the new Afromosia post I had dragged out of my store was not needed! The 2 & 3/4 inch post was a mite small, but it had survived OK thus far, so given a little modification, would be fine. Needs the cracks in the top filling with epoxy and a lead or copper cap shaped and 'Sikaflexed' on the top, to prevent water ingress. There is also a large hole athwart ships, across the bottom of the samson post where a bolt had been fitted to secure the bowsprit. Gross overkill! Will glue a dowel in there! The heel of the new sprit will notch simply round the post, there only needs to be one other deck fixing, where it rests on the s/s upright at the stem.
To this end, after trying a long batten as a dummy bowsprit, at various angles, I cut 1 & 1/2 inches or so off the vertical fitting with John S's new angle grinder and also removed a surplus forward pointing s/s plate. That too had been used to fasten the old sprit! Really too many fixings.. Oh did I mention the other two rusty, nasty, 1/2 inch bolts through the sprit and the foredeck! Wonder what sort of strains they were expecting it to take!
Then I drilled a hole in the shortened vertical plate, to take a bolt to fasten the sprit to the bow. Axel a local chap came to my assistance. John S's nor my drills were cutting, he sharpened one of mine old ones by eye and it cut through easily after! Ran out of drills at 3/8th of an inch, so the hole just needs opening up to 11mm to take a 10mm bolt or clevis pin. Easy job for later. If we can find a sharp enough drill!
I spent a few minutes at odd times, running my little jack plane along the silly upstand on the rubbing strake, trying to create a bevel that would shed water, I have done the port quarter. The remaining bits of deck level rubbing strake need similar treatment and then a coat of Sikkens or similar as the timber will not survive long un-coated. This is an easy job for John S. to do, whilst the exercise will keep him nice and warm in the next month or two, finishing off by sanding all with a belt sander or by hand, to remove the lichen and rubbish and get a coat of preserving paint or stain on....
I now understand John S has obtained some dark oak Sikkens. That will do the job nicely!
The joint between the timber and the hull needs to be scraped out with a sharp long point and filled with something like Sikaflex.. to keep the water from getting down there.....
Outside work, apart from the last mentioned rubbing bands, is about over for the year, so time to put the cardboard mock up of the Yanmar motor into use (John S. has been putting off making this template for too long), time now is pressing.... and measure up for the new engine beds. These have to be acquired and fastened to the existing beds and may need epoxy, so may just have to be dry fitted for now, shame, as had these been sorted earlier, the job of installing the newly refurbished Yanmar could have been done over winter, by Russell the engineer ... Will now have to wait till spring.
John W. for John S.

It has been a very long time since I added anything to this page. Poor John Stevens has not been at all well this past year. He is slowly recovering and hopefully come spring he will be back to sorting and finishing off GlassTide.
October 2018 I helped him wheel the bilge keels we had removed, up to a local engineering shop in Tollesbury, where they cut off the offending bottom 3 inches and properly welded on a replacement strip and new foot. While they were at it John asked them to add a triangle of steel to the back end of each plate so as to make the aft edge near vertical, this of course will offset weatherhelm.
I persuaded John S to contact the company as a year had gone by and pay for the work thus far and I would collect the keels, in case they ended up in their scrap pile!
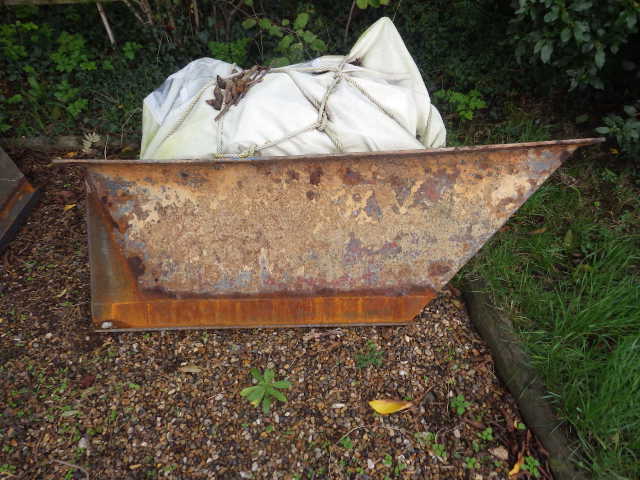
I went there in late October and collected them, they were indeed in the scrap corner and it took a little effort by two burly workers to extract them and shoehorn them into the back of my tiny Morris minor van! The front wheels hardly touched the ground on the 20 mile trip back to Tillingham.
The idea had been for John S and I to go to the firm a year back once they were welded and make the holes in the plates large enough and square to be able to take the new galvanised coach bolts he had purchased. Of course with John poorly this had not happened. They would then have been shot blasted to clean them up and taken to the galvanisers...
So I have the keels safe her and I may try and drill out those holes, but John S is yet to send me a sample bolt so I can get the hole size right. I did have a sample but but I left that with an engineer friend who was to make me a tool to assist squaring the holes. Sadly he has been hospitalised with leg and back problems and though OK will not be back at his workbench till 2020!
So for now the keels are sat in my garden, coming to no harm, just getting a film of thin rust on them that will come off instantly the shot blaster get to them! If John S finds me one of those new galvanised coach bolts and pops it in the post I will start opening up the holes to the correct size and maybe find time to start filing the holes square!
John W.