


|
BETA MARINE HEADER TANK REPAIR.
By John Williams Beta Marine header tank problem. After the 2023 summer of frustratingly high winds
and heavy rain, the weather eventually improved to allow us to leave the
berth safely, in August! No sooner we did than we found an engine cooling problem! Now we have had issues with weed and the filter blocking in previous years, but this was different.
Since the engine exhaust
alarm has been fitted we have been alerted at once to lack of water flow,
because of a weed blockage. But this day the exhaust temperature was a
healthy 45 degrees C.
Not
a salt water flow problem.
Odd sign was the strange smell from the
exhaust… So
hot did the motor get, as we trickled into the berth,
that
it died.
????
Fortunately grandson Brandon was already
ready with the stepping ashore line, so could act as our brakes!
We abandoned the boat in disgust and let it
cool down. Was not about to open the radiator cap!
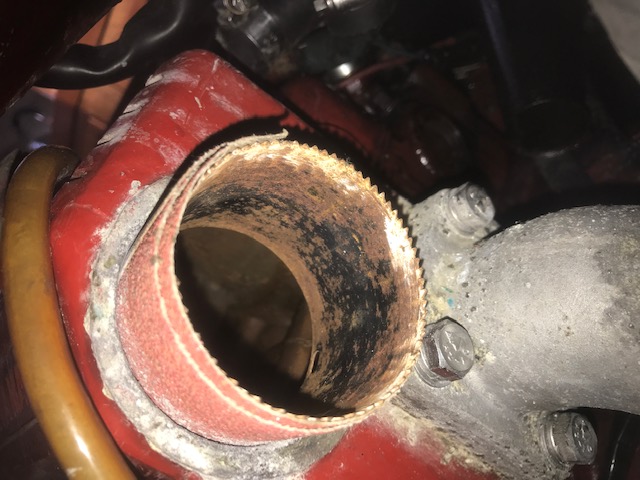
Next day I came and checked the engine and found that we had
boiled all the water and antifreeze off, in fact it had escaped into the
salt water side of the heat exchanger, thus the odd antifreeze smell from
the exhaust.
I had previously had a problem with the heat exchanger, 12 years or so back. After the annual clean of the tube stack I rebuilt all with the ‘o’ rings as supplied by Beta, only to subsequently find the ‘o’ rings leaked salt water onto the Ali header tank casting and corroded it.
The ‘o’ rings were the wrong ones! Too
skinny!
A quick repair with JB Weld and the
correct ‘o’ rings and since then we had used the motor for hundreds of hours
sailing (and motoring), all round the UK.
Just a little more to do, or I thought, till we get a perfect seal...
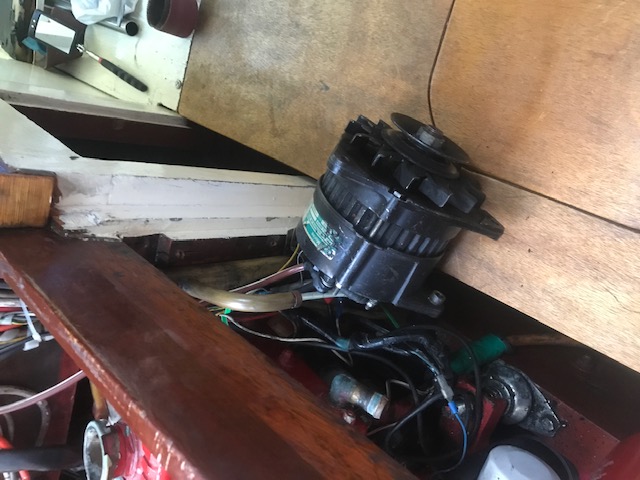
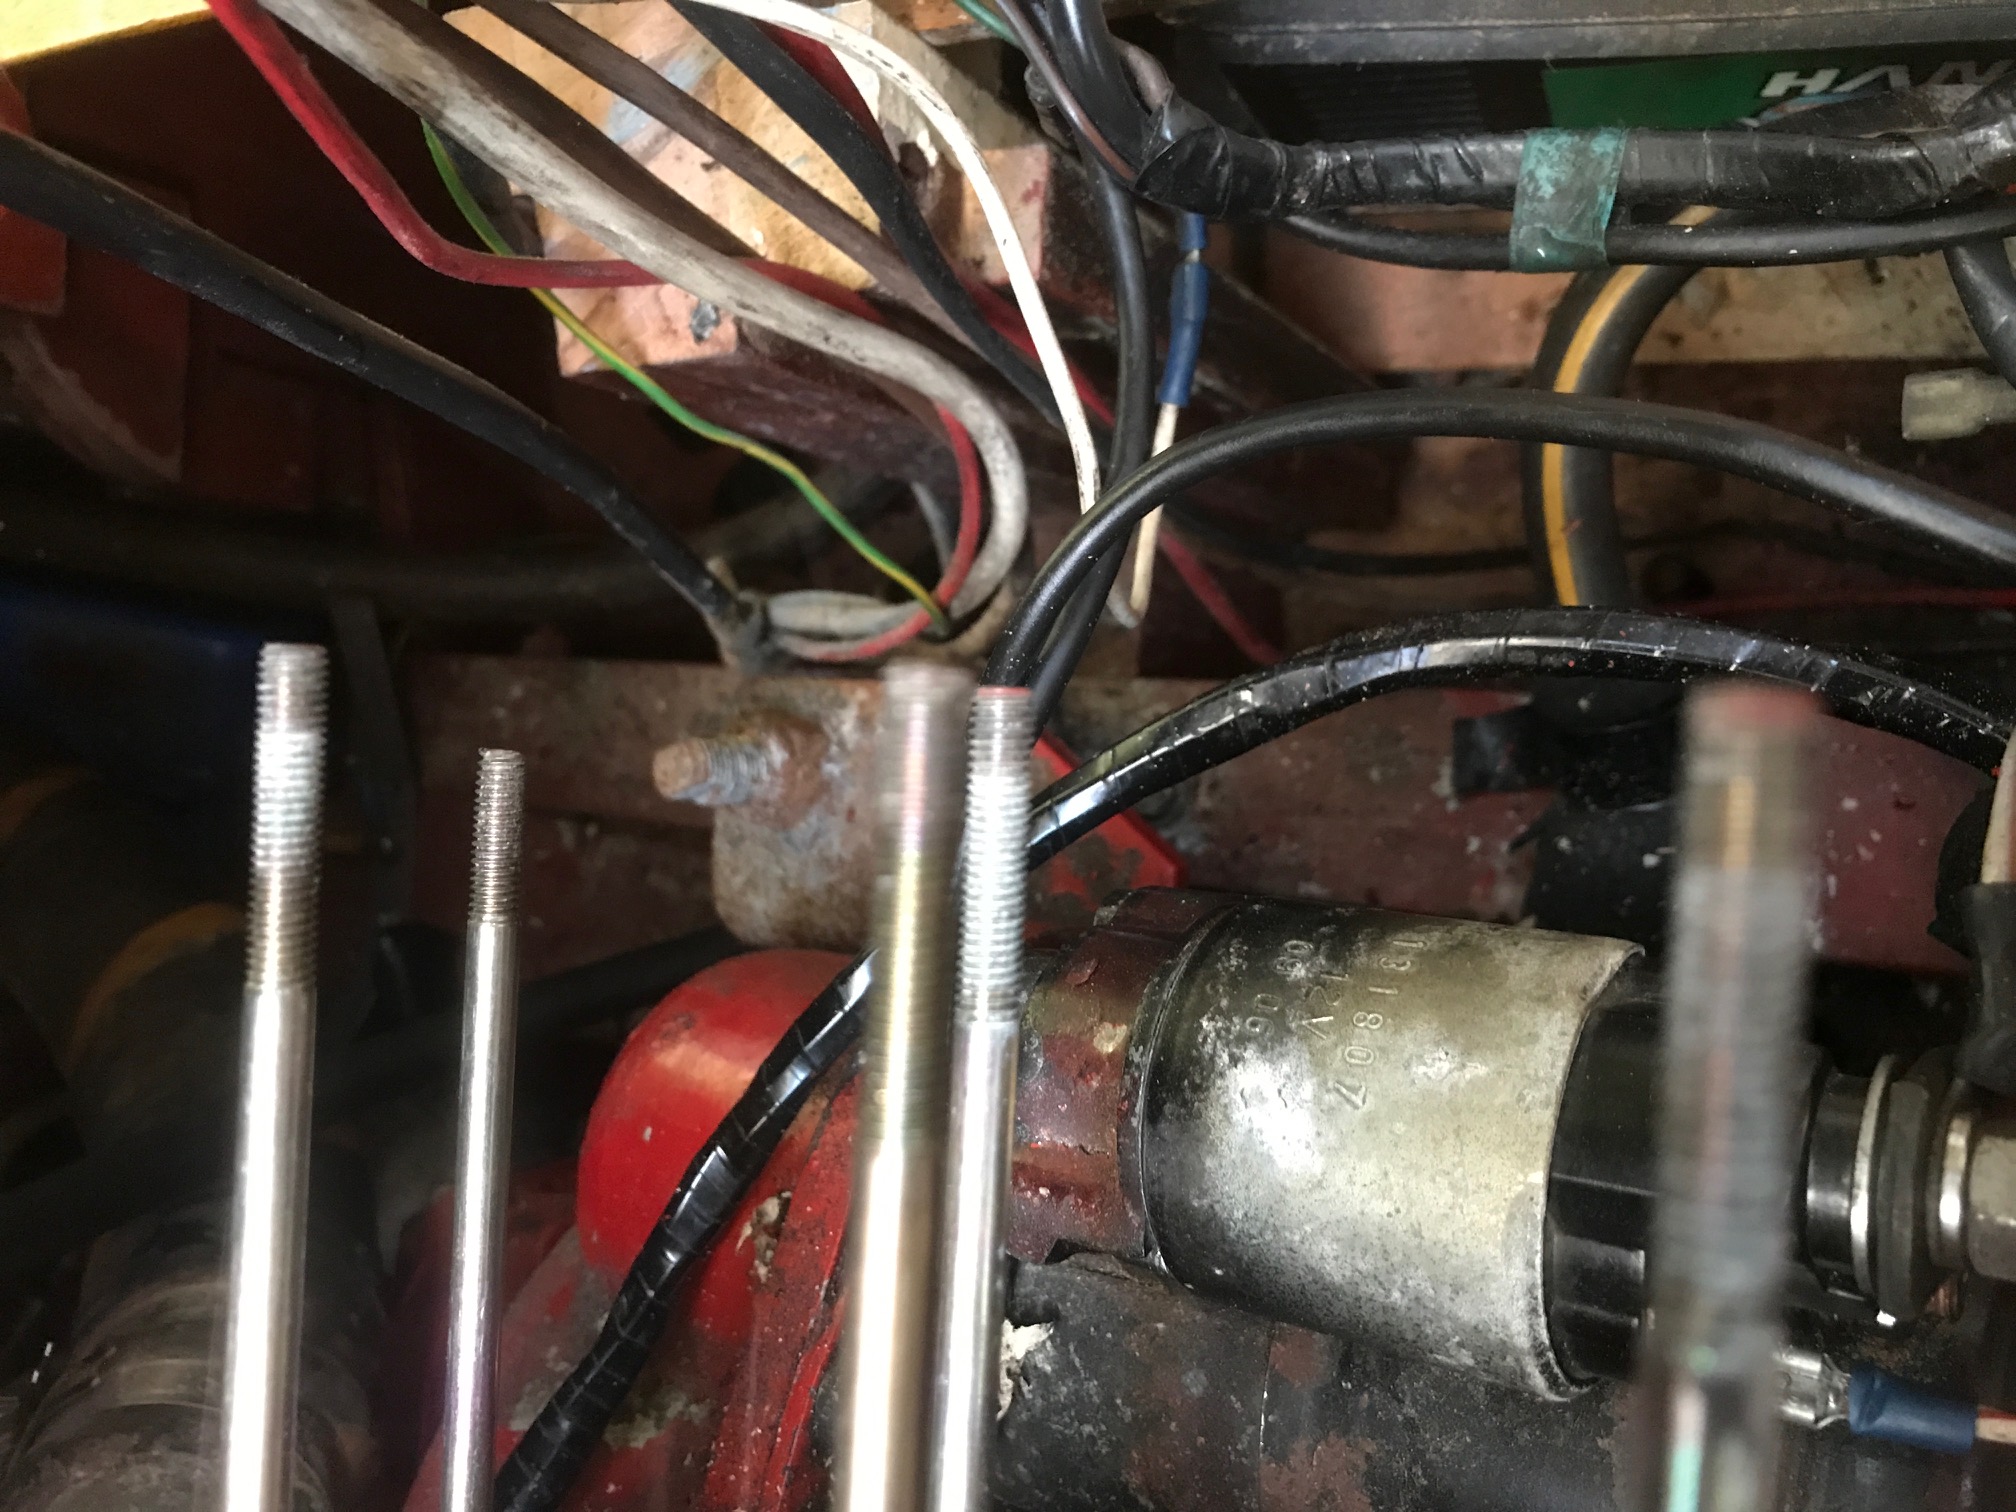
Of course to get better
access to the
header tank end caps I had to remove the alternator completely,
a
bit of a faff.
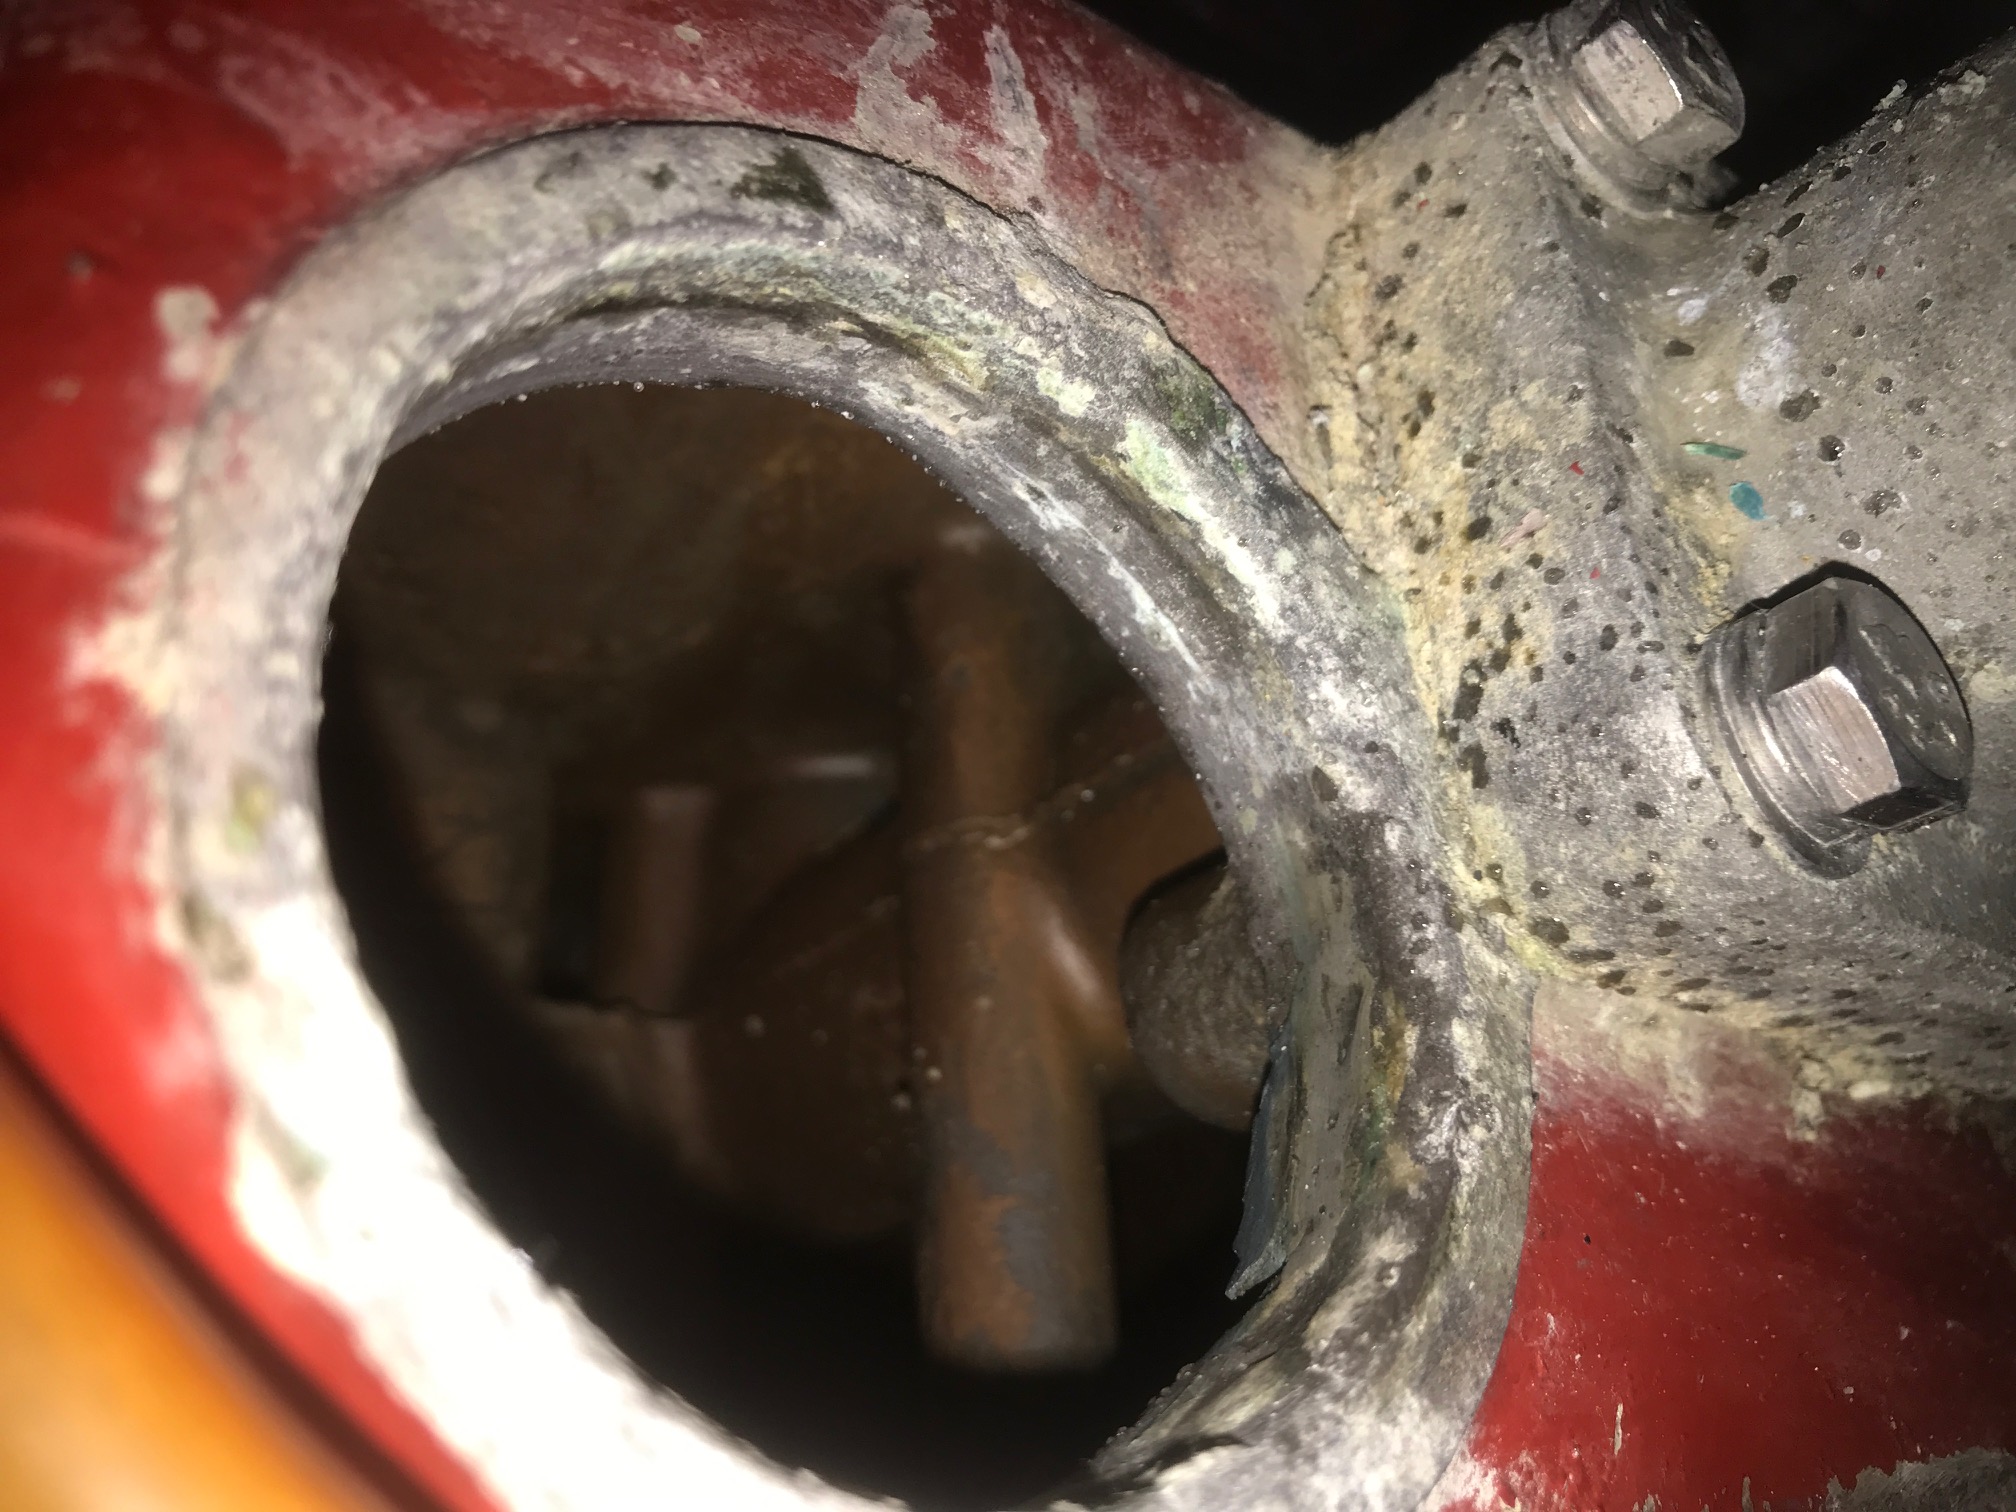
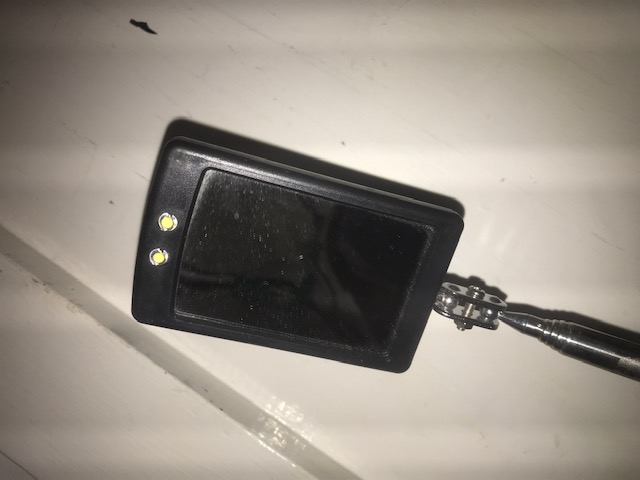
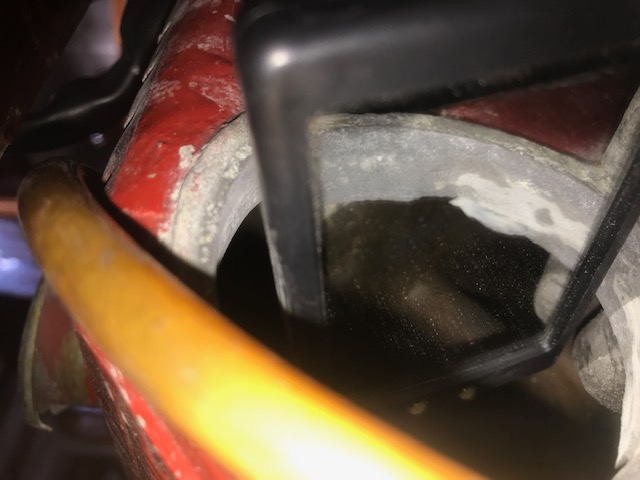
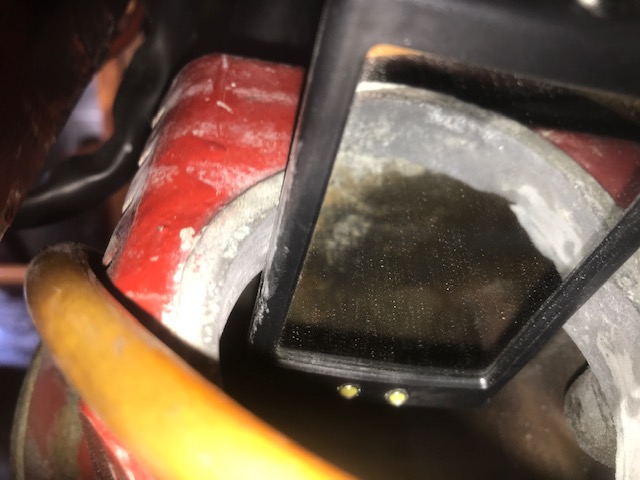
Using a mirror on a stick, with built in LED’s, (from the middle aisle at Aldi!) I managed to get a pretty good view of the damage.
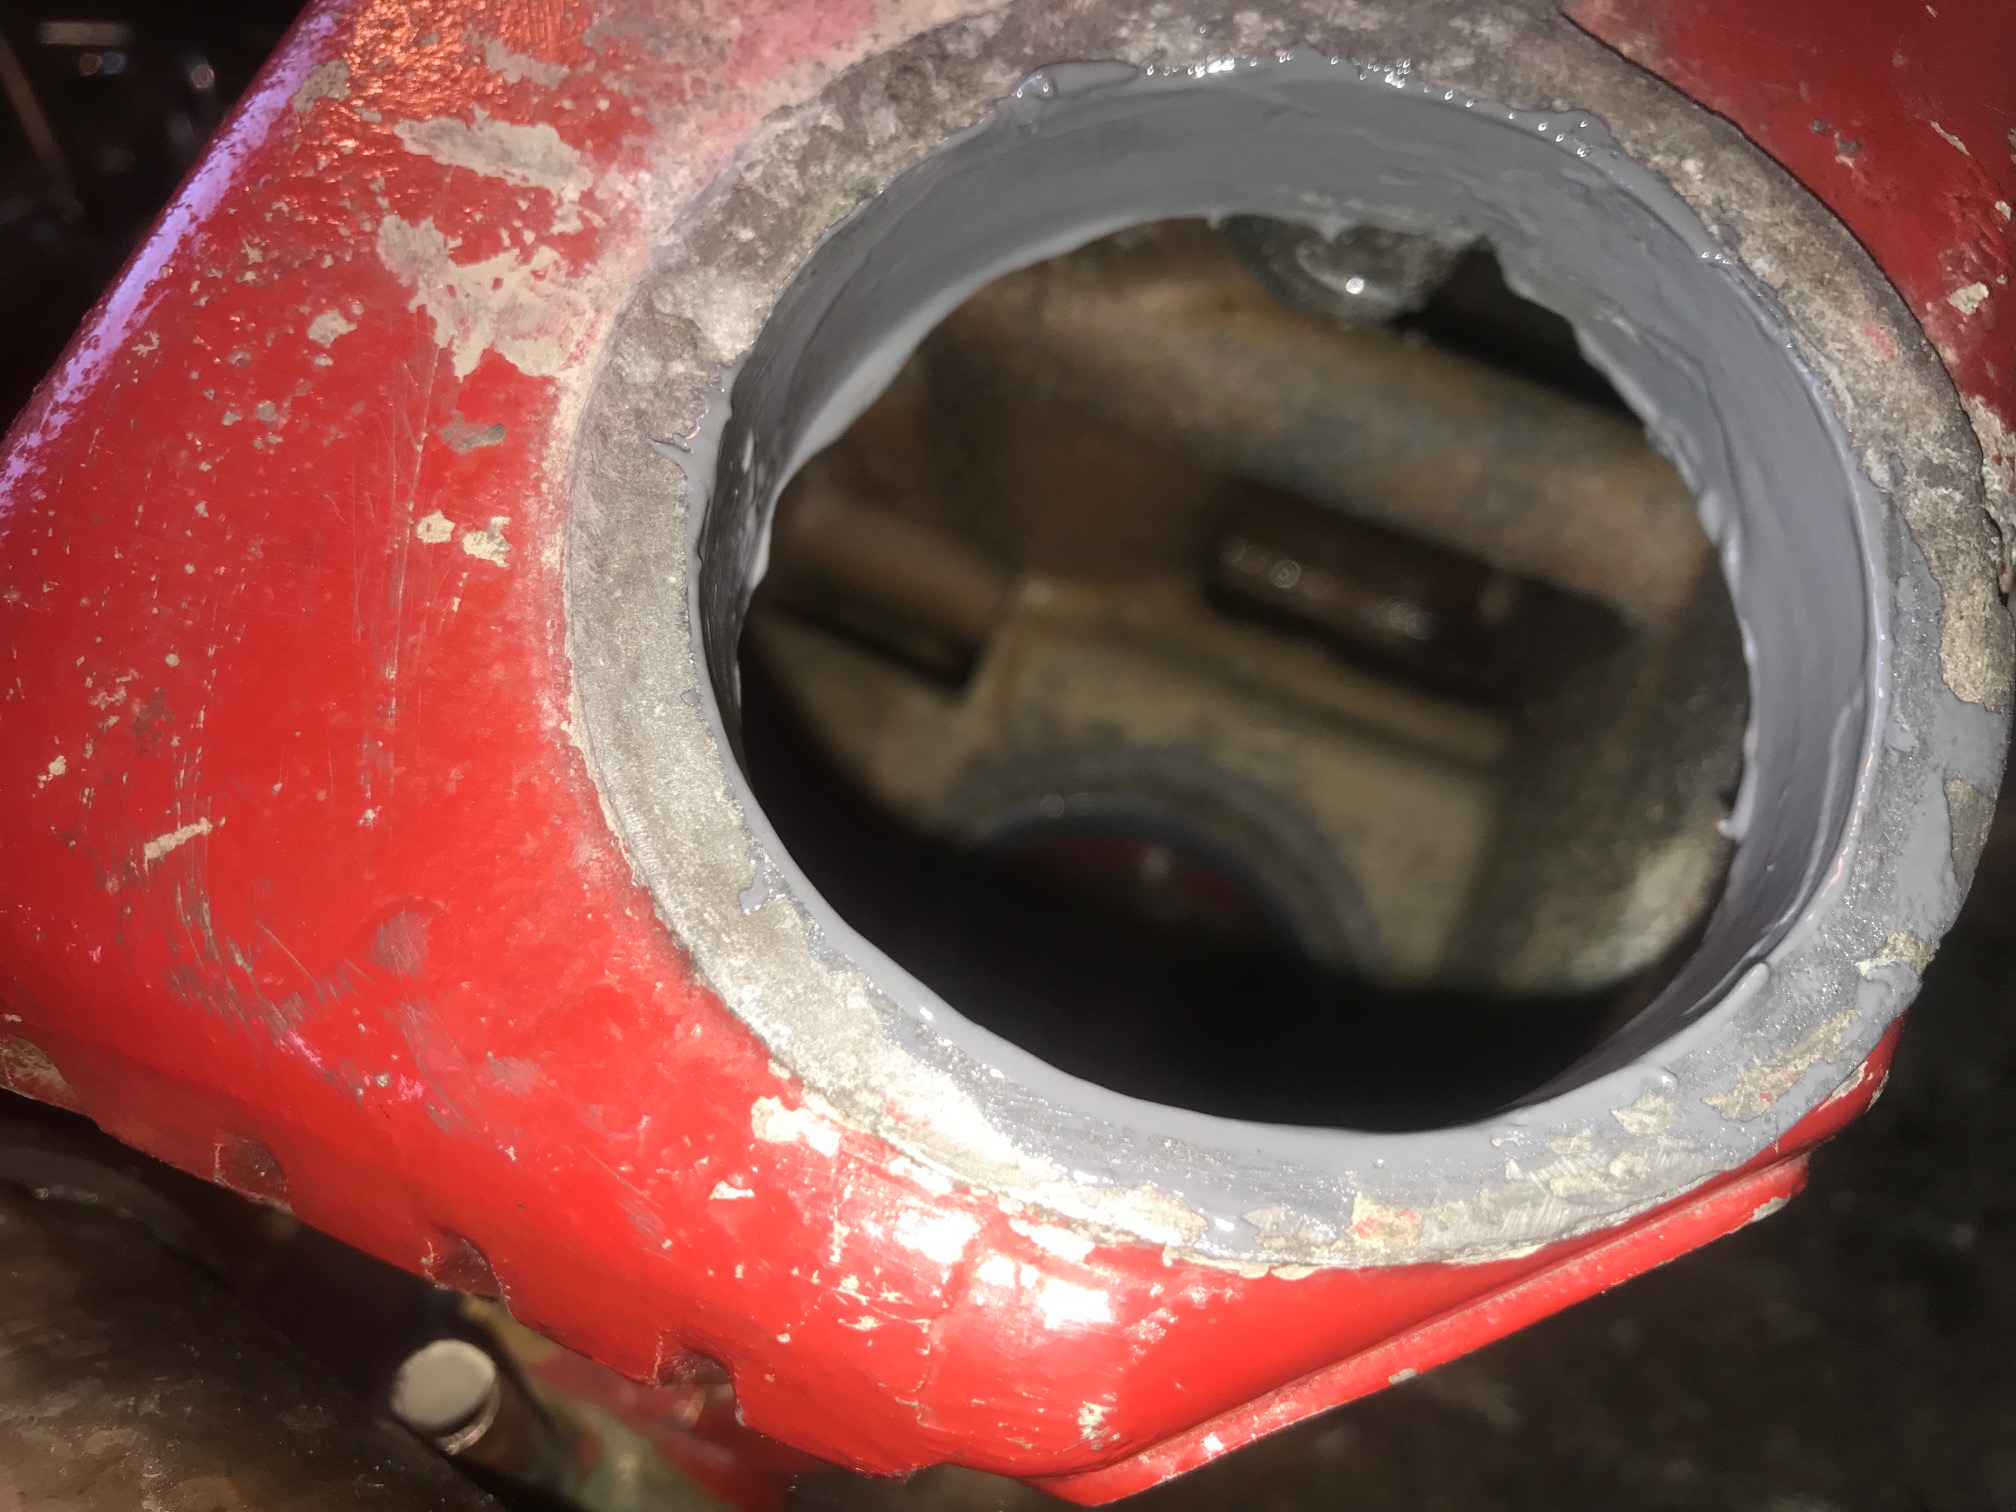
I set to with a couple of
tubes of JB weld, and tried to gently spread it evenly in the circular
opening.
It was difficult to really see well as it was
applied from a funny angle
But I thought I had it cracked!
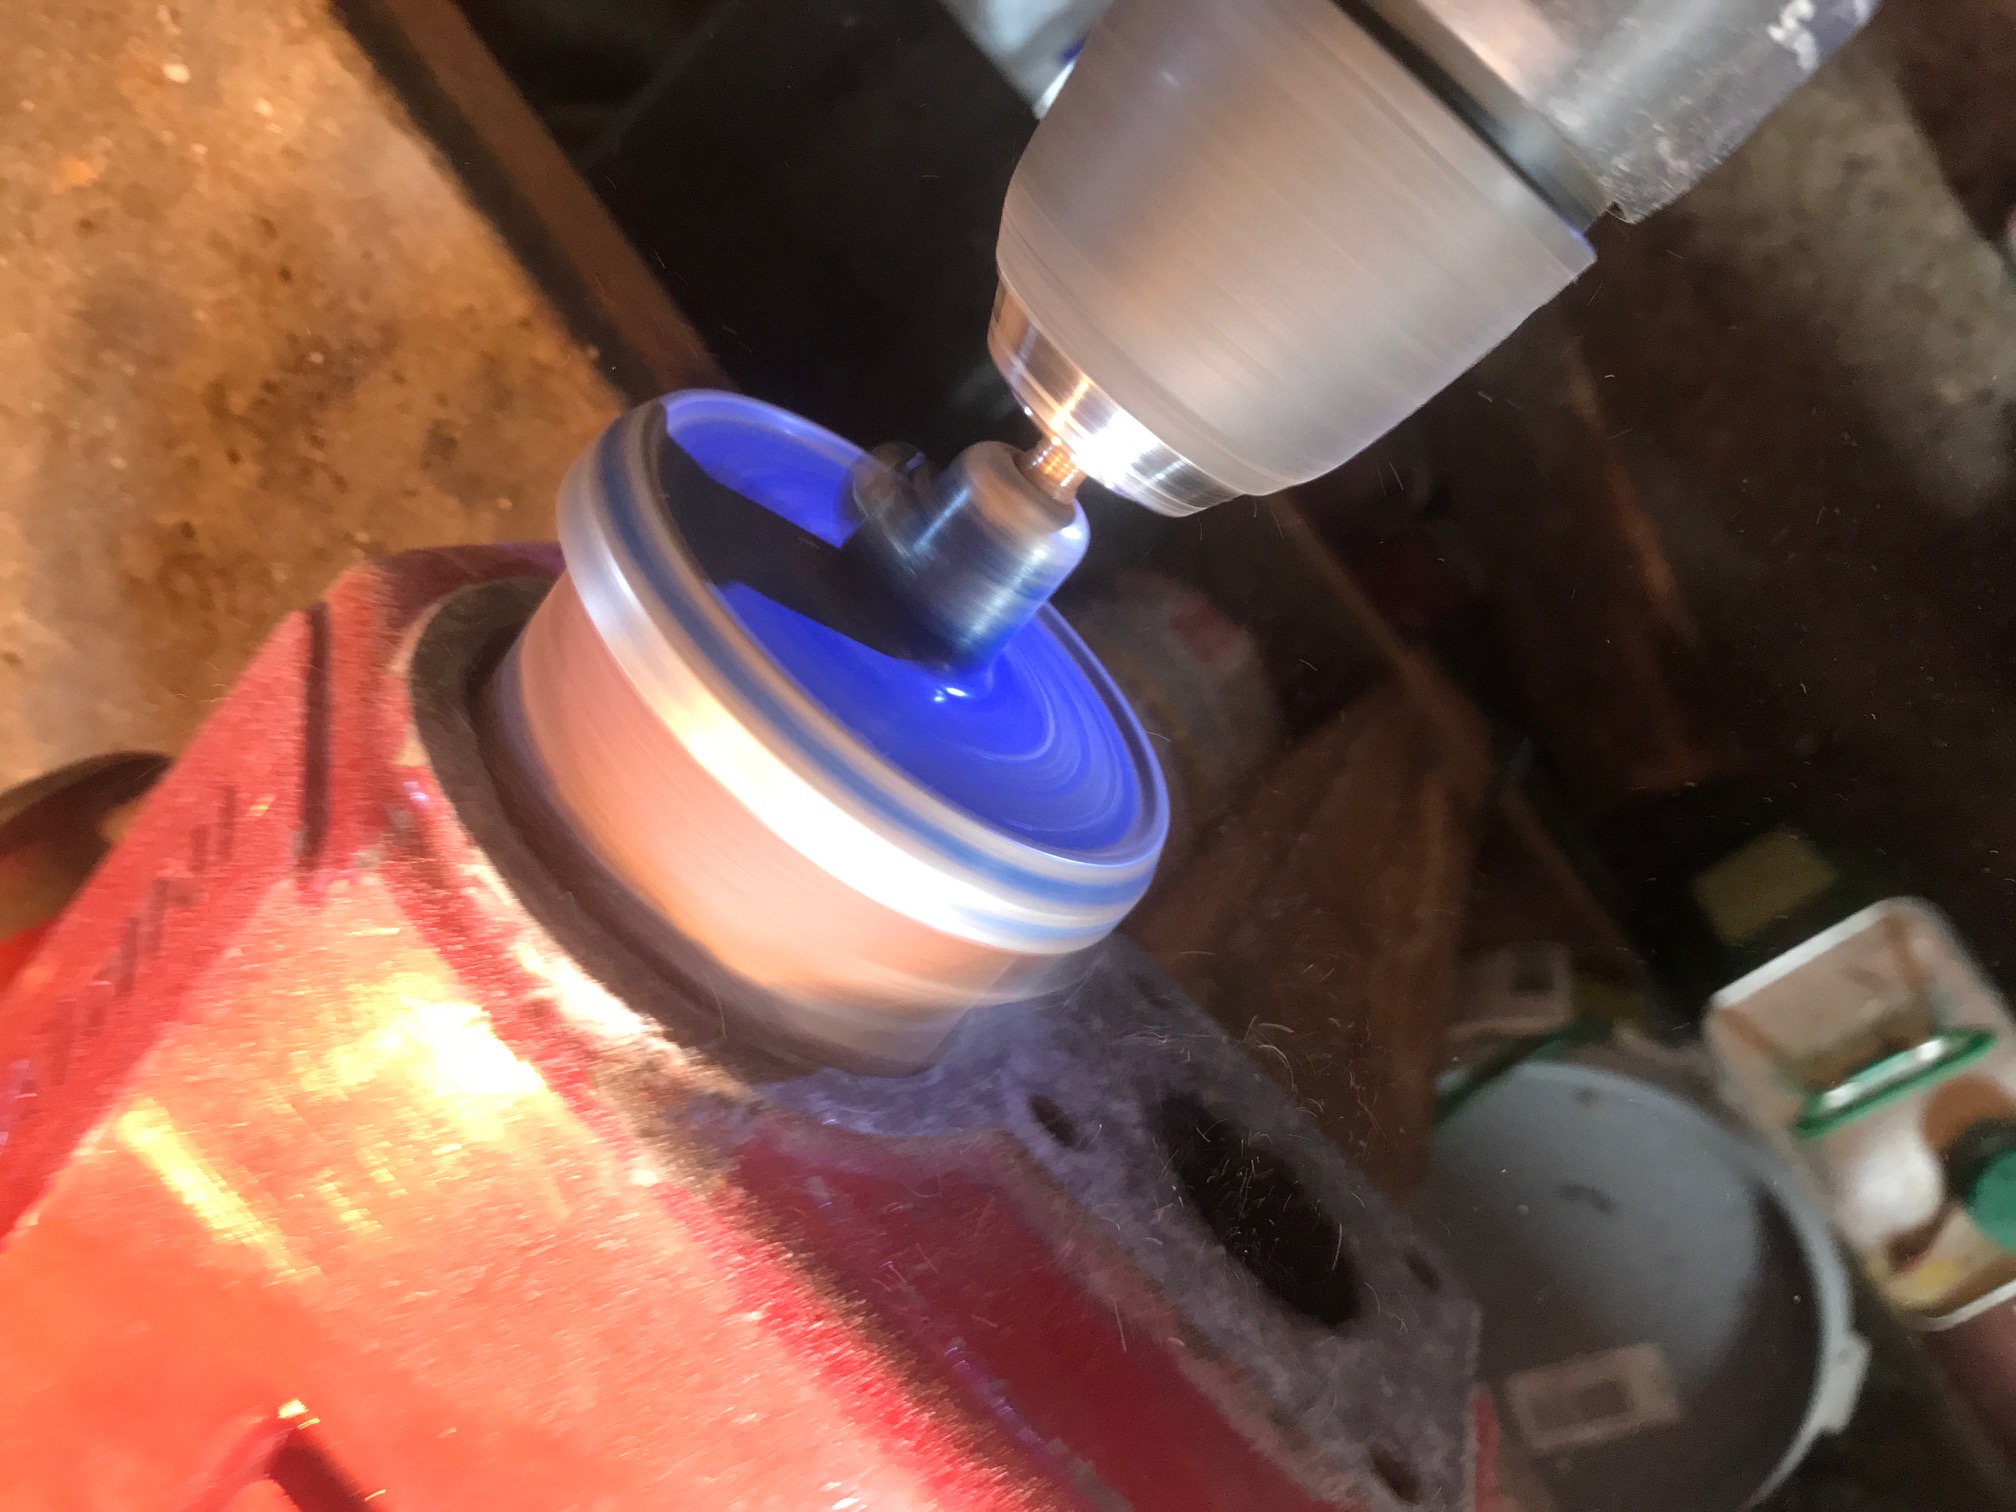
I devised a neat way of
smoothing off the JB weld, with a hole saw wrapped in glass paper spinning
in a battery drill. Made a perfectly smooth surface on the circular opening.
Though it was difficult to see, I could,
whilst standing on my head in the quarter berth, get my fingers in there, to
feel how smooth it was.
Well it was not smooth
enough!
After a lengthy rebuilt of the motor and another
trial of the motor in the berth and we again pumped water and antifreeze out
the exhaust. To add insult to injury suddenly the starter motor
then refused to work! I was at a loss as to
why, so I called on Steve of Althorne Marine Services.
An ex Eventide owner and real nice chap.
Took him minutes to find the corroded
connector on the solenoid and replace it, however he did tell me the main
terminal on the starter was loose and that could be a bigger issue!
Did not need this!
Despondent, as the
weather now in September was better than it had been all year, I got
serious.
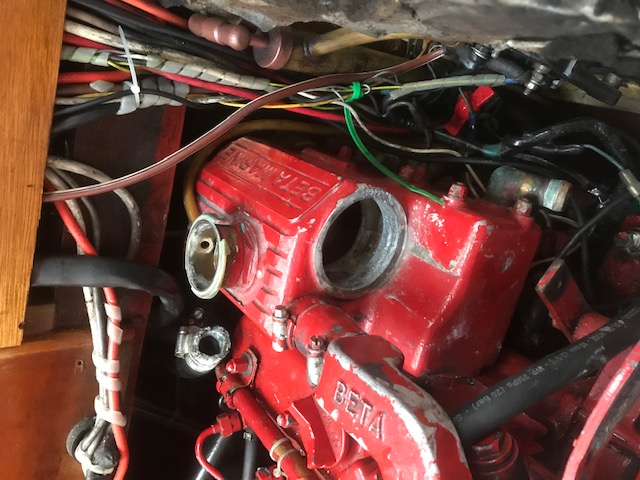
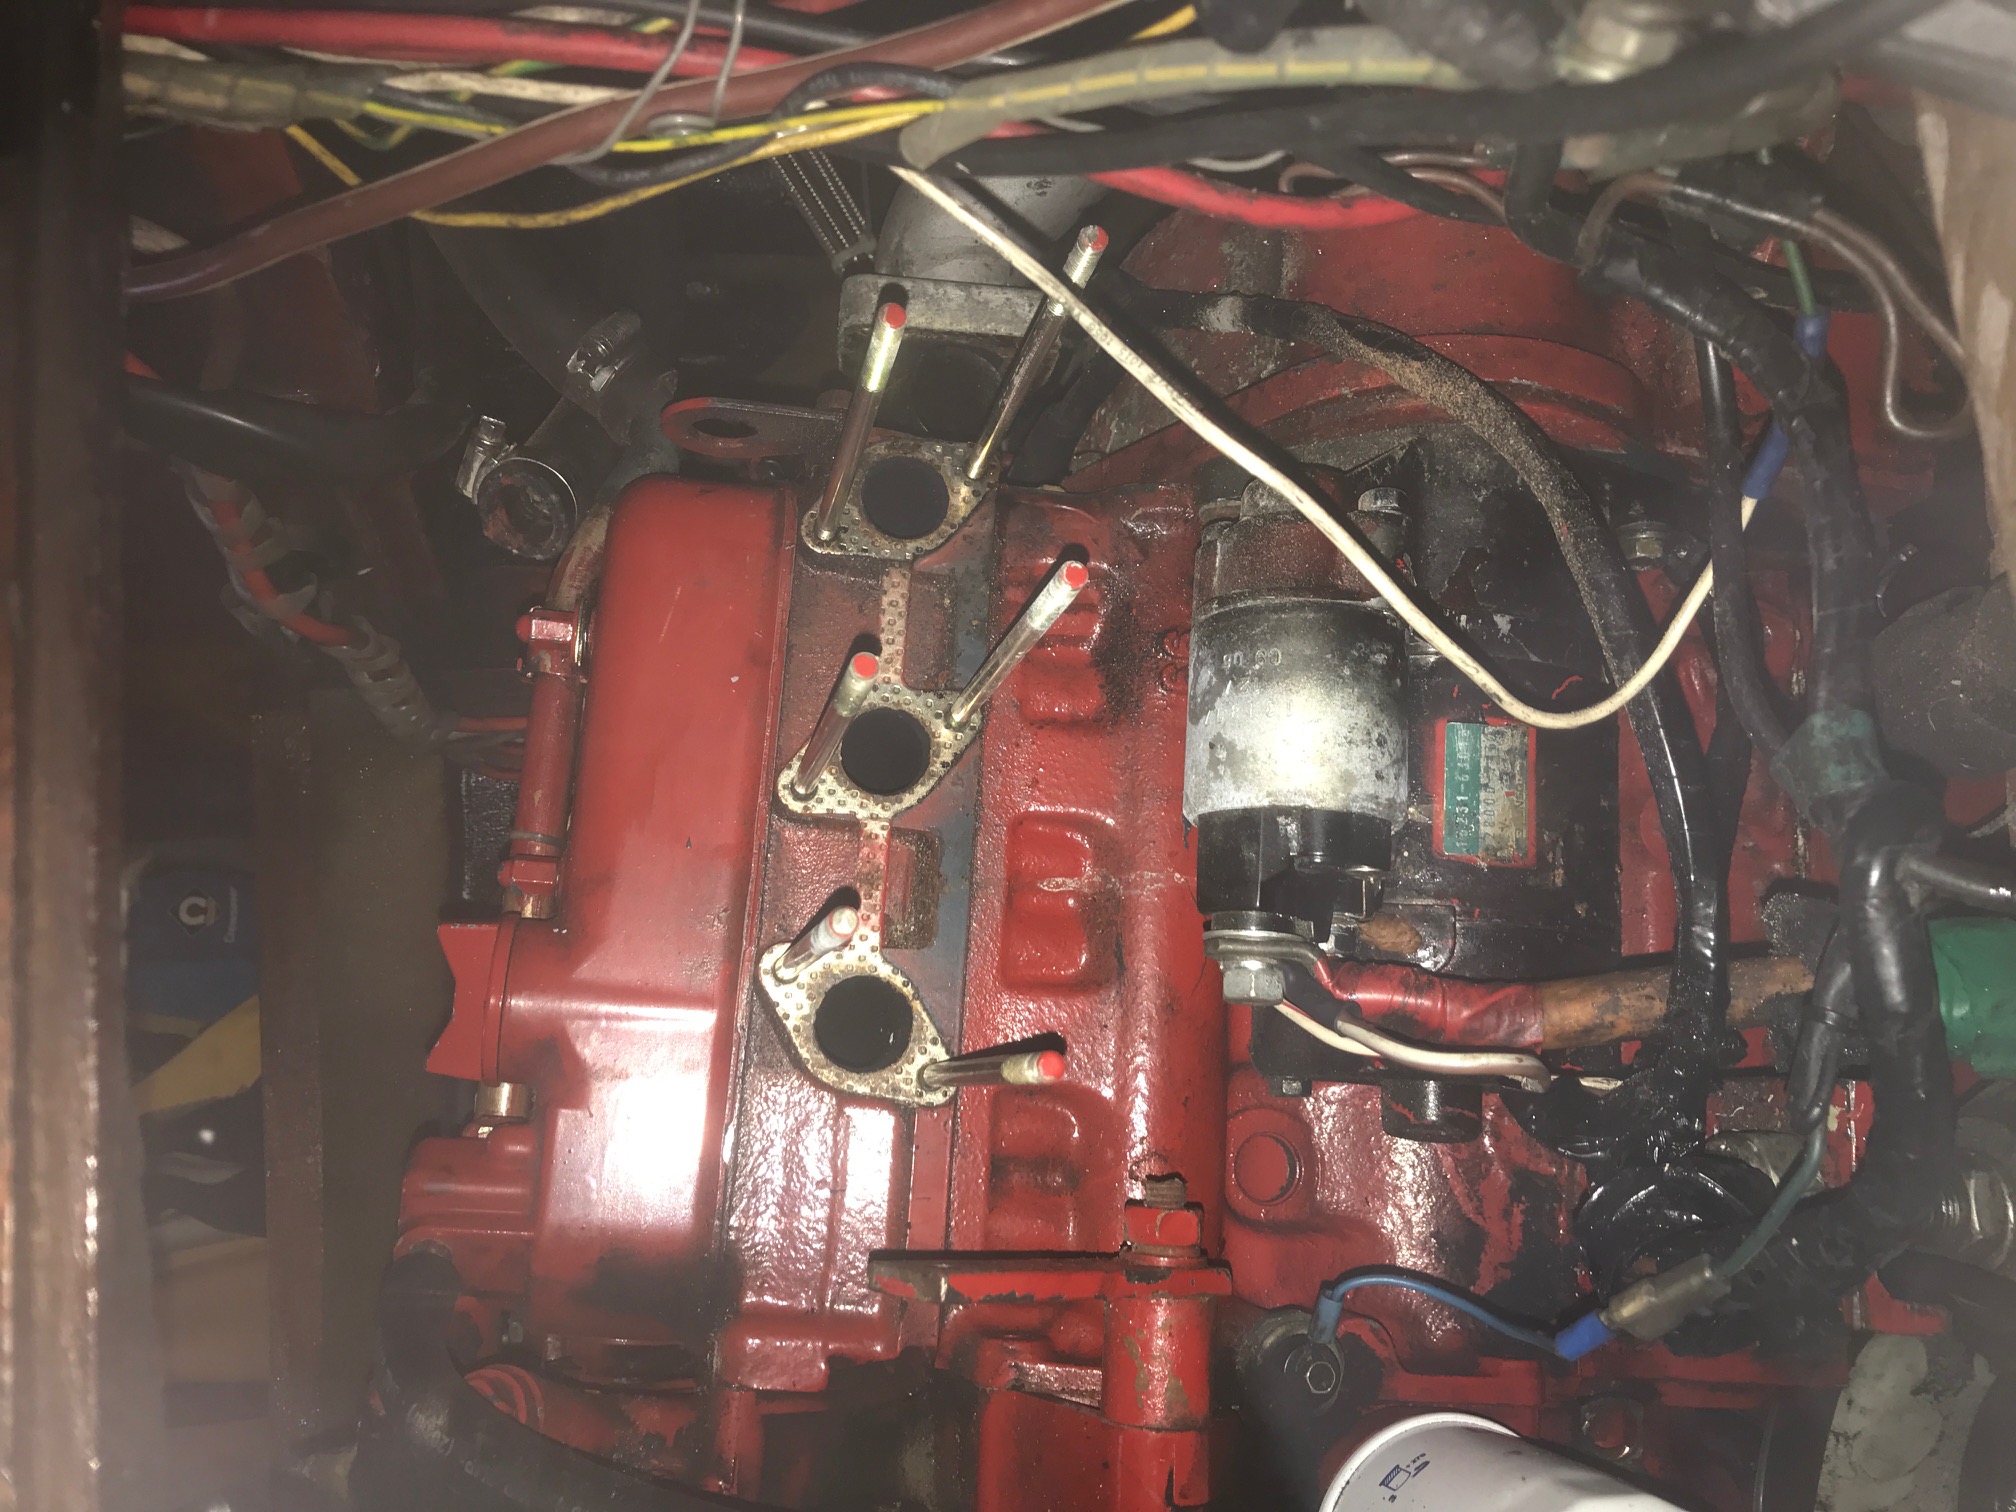
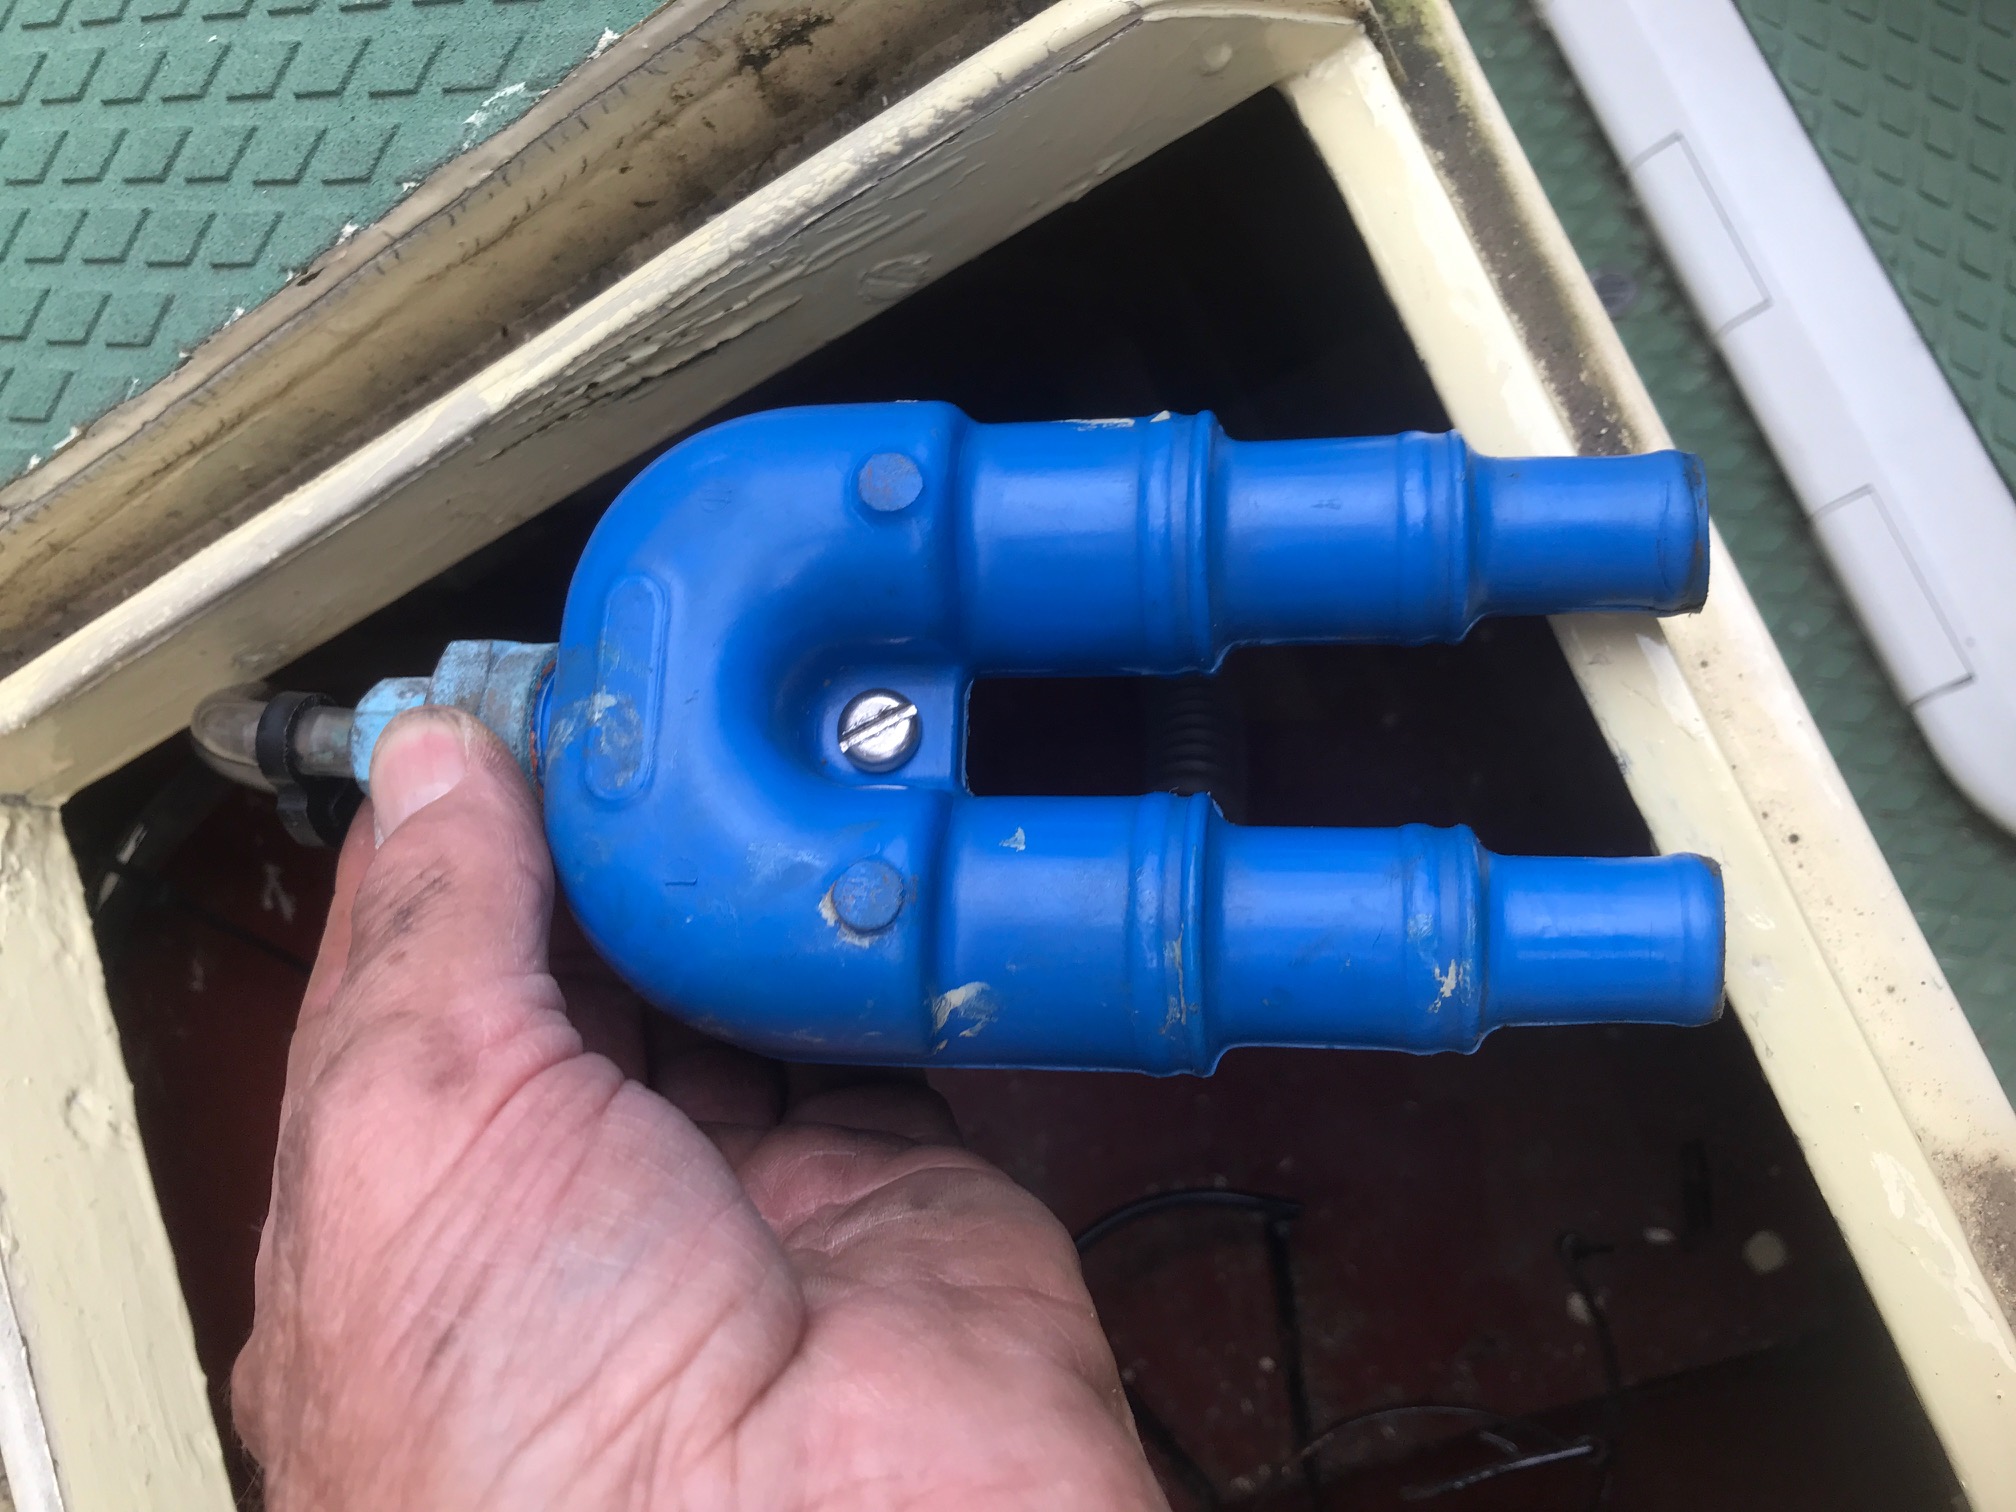
I decided to take the header tank off the
motor, and the starter!
Actually to get at the starter you really
had to remove the header tank as it was right above the starter making
access difficult.
OK soon spotted the first
snag.
To remove the header tank it had to be
slid to port about 6 inches, to get it off the long studs.
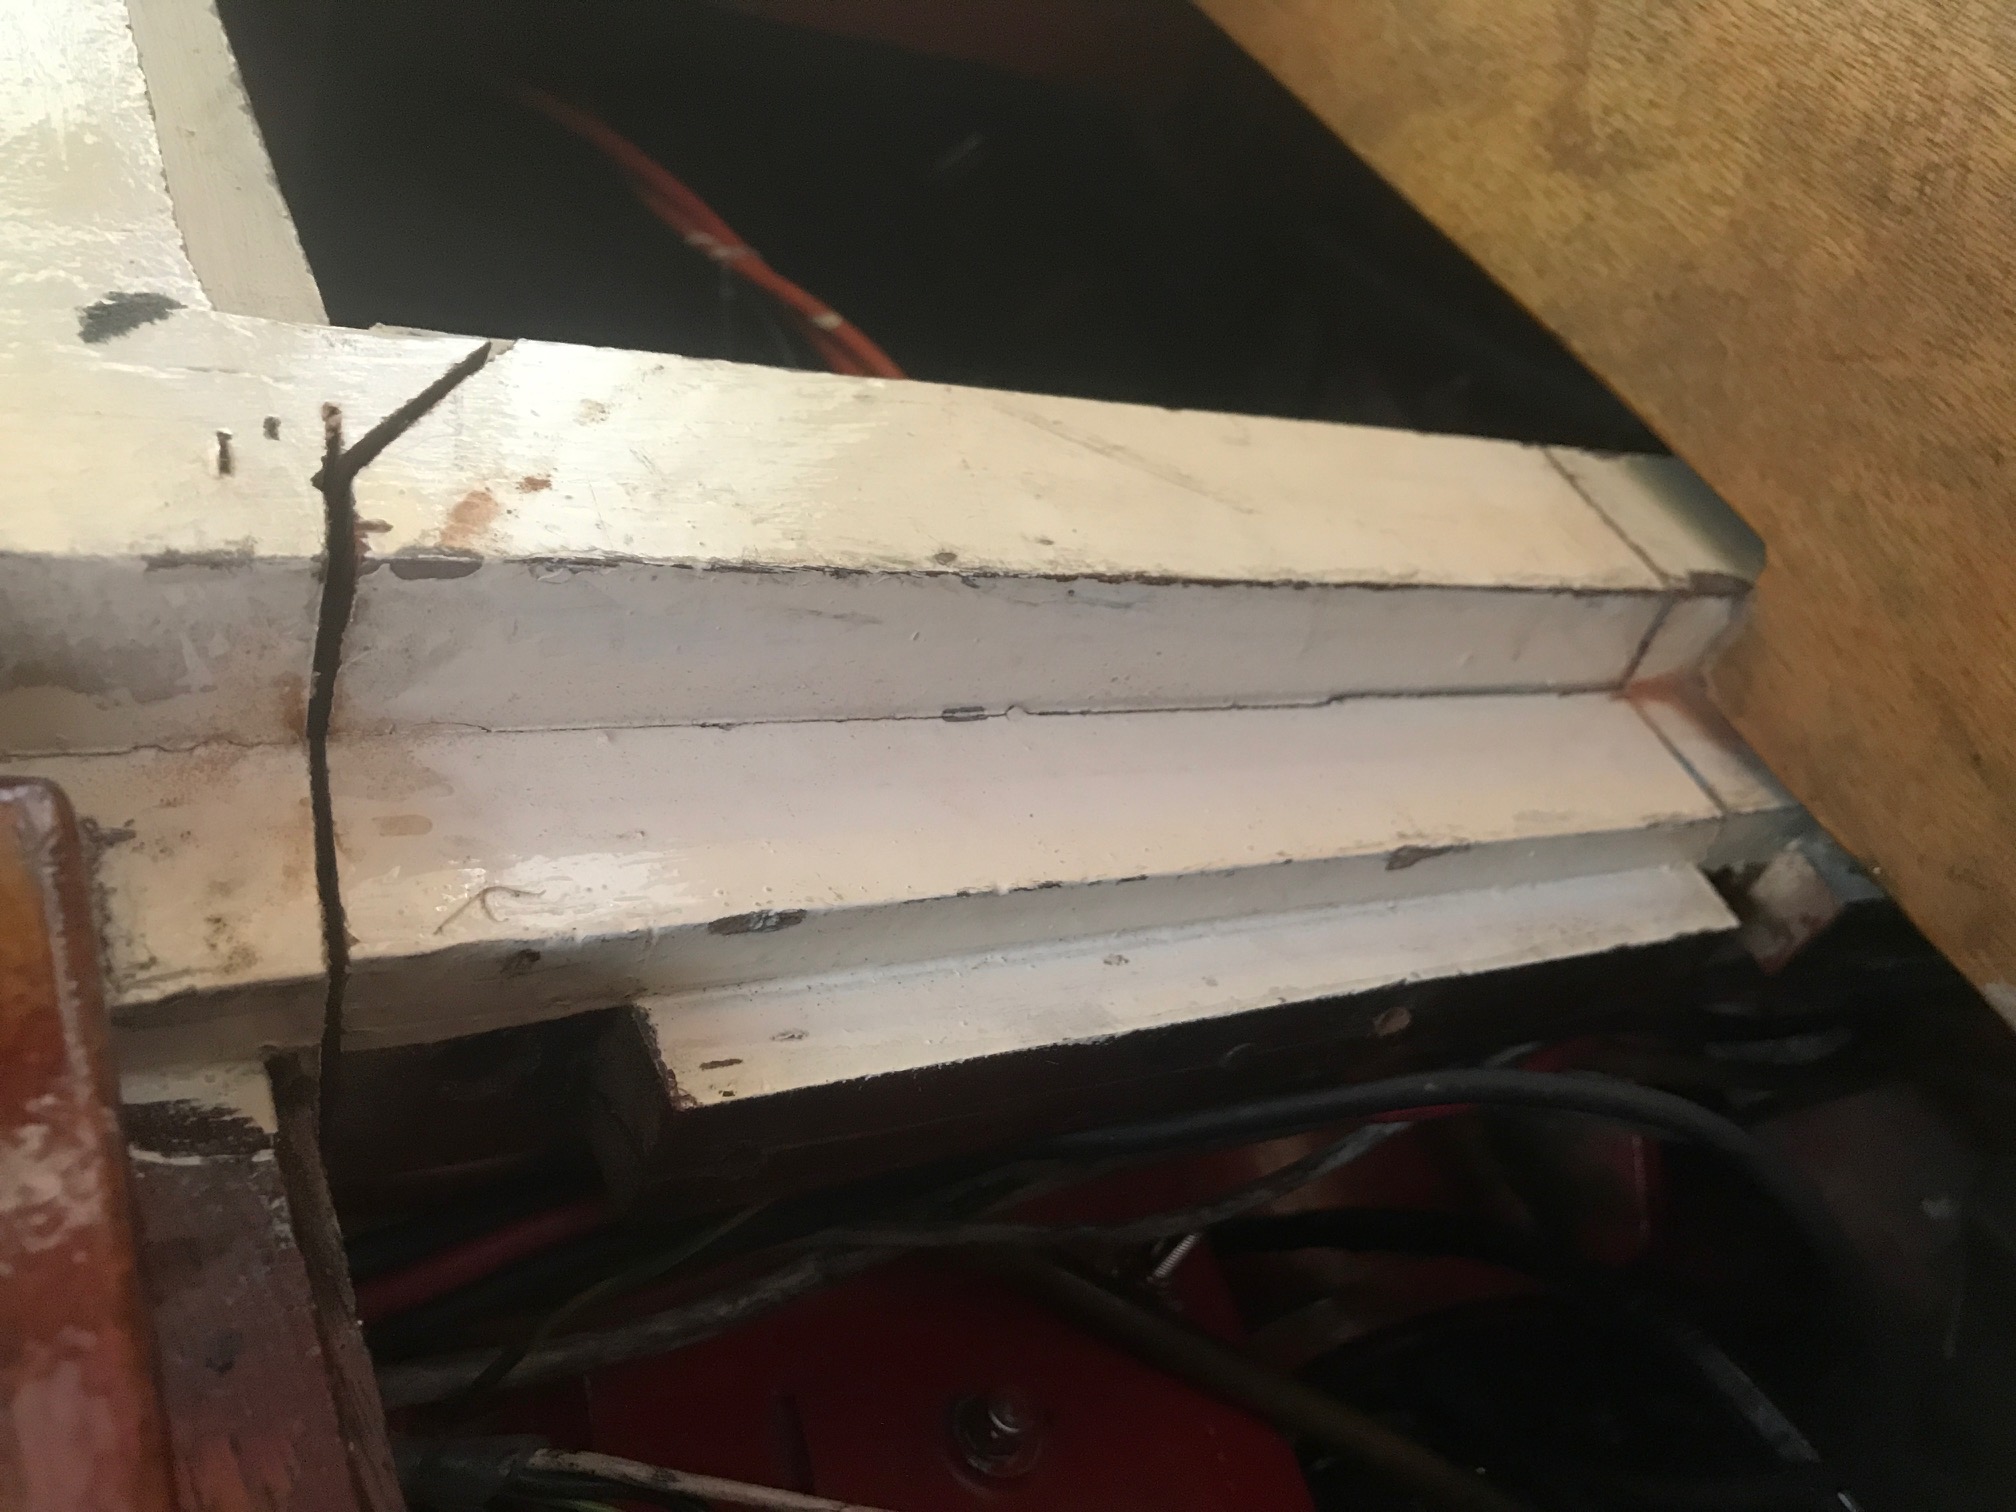
Not enough room! The rear post of the engine box was in the way. Rats.
I thought about it then came back to base
and retrieved my battery jig saw.
Once the oil empting pump and all the
nearby wiring was also removed, I cut off the rear, port engine box support!
Sacrilege!
Once removed I could then slide the header
tank off.
I could also see the timbers that I had
removed were as good as new, not bad for over 40 years in situ.
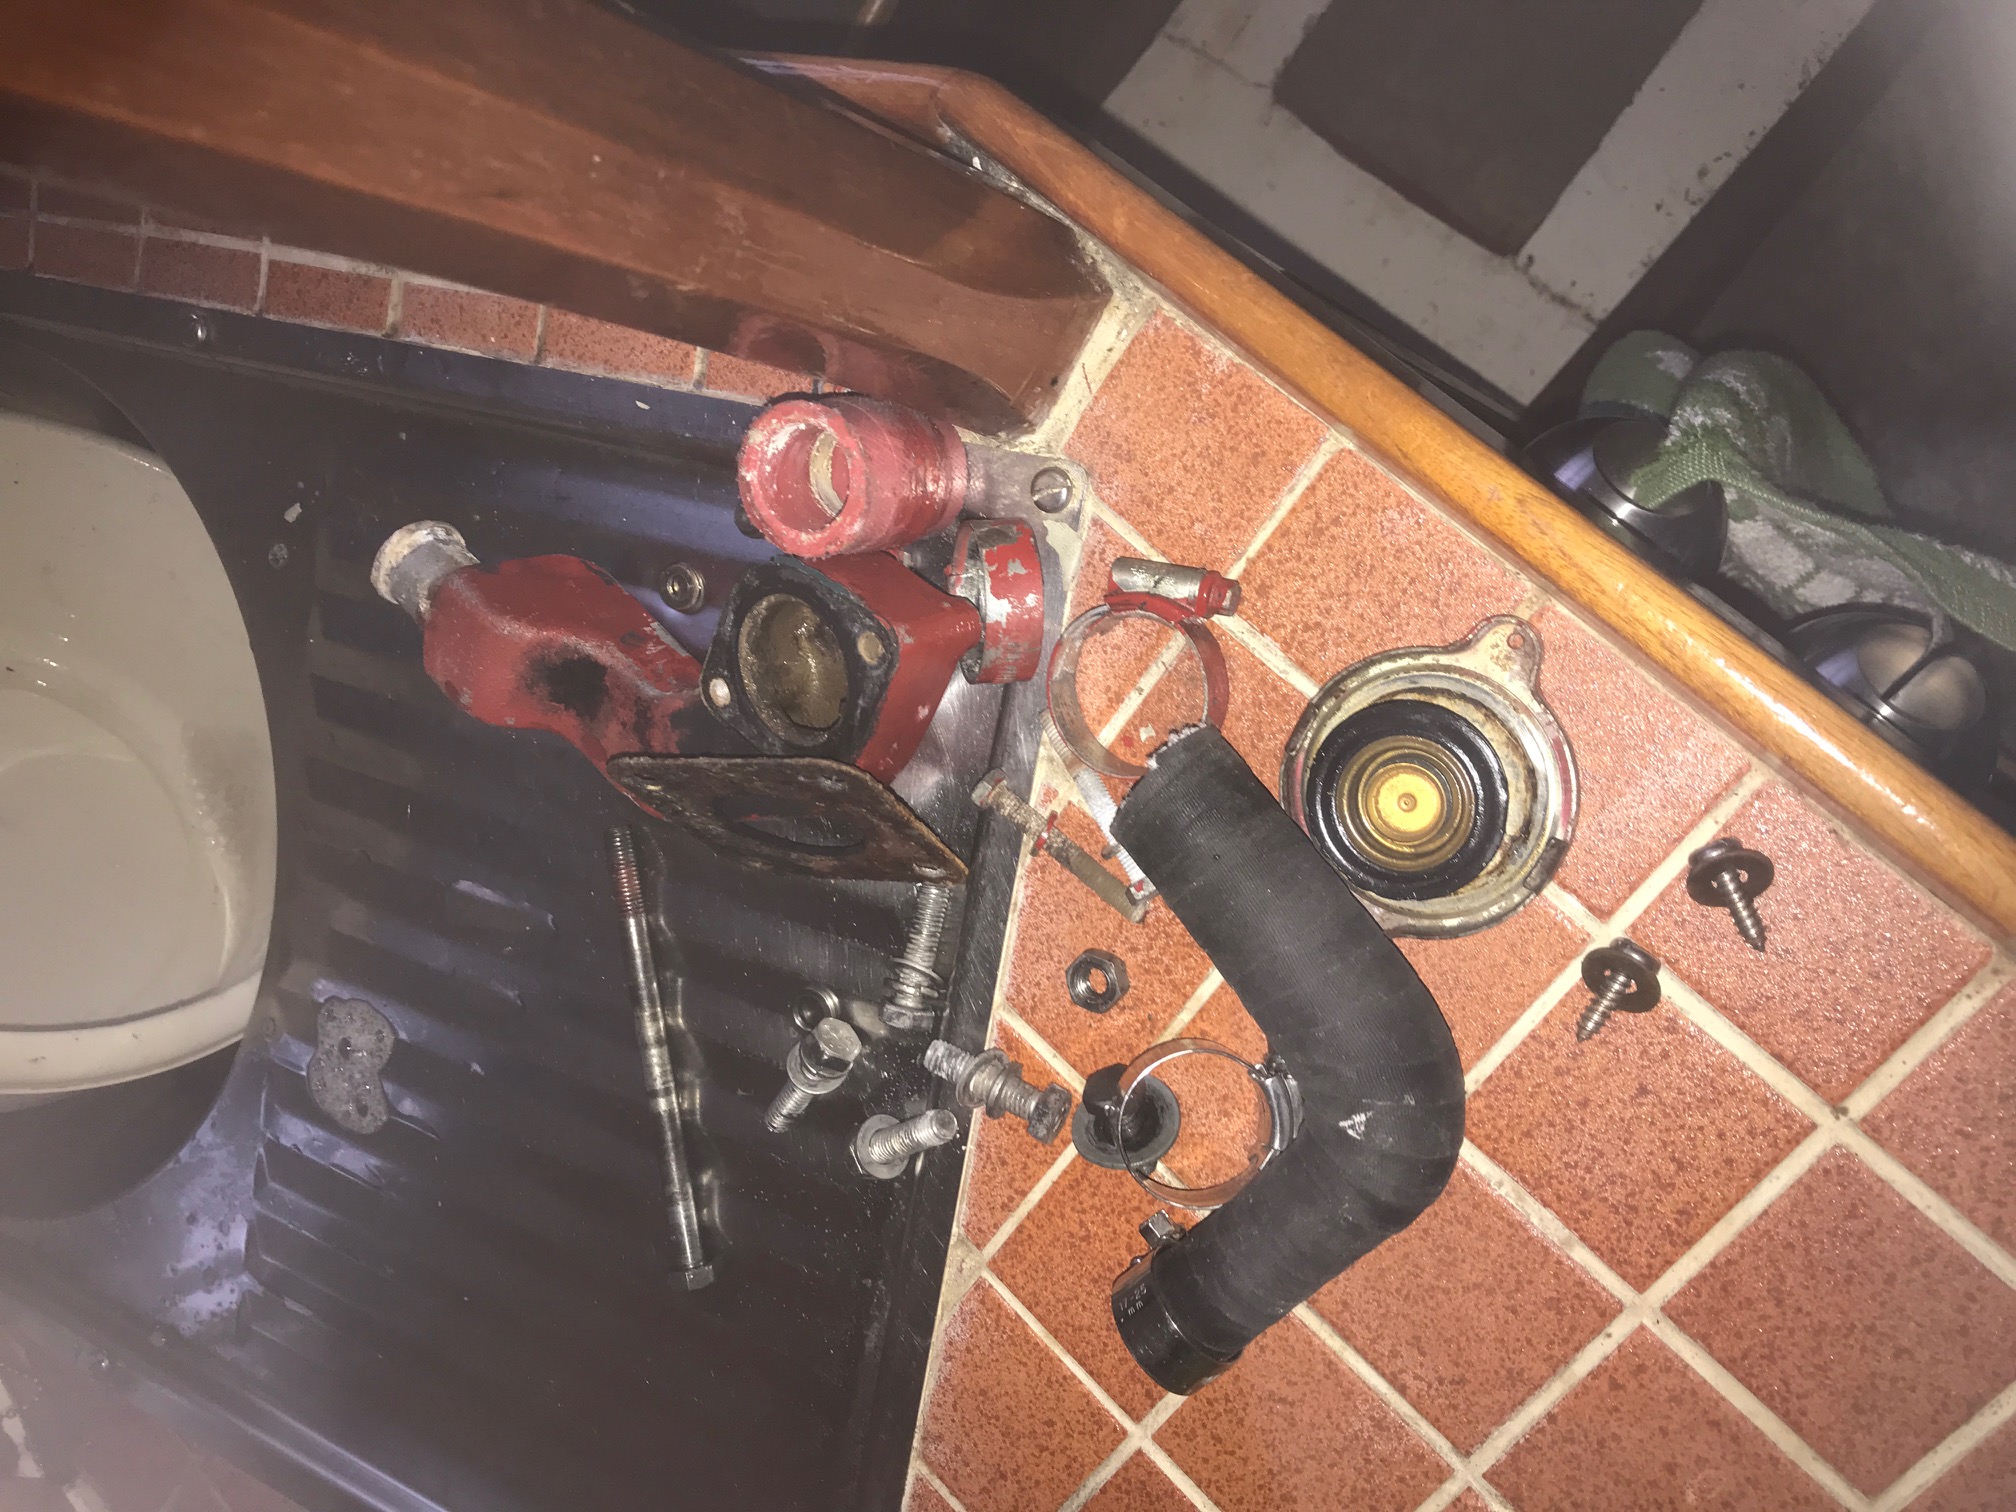
With the header tank in
my workshop ashore,
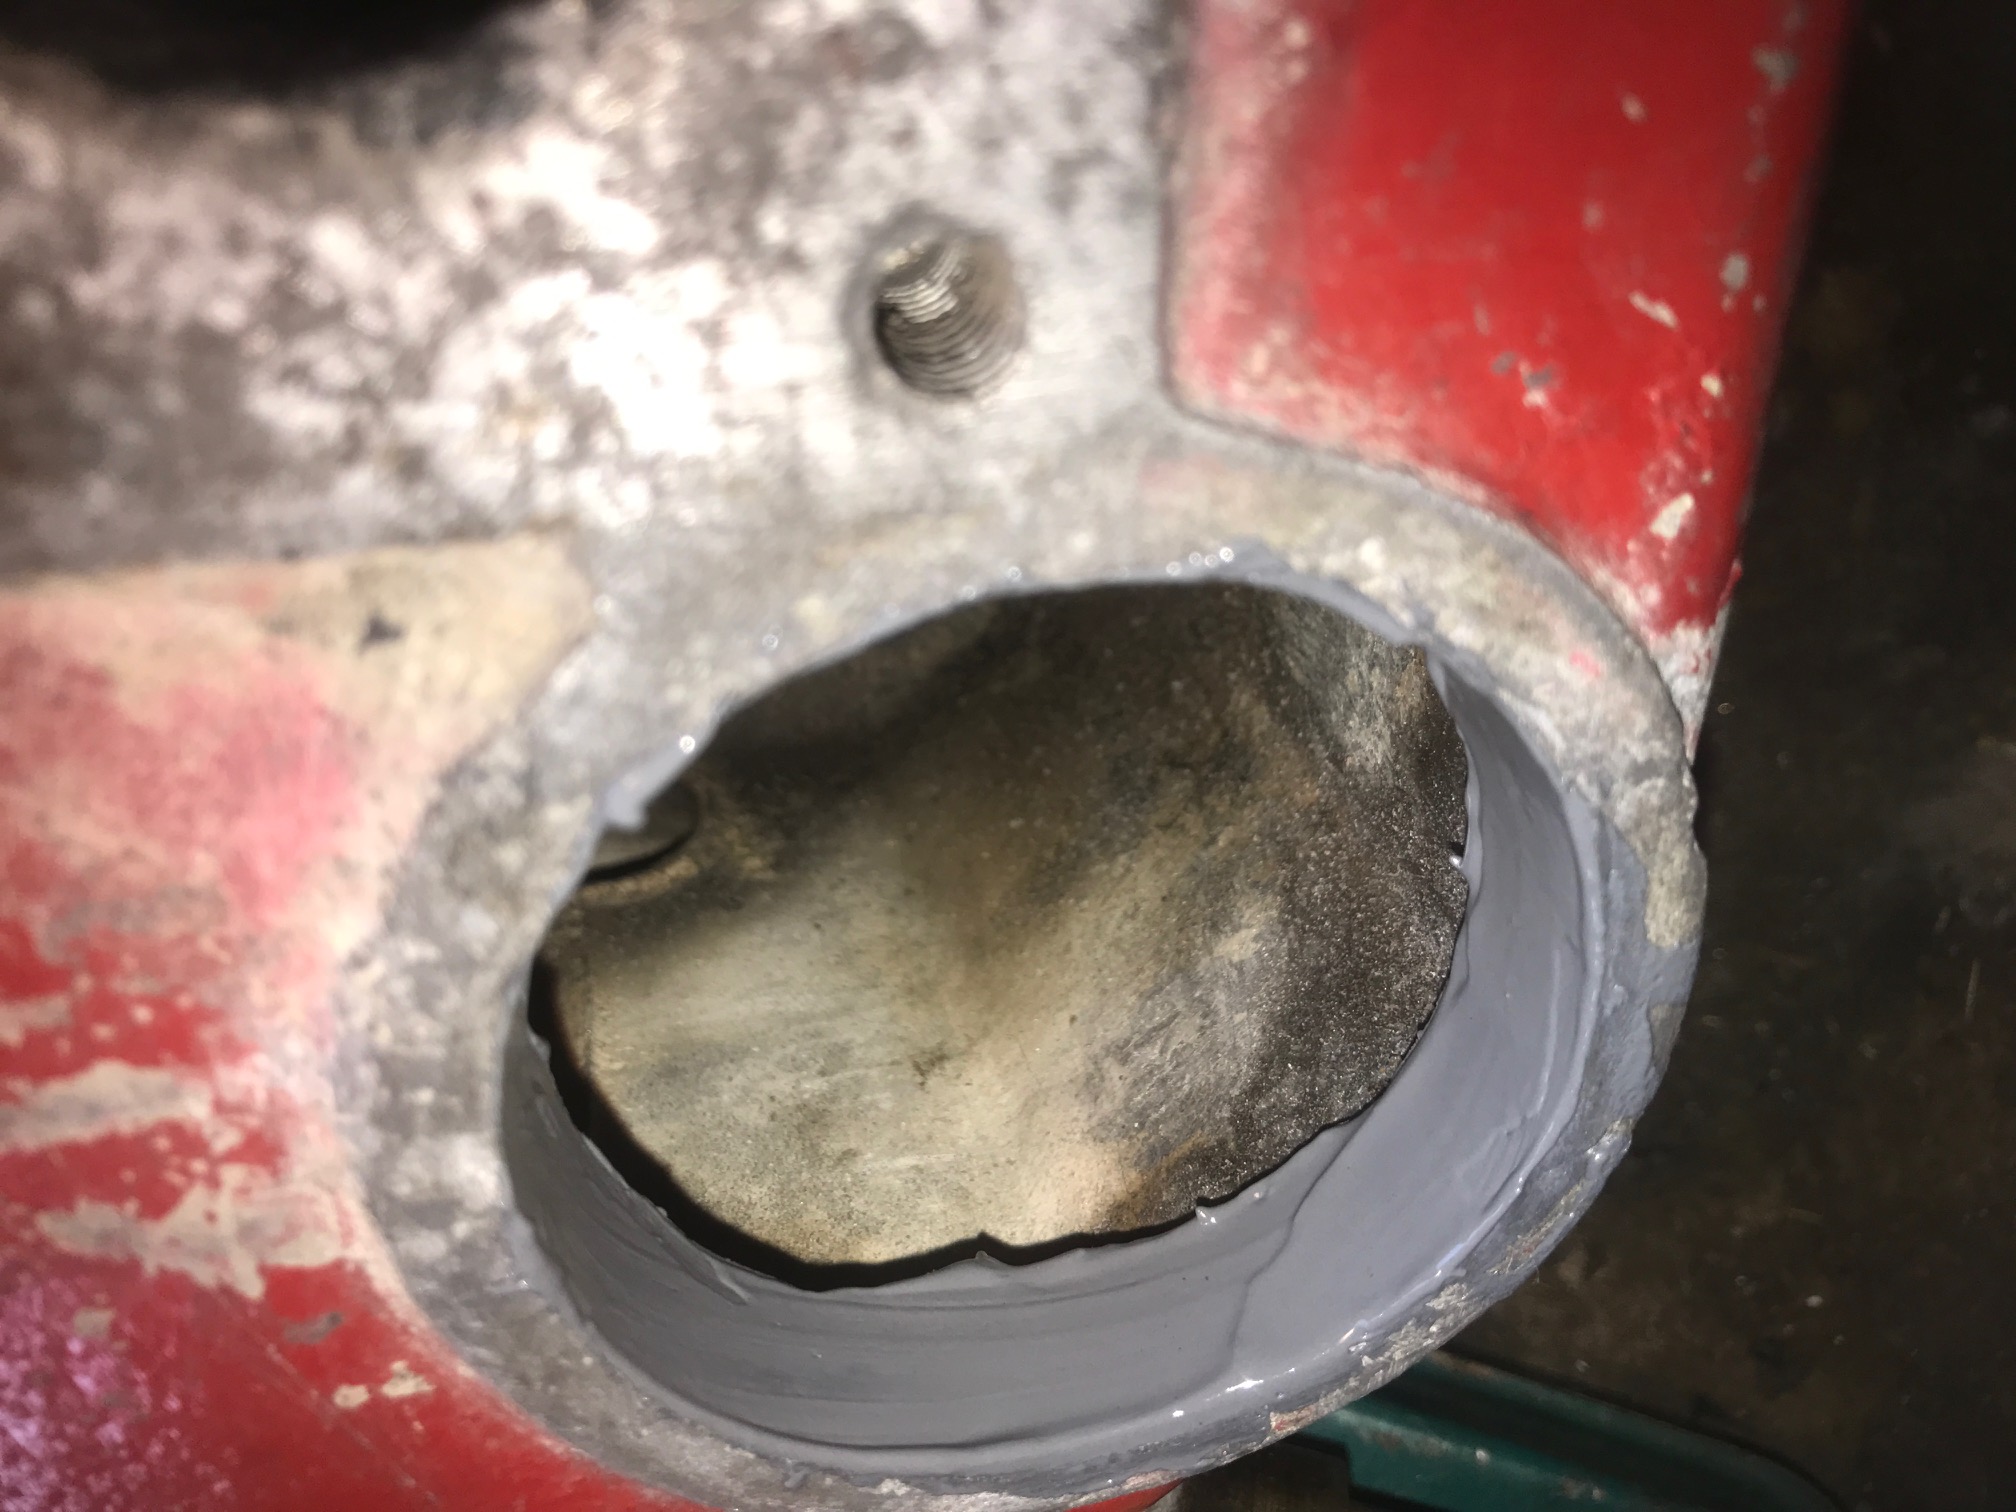
I set to and stripped all down on the
bench, cleaned everything and it was now easy to see where I had missed a
small corroded
area on the back end of the header tank, not a big chunk
missing,
but enough. I re-cleaned and sanded
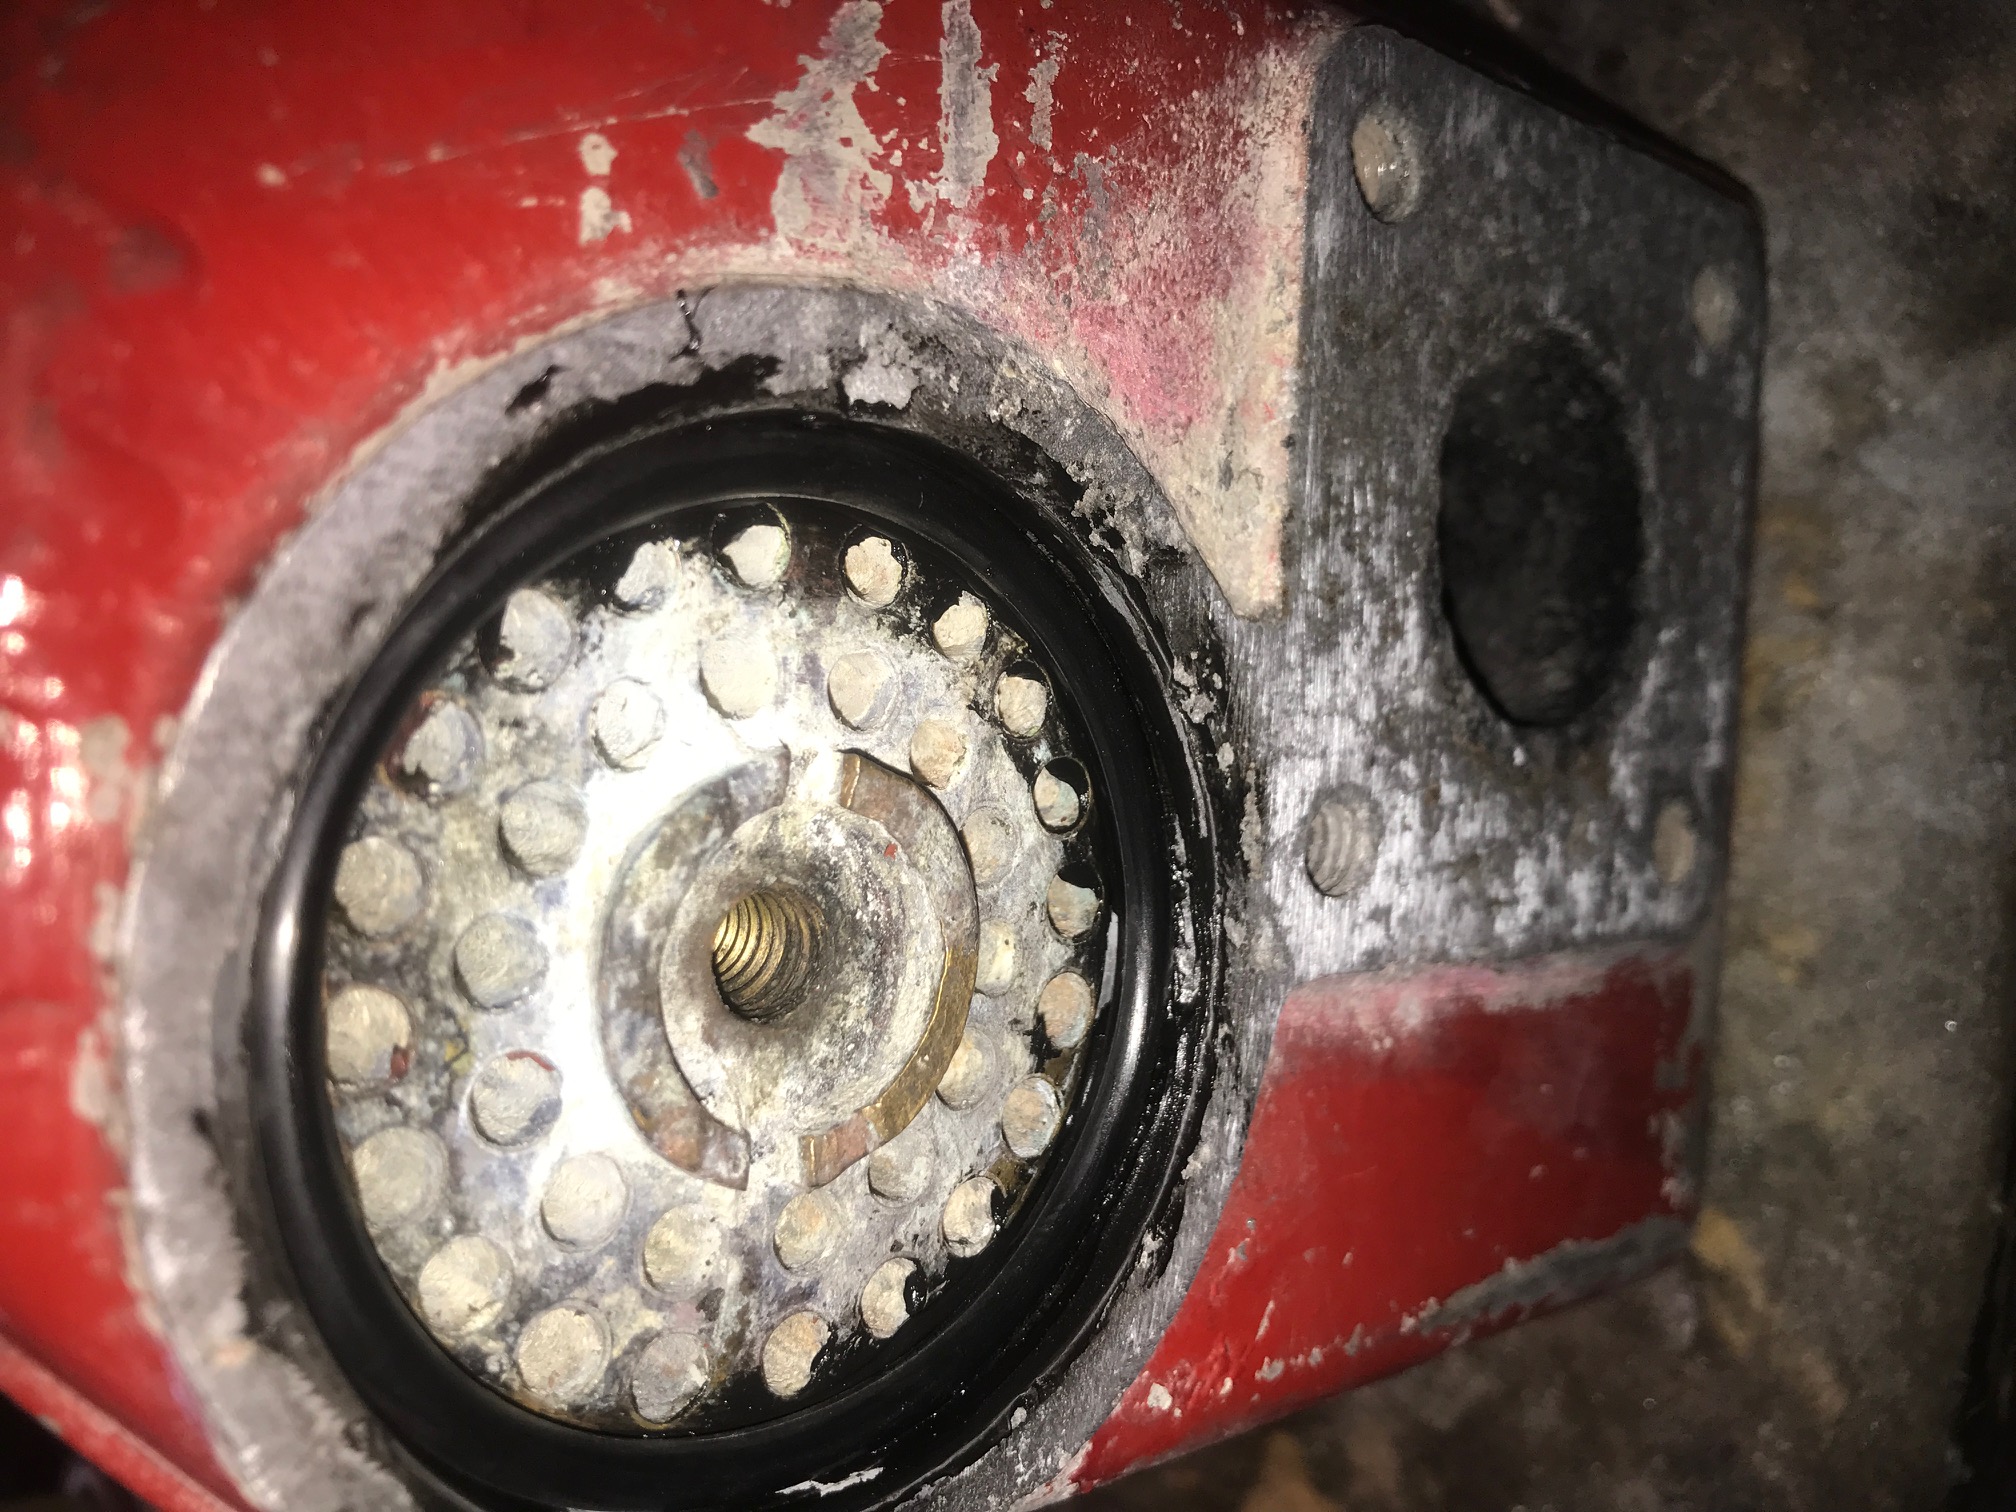
all the Ali at the ends and again applied JB weld.
This time it was easy to see in the ends
to ensure all evenly covered.
I used the same hole saw wrapped in glass
paper, a broken belt sander belt, to smooth all off until the bronze tube stack
could be fitted without impinging on the case.
New ‘o’ ring seals
fitted, and a smear of heat proof silicone for good measure and all rebuilt.
Because I could get at it easily I could
now
apply a vacuum to the header tank pipe fittings
that proved it was water tight! Done in the time honoured way by applying a
wet thumb to one side of the tank and sucking on the other so my tongue was
stuck to it!
I held it on for a few minutes and it
showed no sign of leaking.
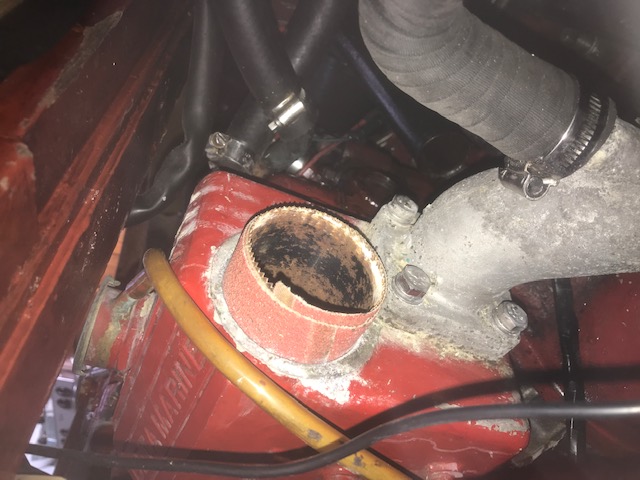
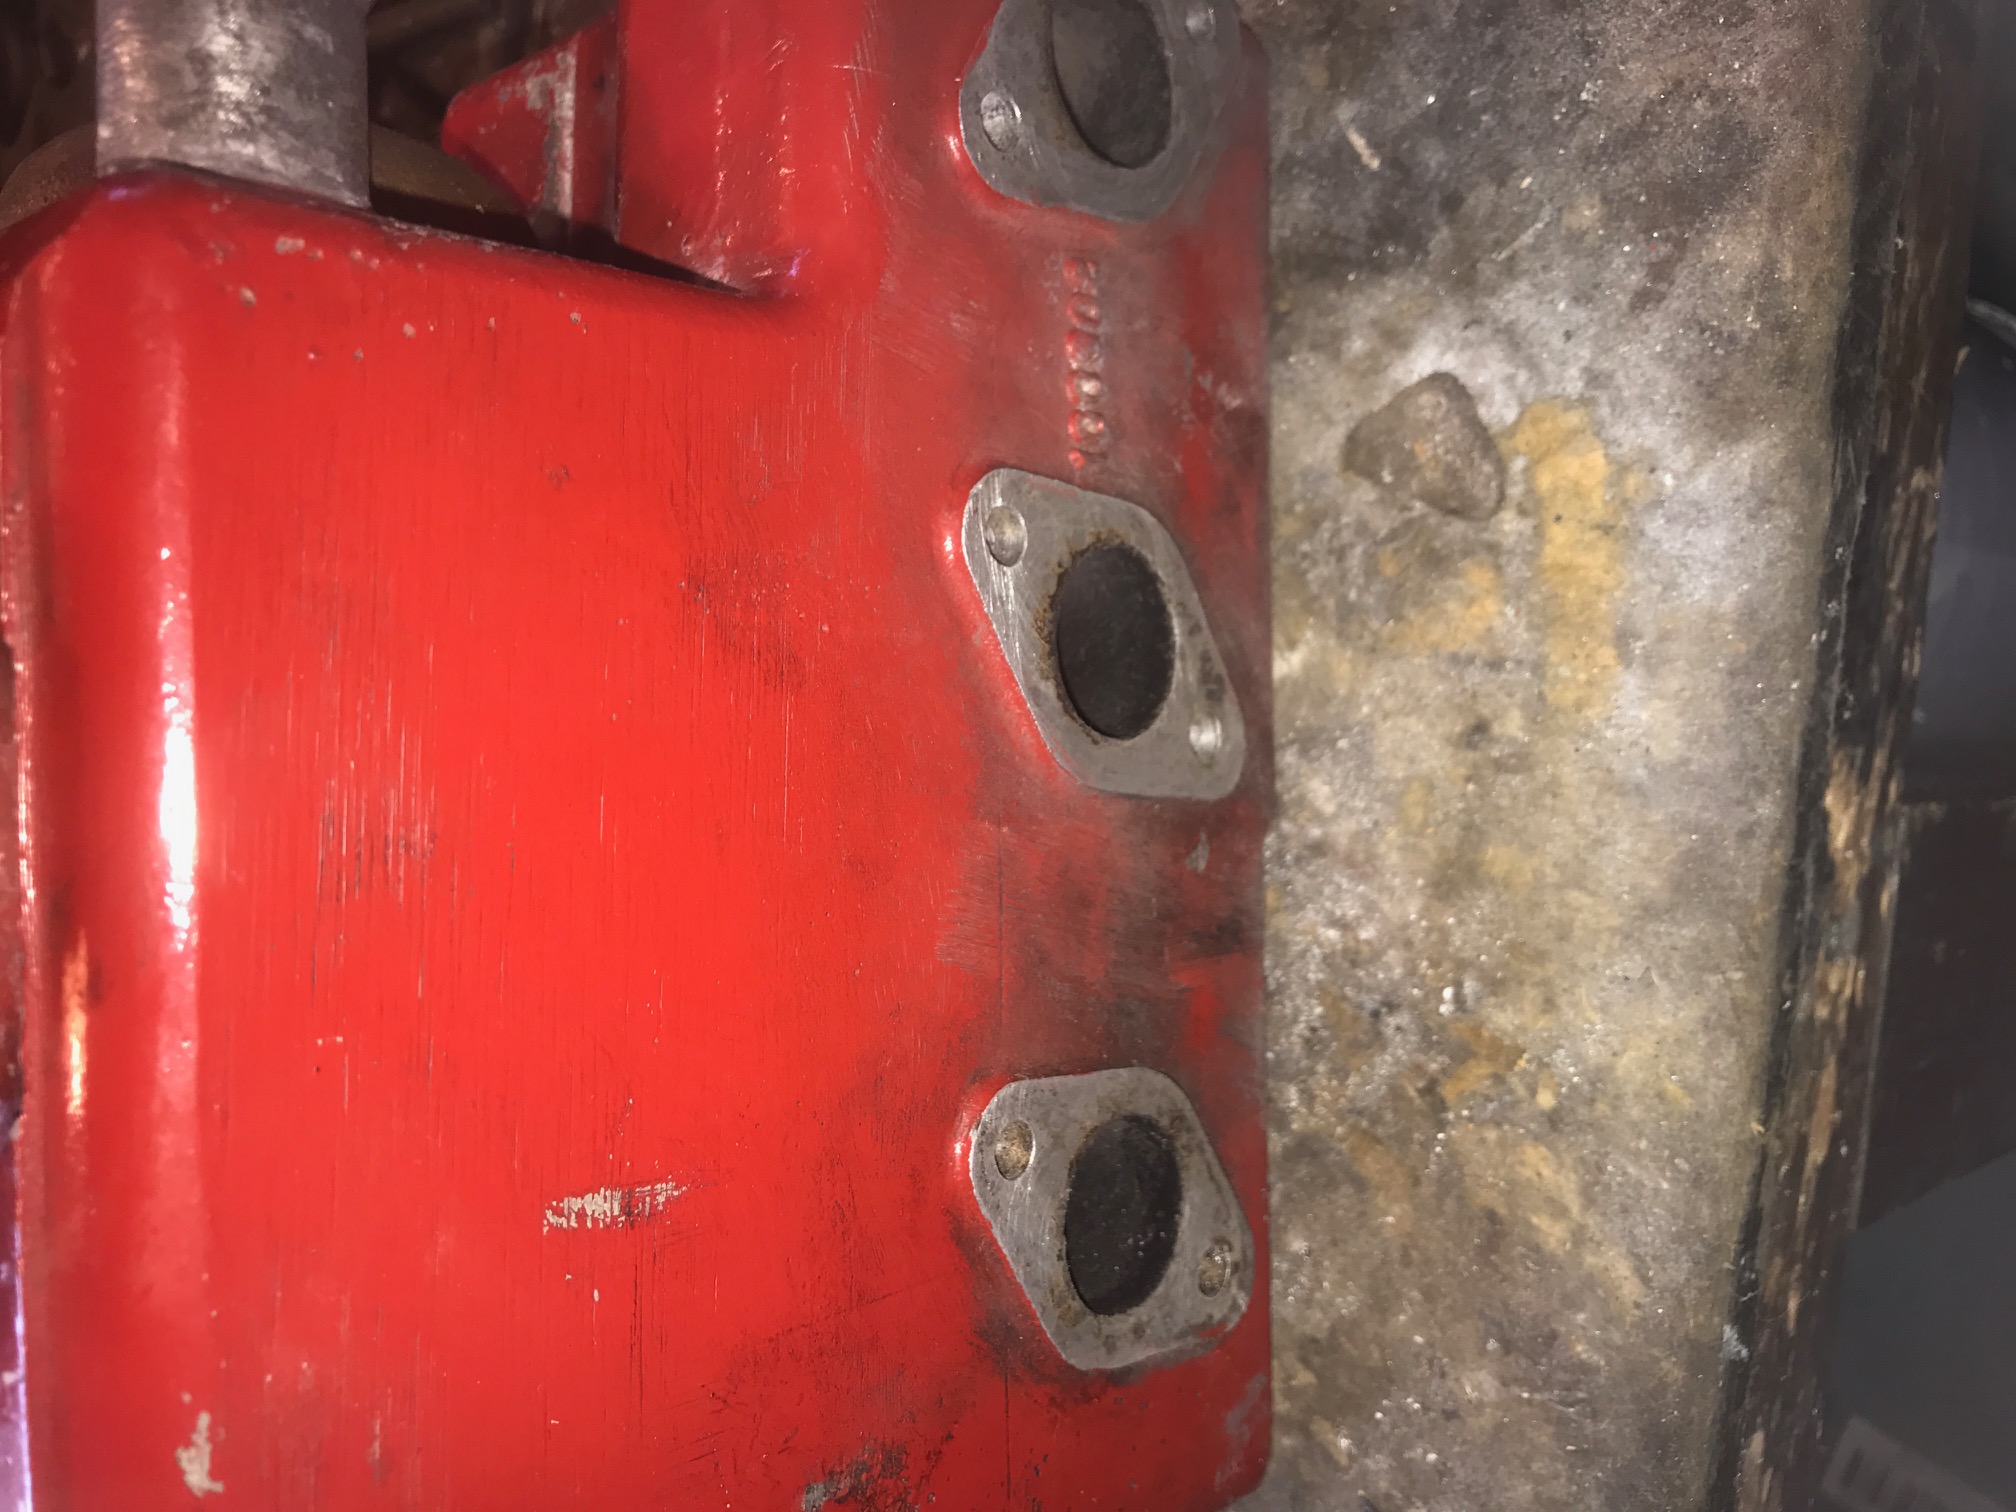
At this stage I cleaned up the three inlet ports on the header tank and the exhaust port, judicious use of a large flat file.
Whilst I had been doing
this I had enquired from Beta about a replacement header tank, just the
cast ali tank.
In case I could not restore the case...
‘Sorry, over 30 years old and no longer
available’.
A new style fabricated tank was available
but my bronze tube stack would not fit, so all new parts had to be purchased
to use it..
£1,000!!! Ouch. I also asked about the
starter, being a Kubota part I assumed cheap…
Wrong!
They wanted £400!
Searching the net I found one for sale for
£99.00!
Ordered.
When the new starter
arrived it was obviously different, a thinner body and when the old one was
removed, you could see there was a different number of teeth on the pinion.
Rats again!
Then I remembered the
little auto electrical place in an old shed back of an industrial unit in
nearby Danbury.
A quick call and I arrived hot foot, with
starter in hand.
The gent there, a real gent, picked it up,
looked at the loose fitting and with a deft twist of the wrist with a pair
of pliers, handed it back, ‘fixed’ he said!
Apparently these solenoids have a ‘star
washer’ that is used to hold the stud in place whilst the nuts and cables
are attached, it was only that star washer that was loose.
At the same time the starter motor supplier came
back to me saying they did not have one to fit and I could send it back at
their cost, instantly reimbursed.. A result. I had asked Steve to
assist with the rebuild, just in case, and he took just moments to refit the
starter and the wiring.
The block needed the old gaskets removing though and
as he has the right tool to do that, he attacked it.
He refitted the header tank, a simple job of sliding
it on the studs, but on tightening the studs there was an ominous ‘click’
and a stud wrung off, before it was even finger tight!
Can y
Rats again! Steve nipped up to his workshop, retrieved a stud
extractor and removed the offending part.
The next day I turned up
at the boat and
Steve was waving a new stud at me!
It took but moments for
Steve to fit the stud.
At this point I took over and paid Steve
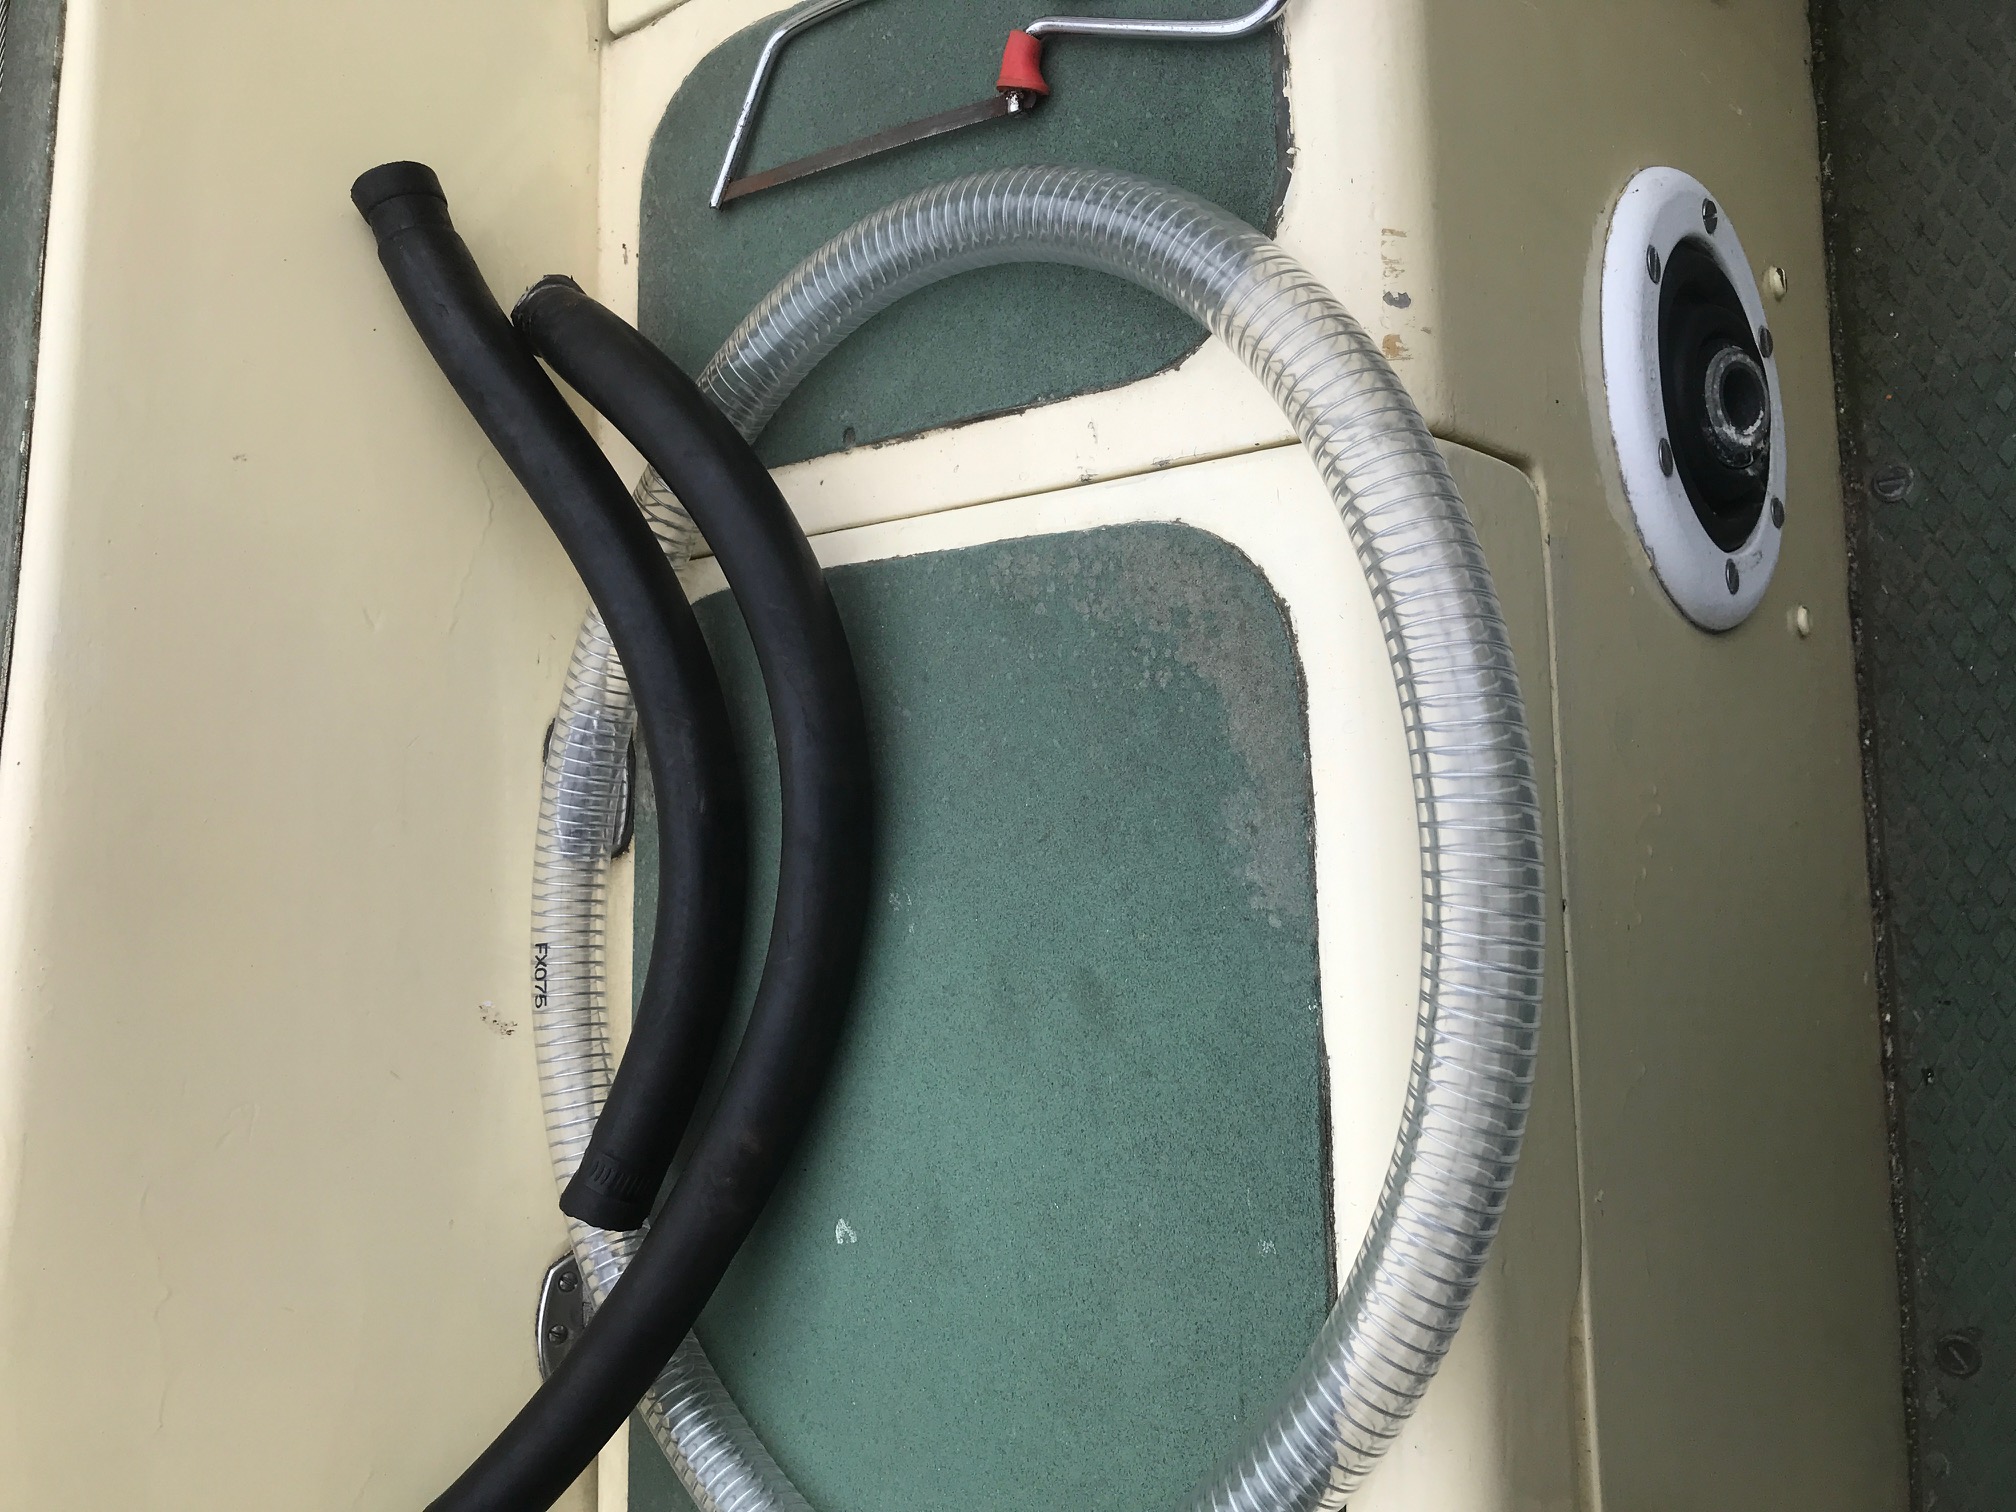
for his time and effort and refitted the header tank, exhaust, replacing all
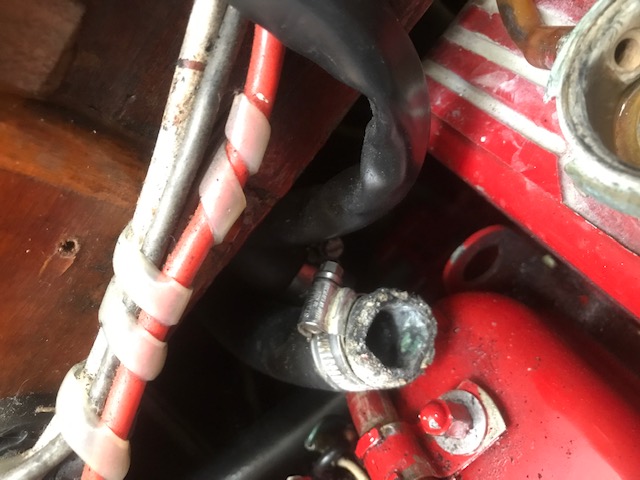
the hoses, including the ones for the anti-siphon unit that had been fitted
30 years back.
Thought it was high time for new ones.
At the same time I thought it judicious to
replace the thermostat.
All new parts had been ordered from Beta,
or supplied by Steve.
With all reassembled I refilled the header tank with
an antifreeze mix and fired the motor up.
There was instantly a
leak from one of the new, clear, salt water hoses on top of the motor,
leading to the blue Vetus anti-siphon fitting..
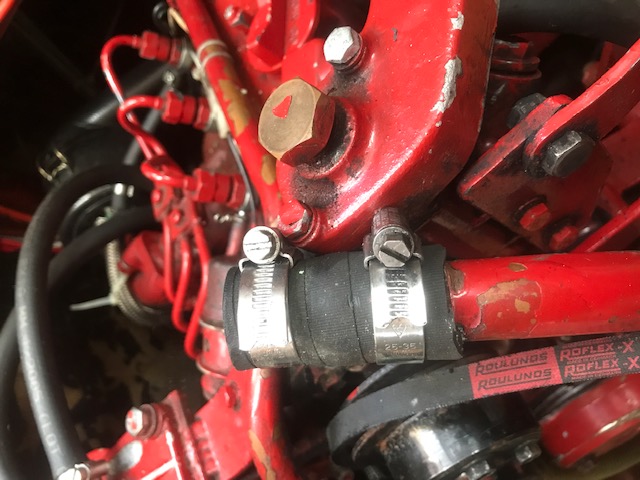
Stop motor and tighten hose.
Check all the other hoses and get a little
on some of the other jubilee clips. Restart. Motor purring
and I crawl head first down the quarter berth and peer into the access
hatches.
All dry! I run the motor for 30 minutes in gear at 2000 revs,
moving a bit of water round the marina!
The next day I am back.
With trepidation I remove the cap, the tank is still full!
Result. No loss of water!
I run the motor for
another half an hour, in gear again..
Check all the hoses and fitting again.
All dry….
I check the bilges, and
sponge out a couple of cupful's that had escaped whilst I was removing hoses
etc.
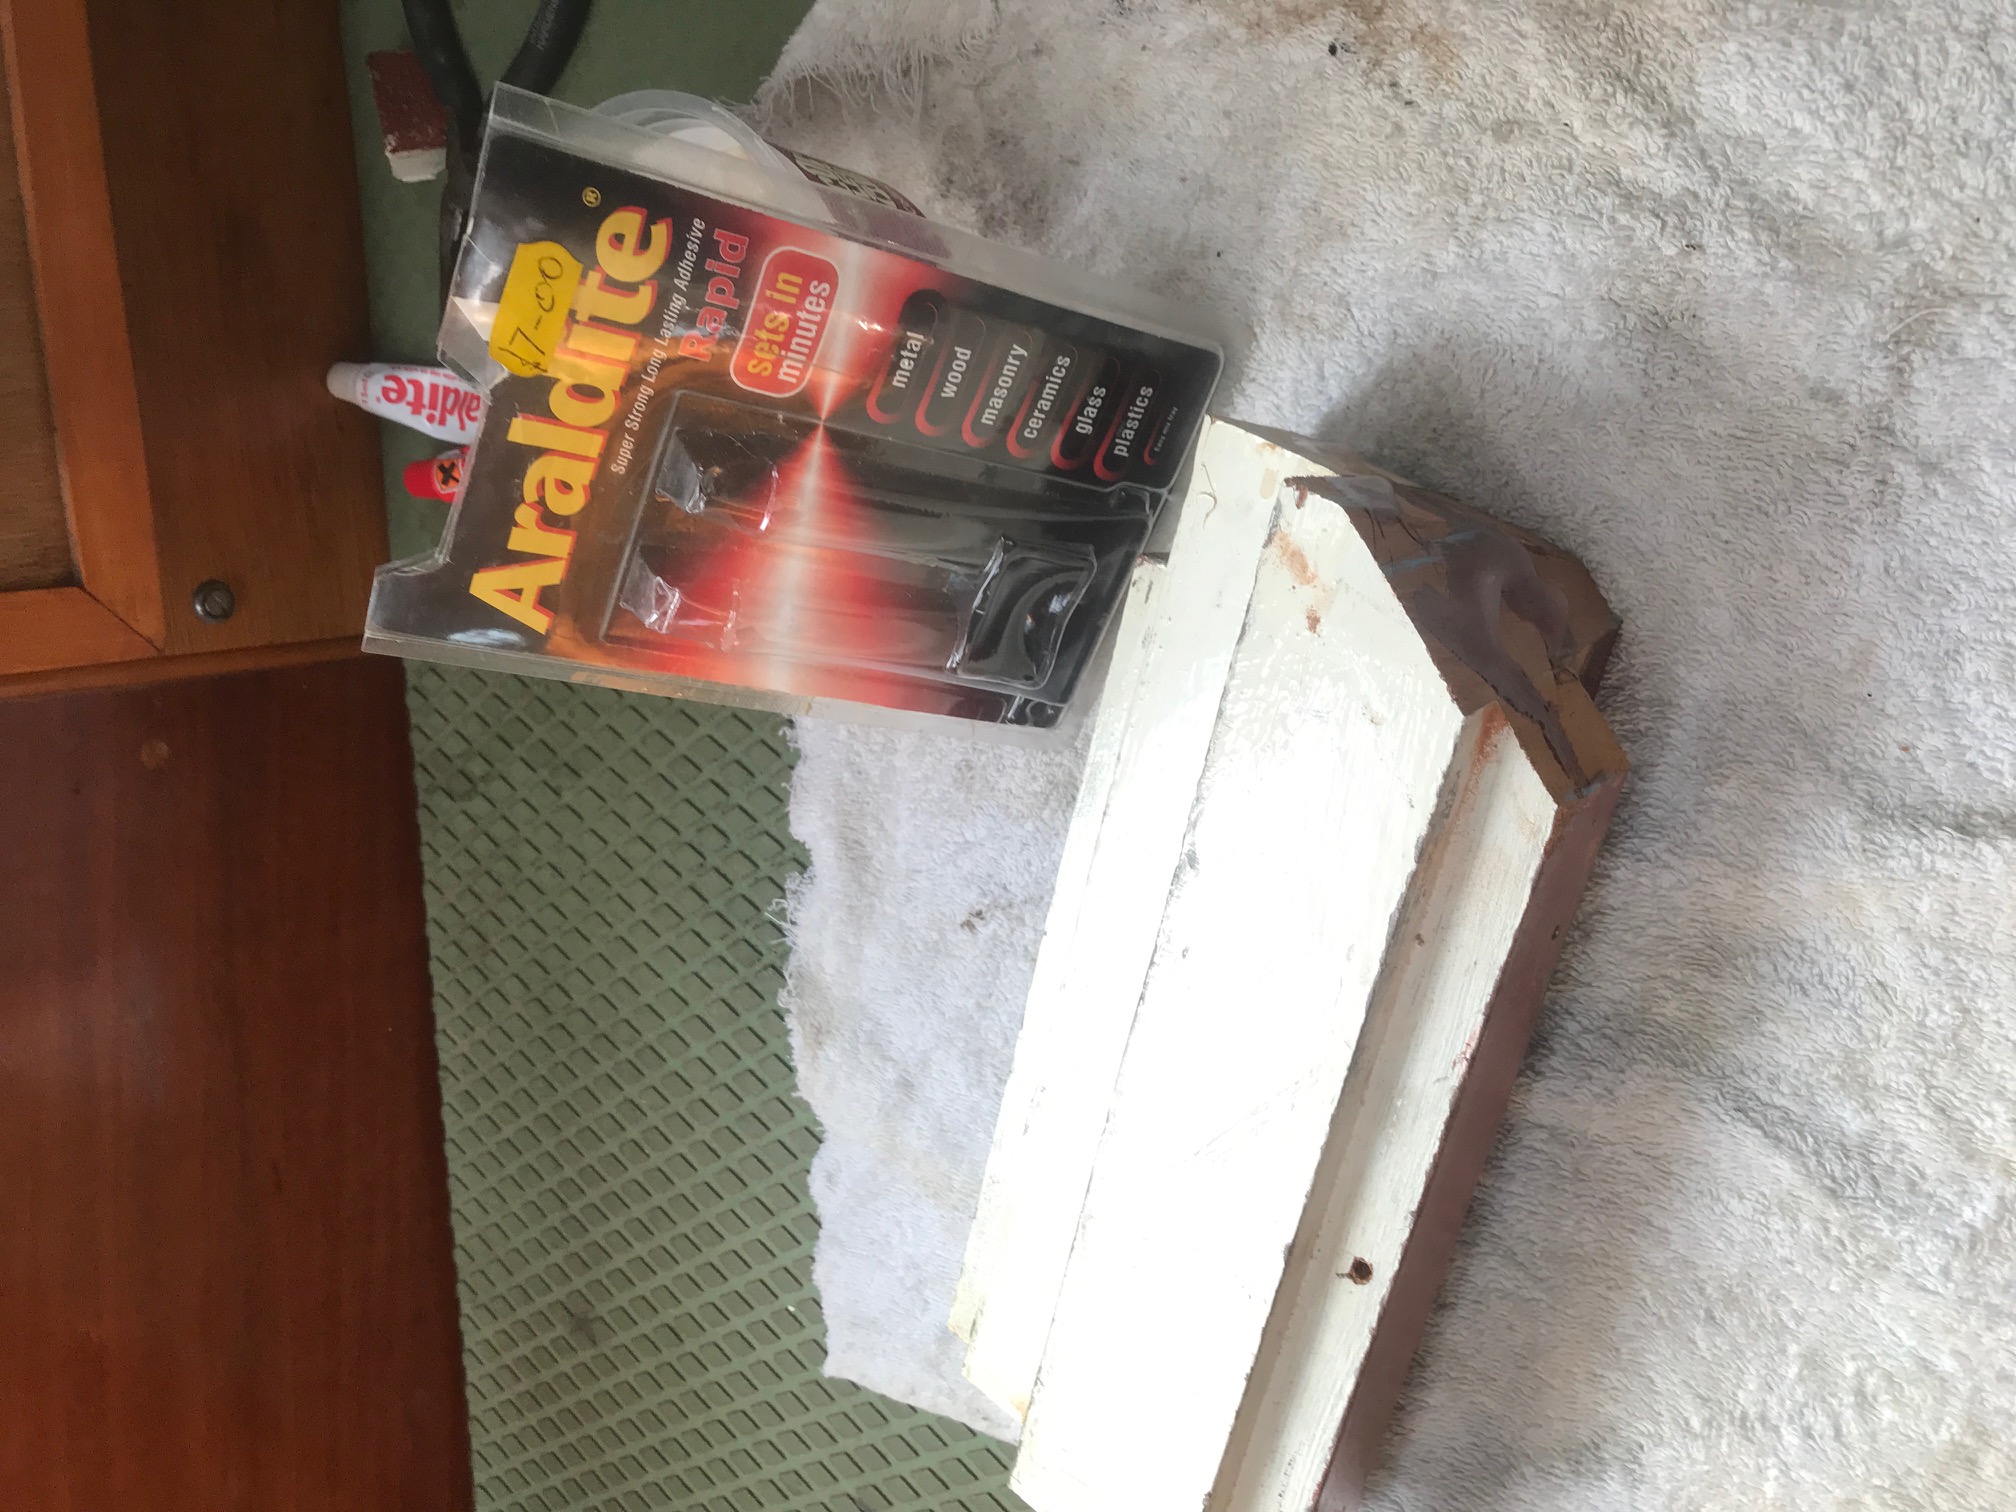
I decide to glue the
engine box support back in, as I appear to have won…. so a quick mix of
Araldite rapid and hold the post in place.
The heat from the motor helps and within
minutes it is firmly stuck.
I mix up another small batch and go round
using it as filler on the two saw cuts.
I have not painted the post, so if I ever need to
remove the header tank again I have a plain mark to follow with the jigsaw!
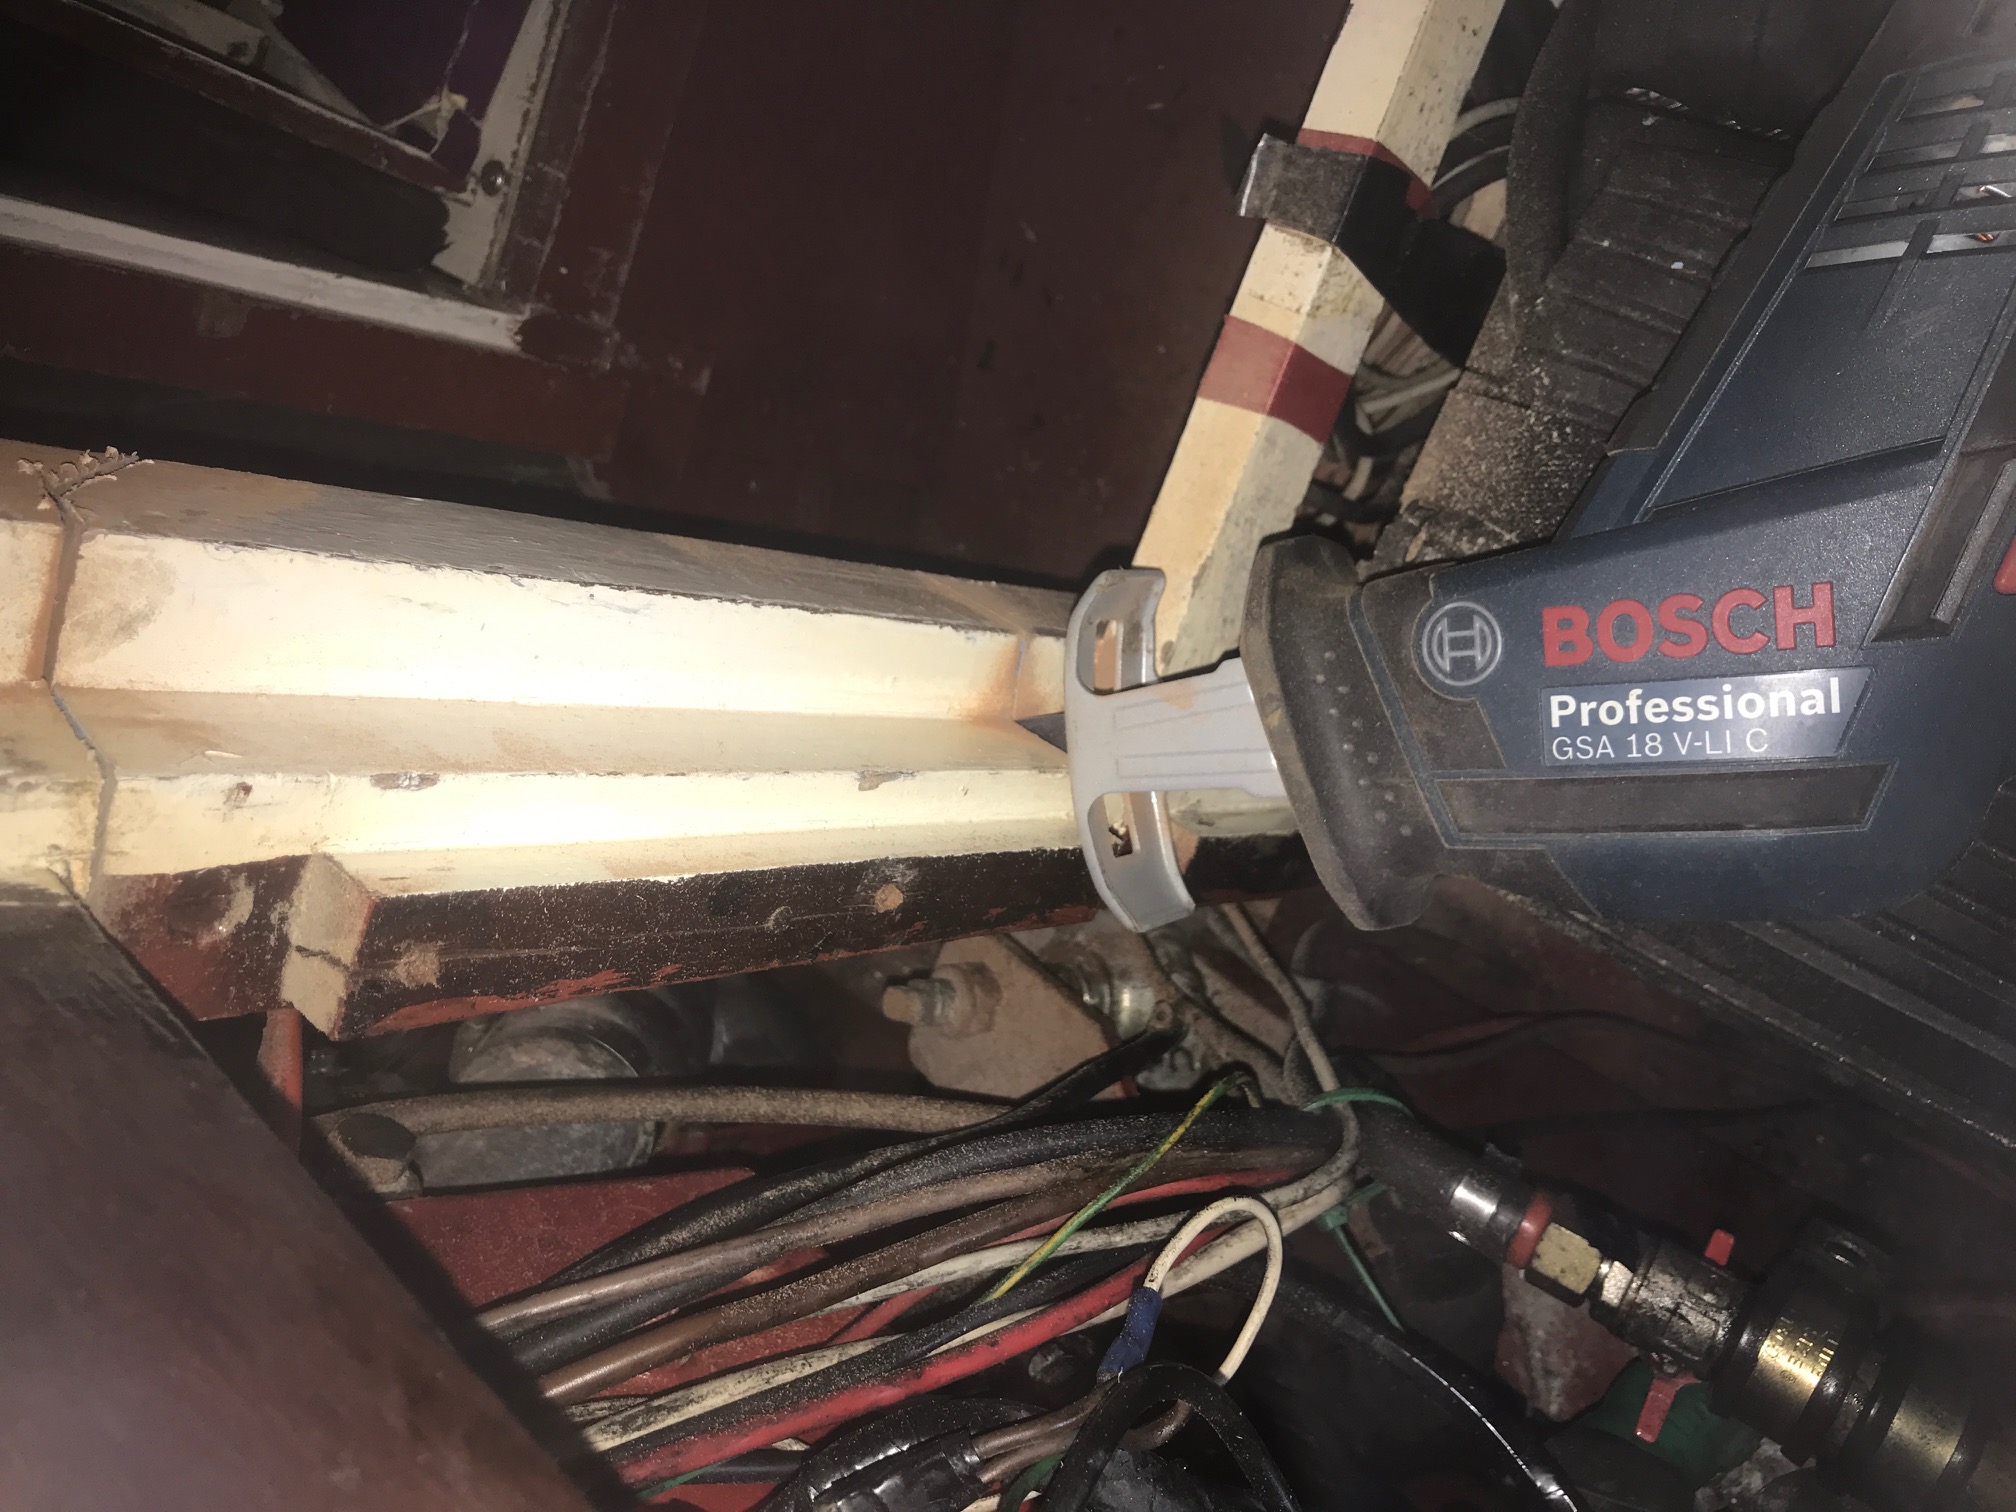
I spend an hour or so
tidying the wiring and refitting the sump pump, replacing all the engine box
panels, the mast lowering gear, the boxes of engine spares and the berth
cushions.
When I am done the boat
is back to normal.
The motor has also cooled down so it was
safe to remove the filler cap.
Still full! Home for another
congratulatory beer!
A couple of days later,
the 30th of September 2023, we were able to get away and take her
out for a few hours motoring, and a little sailing.
All was good.
After returning to Bradwell we sat on
board for an hour or two whilst we had a picnic and the motor again cooled.
Another check, the header tank is still
full.
Fixed!
That morning we had
queued for an hour in the sun for our Covid and flu inoculations’.
As we left the boat we realised our arms
were really hurting, so back to base to collapse in a heap, but warm in the
knowledge the boat was back in commission! John
|
|


