![]()
![]() ..
..
|
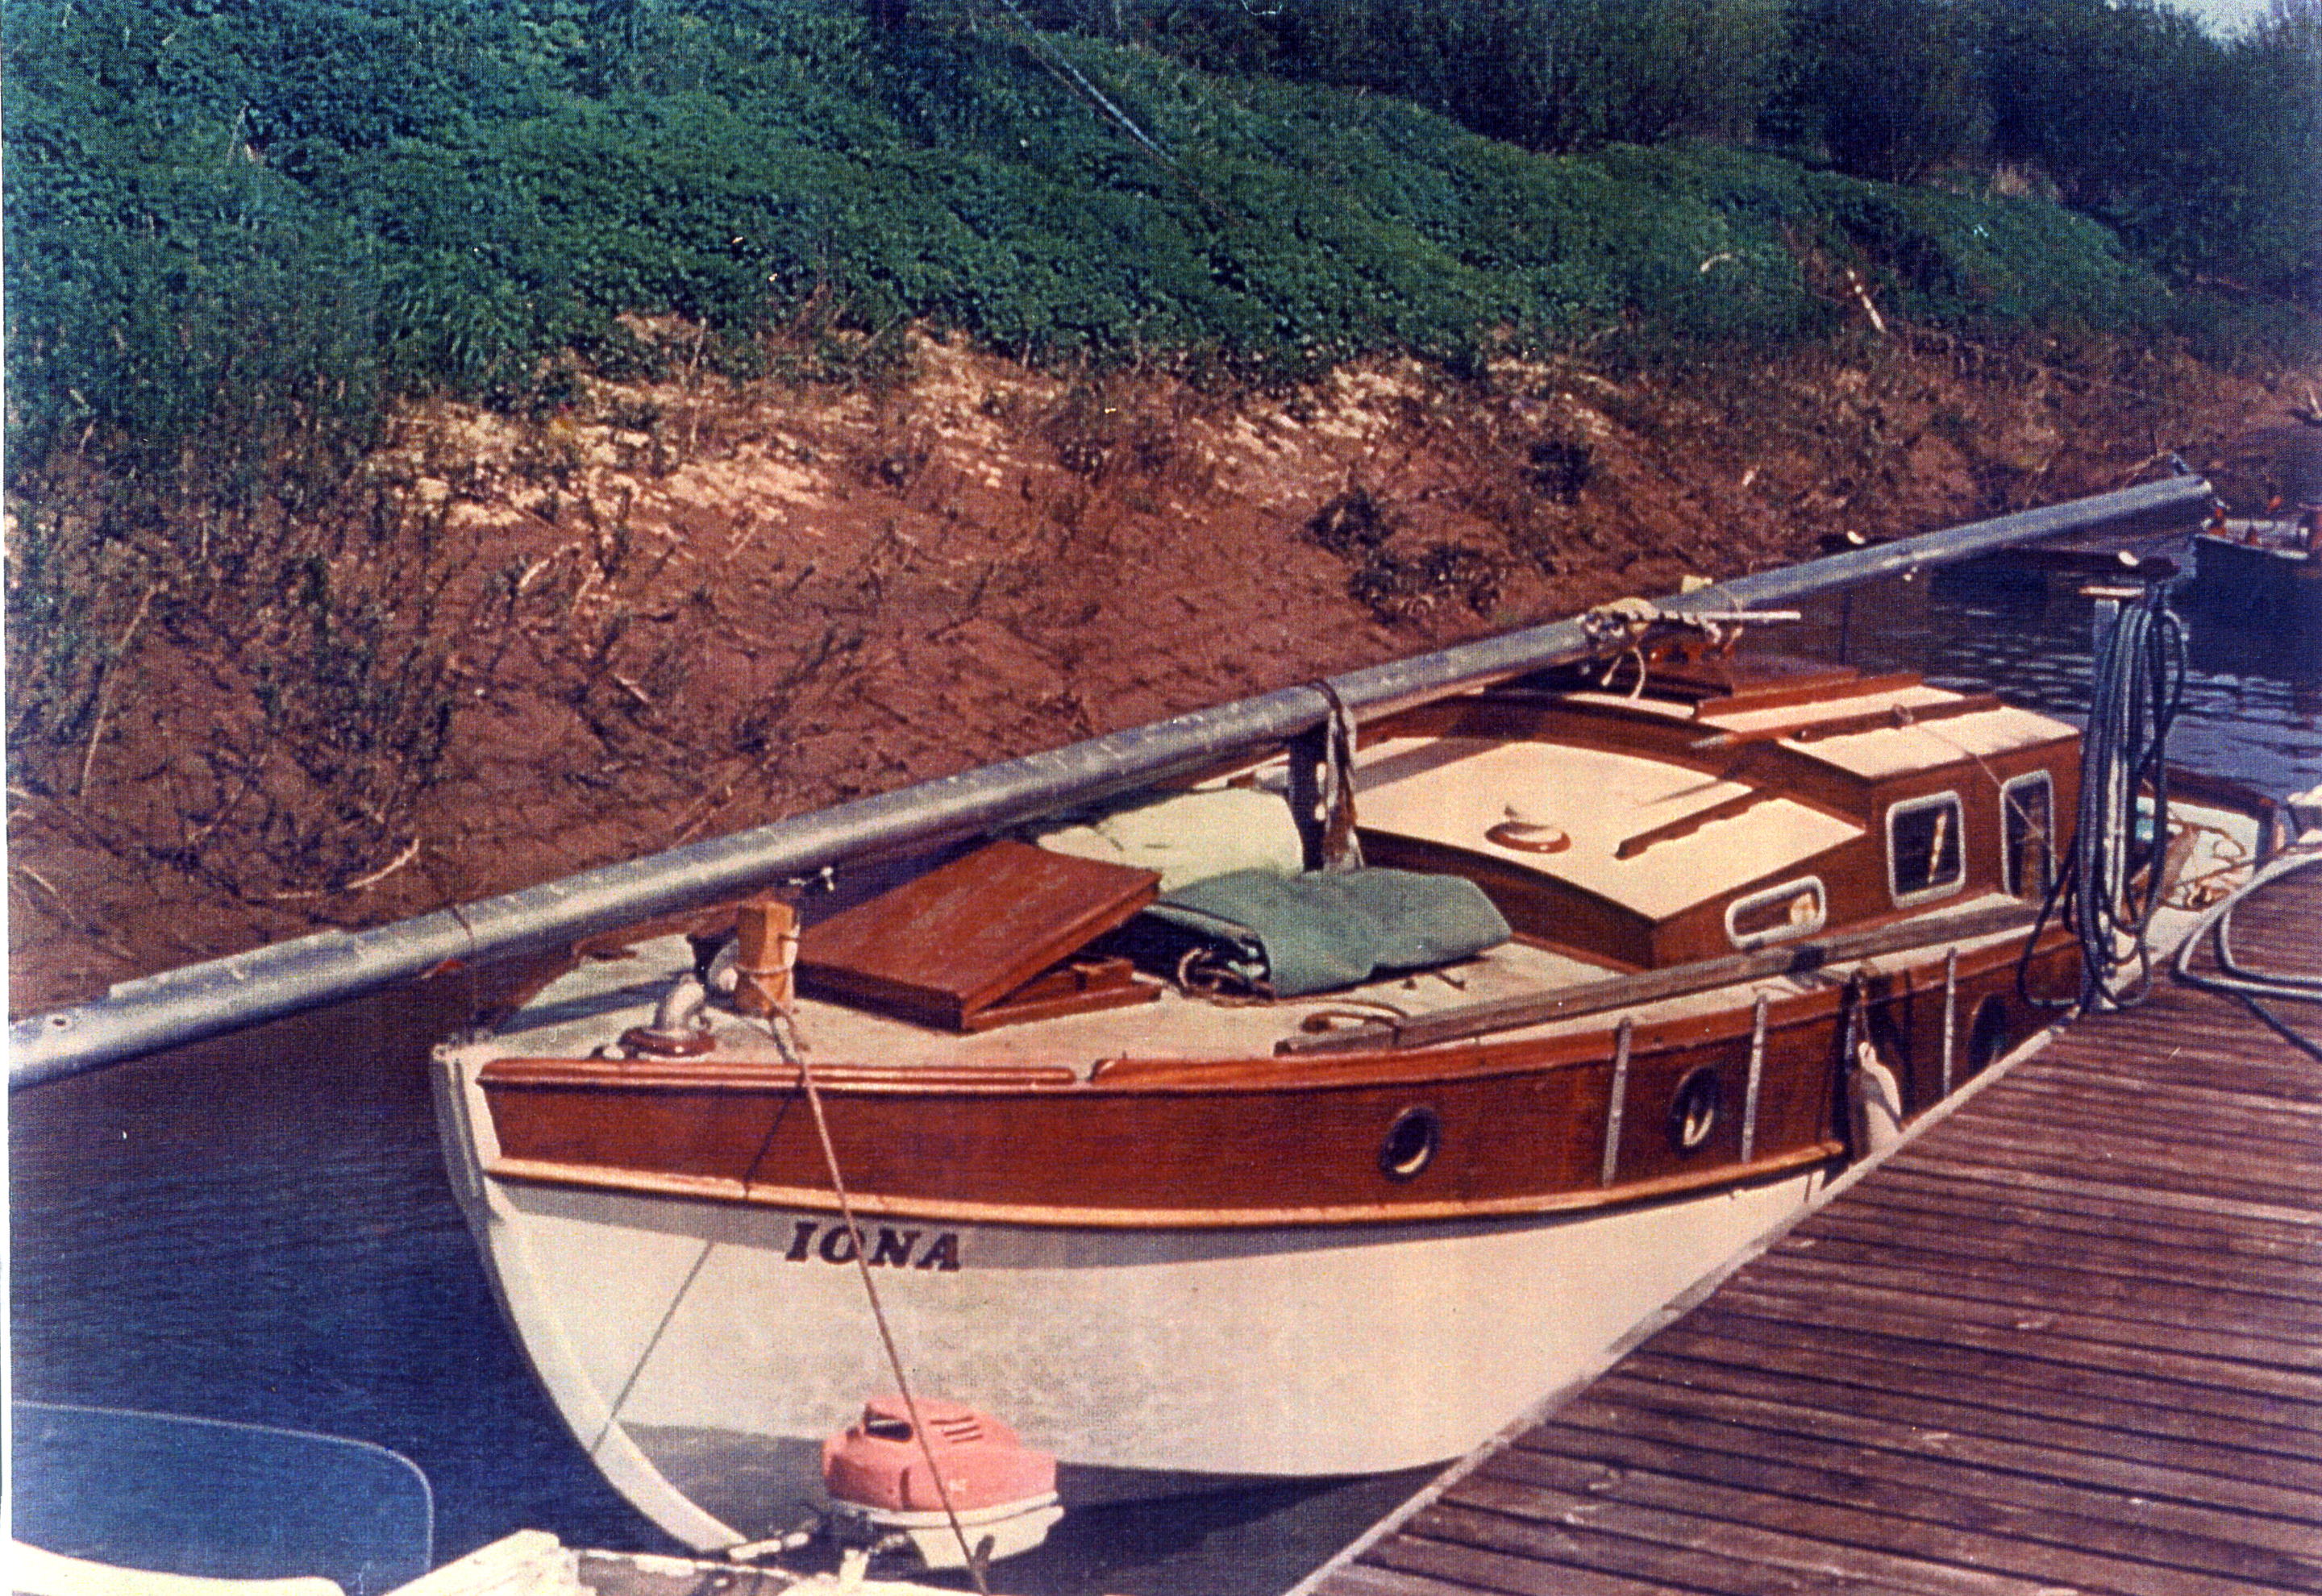
Dear John,
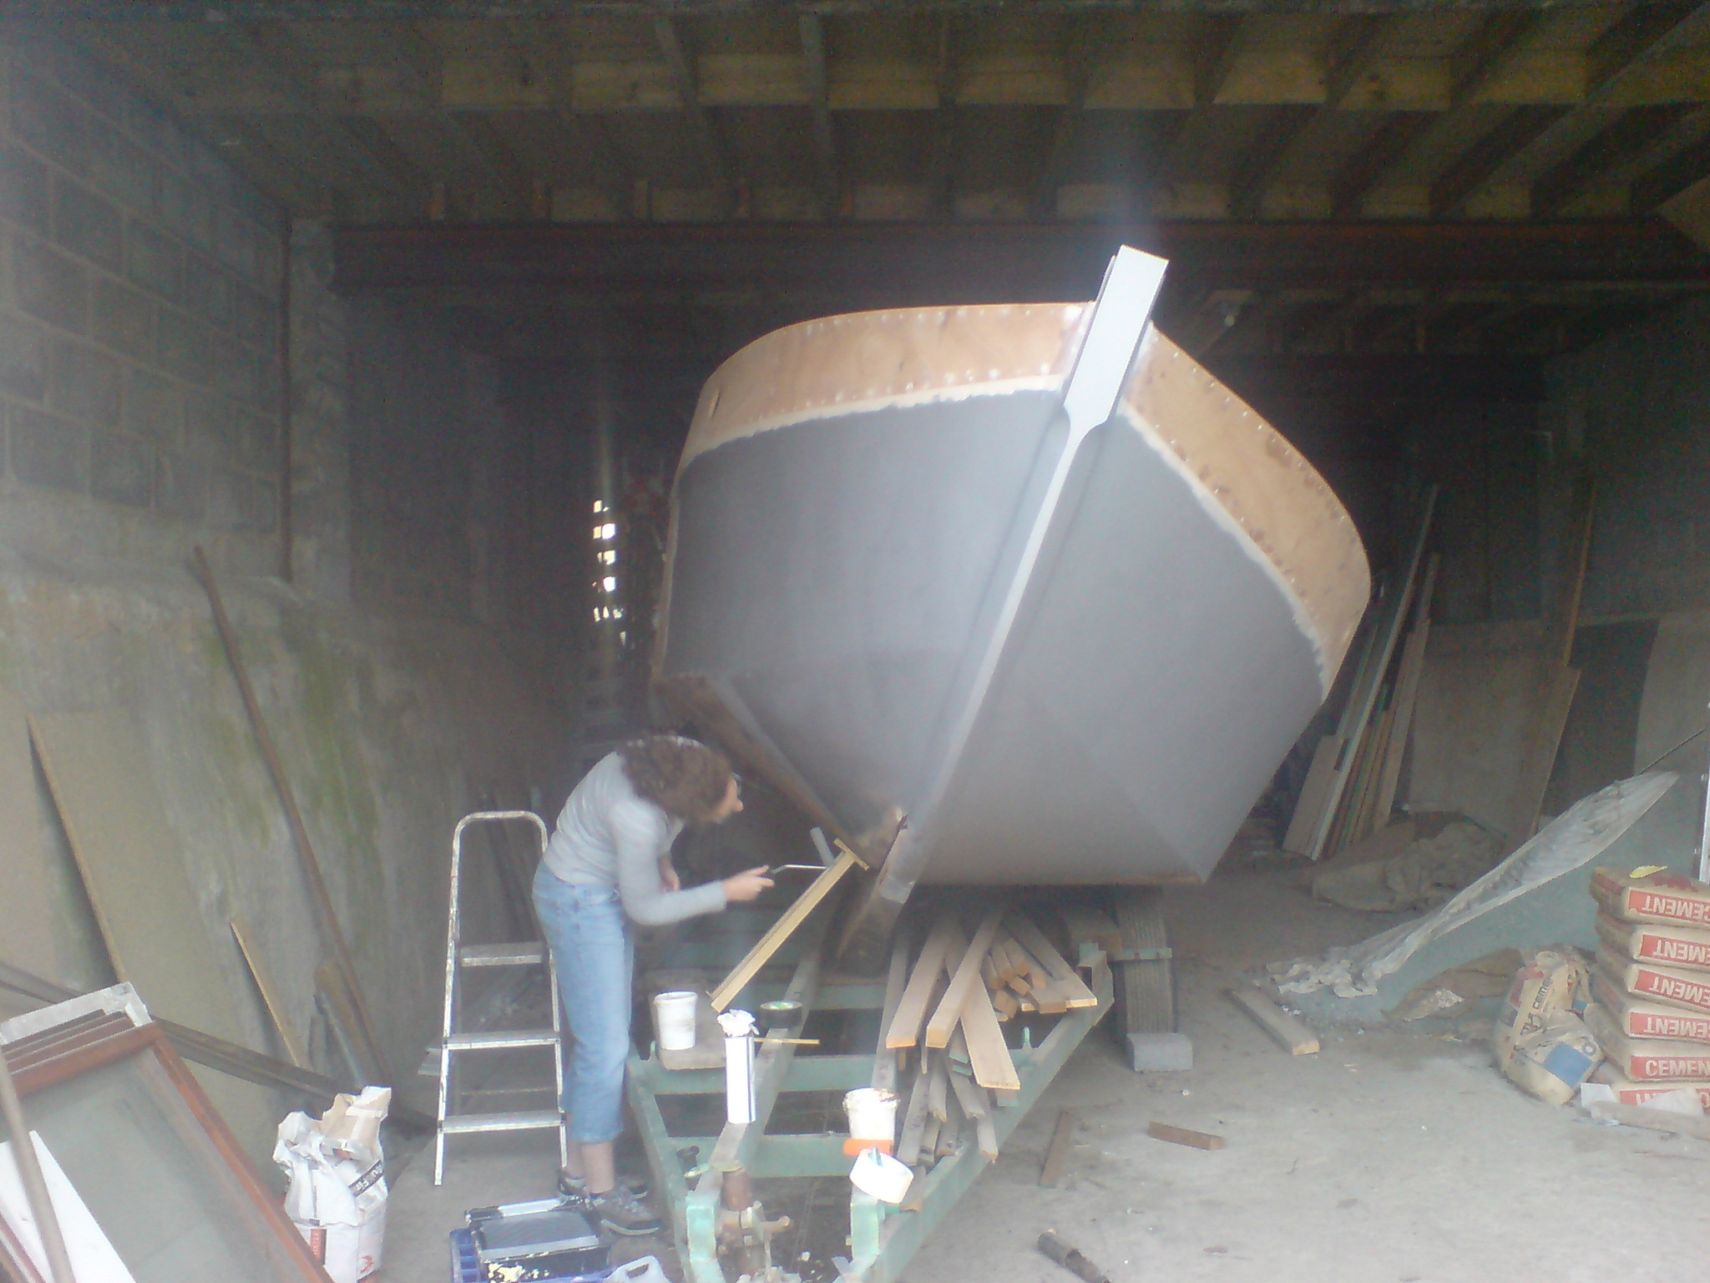
Just thought you might be interested in a progress report on IONA. At last I'm going in the right direction, fixing good timber back onto the boat rather than ripping rotten stuff out!
Had to make up a complete new transom, It's the swept transom, so had to laminate 1/4" Iroco around a ply form I made. about 6 pieces as I recall, glued together with epoxy. I'm seriously thinking of replacing the inboard rudder with a transom mounted one as you have done on 'Fiddler's Green', and so took the opportunity to beef-up transom with lodging knee's either side. Maybe overkill, but it wont do any harm either.
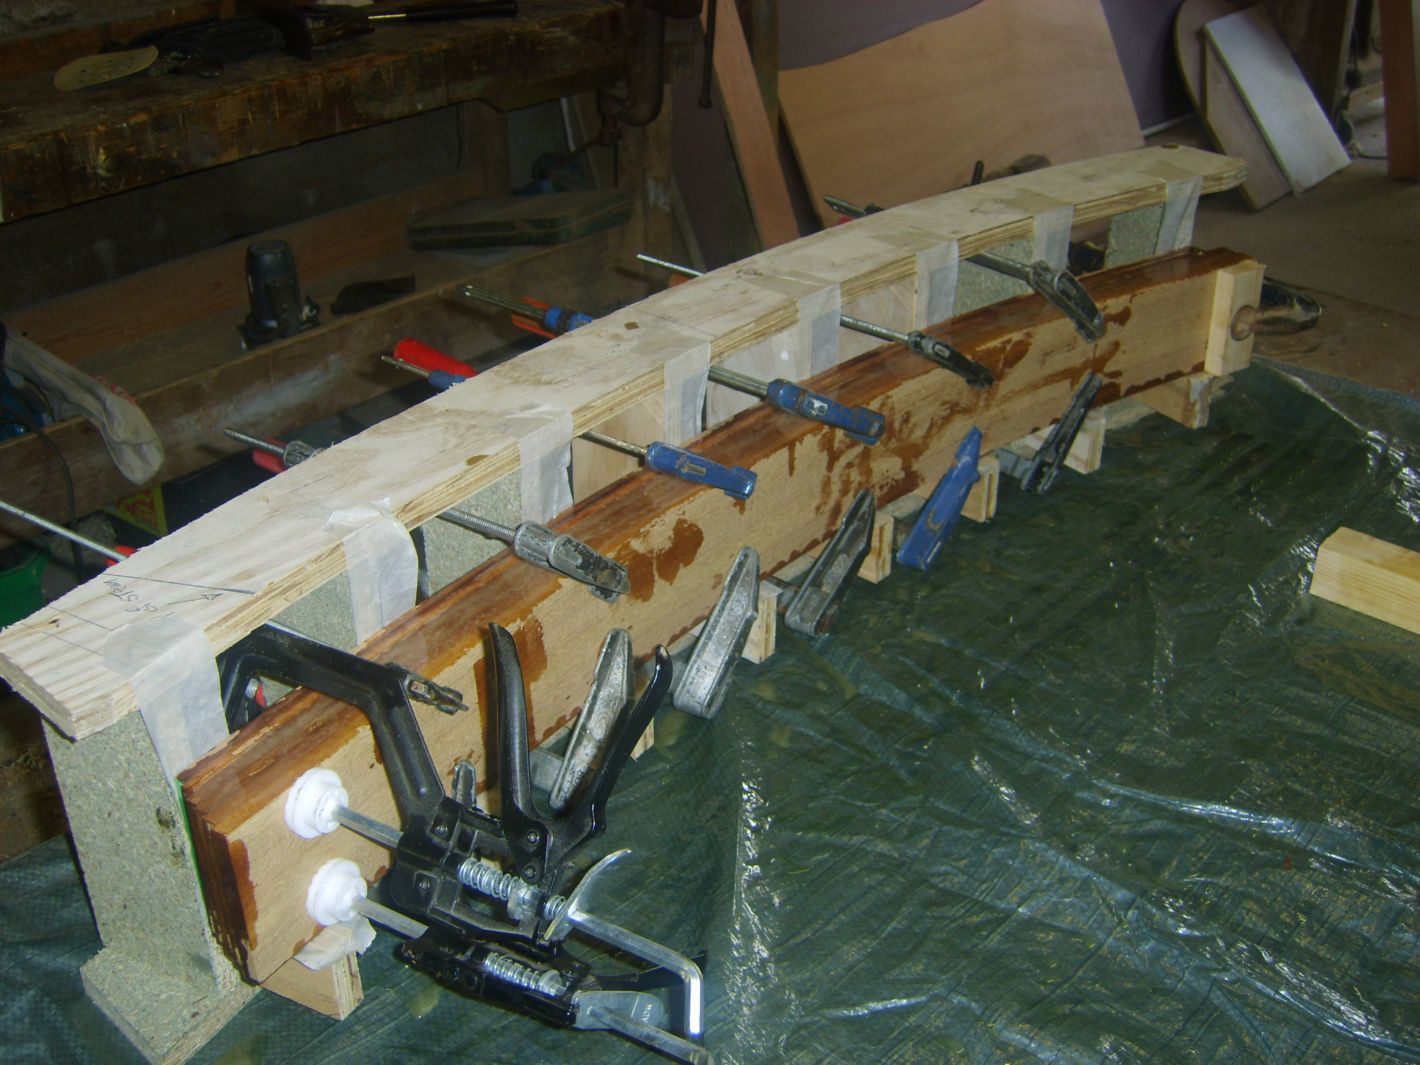
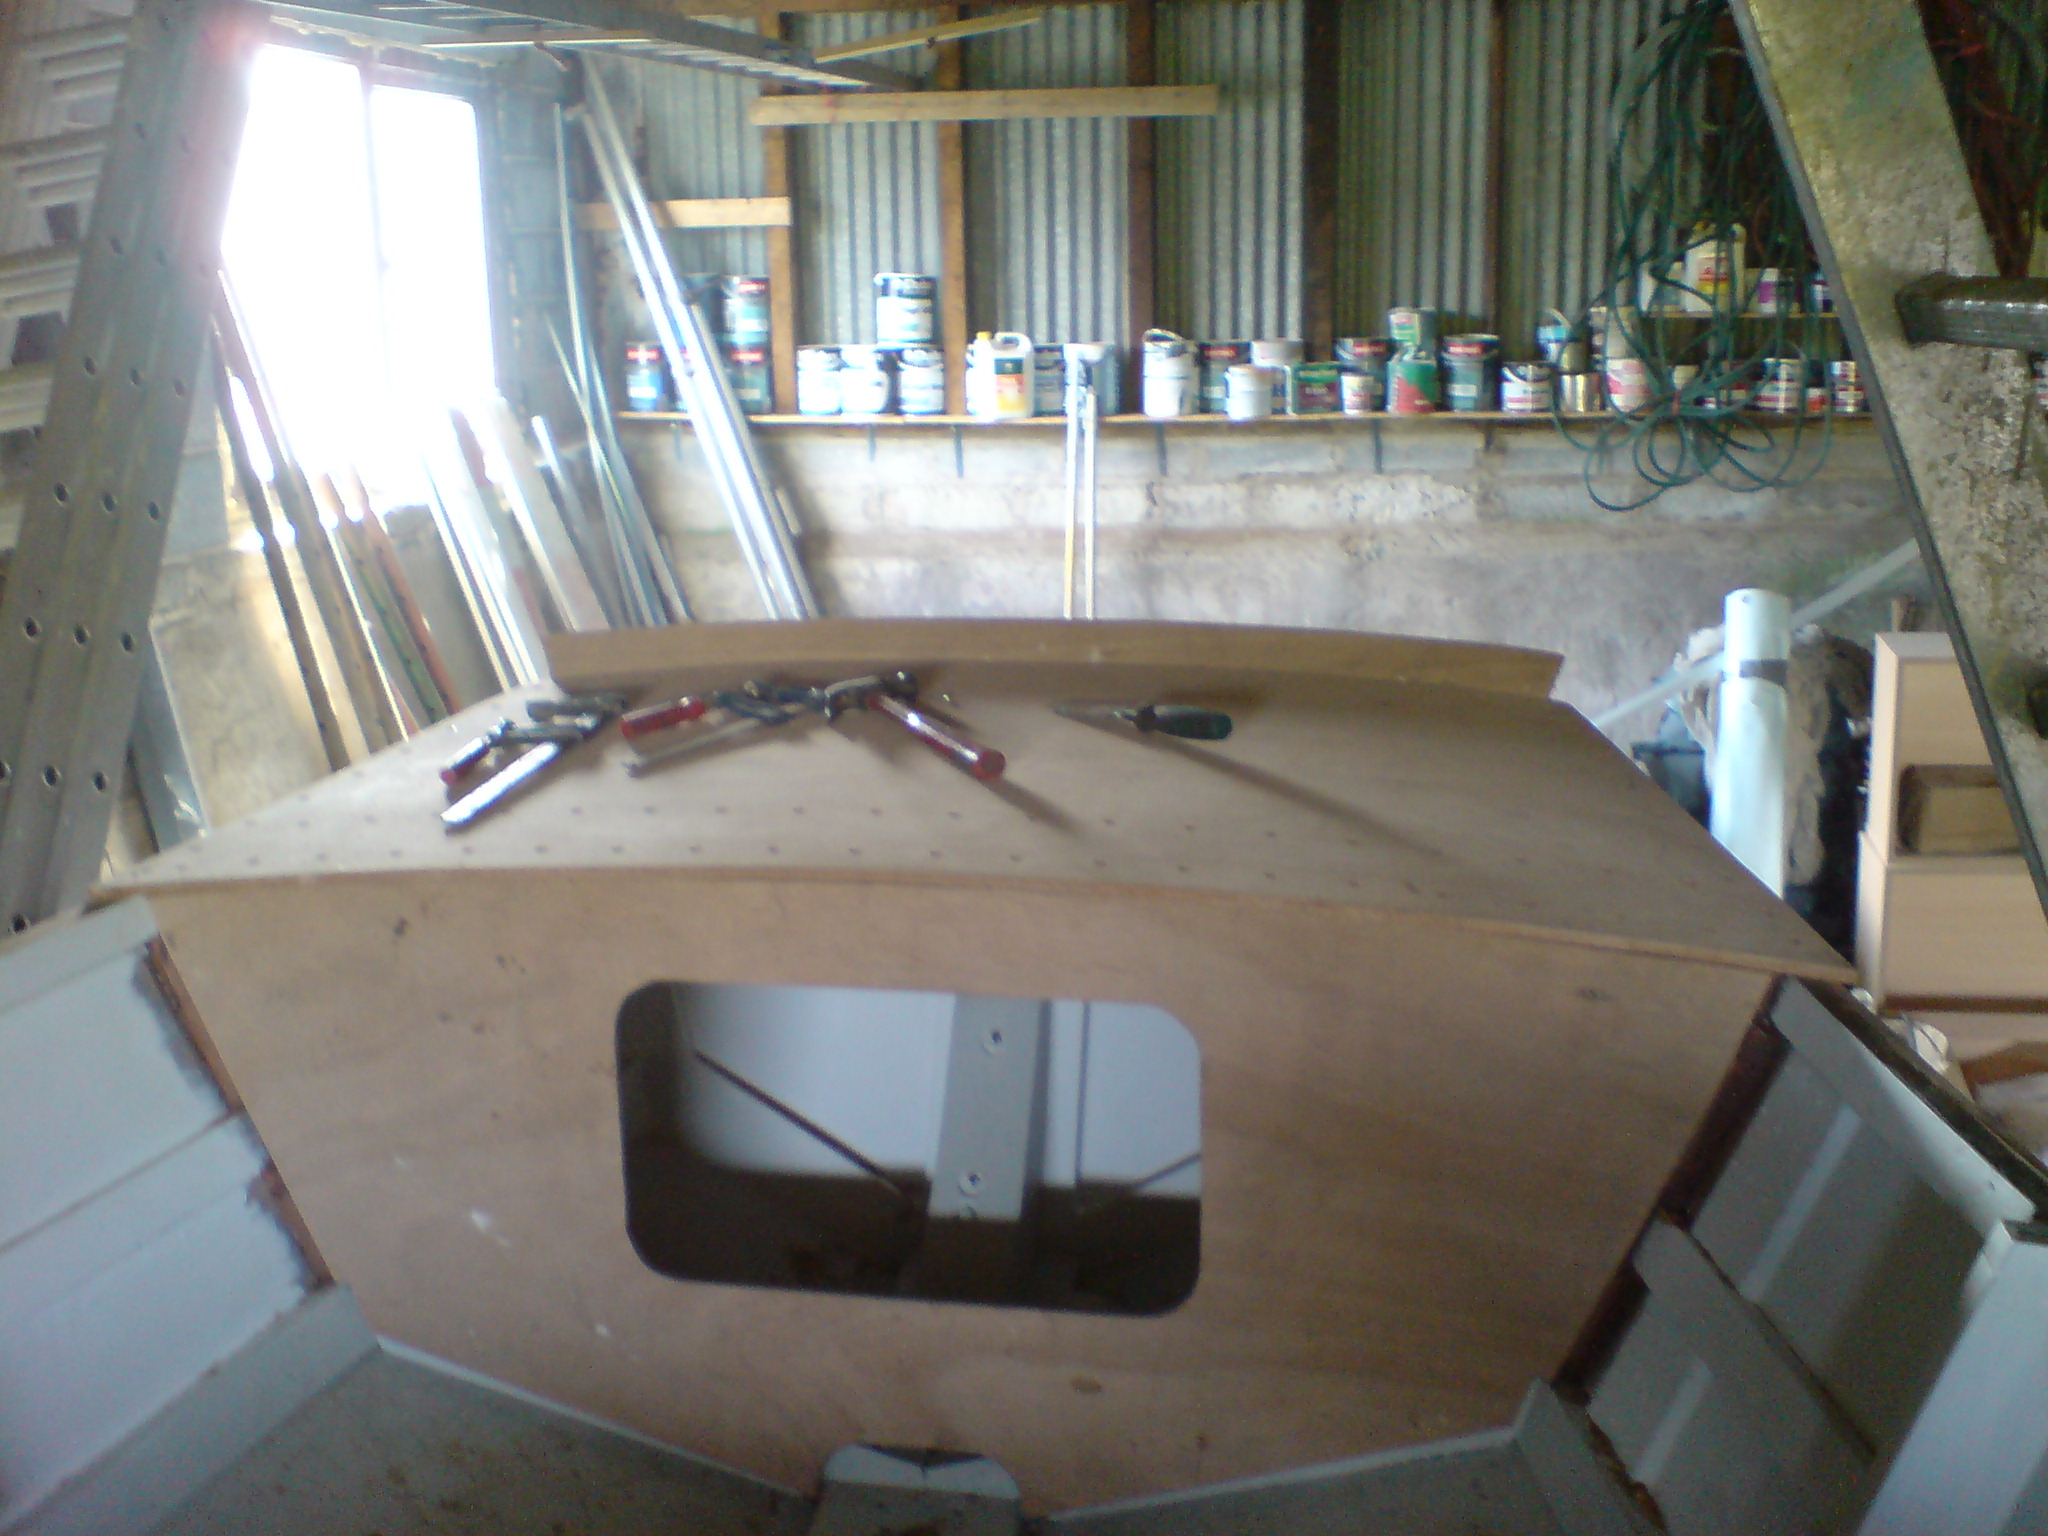
These show the new transom
construction, Iona's is the swept version so I had to make a ply form. I
used 3/4" shuttering ply cut to the correct curve. I got the dimensions
and radius off the plan CD. The form glued and stapled together, with
plenty of room for clamps!
Also managed to get hold of a
copy of 'building chine boats' by Michael Verney. Some useful information
in the book, well worth having if your doing major work. Unfortunately out
of print now, but managed to get hold of a second hand copy off 'tinternet'.
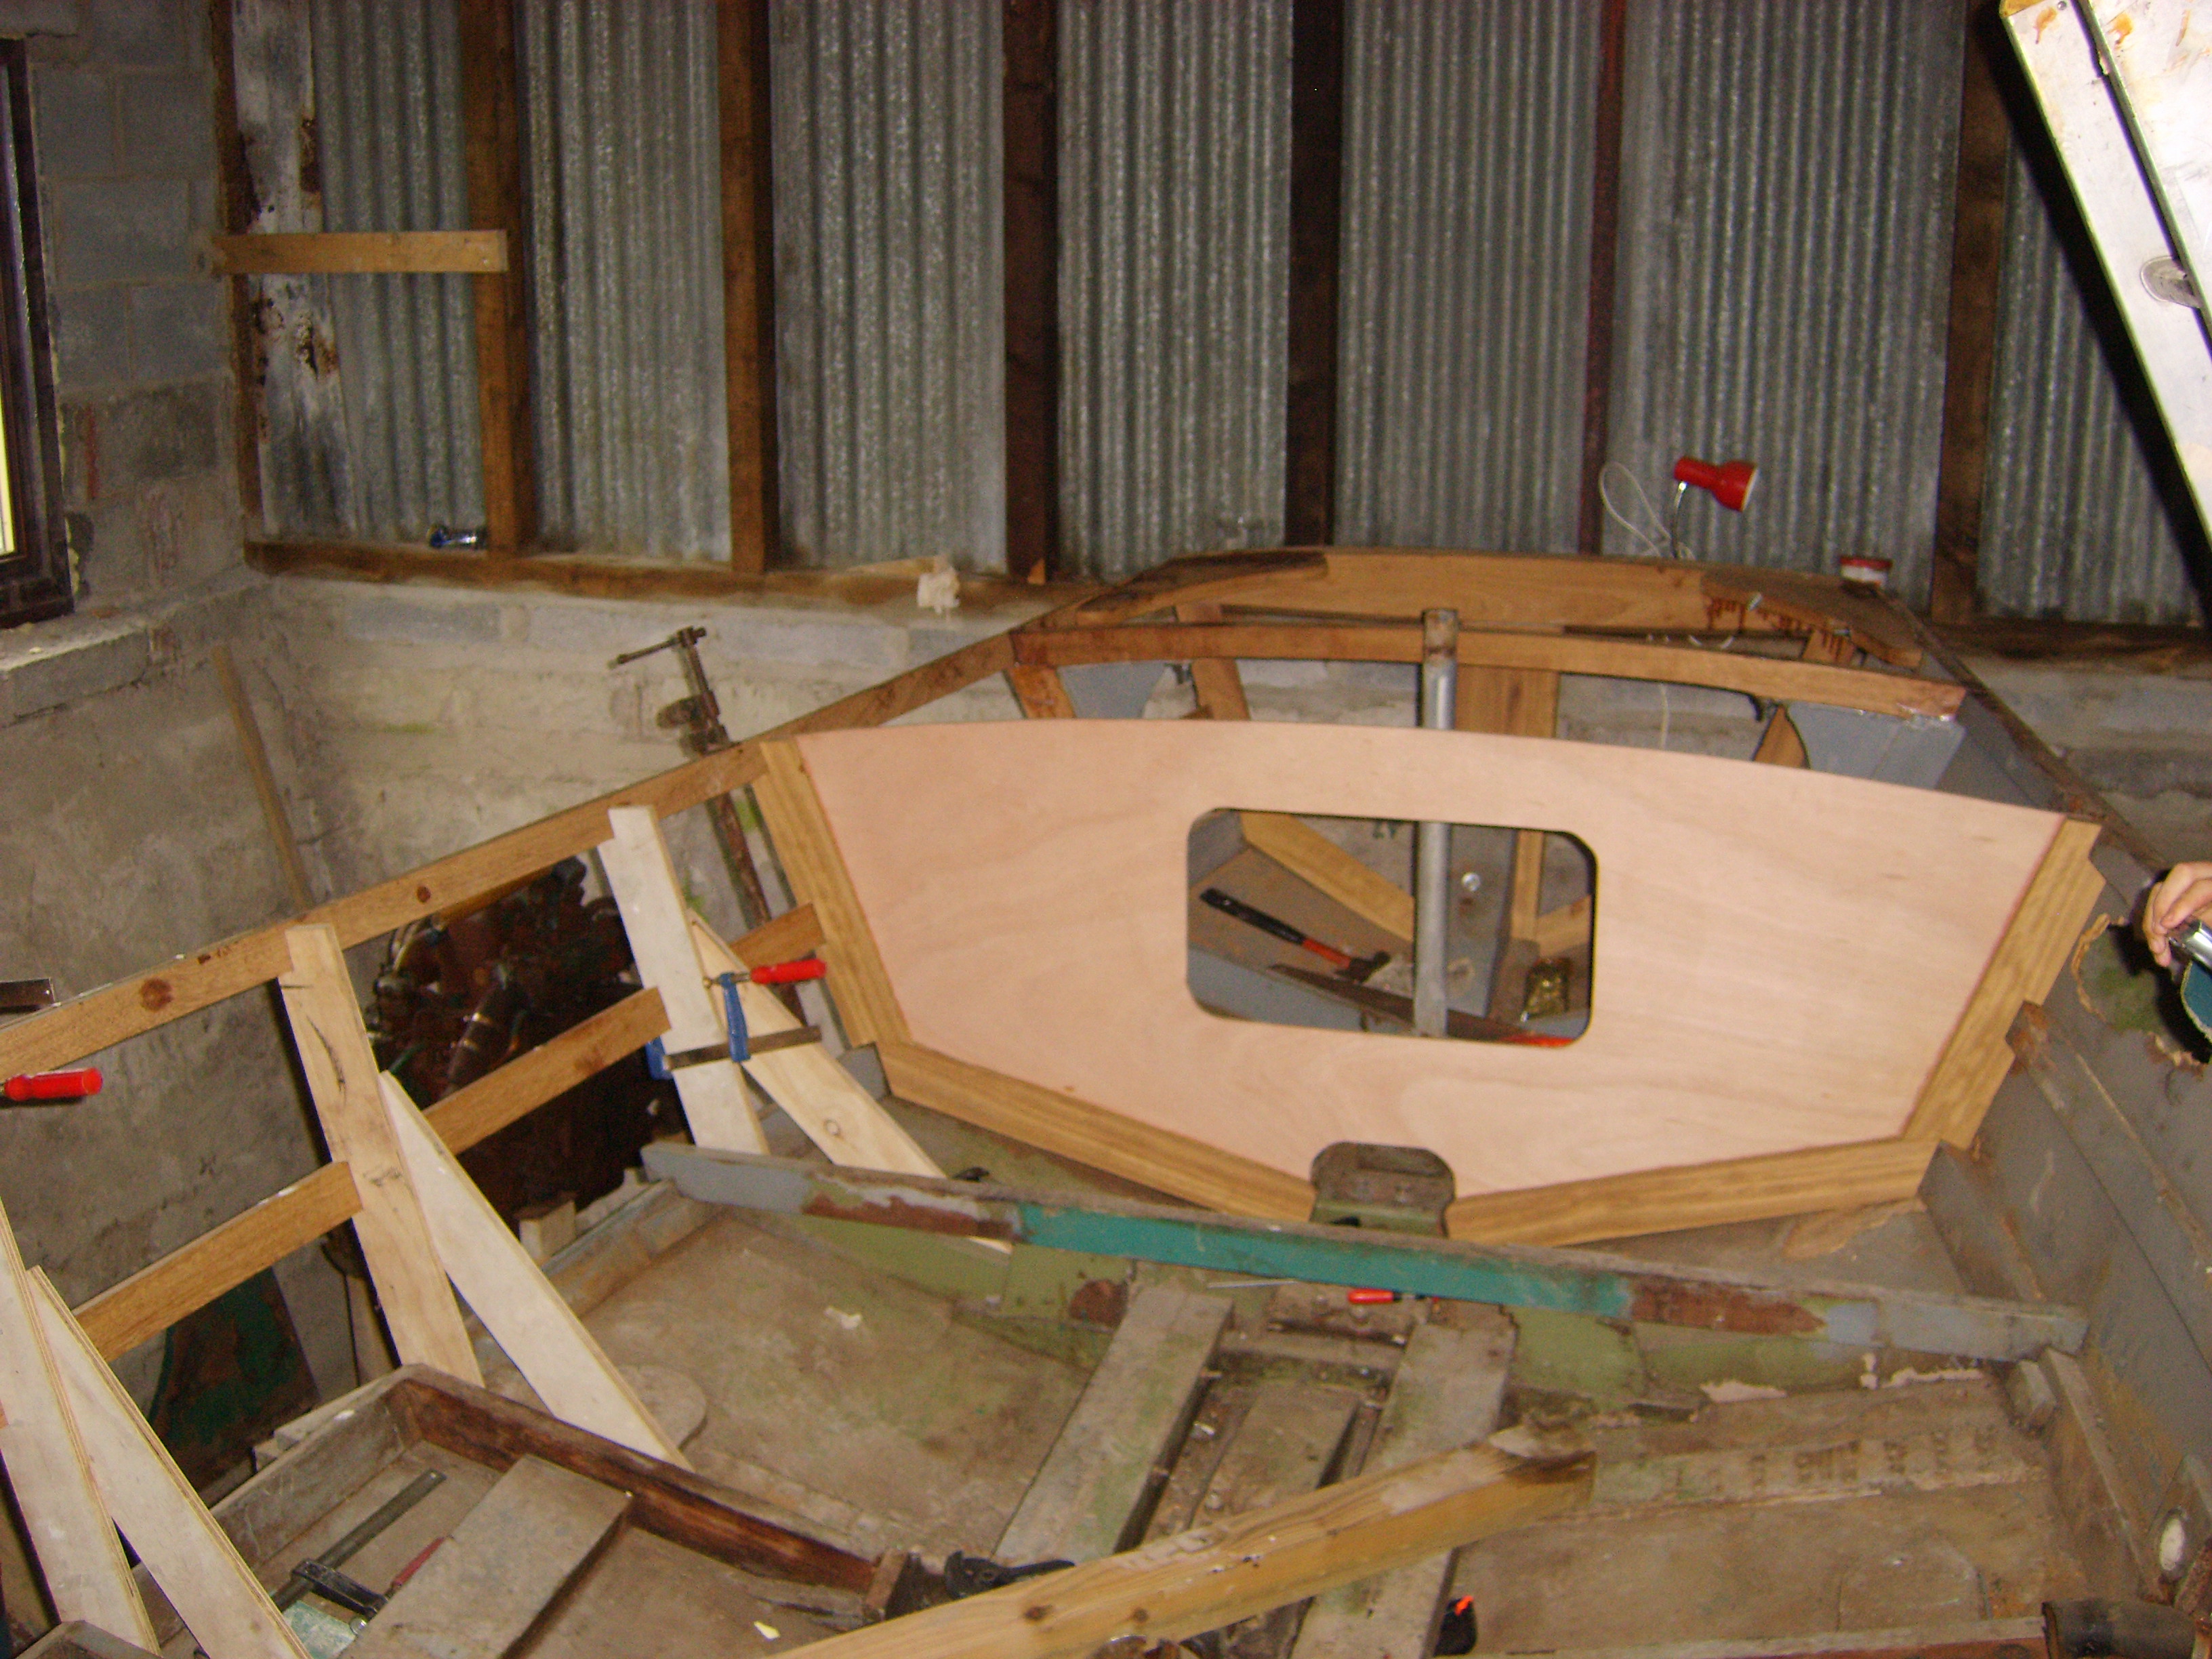
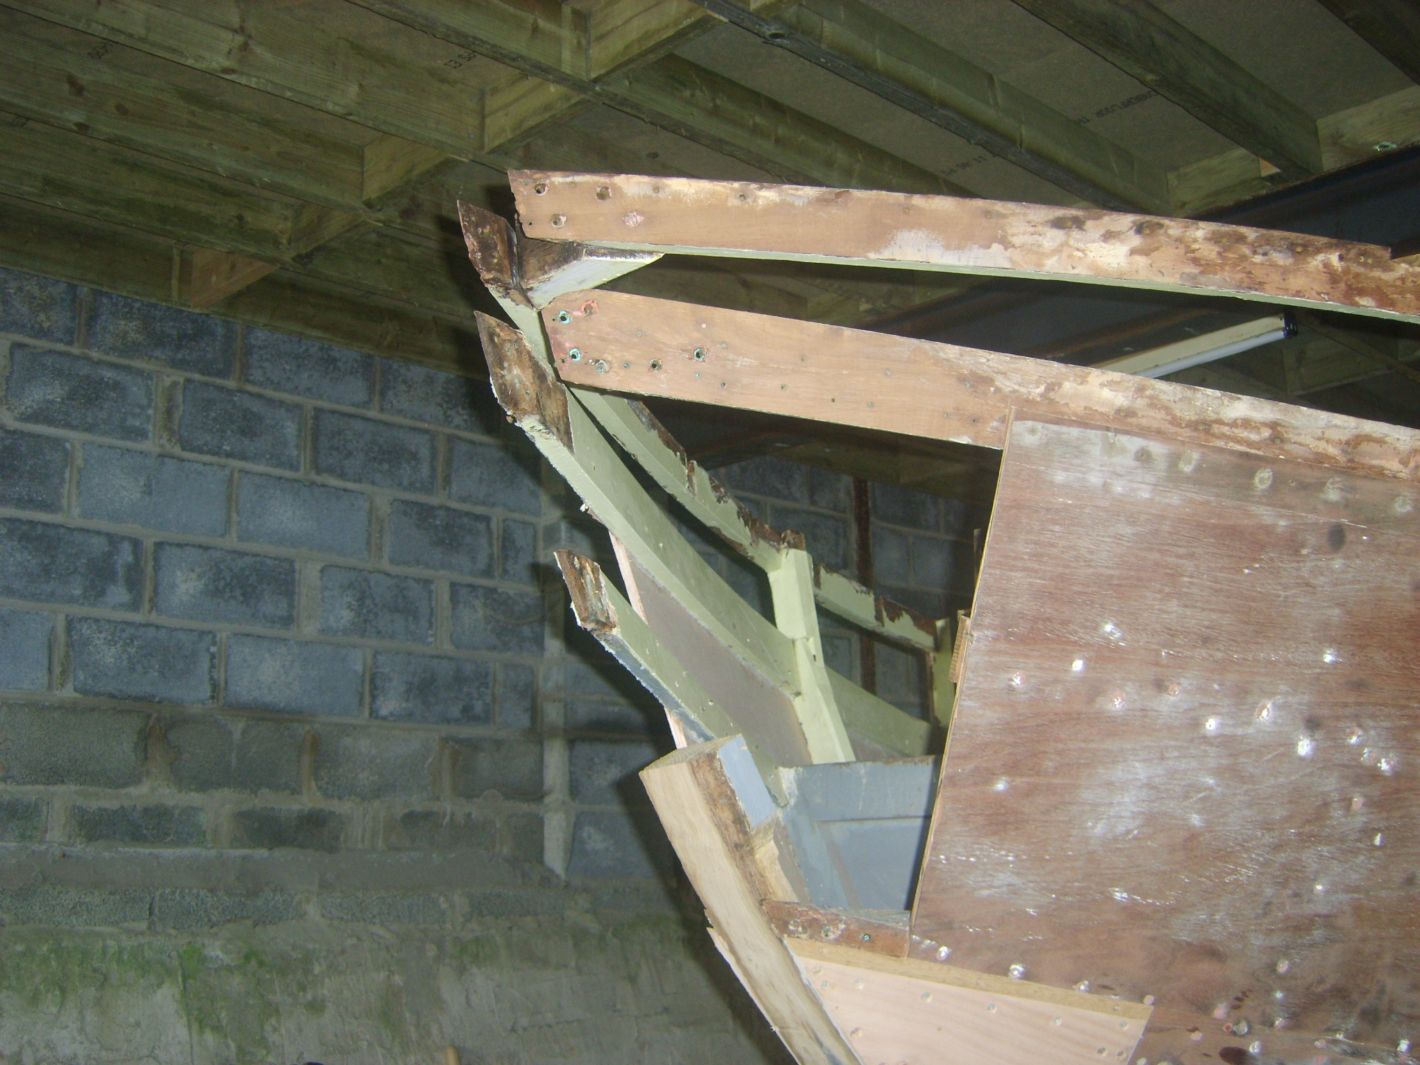
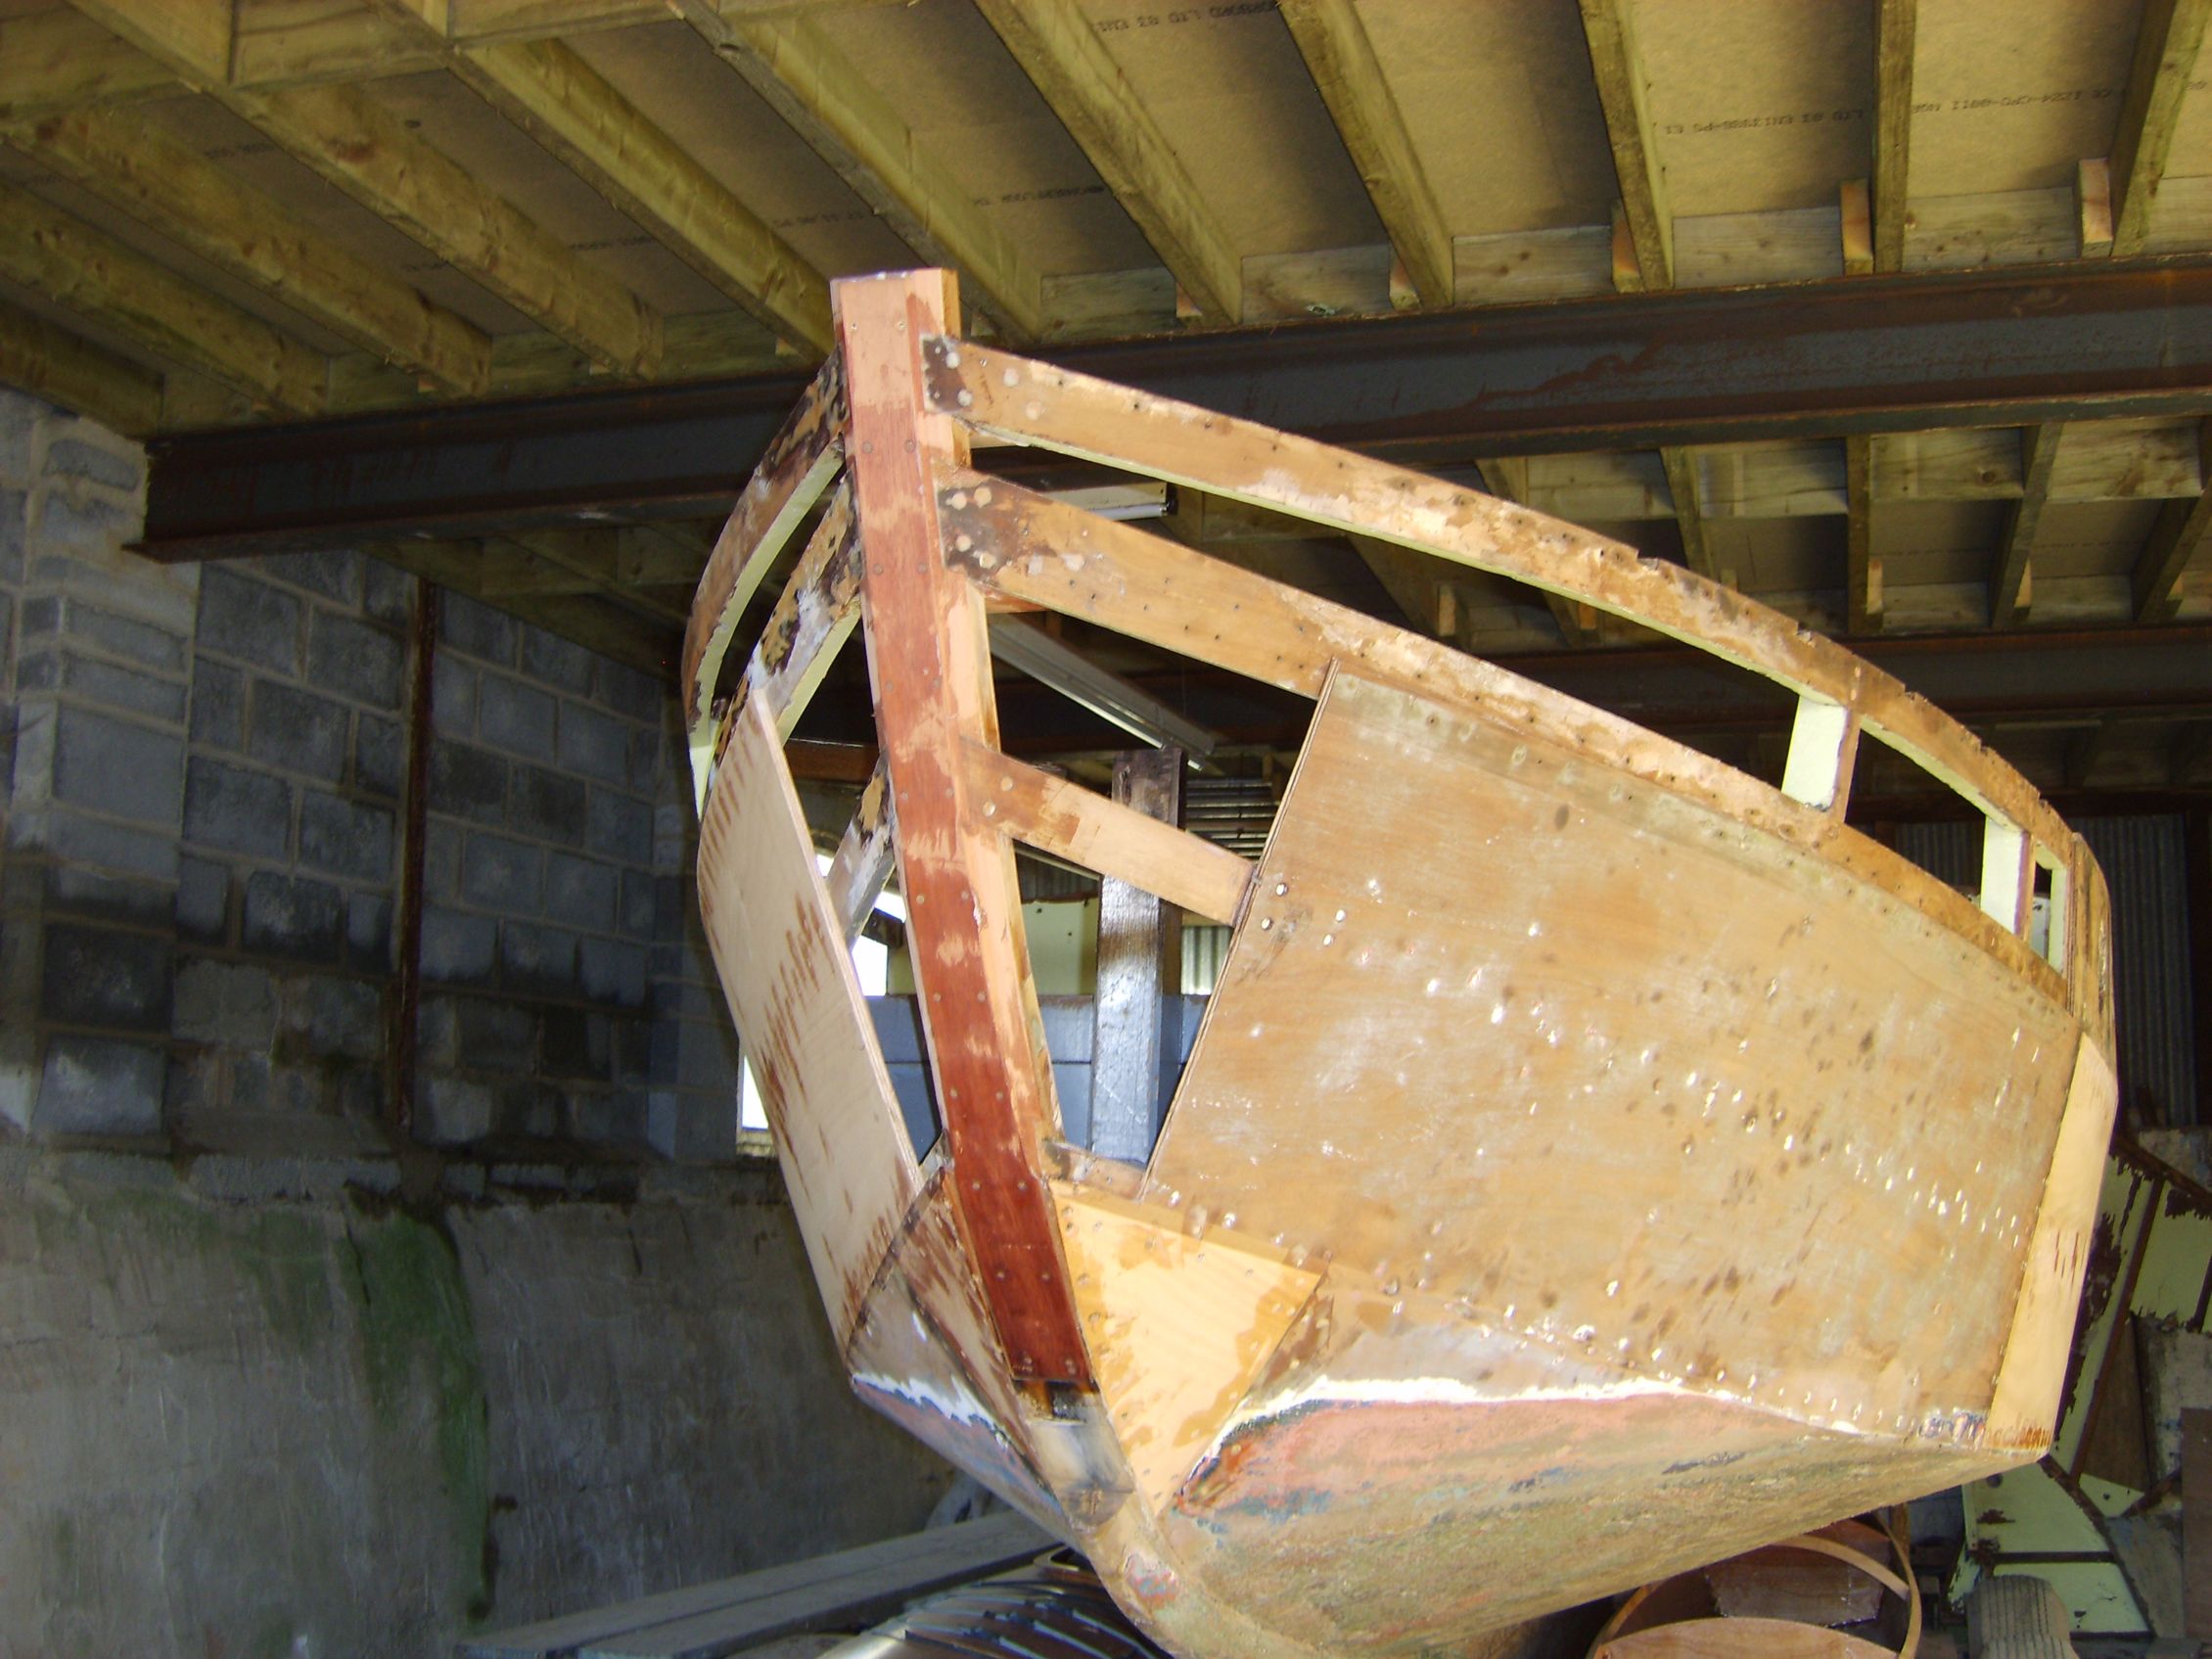
The stringer, and sheer timber have been replaced from stern to amidships on the starboard side, I kept the correct shape by making 3/4" ply patterns copied from the port side of the boat, and screwing and bracing them to the bilge timbers, then bending the new timbers around them. (Photo shows)
Just recently I have started fitting the new panels on the starboard side of the boat, and also the ply panel for the transom.
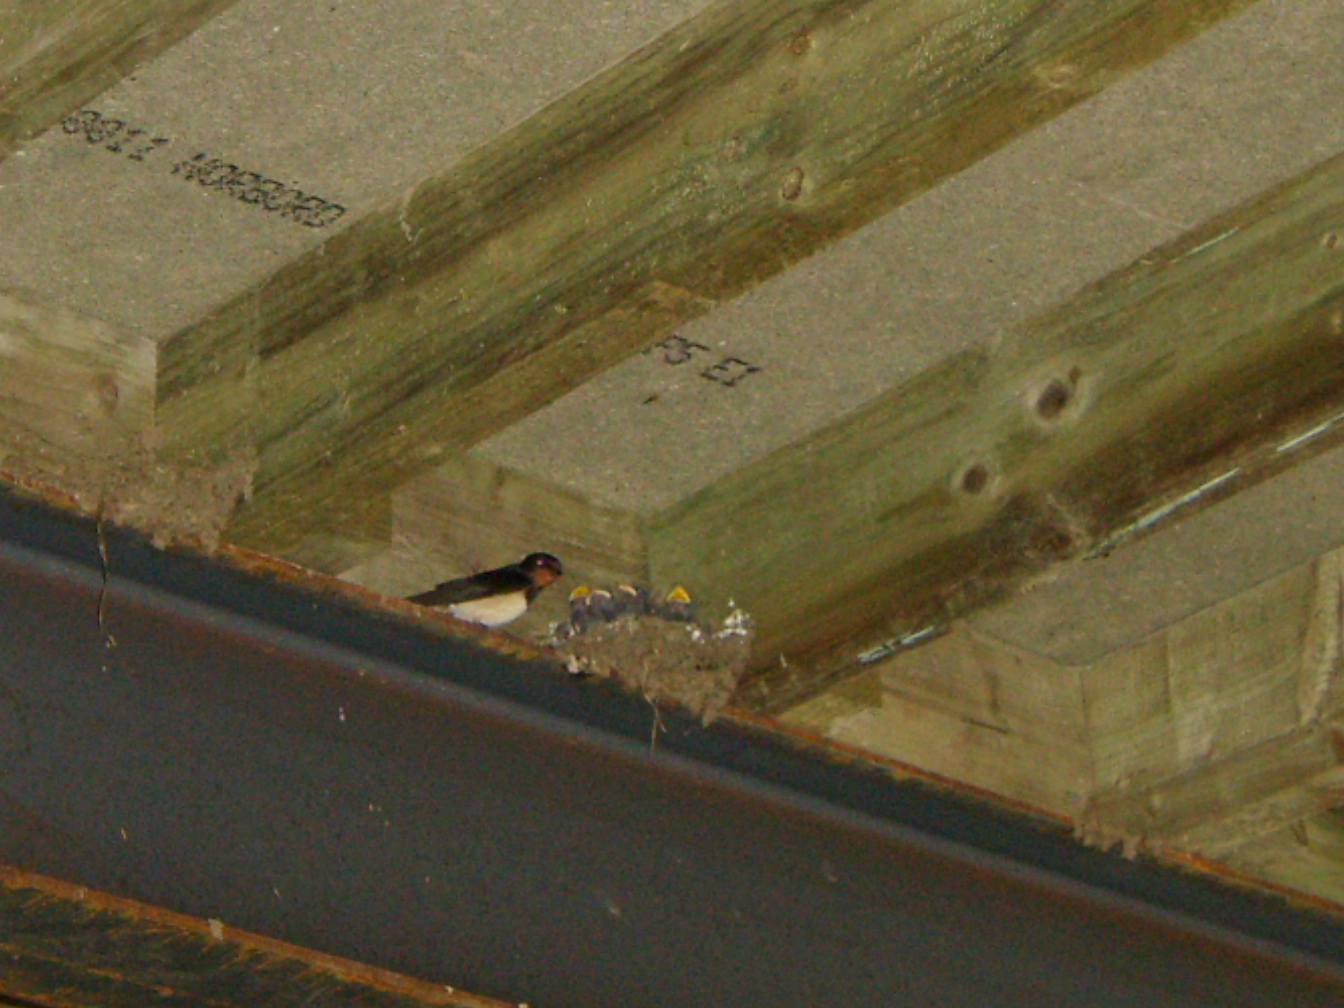
I still have to replace a few panels on the port side, and various other sections, but as you will appreciate, I think I've broken the back of the hull repairs now. If I can have the hull & deck all repaired by the end of this summer I'm fairly confident that next season, I will have her back where she belongs, on the water! Although I'm no stranger to the fact that the 'fiddly bits' always take a longer time than anticipated. I have good incentive to give it my best shot. Milford haven port authority will only allow you one season away from your mooring, anything longer and they re-allocate! **************************************** August 2007, waiting for the swallows to fly!
I'm still waiting for the
swallows to vacate the barn, but in the mean time, I've been concentrating
on the engine. It's looking much better now, but parts are fearfully
expensive!
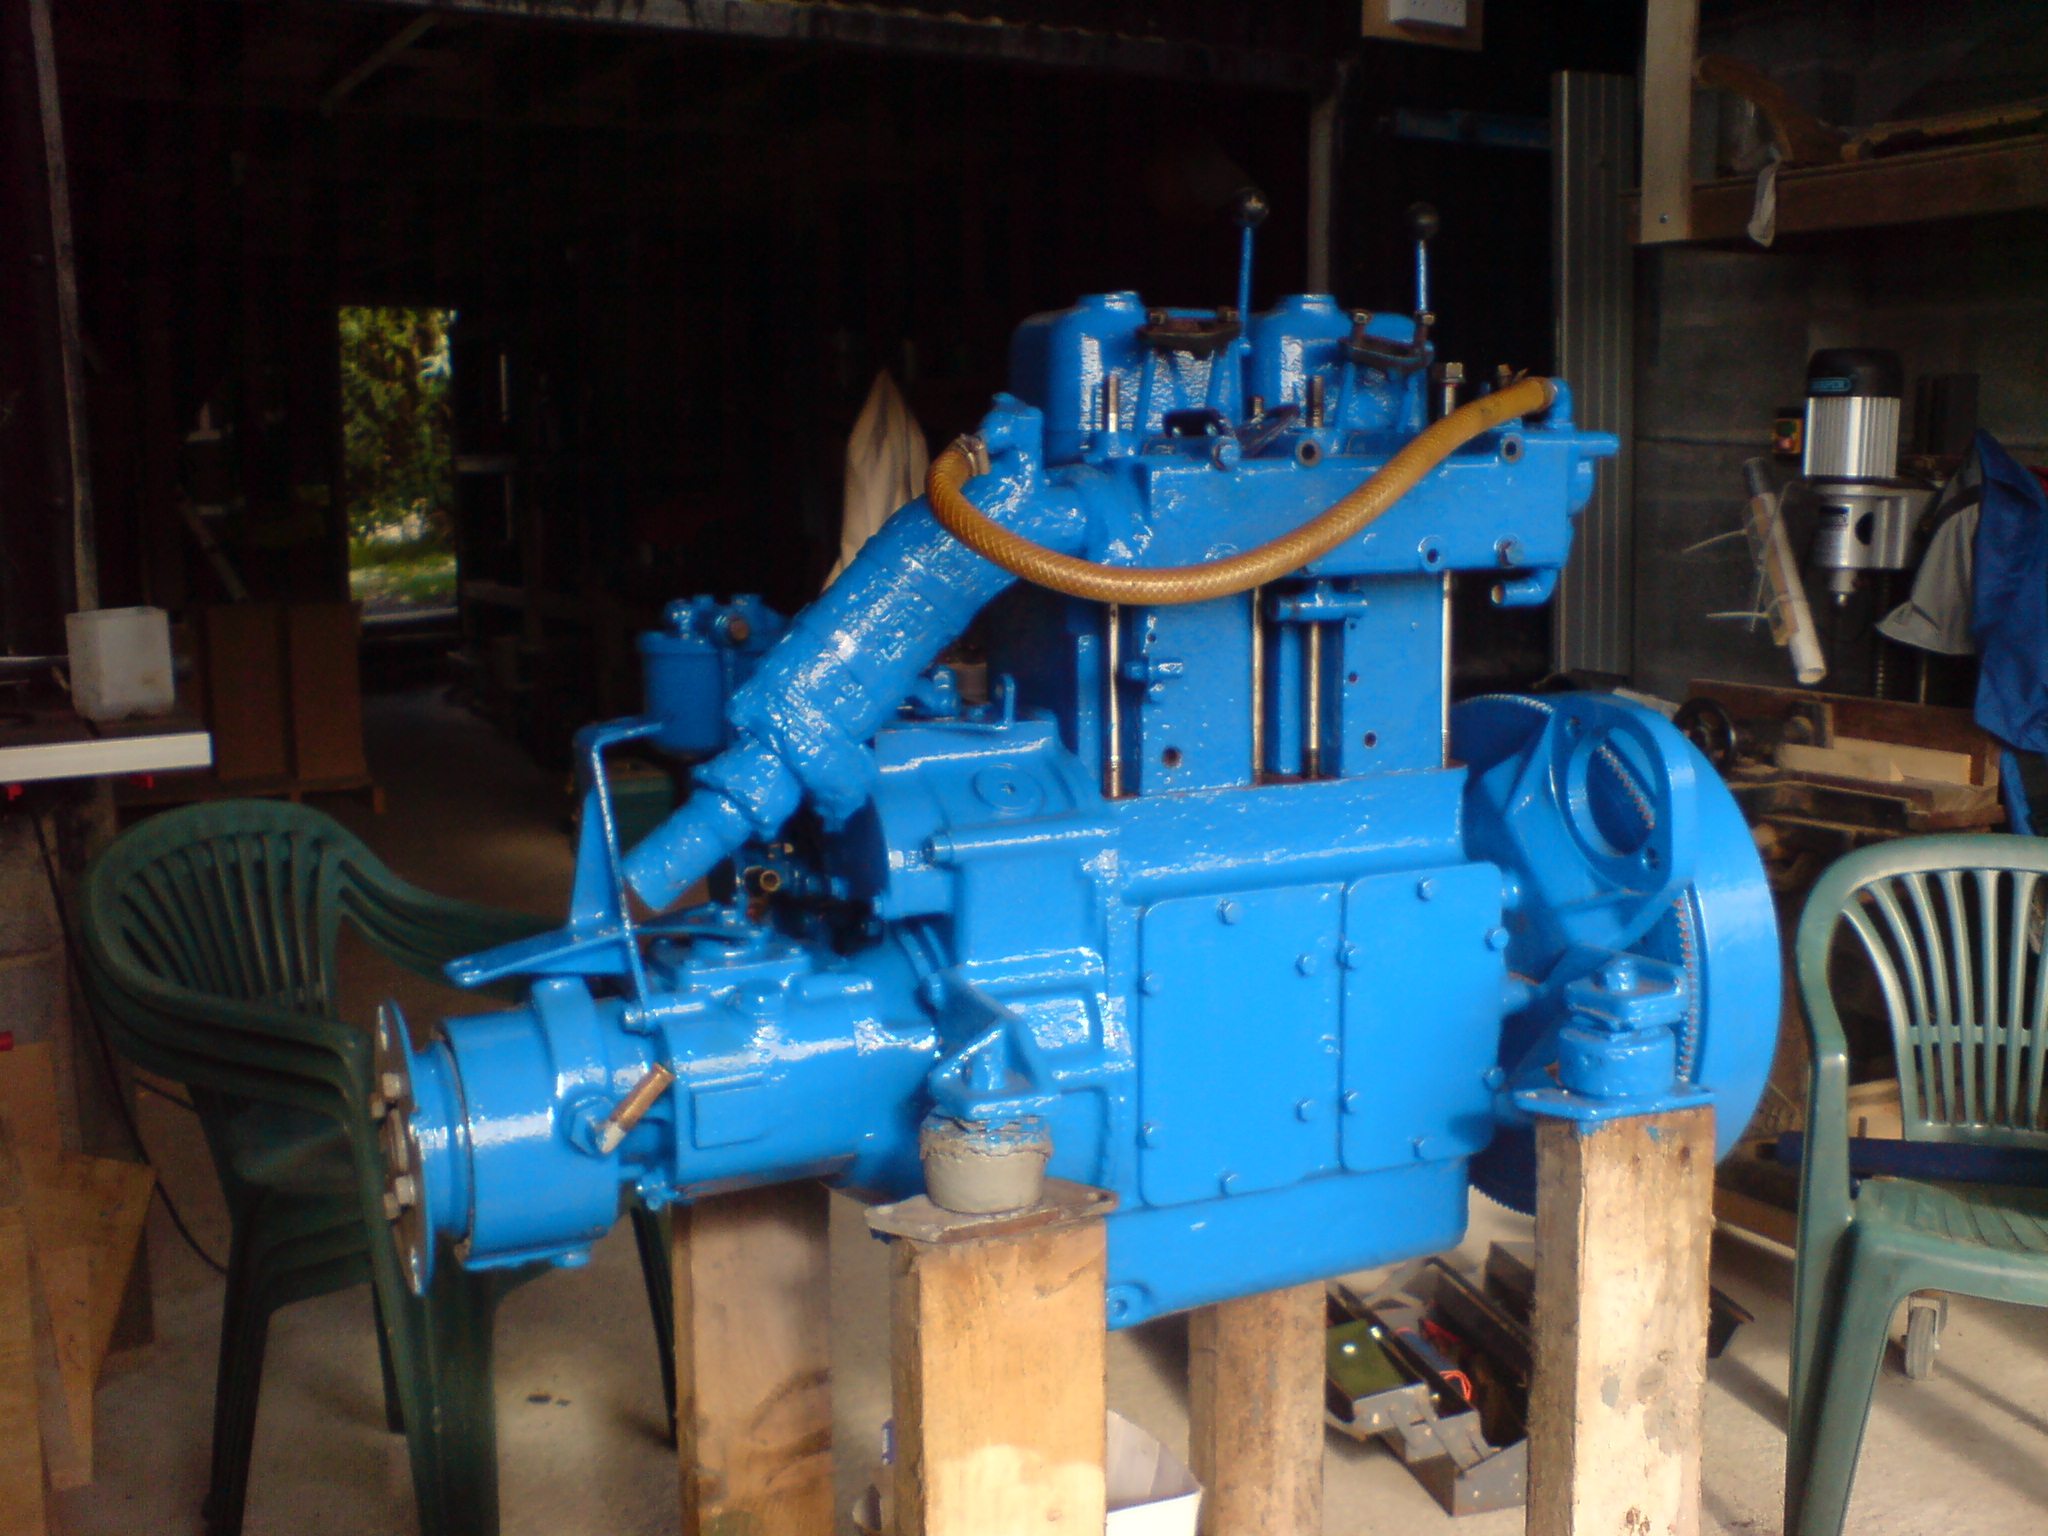
I have been concentrating on
restoring the engine. A 25hp Volvo Penta MD2 B. Runs well but needed a
good cleanup. Apart from the flaking rust all over the engine, some
of the cylinder head bolts were dangerously wasted on one side and needed
replacing. Not cheap at £25.00 each!! New cylinder head gaskets, new
inspection panels fashioned from mild steel plate, a lot of hours with a
heavy duty wire brush attachment on the mini-grinder, and a good coat of
high temperature engine enamel paint, and she looks a million dollars now!
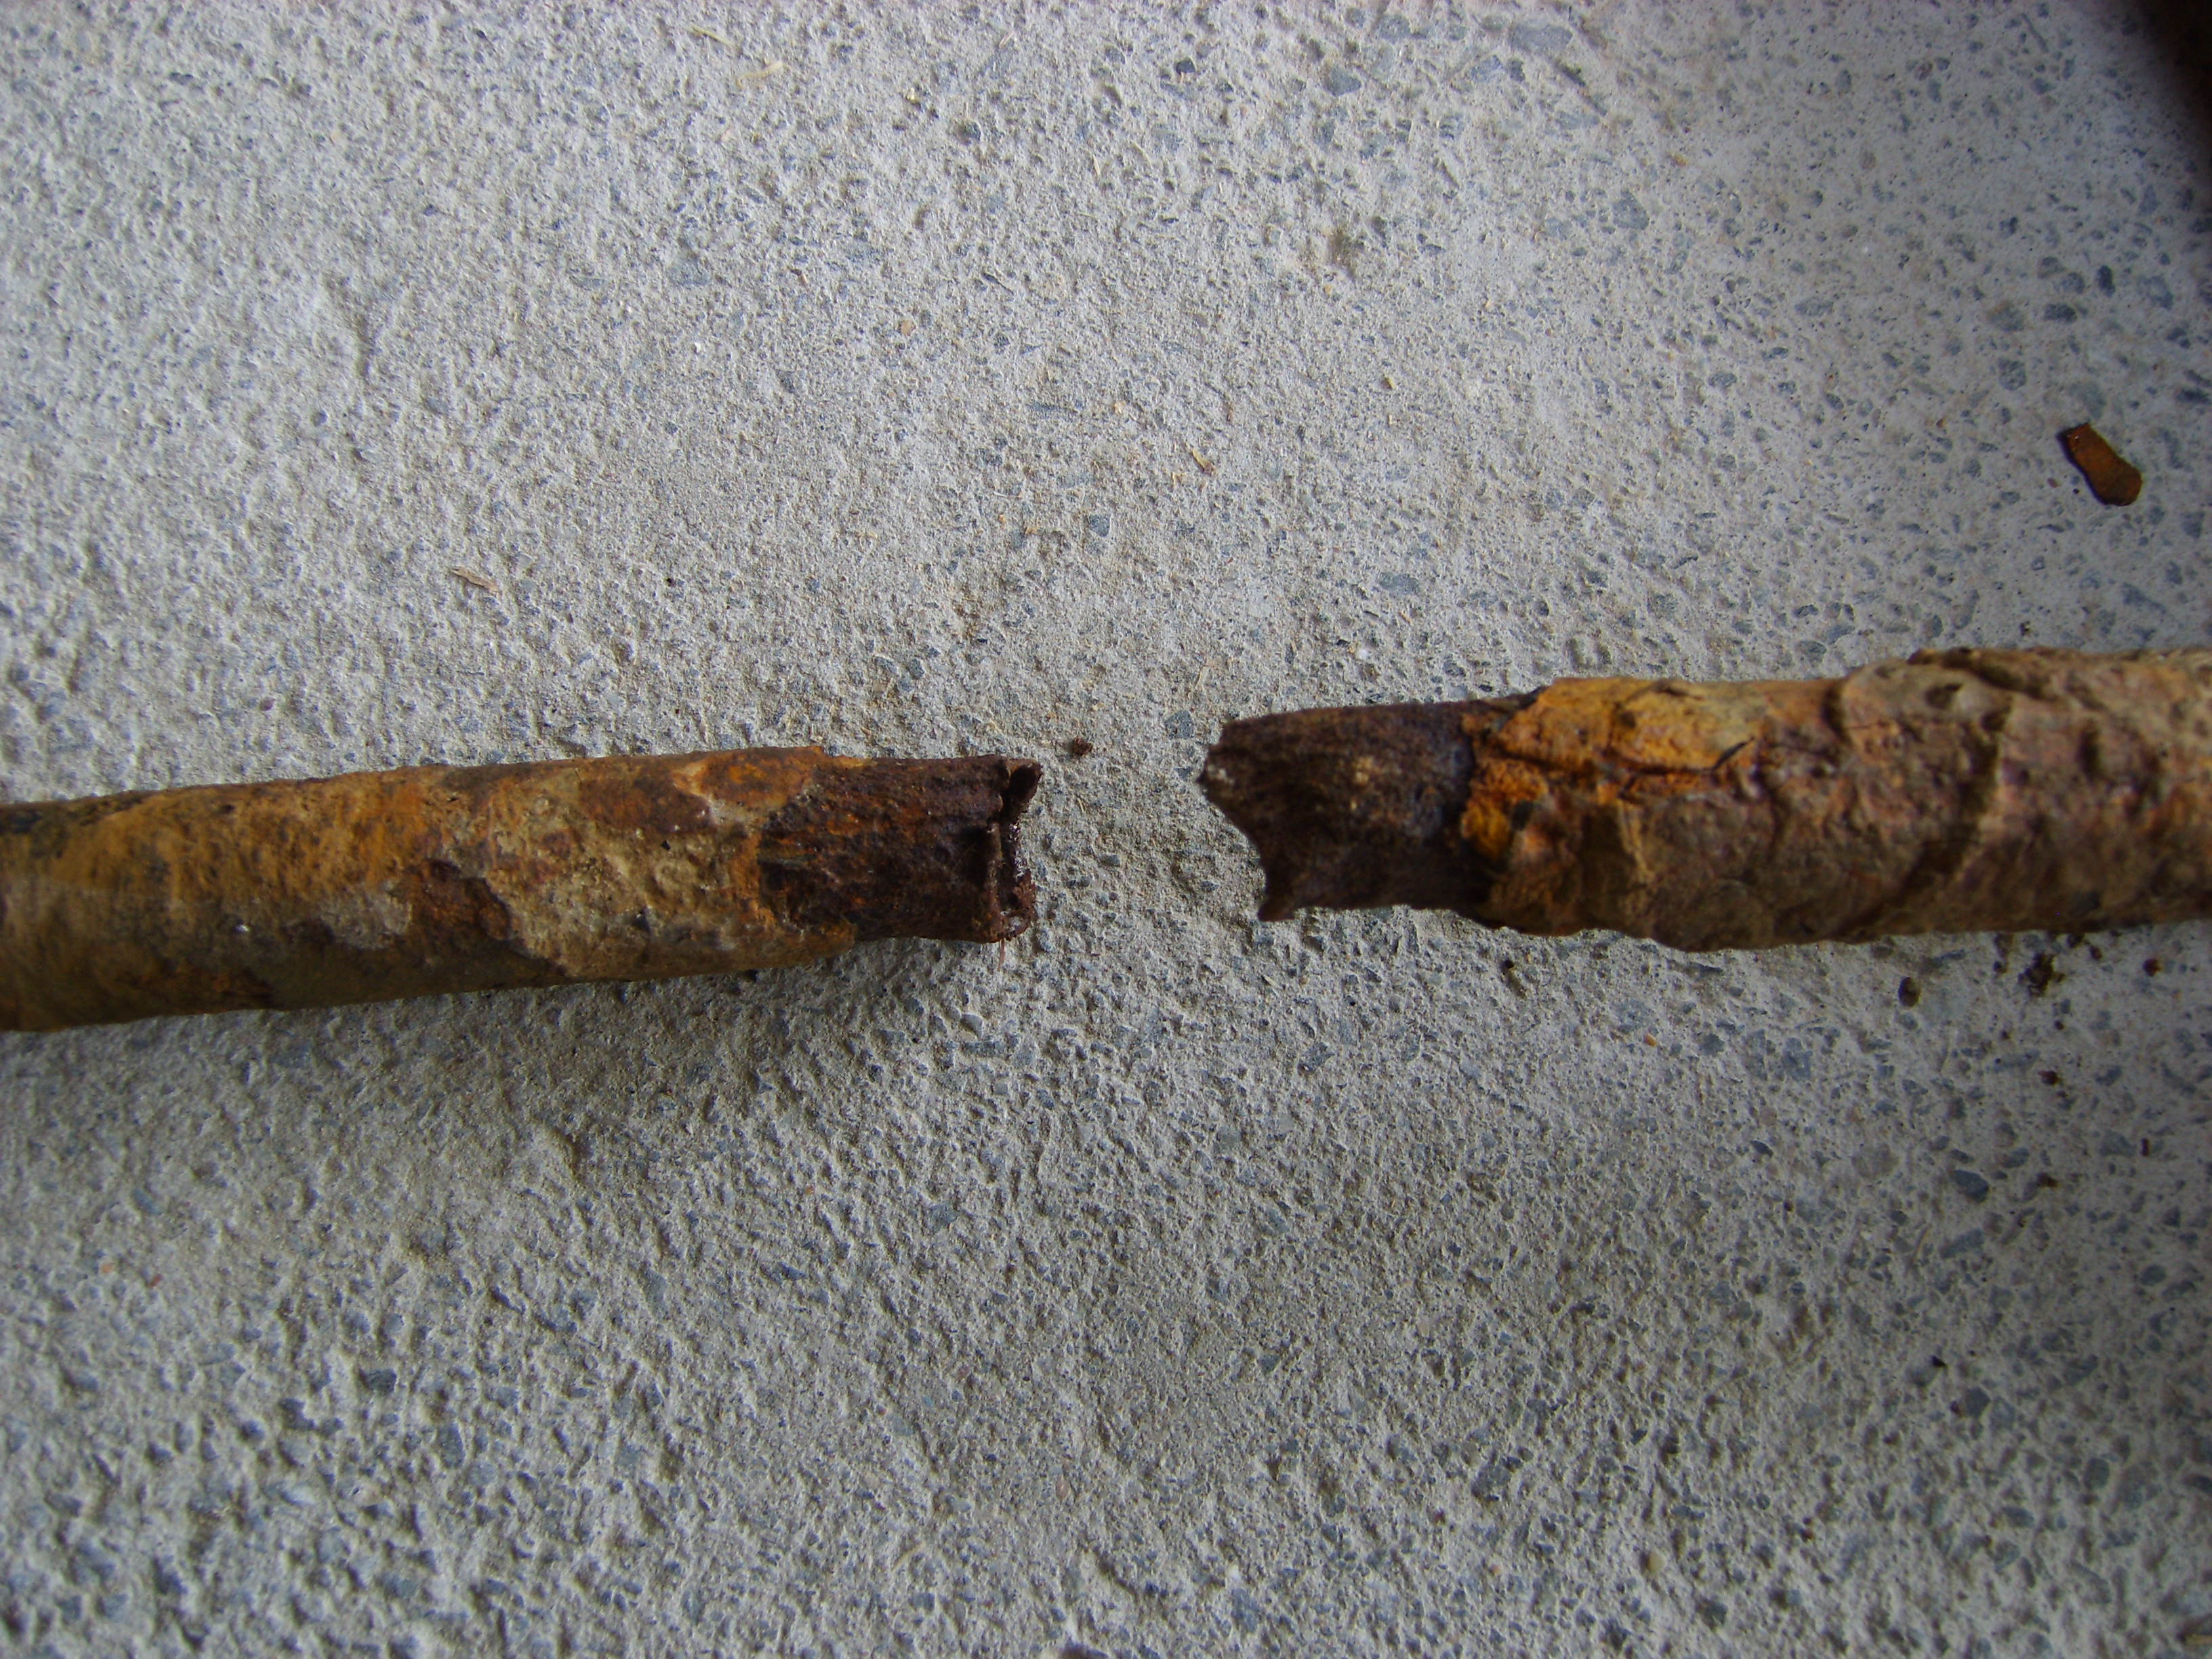
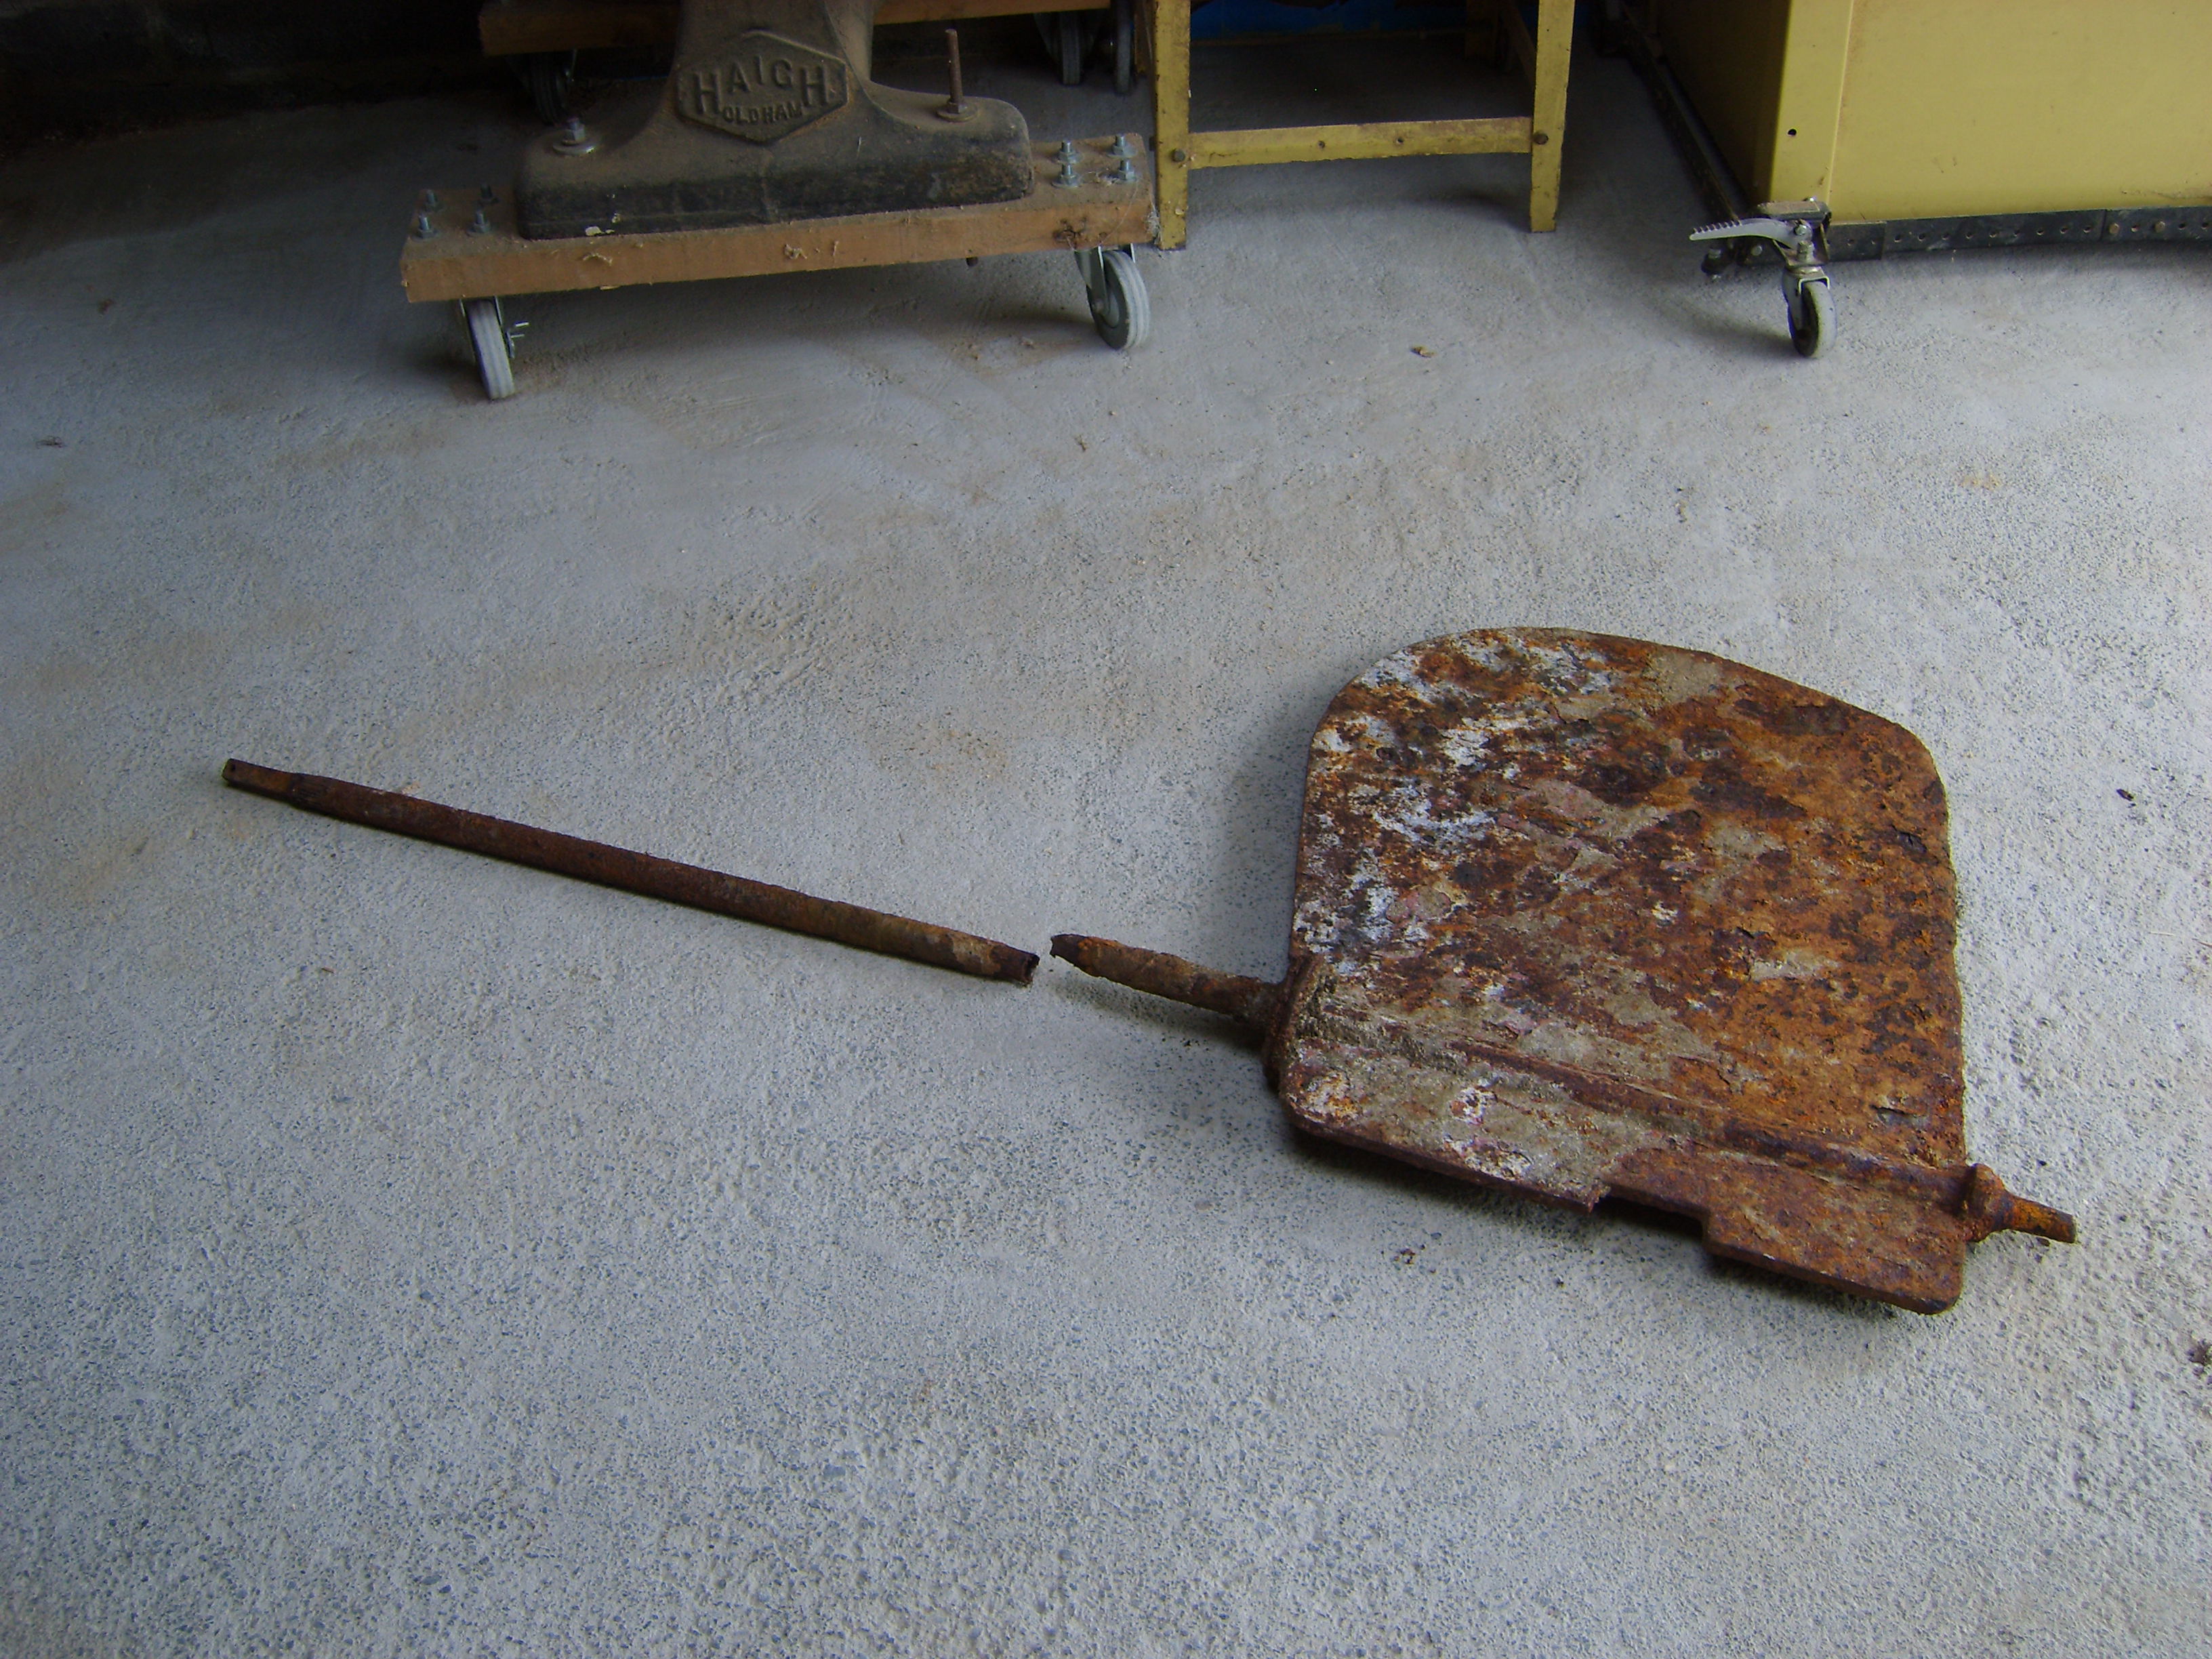
When I removed the inboard
rudder I found that the shaft was badly wasted just above the blade inside
the tube where you couldn't see it! It actually broke in half whilst
removing it, one good heave on the tiller and I'm sure it would have
sheared off! A warning for all with inboard rudders to check their
condition on a regular basis!
Anyway, all the best John, I will keep you posted as to future progress. Tom ********************************* April 08
Sorry it's been so long since the last update, work has been progressing steadily although not as fast as I had hoped. You may remember that I was hoping to have her afloat this season, but sadly this is looking very unlikely.
The good news is that the hull repairs are all but complete, only filling and fairing to do prior to finally getting some paint on! We have removed the bilge keels ready for shot blasting and epoxy coating, also plan to add 6" of depth to them as the main keel is 10" deeper, leaving her at quite an angle when she dries out. Bilge keel bolts were ready for renewing anyway.
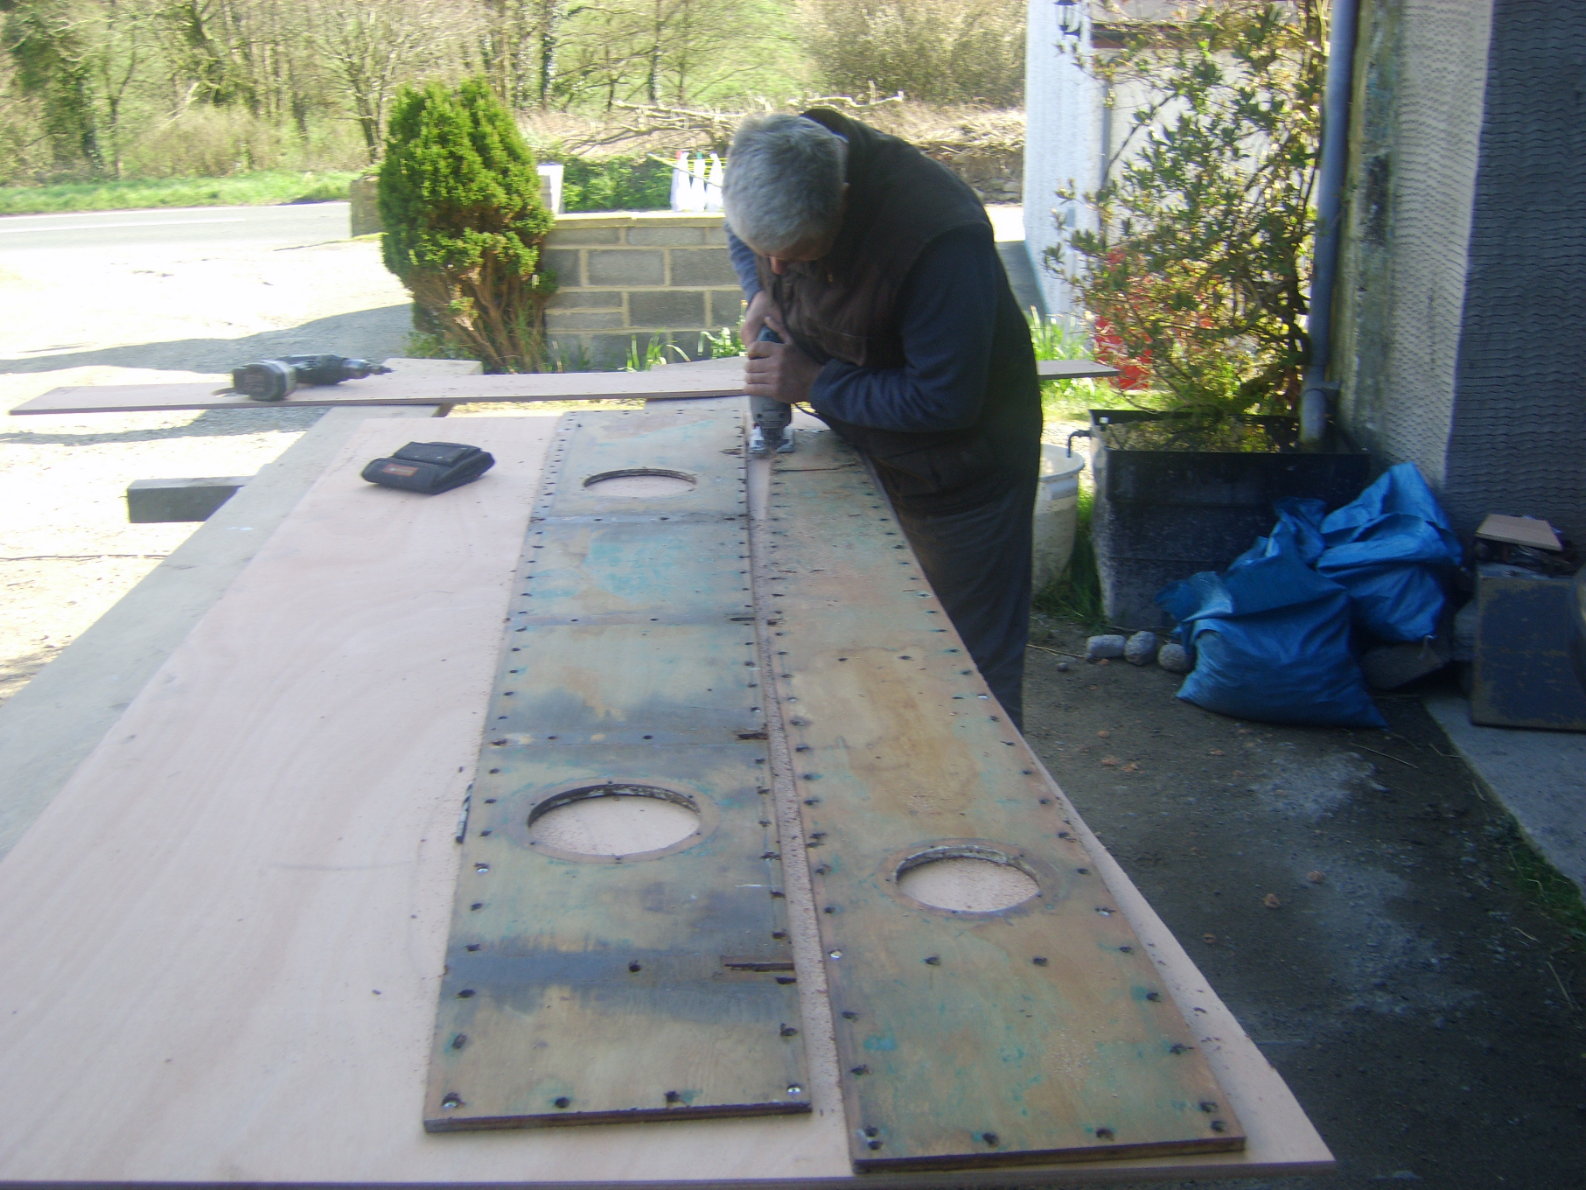
Recently we have removed the rotten raised topside panels and made new ones. Fortunately we were able to remove the old panels in one piece, so just screwed them to a new piece of marine ply and cut around them, also drilled through the old screw holes, saving re-drilling the stringers. Hopefully as the days lengthen, and the weather warms, progress will accelerate, will keep you posted.
November 2008. An update. Sorry
its been so long sending pics of progress, we've had a few setbacks but here
are some pics to update you and the IONA page.
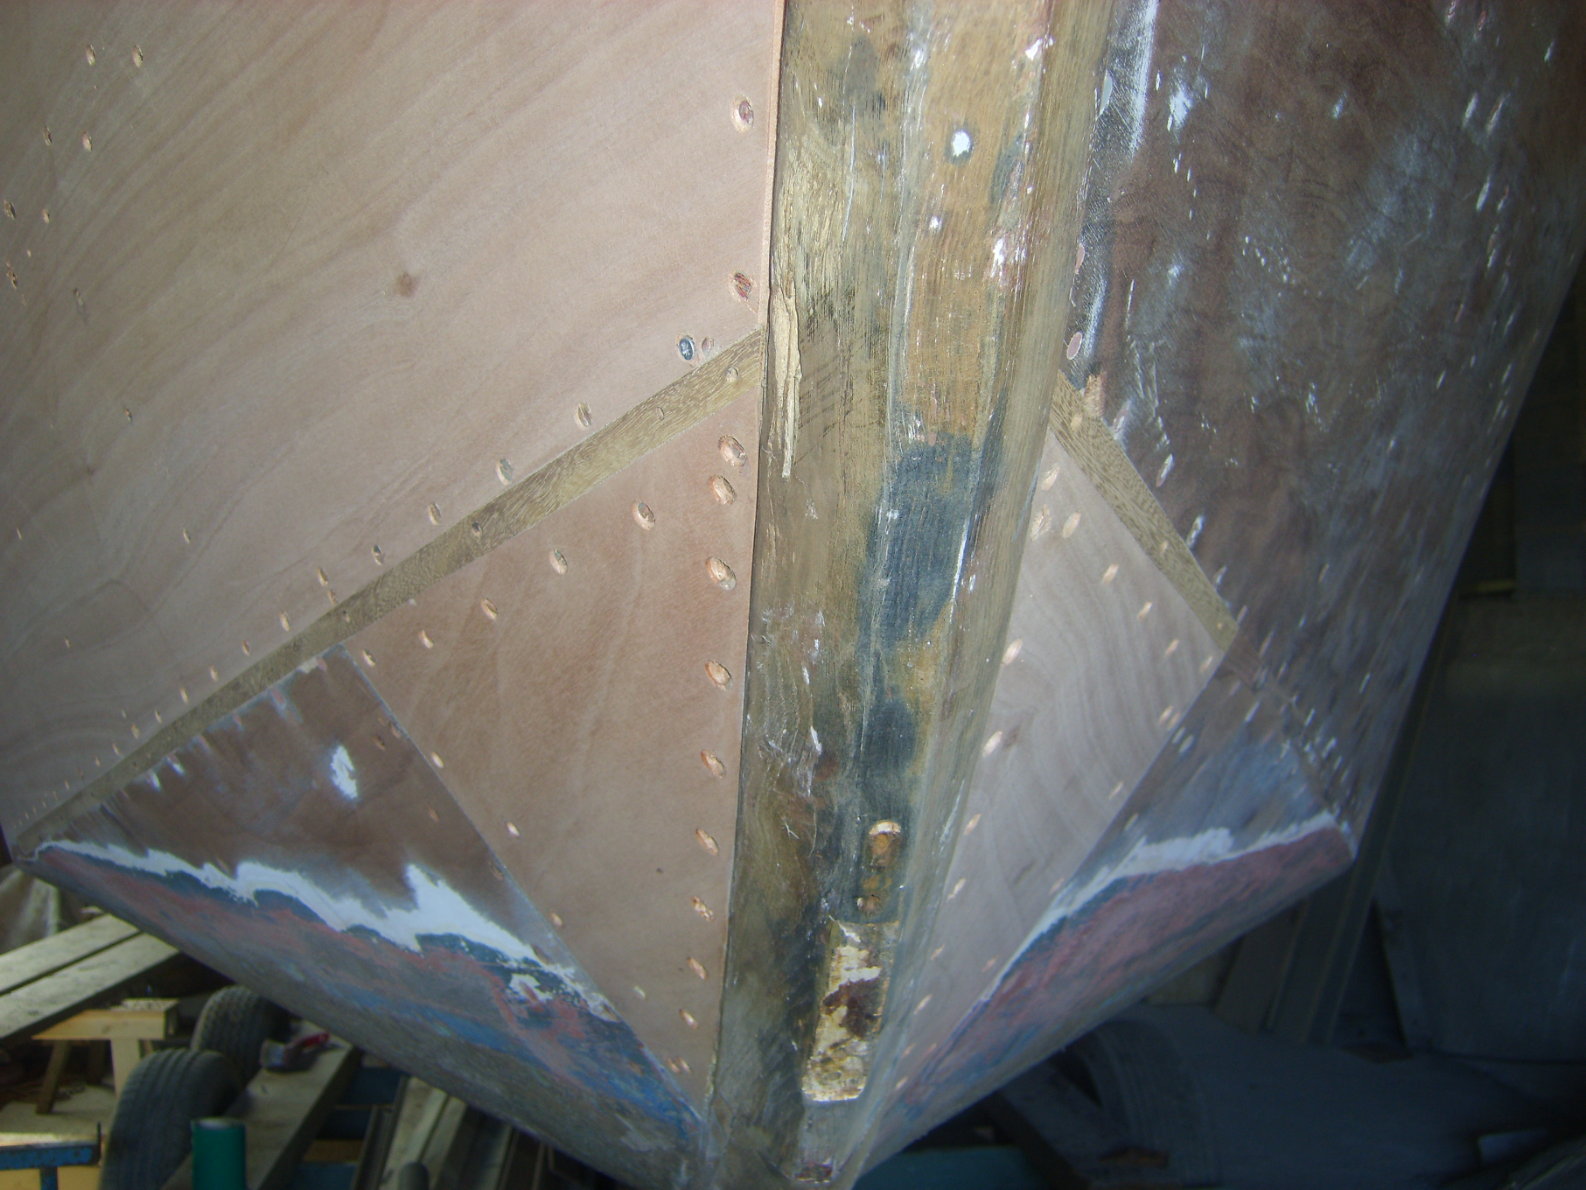
I laminated a new stem from IROKO Half lapped into sound lower section of existing stem
Next, time to fit new stem for good. Only one section
of the stringers completely rotted away where it joined the stem. All the
others were O.K.
All faired-in and the panels replaced, also new cut-water laminated on and shaped.
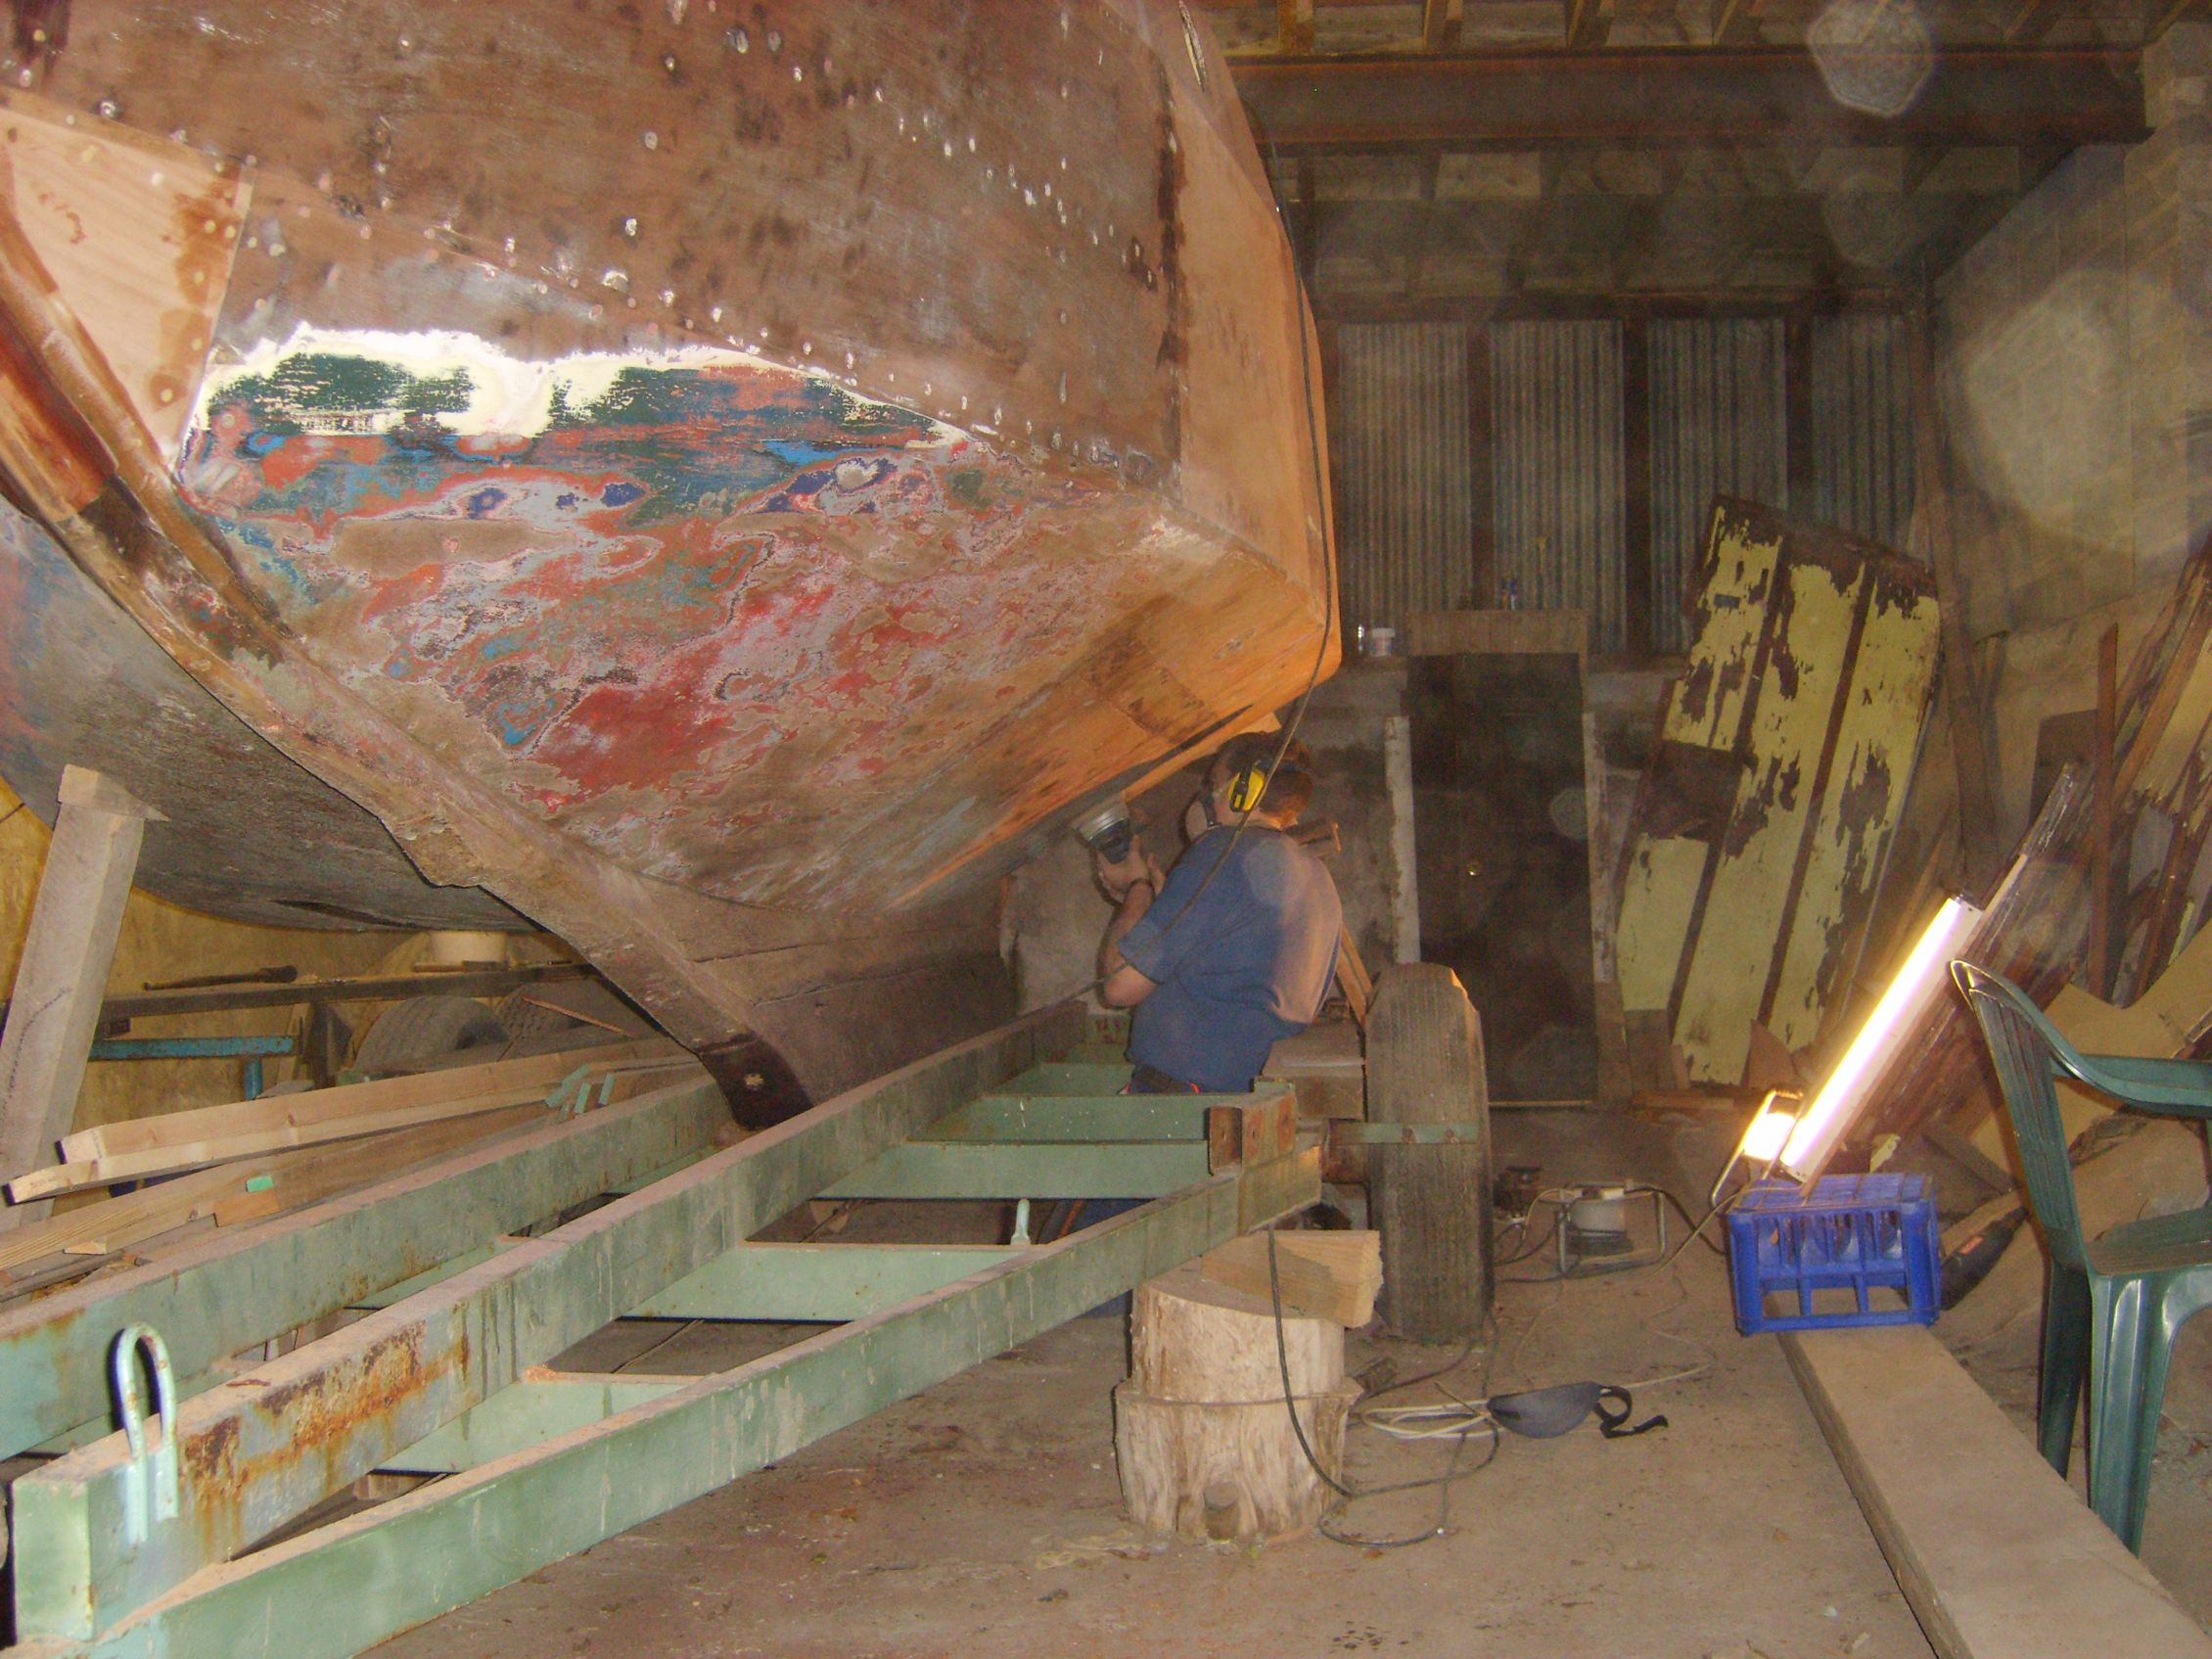
All that's left to do on the hull is fill & fair, then ready for primer. Ryan preparing the hull BWL for paint Regards. Tom Greenwood.
March 2009.
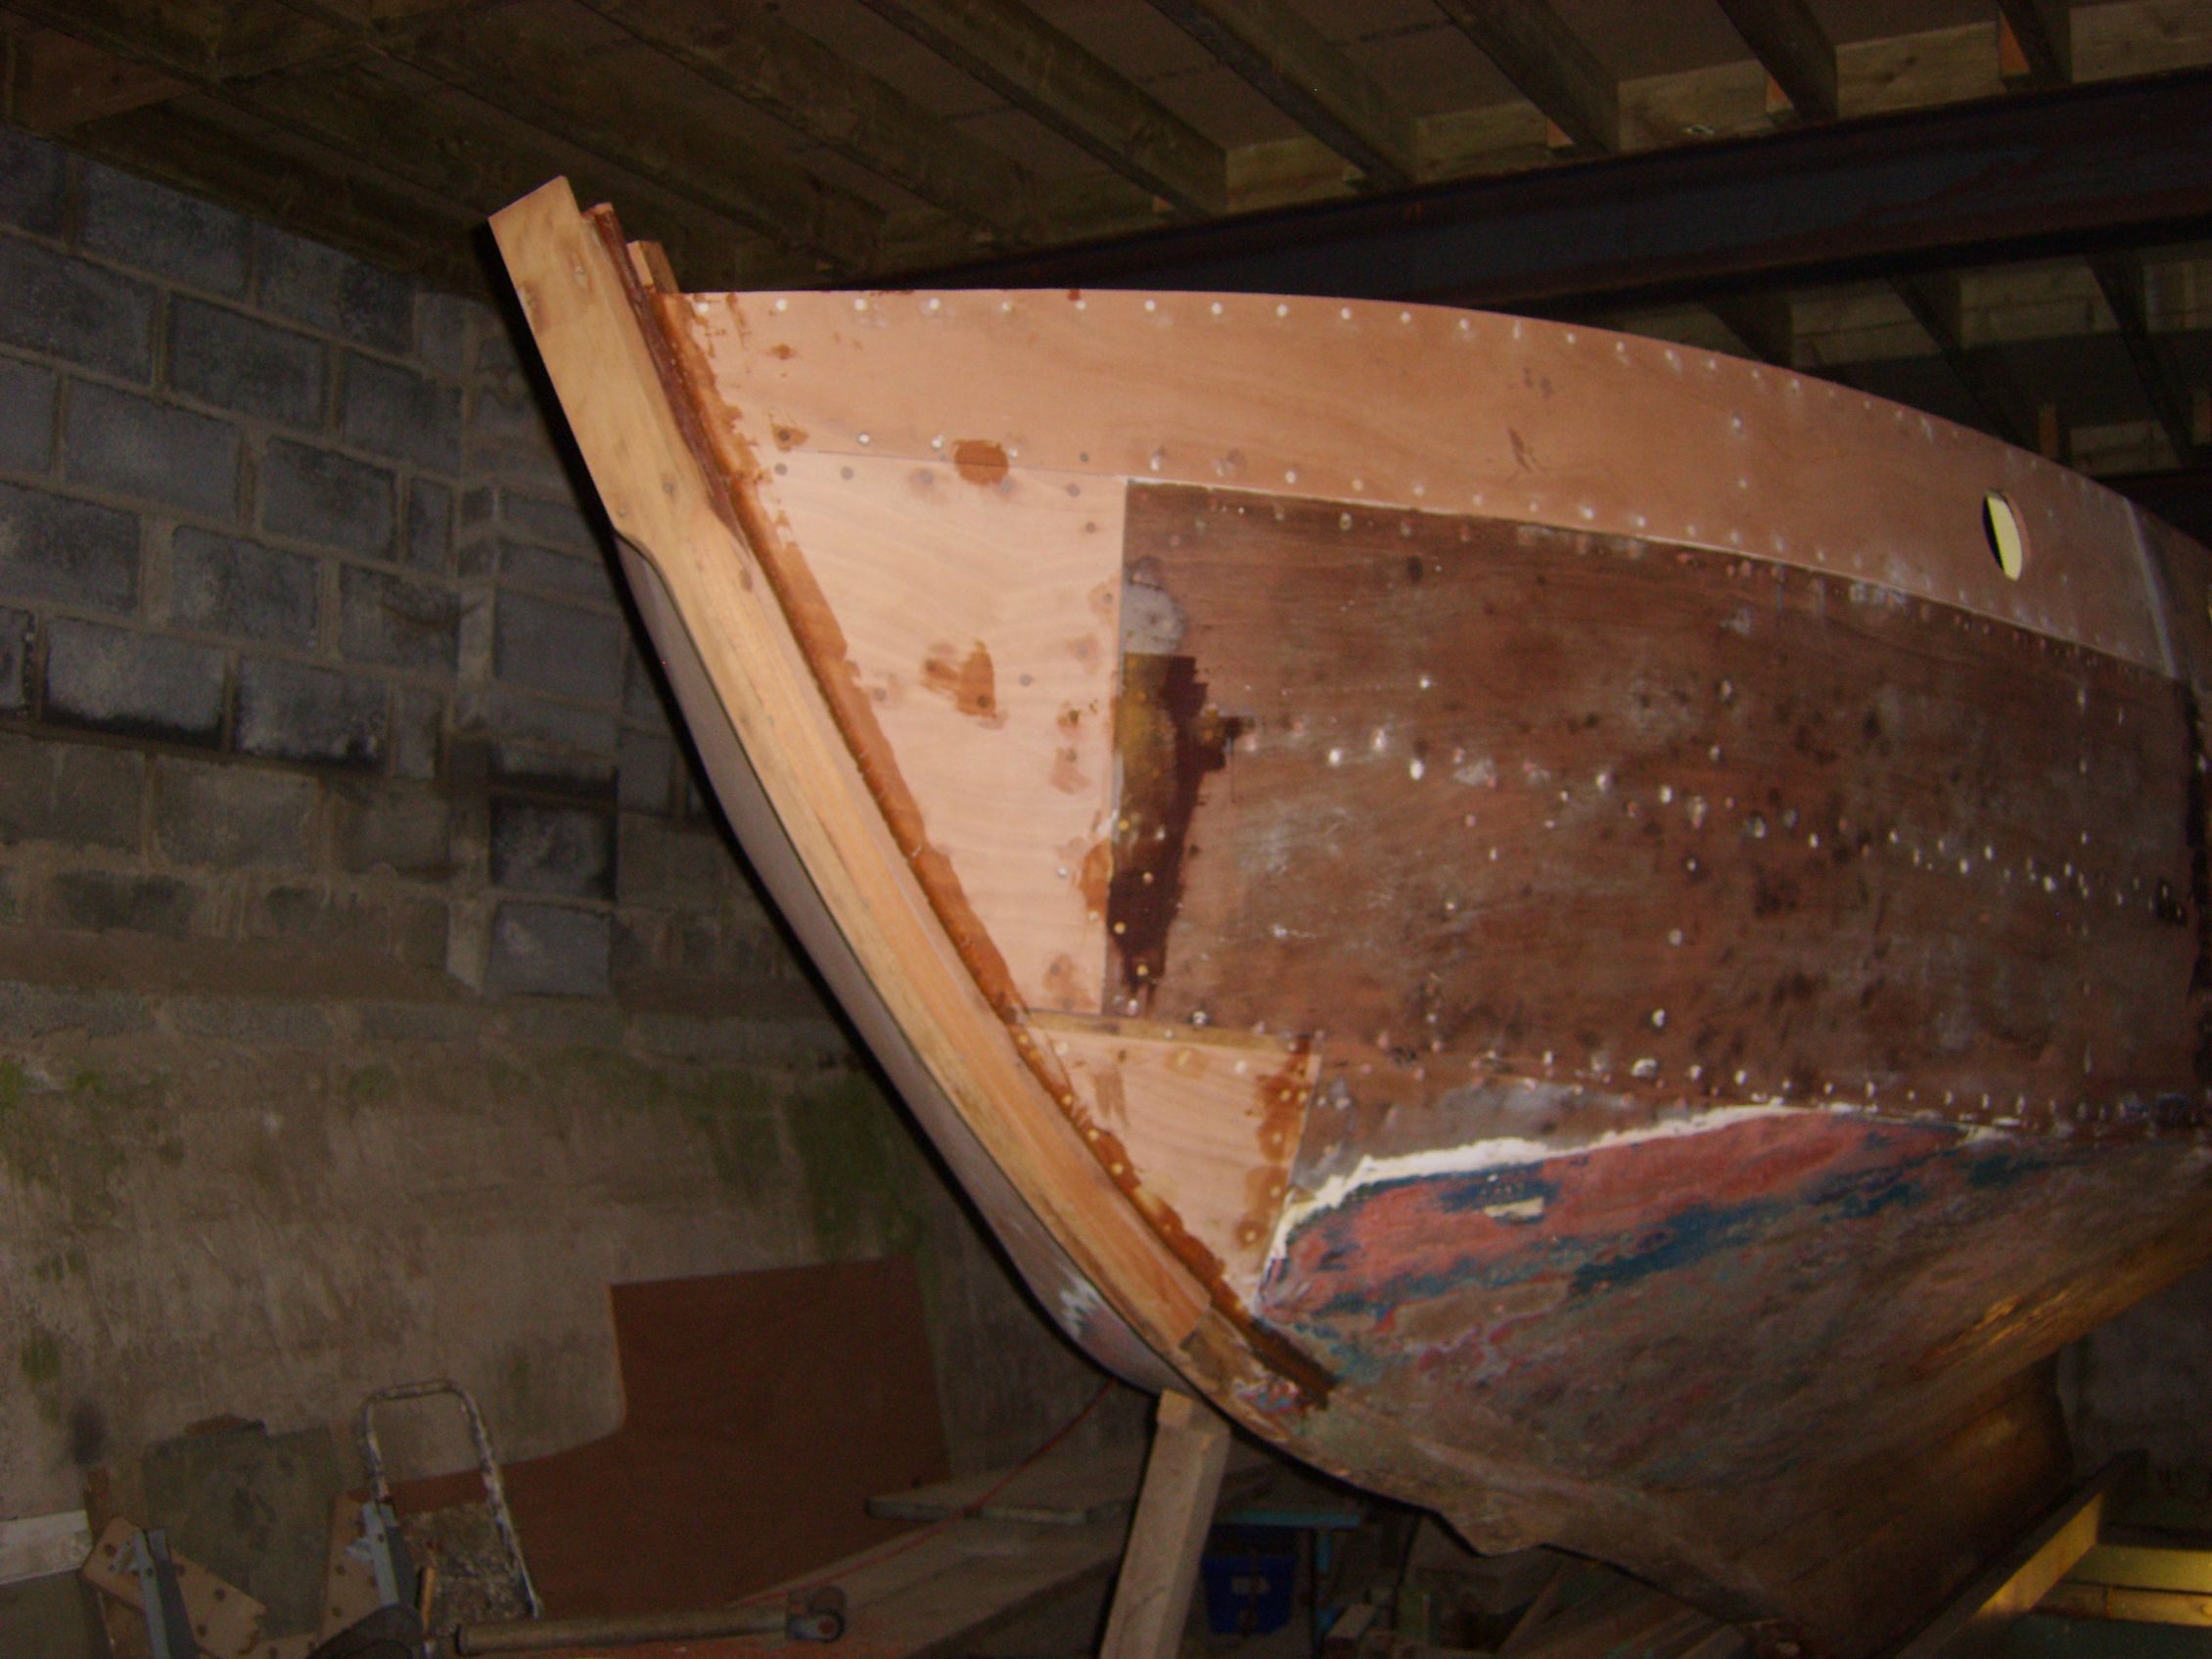
Here the last repair patch is glued in place and all bad sections have been repaired.
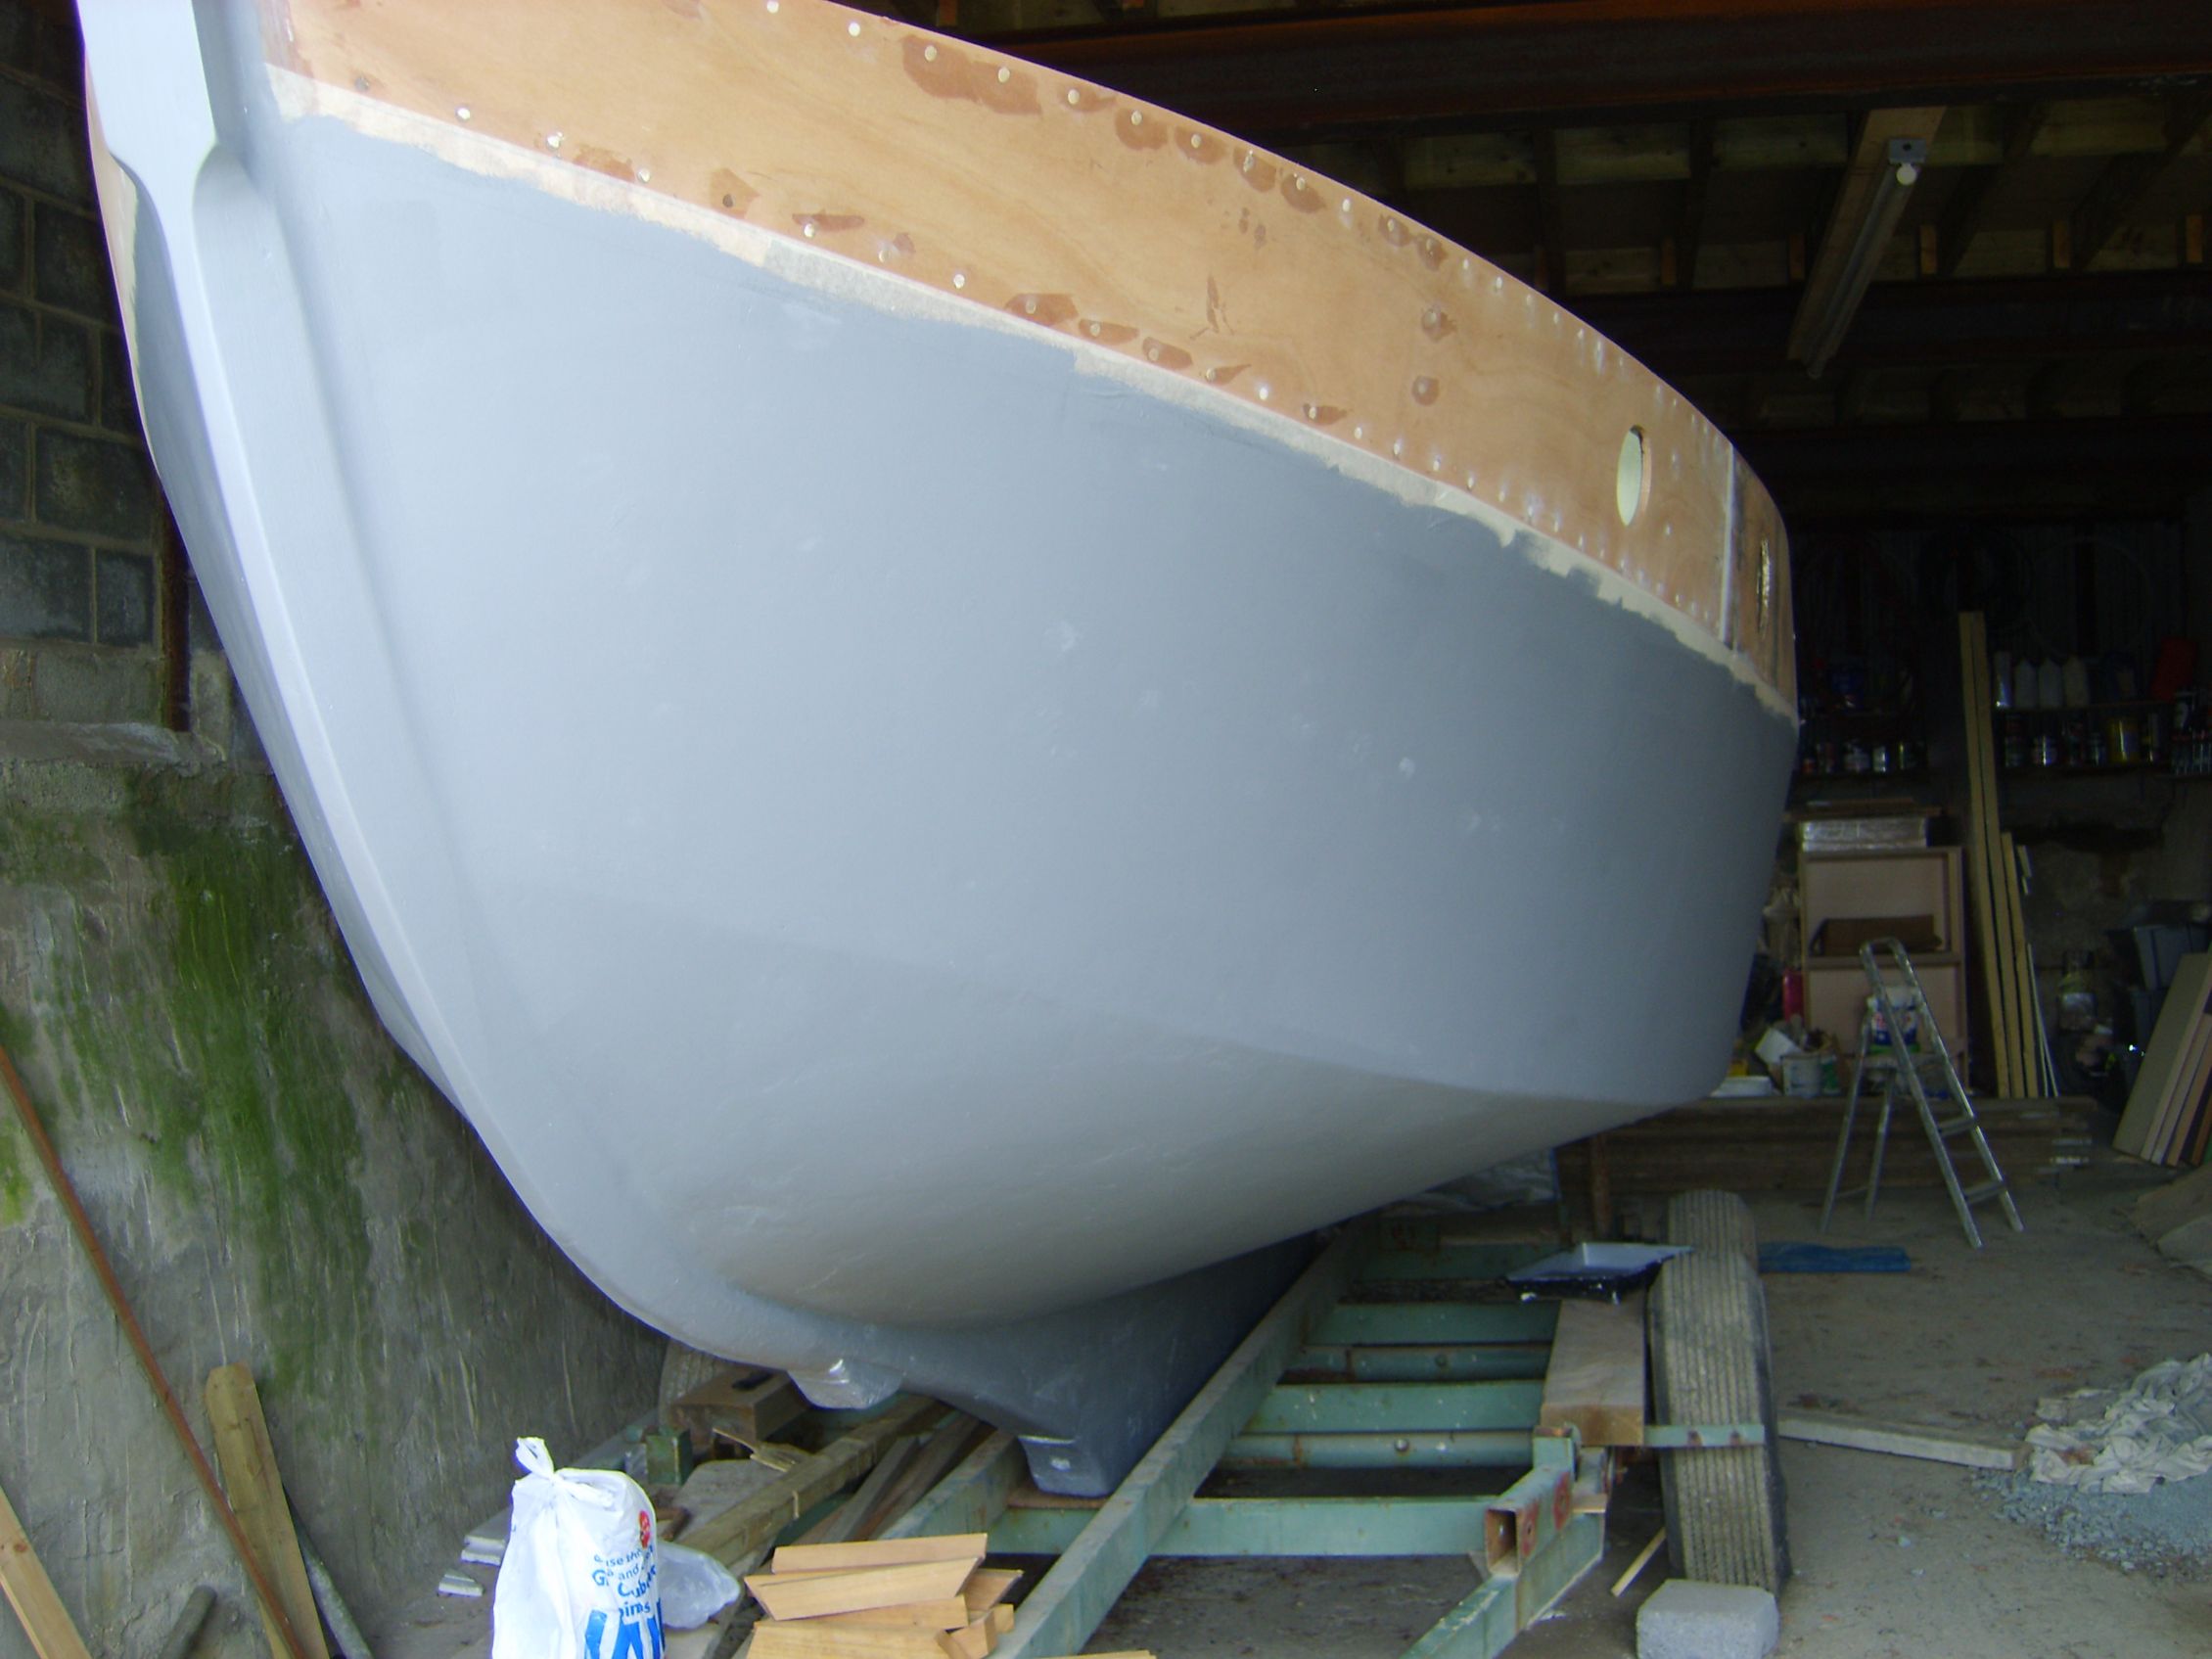
The first coat of primer is going on, a very satisfying job!
Time to stand back and admire the paint! Now the fairing and filling starts as each fresh coat of primer reveals more slight dents and the filler comes out again. worth all the effort though when that final top coat goes on. Now where was the waterline.....? soon be launch time! Keep at it Tom! Tom Greenwood.
March 09 update.
Here Tom has finished gluing the last hull repair patch in place
Now the satisfying job of painting on that first coat of primer!
Stand back and admire it Tom, and get ready with the filler to fair each subsequent coat of primer as it shows up all the irregularities. worth it when you admire the final top coat though!
Now where was the Waterline??? Soon be launching time, keep the pics coming Tom.
May 2009
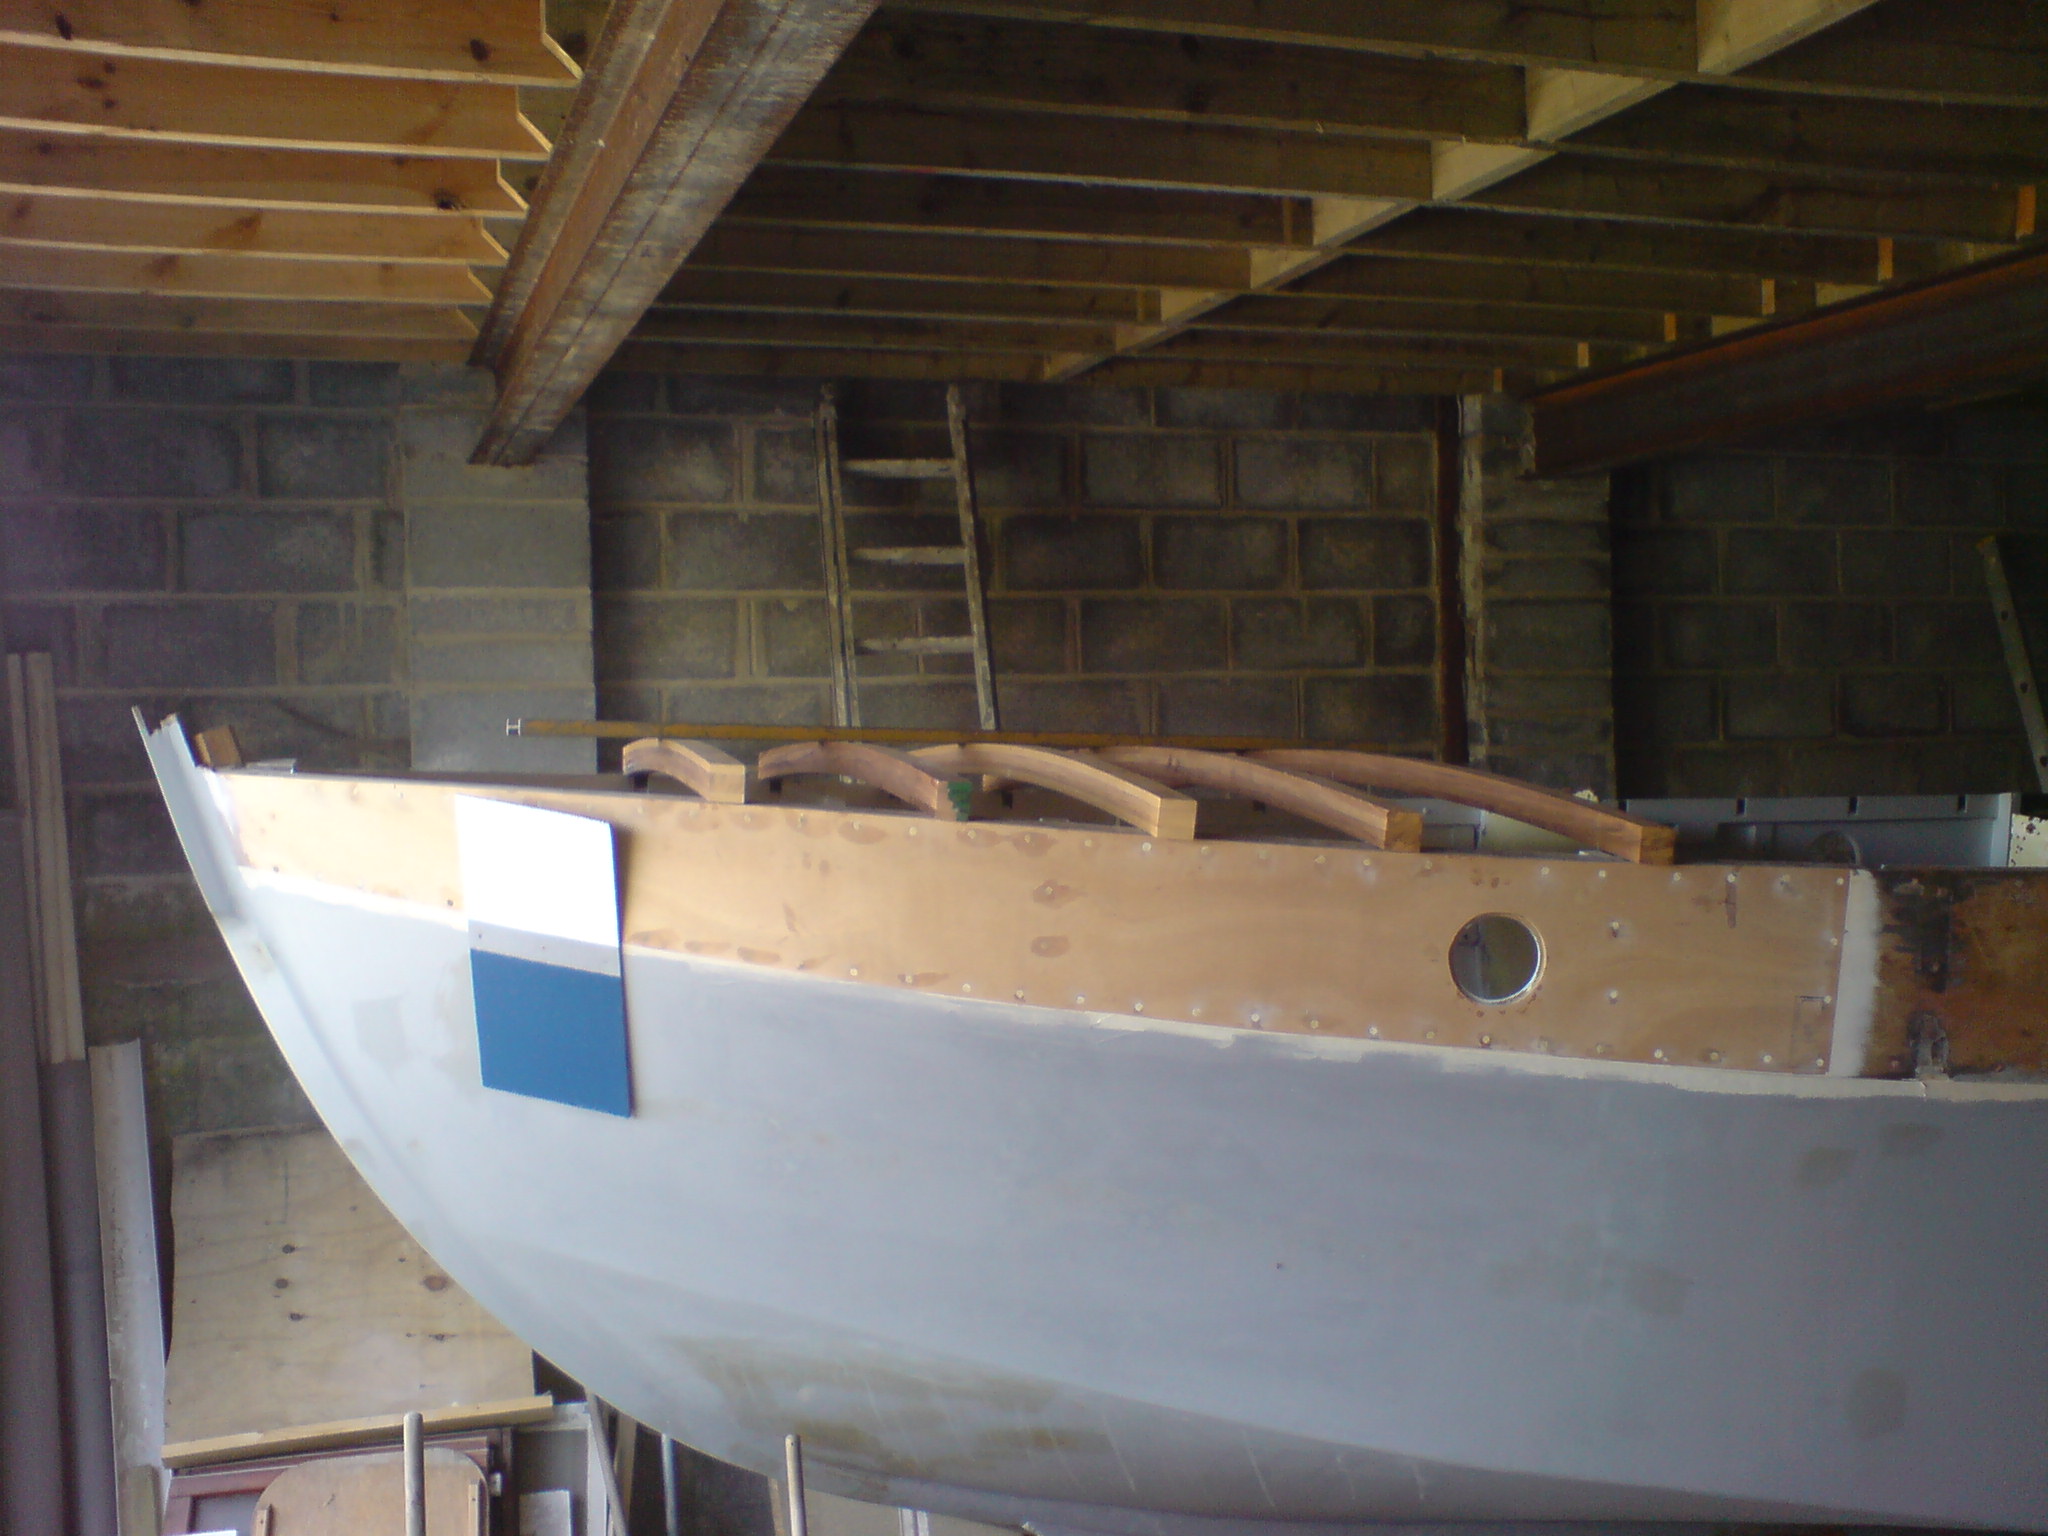
A few more pics for the page. We've started painting inside the boat now, especially in the fore peak and under the stern deck where painting will be difficult after the deck has gone down. I am using JOTUN marine paint system and so far I am impressed with the results. Covers well, dries quickly and relatively inexpensive.
Also laminated new forward deck beams and they're ready to start housing into the stringer as soon as the gloss is done on the inside. And last weekend I reached a milestone and fitted the first piece of new deck on the stern!! Not glued down as yet as I want to paint the underside first, A tip I gleaned from your old mate Nick Gates 'getting afloat'.
Ive decided to take the opportunity of lengthening the cabin to forward of the midships bulkhead and also making the cockpit slightly longer. I am planning on putting the companionway hatch to one side of the cabin as you have done on FG, mainly because the engine is quite large for the size of the boat, and when the engine cover and steps down into the cabin are in place half of the cabin is taken up! So hopefully coming down to one side of the engine will make more room.
Speaking of tips, what would you recommend for bedding the bilge keels and skeg onto? Ive been advised sikoflex, but what if I need to remove them again in the future! I would appreciate your advice. My advice would be to use Sikaflex. It is great stuff, the bilge keel on FG were bedded on it 20 years ago! If you ever did need to remove the Sikaflex it can be cut through with a cheese wire.
Further to this conversation with Geoff, we have had the grand daughter of the original builder on, with this picture! We have been able to put her in touch with Tom. Ray Allsopp is coming up for his 90th birthday shortly won't he get a surprise to learn his Iona is still cared for! John.
Tom Greenwood.
April 2010 update....
Restoration on IONA is
still progressing. I have a raft of pics to send, far more than an e-mail
will allow so wondering if it would be better to send a cd to you by post?
I don't think I have your address, so if you could e-mail it to me. I’ll
send that off to you. There are also some short video clips. Any good to
you?
I
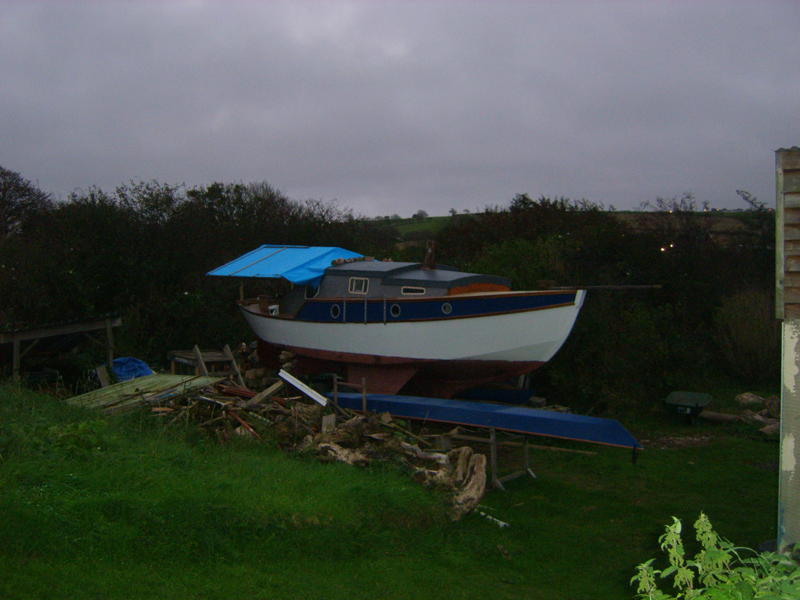
will attach a photo taken by his great grandson for the page with this
e-mail, and one of Iona back on her trailer having a breath of fresh air,
having been pulled out of the barn for the fist time in many, many months! Tom.
June 2010. A couple of updated pics of IONA. Sorry to have dumped such a huge pile of photo's on your lap with the cd. I will try to send fewer more regularly in future. Tom did send rather a lot of pics, but sadly many were in a format I could not open properly but many duplicated what he has already sent, so you have not missed much! The video clip of the 2 Cylinder Volvo purring away was good though!
Sad to report the death of Geoff Bonner who gave me the boat. I was
looking forward to him seeing her restored and back on the water. I've
included one of my favourites of Geoff and his wife Joan along with my Dad.
My Mum took the picture. Great to see them enjoying a day on the water on
IONA.
August 2010.
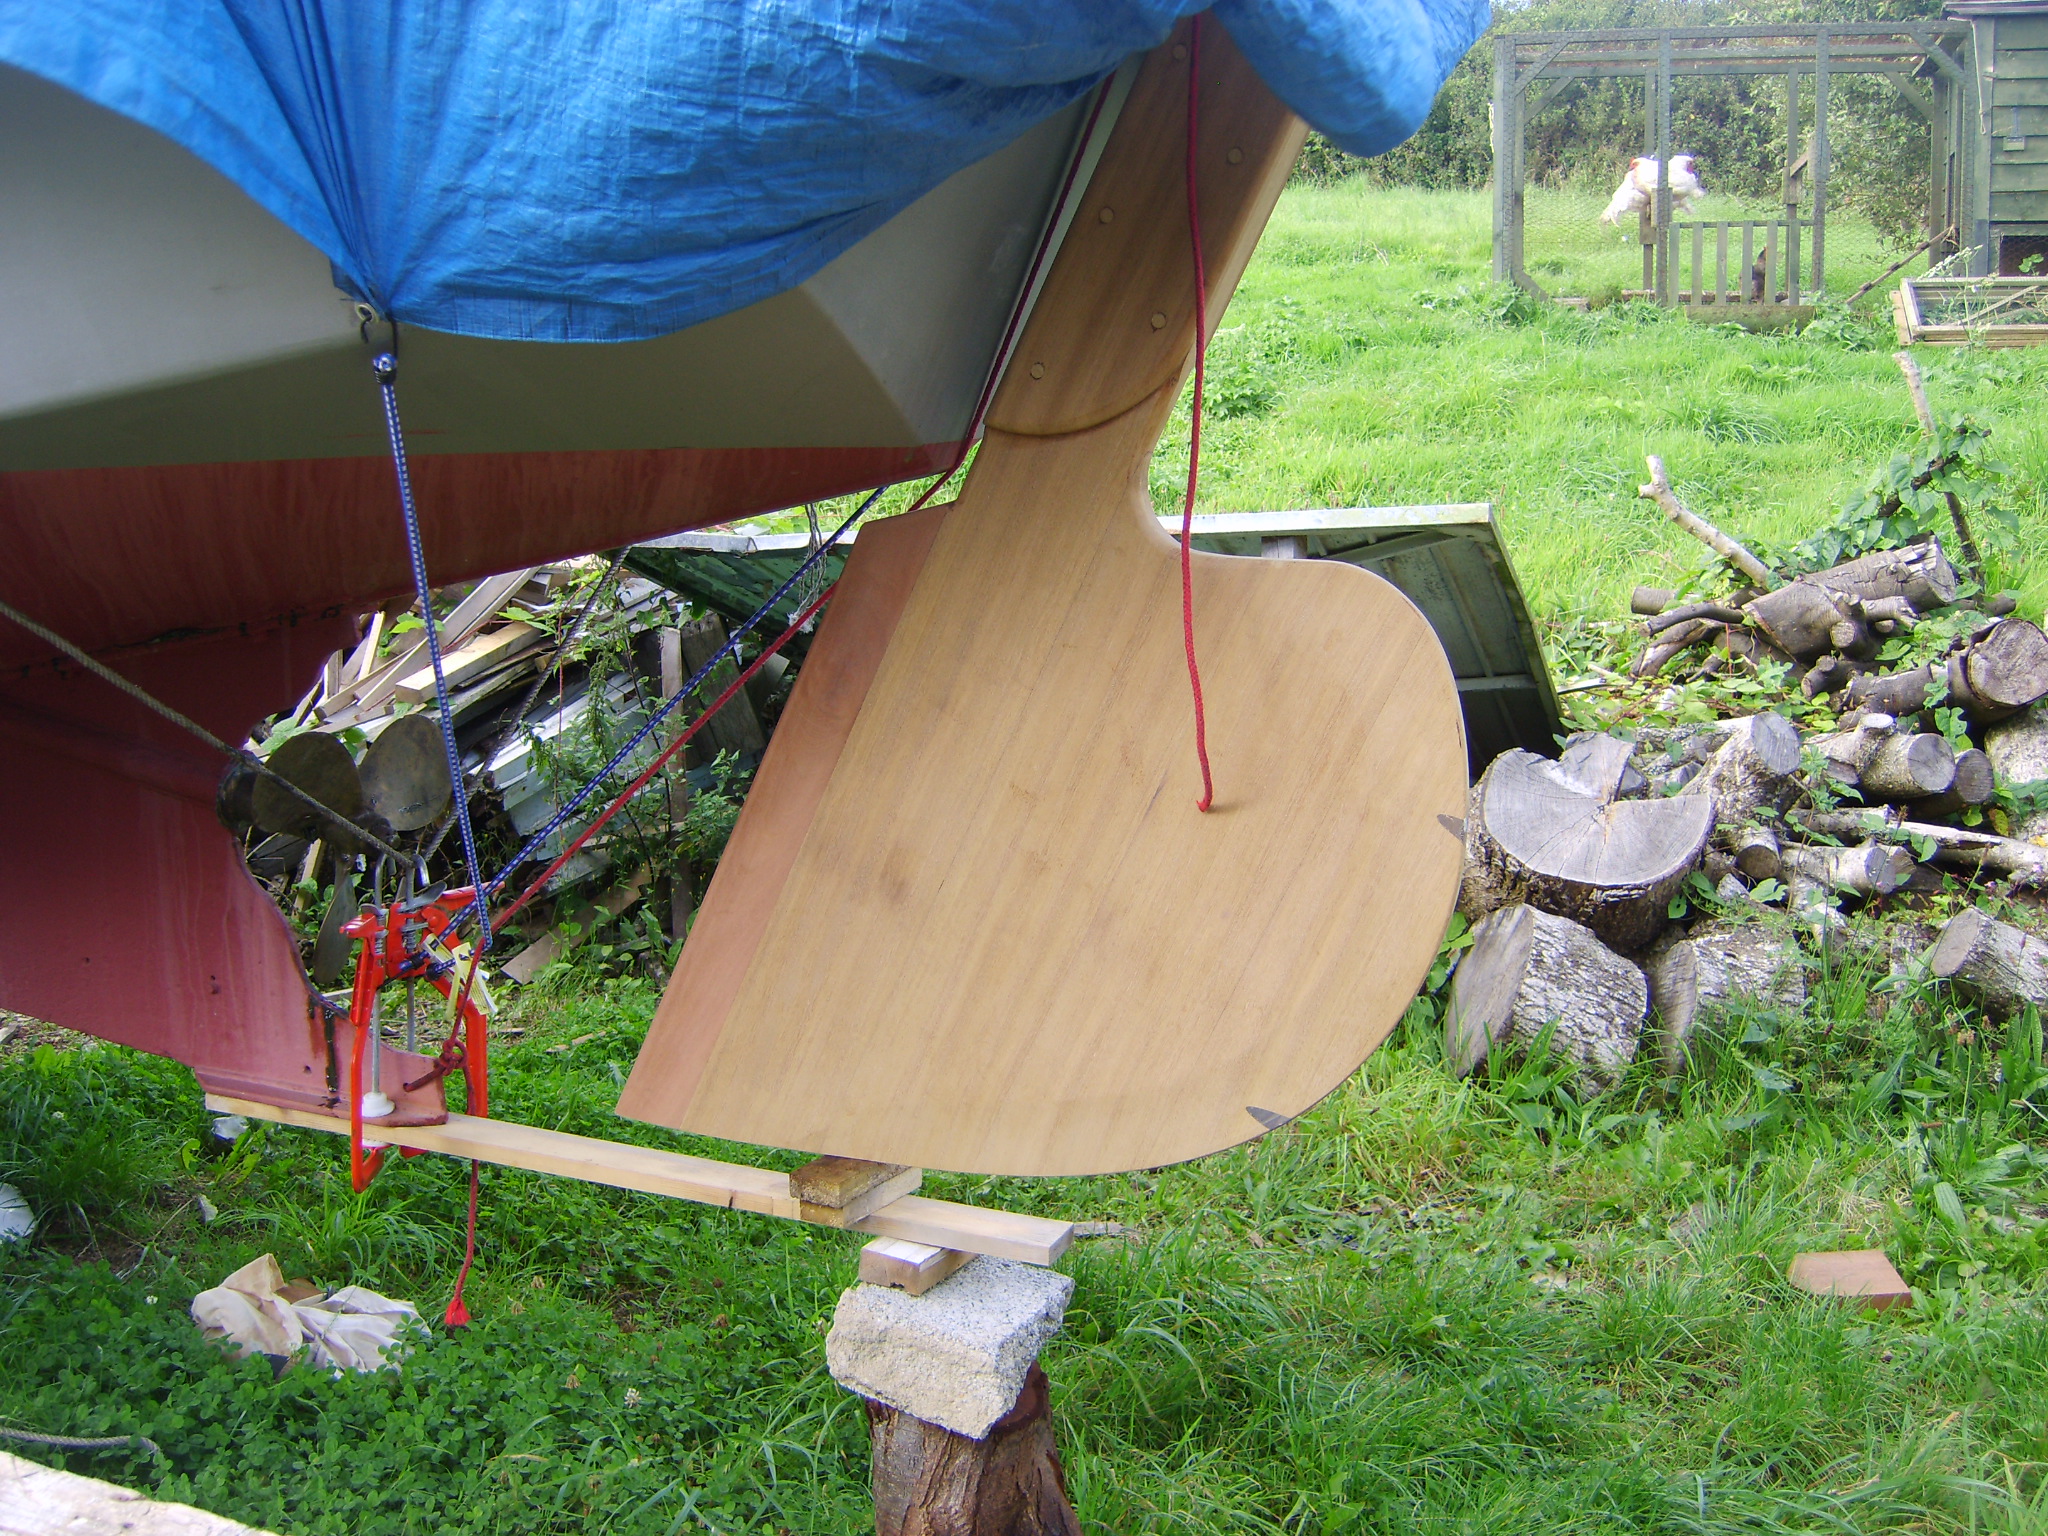
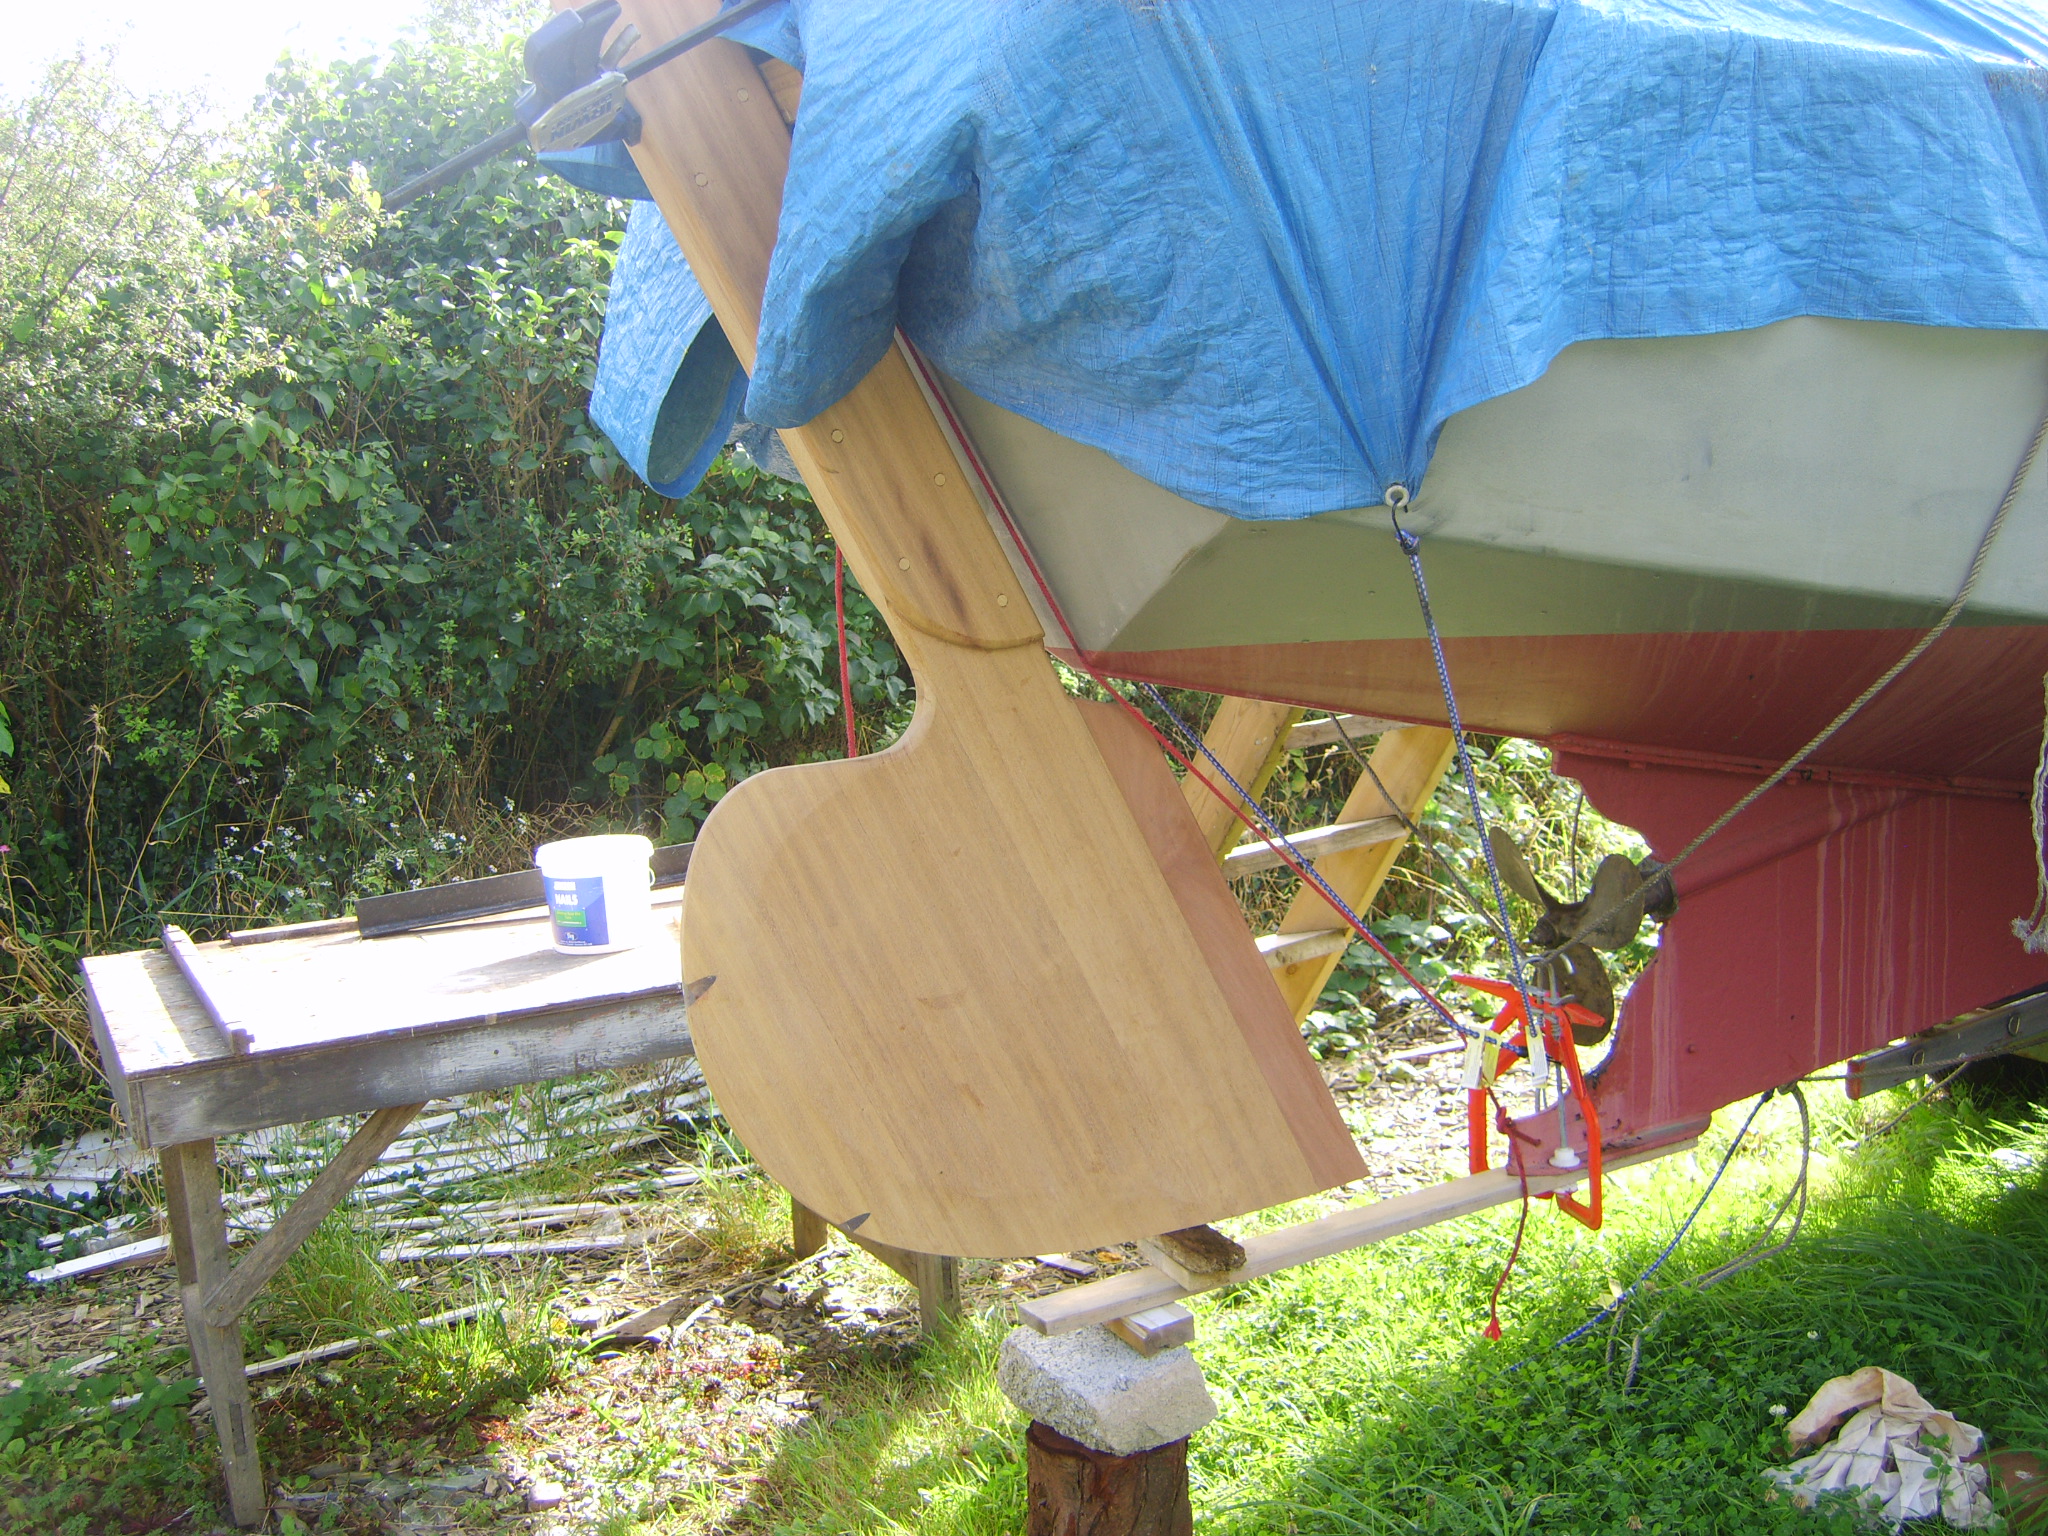
I fashioned it from 6" x 1 1/4" iroko. 1 long length to form the stock, another 3, shorter lengths, to form the blade.
All glued together with epoxy and through bolted with threaded bar to keep it all together. Added a piece of sapele to the inside of the stock below the water line to form a leading edge to the rudder. Just trying to think of some way of hinging it now.
Any tips? Yes Tom, I made my rudder bearing from s/s. I fashioned two fittings for the transom on flat bar with round bar drilled out to 12mm for a pivot and 2 wrap round fittings for the rudder same s/s plate and drilled out bar. Then a 3 ft approx pivot pin through the lot, with split pin and washer to secure it. Been in use 20 years with no problem. I made a galvanised steel pin upstand on the skeg for the heel and hollow tuphnol lined pipe section strapped to the base of the rudder. Always use galvanised underwater, not s/s. This did not take any weight, but simply retained the heel and stopped lines getting up there, I replaced the surface on the pin with an epoxied on plastic tube ad replaced the tuphnol with a new piece drilled to match the pin about 5 years ago, still fine! Rope cutter fitted to prop as well! Click this to go to the Tips page for more John
A friend of mine has given me a nice piece of Oak that I plan to
fashion the tiller out of.
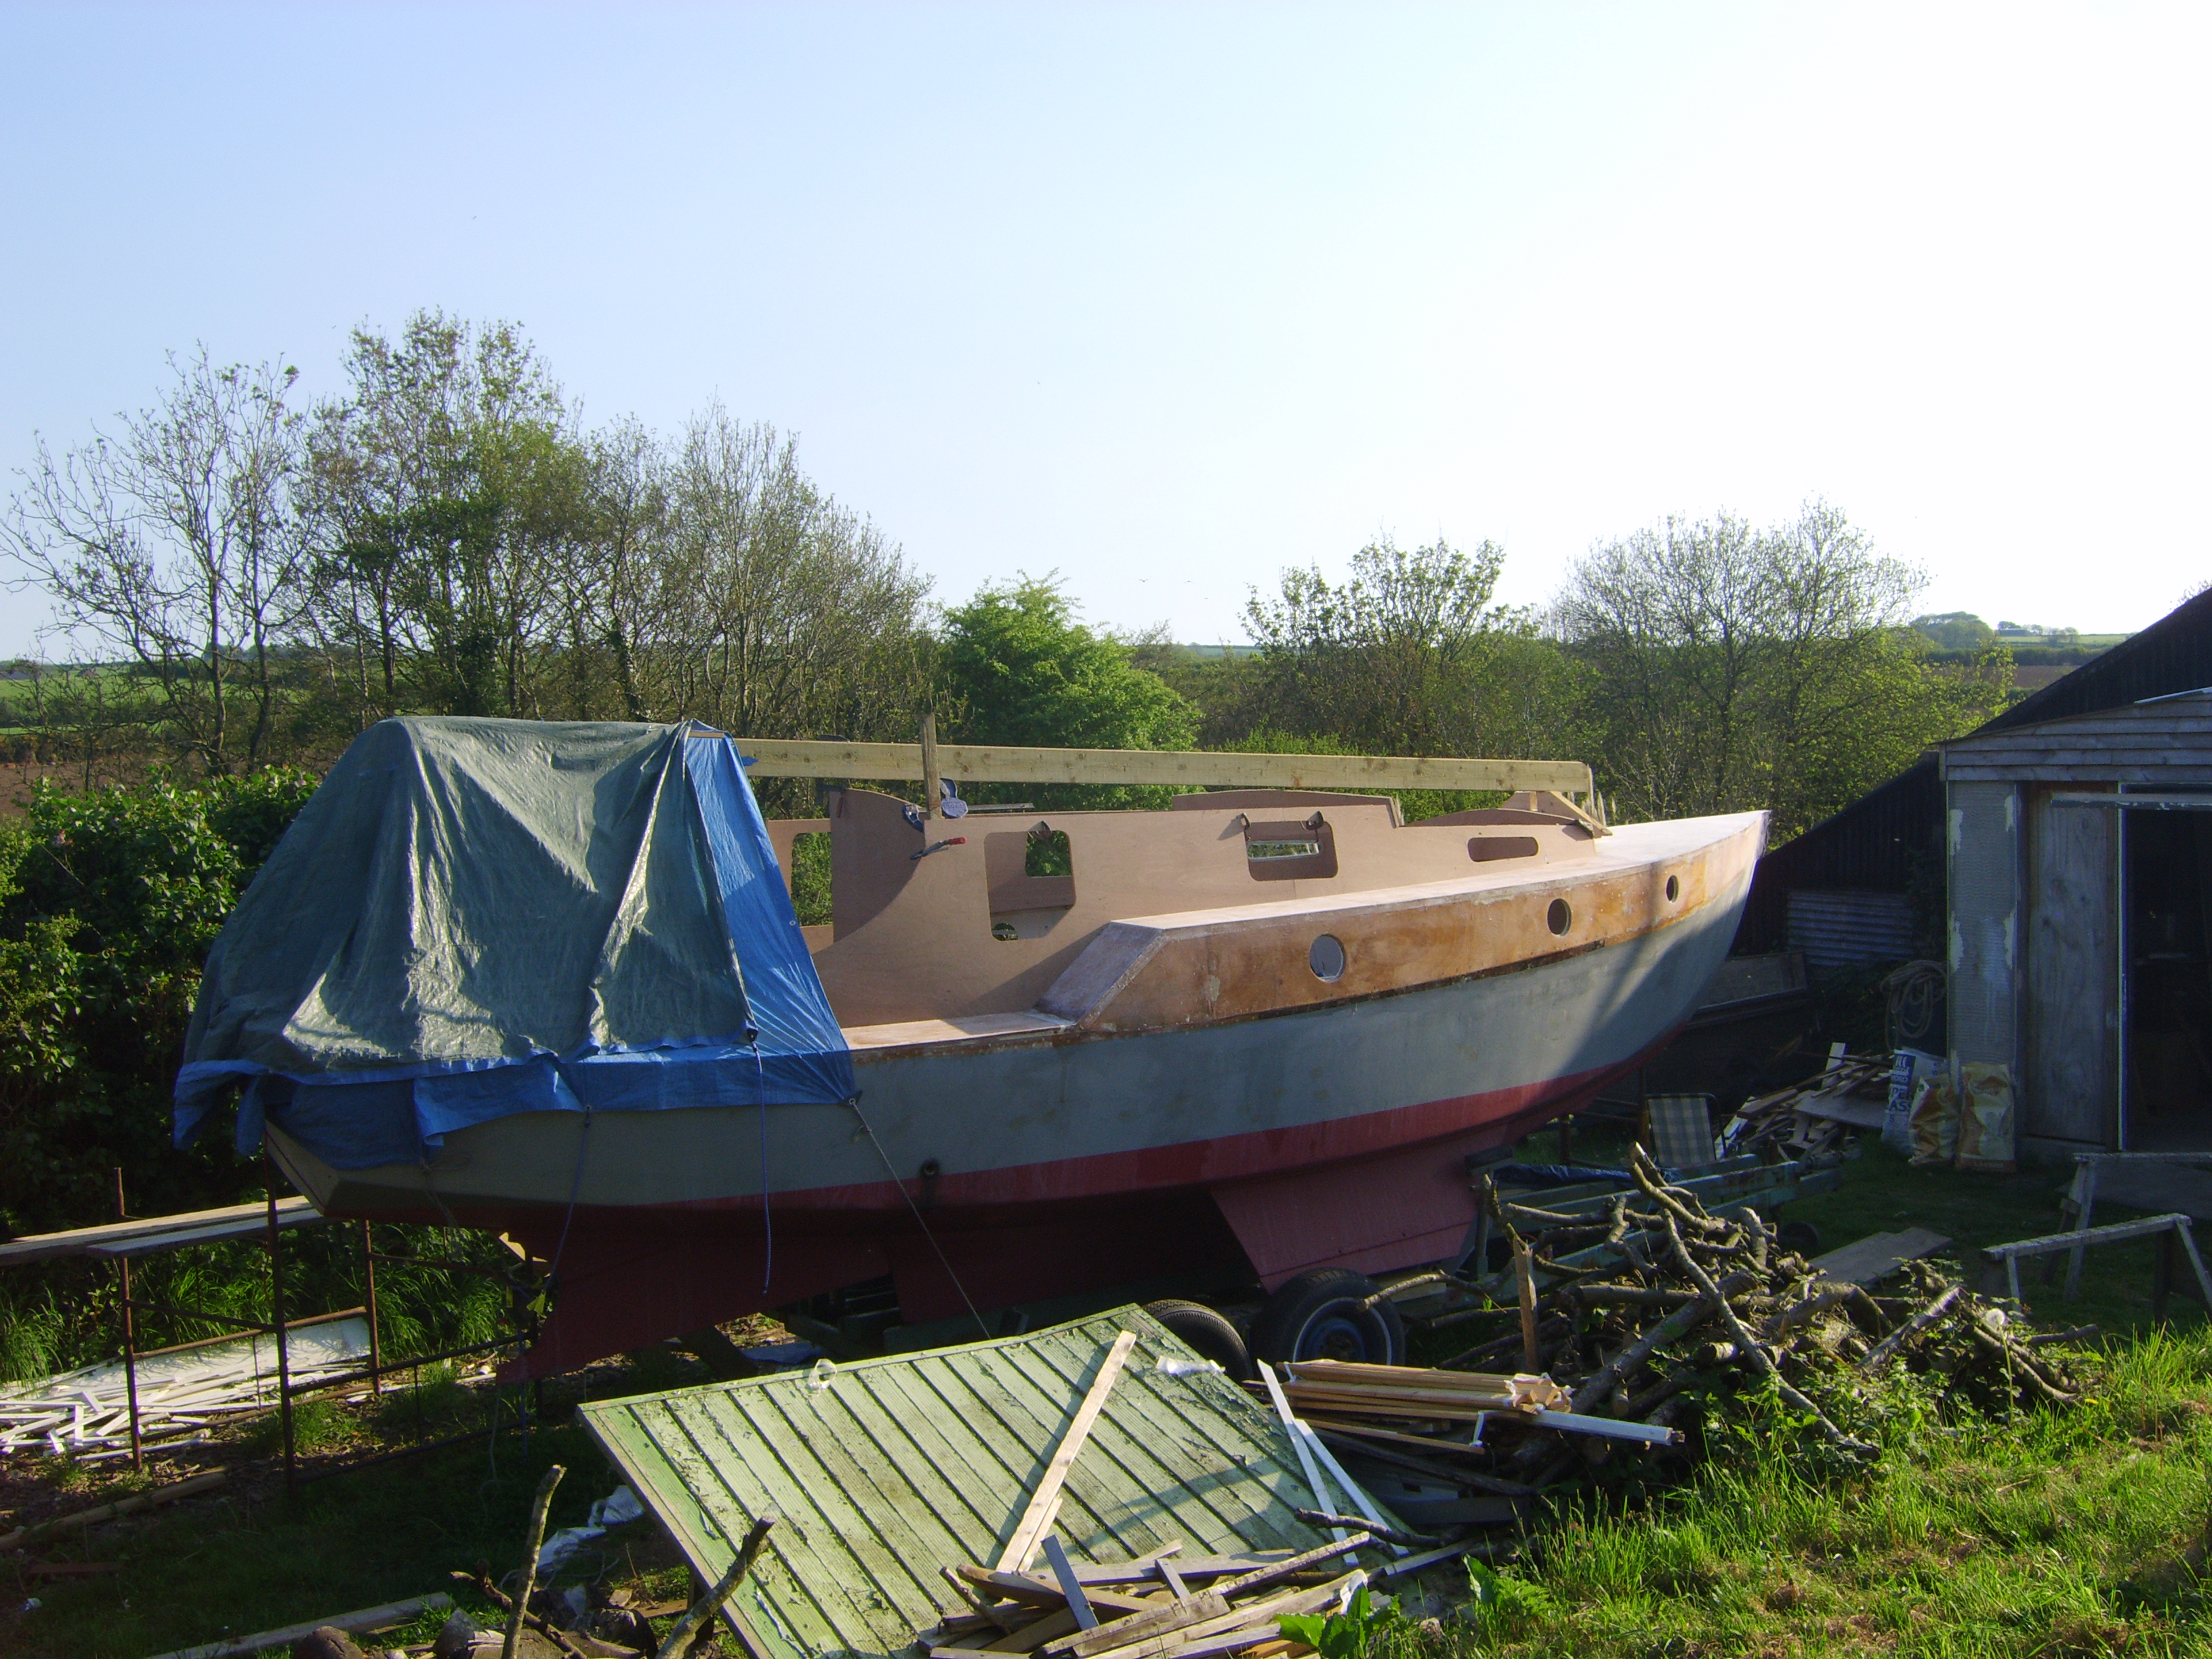
Autumn 2011, and what a change. The boat looks to be largely finished externally and maybe a launch date soon?
|